Today, organizations collect vast amounts of unstructured data, yet deriving insights from this data remains a challenging task. By moving DynamoDB to Redshift, you can unlock the potential to transform unstructured data into actionable insights. This will help you make informed decisions, uncover hidden patterns, and enhance strategic planning.
In this guide, we’ll explore three effective methods to connect DynamoDB to Redshift: leveraging AWS Data Pipeline, DynamoDB Streams, and no-code tools like Estuary Flow.
Before diving into the methods, let’s take a quick look at the platforms—DynamoDB and Redshift—and their unique advantages.
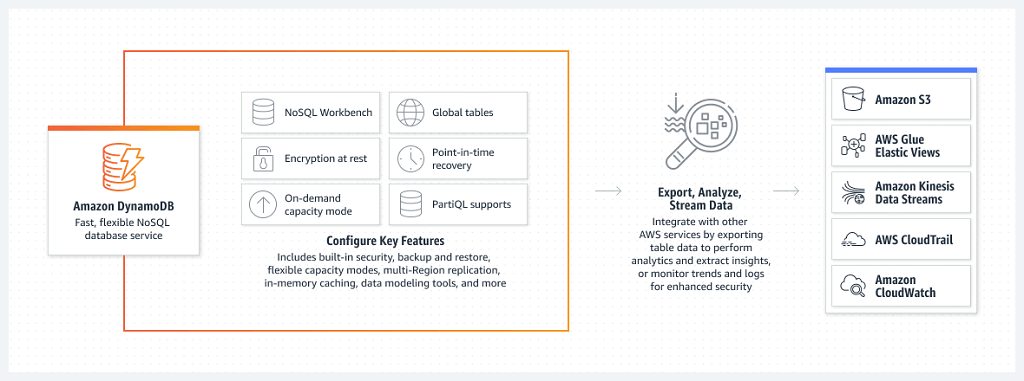
Amazon DynamoDB Overview
As a NoSQL database, Amazon DynamoDB is a modern and dynamic solution for data management needs. Backed by AWS, DynamoDB eliminates the need for provisioning, scaling, or handling servers, enabling you to focus on your core business operations.
With its flexible schema and seamless scalability, DynamoDB allows you to store and retrieve both structured and semi-structured data. The schema-less design eliminates the constraint of traditional relational databases, allowing you to adapt to evolving data needs.
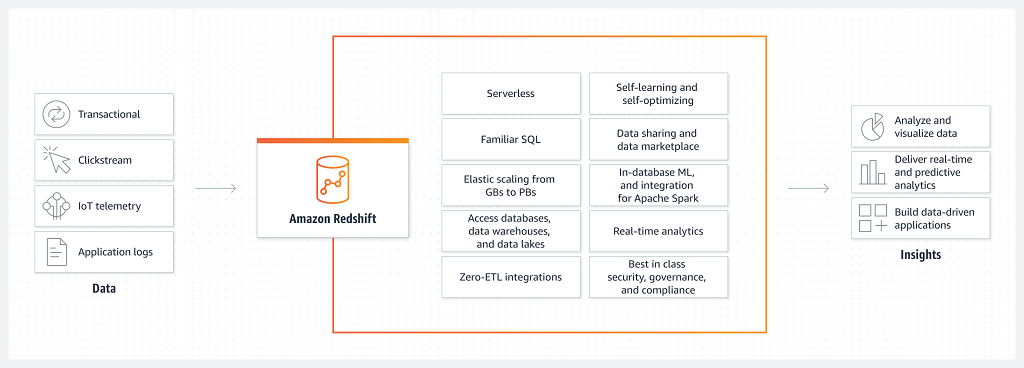
Redshift Overview
As a data warehouse, Amazon Redshift is a robust cloud-based data analytics and management platform. Designed to handle massive datasets, Redshift offers a high-performance, fully managed solution for storing, querying, and analyzing structured and semi-structured data. Its columnar storage architecture and parallel processing capabilities enable lightning-fast query performance, making it well-suited for complex analytic workloads.
In addition, Redshift scalability allows you to effortlessly expand storage and computational resources, ensuring optimal performance as data volume grows. These features help you to derive meaningful insights and drive data-driven decisions from your data.
3 Methods to Move Data from DynamoDB to Redshift
There are several approaches to moving DynamoDB to Redshift, depending on your specific use case. Below are three of the most effective methods:
Method #1: Use No-Code Tools Like Estuary Flow for DynamoDB to Redshift
Method #2: Load Data From DynamoDB to Redshift using AWS Data Pipeline
Method #3: Migrate data from DynamoDB to Redshift using DynamoDB Streams
Method #1: Use No-Code Tools Like Estuary Flow for DynamoDB to Redshift
Estuary Flow is a reliable no-code data pipeline tool and Change Data Capture (CDC) solution that seamlessly automates complex data workflows, reduces manual tasks, and improves efficiency. With its wide range of pre-built connectors, it focuses on integrating various data sources and allows you to centralize data with multiple platforms.
Estuary offers several benefits for data integration, migration, transformation, and management:
- Unified Data Platform: Flow offers a unified data platform for connecting, transforming, and managing data from different sources, simplifying complex data workflow. This eliminates the need to know different platforms and technologies to meet your requirements.
- Seamless Integration: It supports integration with multiple sources and destinations, including databases, cloud services, and APIs, without writing complex code.
- Real-Time Data Processing and CDC: Estuary Flow supports real time data processing and change data capture, enabling you to capture, process, and analyze data as soon as it is generated. With Flow’s CDC capabilities, you can track changes in a DynamoDB table and capture them in Flow collections in real-time, which allows you to move your DynamoDB data to Redshift tables almost instantly with millisecond latency.
Before configuring your DynamoDB to Redshift data pipeline through Estuary Flow, log in to your existing Estuary account or sign up now for free. Familiarize yourself with the prerequisites before proceeding.
Prerequisites:
- DynamoDB tables with DynamoDB streams enabled. To enable DynamoDB streams for a table, click here.
- An IAM user with the necessary permissions specified with the dynamodb prefix in an IAM policy.
- The AWS access key and secret access key.
- A Redshift cluster.
- An Amazon S3 bucket.
- An AWS root or IAM user possessing read and write permissions for the S3 bucket.
Step 1: Connect and Configure DynamoDB as Source
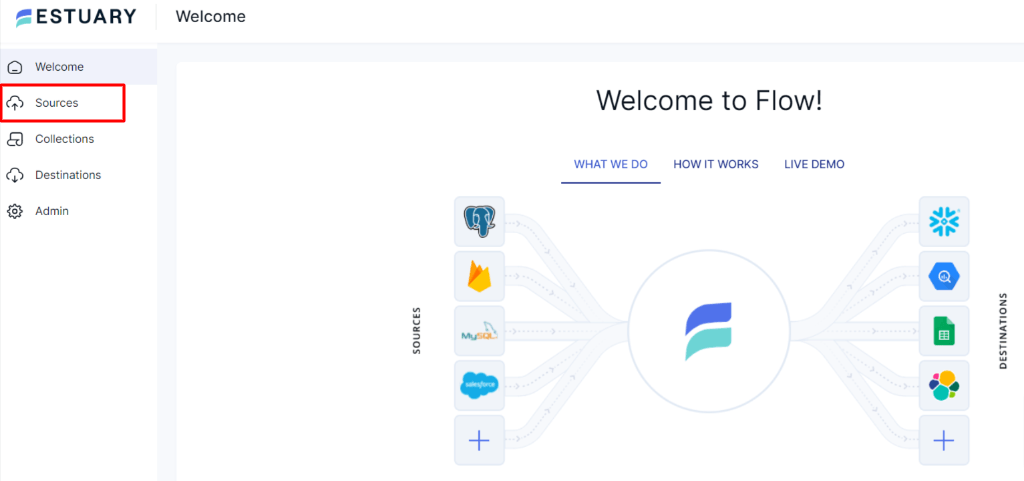
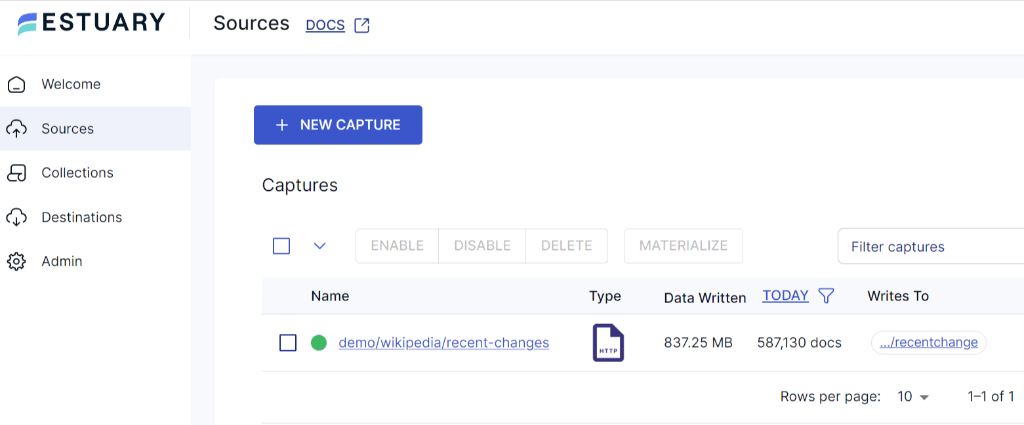
- After logging in, click on the Sources located on the left-side of the Estuary dashboard.
- On the Sources page, click on the + New Capture button.
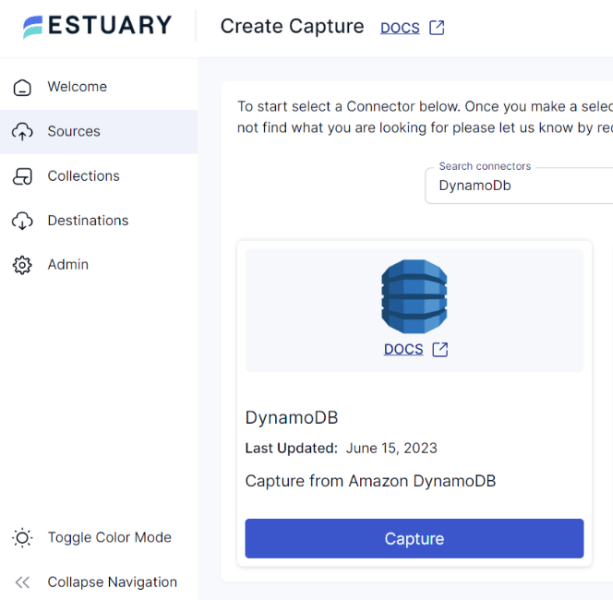
- To set DynamoDB as your data pipeline source, search for the DynamoDB connector in the Search Connectors Box on the Create Capture page. Then click on the Capture button in the same tile.
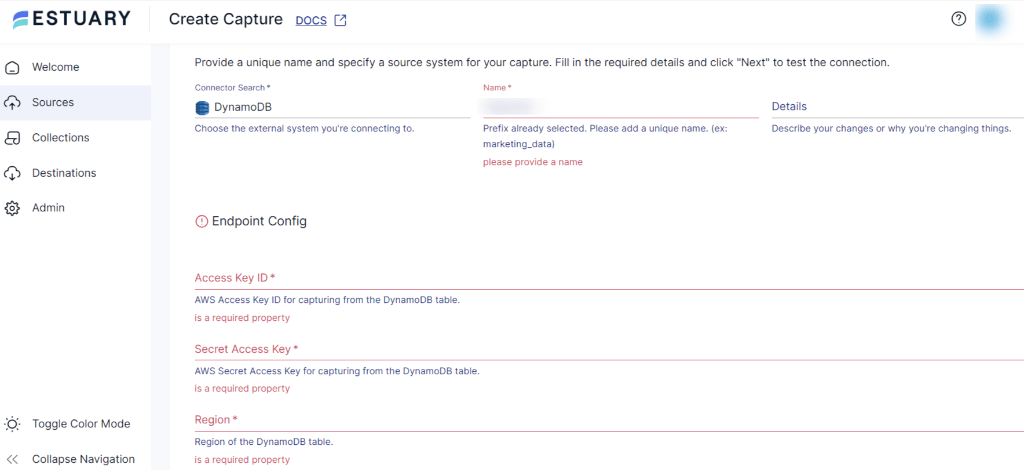
- unique name for your connector and specify the source system for your capture. Fill in the mandatory Endpoint Config details, such as Access Key ID, Secret Access Key, and Region.
- Click on the Next button to test the connection, followed by Save and Publish.
Step 2: Connect and Configure Redshift as Destination
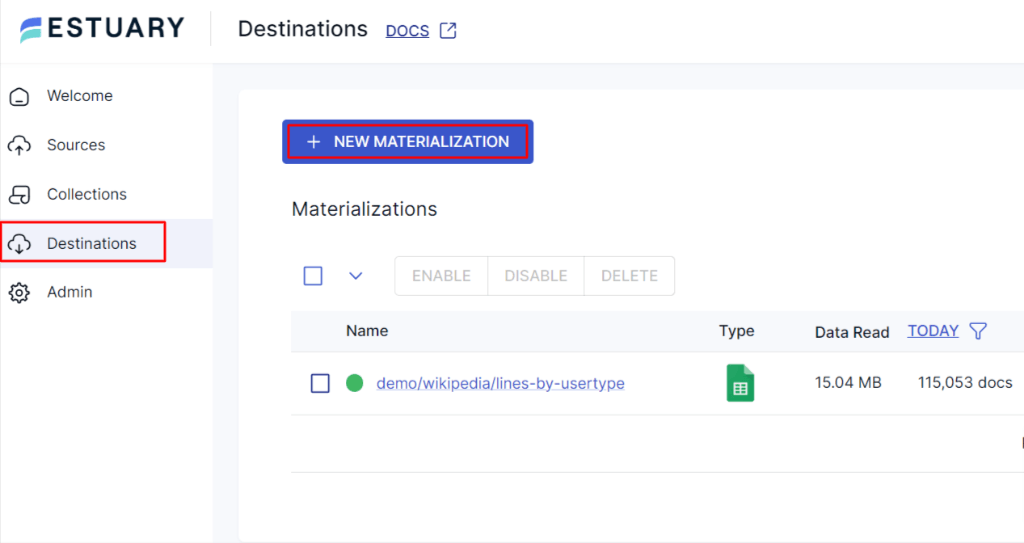
- To configure Amazon Redshift as your pipeline destination, navigate back to the Estuary Dashboard and click on Destinations.
- On the Destinations page, click on the + New Materialization button.
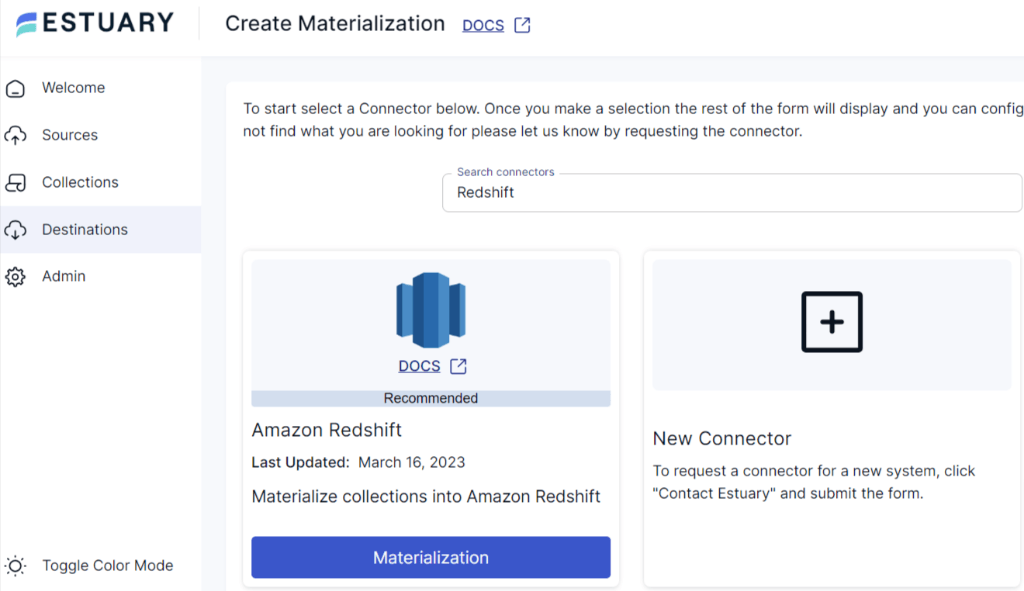
- Search for the Amazon Redshift connector in the Search Connectors Box on the Create Materialization page. Then click on the Materialization button in the same tile.
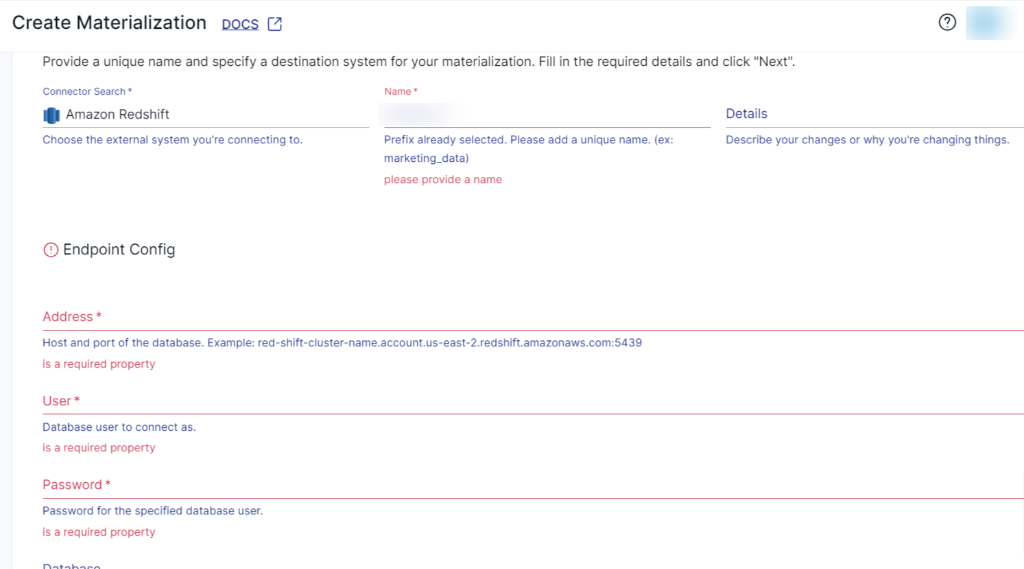
- On the Amazon Redshift Create Materialization page, provide a unique name for your connector and specify the destination system for your materialization. Fill in the mandatory Endpoint Config details, such as Address, Username, Password of the database, S3 Staging Bucket, Access Key ID, Secret Access Key, Region, and Bucket Path.
- While the Flow collections are automatically chosen, consider using the Source Collections section to manually pick the collections you wish to materialize into your Redshift database.
- Once you’ve filled in all the fields, click on Next, then proceed by Save and Publish. Estuary Flow will now replicate your data from DynamoDB to Redshift in real-time.
For a comprehensive guide to set a complete flow, follow the Estuary’s documentation:
Method #2: Load Data from DynamoDB to Redshift Using AWS Data Pipeline
To manually move data to Redshift, you can use AWS Data Pipeline, a web service offered by AWS that facilitates the replication of data between different AWS services.
Replicating data from Amazon DynamoDB to Amazon Redshift using the AWS Data Pipeline involves several steps. Here’s a detailed guide on the process:
Prerequisites:
- DynamoDB table.
- An active AWS account with permission to access both Redshift and DynamoDB.
- Set up an Amazon Redshift Cluster where you want to load the data.
- S3 bucket to store the exported DynamoDB data files.
Step 1: Log into your AWS Management Console
Step 2: Export Data from DynamoDB
- Navigate to the AWS Data Pipeline service.
- If there is no existing pipeline in the current AWS region, opt for the Get started now option. Alternatively, if you already have at least one pipeline, choose Create new pipeline option.
- You’ll be directed to the Create Pipeline page. Provide the name for your pipeline.
- Select Build using a template.
- From the drop-down menu, choose Export DynamoDB table to S3.
- In the Source DynamoDB table name, select your DynamoDB source table.
- In the Output S3 Folder text box, specify the S3 bucket URI where you want to export data.
- Set the export format as CSV file format.
- Select the schedule for data export as one-time or recurring as per your needs.
- Activate the pipeline to start the data export process.
Here’s a visual representation in the below image depicting the entire process using AWS Data Pipeline.
- Your data pipeline will now be created, and you can track its progress within the AWS Data Pipeline console.
Step 3: Export S3 Data to Redshift
Navigate to the S3 bucket specified in the export configuration and check if the exported data files are present in the S3 bucket.
You can now use the AWS COPY command to load data from an S3 bucket to a Redshift table.
Now, with the help of the AWS COPY command and AWS CLI, export S3 data to Amazon Redshift.
- Navigate to Amazon Redshift service, select the Redshift cluster where you want to load the CSV data.
- In the Cluster details page, go to the Query Editor tab and execute the COPY command. Here’s an example of using COPY command:
plaintextCOPY target_table
FROM 's3://bucket_name/file_path'
CREDENTIALS 'aws_access_key_id=access_key;aws_secret_access_key=secret_key'
FORMAT CSV
DELIMITER ‘,’;
Replace target_table with your Redshift table name, bucket_name with your S3 bucket name, file_path with the S3 path to the CSV file, and provide your AWS access and secret keys.
Once the COPY command is executed, verify the data in your Redshift table to ensure accuracy.
This method allows you to move data from DynamoDB to Redshift efficiently, but keep in mind that it requires manual configurations and does not support real-time synchronization.
Method #3: Migrate Data from DynamoDB to Redshift Using DynamoDB Streams
DynamoDB Streams is a feature of DynamoDB that allows you to capture and record real-time changes to data stored in a DynamoDB table. It maintains a time-ordered sequence of item-level modifications within a DynamoDB table. This helps you track changes such as item creation, updation, and deletions as they occur.
Amazon Dynamo to Amazon Redshift migration using DynamoDB Stream involves the following steps:
- Enable DynamoDB Streams for the source table in the DynamoDB console dashboard to capture changes in real-time.
- Create and configure an AWS Lambda function using the AWS Lambda service. AWS Lambda allows you to execute code in response to events and triggers from different AWS services or custom-defined events.
- In the Lambda function, process the stream records and transform the data into a Redshift-suitable format. This may include formatting, data enrichment, and other necessary changes.
- Set up an Amazon S3 bucket to temporarily store the transformed data from the Lambda function.
- Create your Amazon Redshift cluster if you don’t have one. Design the table schema to align with the transformed data from DynamoDB.
- Execute the COPY command in the Lambda function that loads the transformed data from the S3 bucket into the Redshift table.
By leveraging DynamoDB Streams, you can create an efficient and near real-time migration process from DynamoDB to Redshift.
Limitations of Using DynamoDB Streams
While using Stream to migrate data from DynamoDB to Redshift offers real-time integration capabilities, there are certain limitations to consider:
- Lambda Function Development: Configuring Lambda function to process DynamoDB Streams and transform data involves coding skills, error handling, and understanding of event-driven architecture. Developing and maintaining these functions can be challenging.
- Data Complexity: Mapping DynamoDB’s NoSQL data to Redshift’s relational database can be complex. Transforming and mapping certain data types will need additional processing and might not have straightforward one-to-one mapping.
Conclusion
You’ve seen three distinct approaches—AWS Data Pipeline, DynamoDB Streams, and Estuary Flow—for streamlining the DynamoDB to Redshift data pipeline. Both AWS Data Pipeline and DynamoDB Streams help with the data integration tasks, but they come with their own share of challenges. While the former necessitates complex transformations and hinders real-time synchronization, the latter involves intricacies of Lambda function development, requiring technical expertise.
Automated, no-code data pipeline tools like Estuary Flow overcome common limitations posed by manual approaches. Flow provides a user-friendly yet powerful way to move your data in real-time. What’s more, the availability of several connectors simplifies the replication process without complex scripts or repetition.
Effortlessly migrate Amazon DynamoDB to Redshift with Estuary Flow—get started with a free pipeline now!
FAQs
1. What is the easiest way to move data from DynamoDB to Redshift?
The easiest way to move data from DynamoDB to Redshift is by using a no-code tool like Estuary Flow. This solution eliminates manual effort and ensures real-time data synchronization for faster insights.
2. Why should I move data from DynamoDB to Redshift?
Moving data from DynamoDB to Redshift allows you to leverage Redshift's data warehousing capabilities for complex analytics and large-scale data queries. Redshift is optimized for high-performance data analysis, which can help uncover deeper insights from your DynamoDB data.
Related blogs:

About the author
With over 15 years in data engineering, a seasoned expert in driving growth for early-stage data companies, focusing on strategies that attract customers and users. Extensive writing provides insights to help companies scale efficiently and effectively in an evolving data landscape.


