Amazon DynamoDB is a top choice for managing web applications that require low latency and predictable performance. It’s optimized for quick, seamless operations in high-traffic environments. However, when it comes to complex data analysis and processing, DynamoDB is limited. For more advanced use cases, integrating DynamoDB with Databricks offers a powerful solution.
With this integration, you can leverage Databricks’ real-time processing and advanced analytics capabilities, enabling deeper insights and faster decision-making in response to changing conditions. By utilizing Databricks for tasks such as machine learning operations, ETL processing pipelines, and data visualization, you can elevate your data operations far beyond DynamoDB's core functionality.
To move data from DynamoDB to Databricks, you can use two primary methods: an automated ETL tool like Estuary Flow for real-time, no-code data integration, or a manual approach using Amazon S3 as an intermediary. Both methods allow you to streamline your data operations, depending on your use case.
In this guide, we'll explore both methods in detail, helping you choose the best approach for your business. Let's start with a brief overview of both platforms, or you can skip ahead to the integration methods if you're ready to dive into the setup.
An Overview of DynamoDB
Amazon DynamoDB is a fully managed, serverless NoSQL database service offered by Amazon Web Services (AWS). It is designed to provide single-digit millisecond latency at any scale, making it an excellent choice for applications that require high availability, reliability, and seamless scalability.
A key feature of DynamoDB is auto-scaling, which automatically adjusts throughput capacity based on the workload. This ensures efficient handling of high-traffic volumes without performance bottlenecks or the need for extensive capacity planning. DynamoDB can handle millions of requests per second, supporting applications with demanding performance requirements. With DynamoDB CDC, you can capture and stream real-time changes in your DynamoDB tables for efficient data processing.
DynamoDB also supports flexible data models, including key-value pairs and document structures. This flexibility enables DynamoDB to handle semi-structured and unstructured data, making it a great choice for applications requiring quick iteration and development. However, for more advanced data processing and analytics needs, integrating DynamoDB with data platforms like DynamoDB to Snowflake, DynamoDB to Redshift, or DynamoDB to Postgres can provide deeper insights and capabilities for complex queries and data warehousing.
Overview of Databricks
Databricks is an advanced data analytics and AI platform that provides a unified environment for data engineering, data science, and machine learning tasks. Built on the lakehouse architecture, Databricks combines the capabilities of data lakes and data warehouses. This integration enables you to implement large-scale data processing and analytics on a single platform, streamlining the management of your data and AI workloads.
Here are some key features of Databricks:
- Real-Time and Streaming Analytics: Databricks utilizes Apache Spark’s Structured Streaming to handle real-time data and incremental updates. It integrates seamlessly with Delta Lake, forming the basis of Delta Live Tables and Auto Loader for efficient data ingestion and processing. This allows for real-time analytics and up-to-date insights, enabling faster responses to business needs.
- Data Governance: Databricks provides robust security and governance tools that help manage sensitive data and ensure regulatory compliance. Features include role-based access control (RBAC), comprehensive audit trails, and end-to-end encryption. Additionally, Unity Catalog offers centralized governance for all data and AI assets, simplifying the management of permissions and metadata across your organization.
- Collaborative Notebooks: Databricks offers interactive notebooks that support real-time collaboration. You can analyze data, share insights, and write code directly within the platform, which supports various languages such as Python, R, SQL, and Scala. This fosters cross-functional collaboration between data engineers, data scientists, and analysts, accelerating project development and innovation.
Why Migrate Data from DynamoDB to Databricks?
- Limited SQL Support in DynamoDB: DynamoDB, as a NoSQL database, does not natively support SQL. While it offers PartiQL, a SQL-compatible query language, this won't fully meet your SQL needs for complex queries. Migrating to Databricks allows you to leverage full SQL support, enabling you to run advanced queries and take advantage of databases, tables, and joins, which DynamoDB lacks.
- Advanced Analytics and Machine Learning: Databricks is built for data science and machine learning. It supports popular libraries like pandas, scikit-learn, seaborn, and more, allowing you to build and deploy complex models directly within the platform. This is critical for tasks such as customer segmentation, predictive analytics, and anomaly detection, which require deeper insights than DynamoDB can provide.
- Unified Platform for Data Workflows: Databricks provides a unified environment for data engineering, analytics, and machine learning. It simplifies workflow management by offering a single platform for ETL, real-time processing, and model development, whereas DynamoDB often requires additional services for complex data processing or analytics. This integration not only streamlines operations but also reduces operational overhead by consolidating tools and processes.
Step-by-Step Guide: How to Integrate Data from DynamoDB to Databricks
- Method 1: Using Estuary Flow to Integrate Data from DynamoDB to Databricks
- Method 2: Using Amazon S3 Bucket to Integrate Data from DynamoDB to Databricks
Method 1: Using Estuary Flow to Integrate Data from DynamoDB to Databricks
Estuary Flow is an efficient ETL (Extract, Transform, Load) and CDC (Change Data Capture) platform that helps you move data from varied sources to multiple destinations.
The user-friendly interface makes it easy for you to navigate the platform and explore the different features. With a comprehensive library of 200+ pre-built connectors, Estuary Flow supports seamless connectivity with databases, data warehouses, and APIs.
The no-code design of the Estuary makes it an effortless process to set up an integration between any source and destination.
Let's look into the steps to integrate data DynamoDB to Databricks with Estuary Flow.
Prerequisites
- One or more DynamoDB tables with DynamoDB streams enabled.
- A Databricks account that includes a Unity Catalog, SQL warehouse, schema, and appropriate user roles.
- An Estuary Flow account.
Step 1: Configure Amazon DynamoDB as Your Source
- Sign in to your Estuary account.
- Among the options in the left sidebar, select Sources.
- On the Sources page, click on the + NEW CAPTURE button.
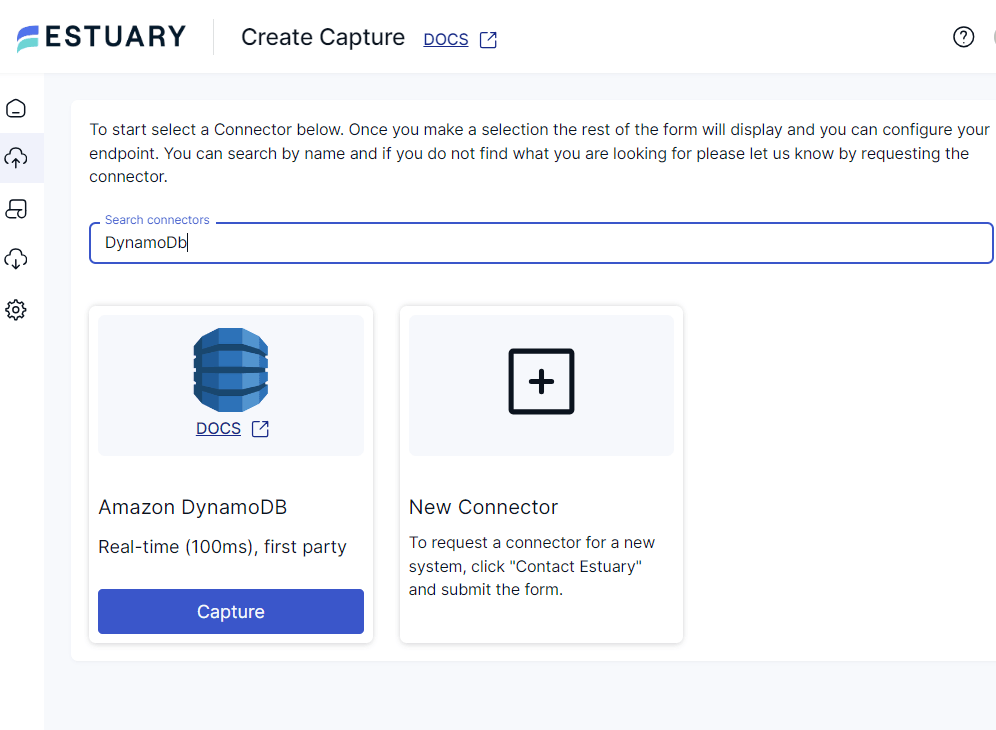
- Use the Search connectors field on the Create Capture page to look for the DynamoDB connector.
- You will see the Amazon DynamoDB connector in the search results; click its Capture button.
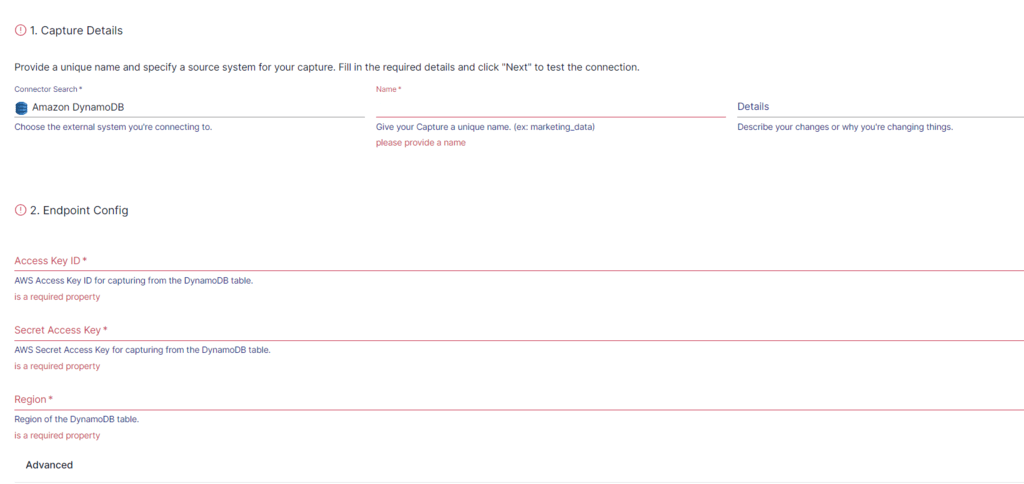
- On the DynamoDB connector configuration page, specify the following details:
- Provide a unique Name for your source capture.
- Specify your Amazon Web Services Access Key ID and Secret Access Key to capture data from the DynamoDB table.
- Provide the Region where the DynamoDB table exists.
- After specifying all the details, click NEXT > SAVE AND PUBLISH.
The real-time connector uses DynamoDB streams to capture updates from your DynamoDB tables into Flow collections.
Step 2: Configure Databricks as Your Destination
- To start configuring the destination end of your integration pipeline, click MATERIALIZE COLLECTIONS in the pop-up that appears after a successful capture.
You can also navigate to the dashboard sidebar options and select Destinations > + NEW MATERIALIZATION.
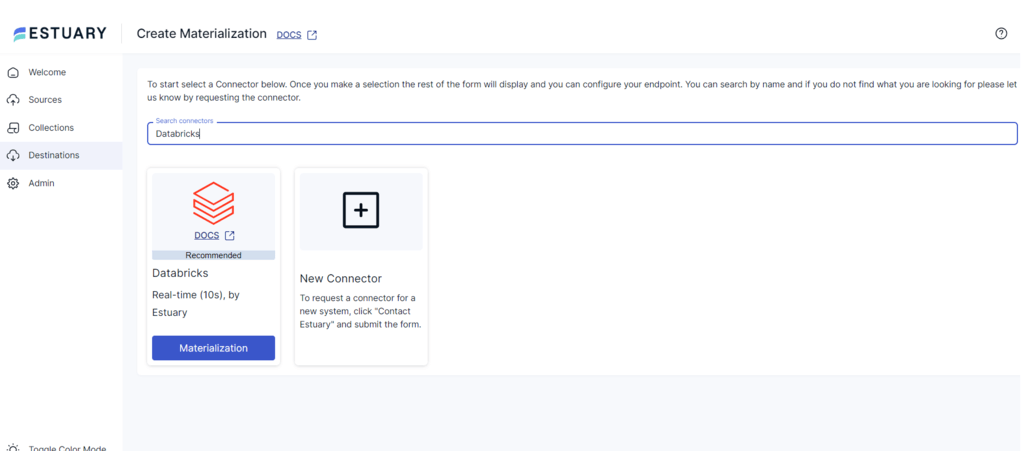
- On the Create Materialization page, type Databricks in the Search connectors field.
- When you see the Databricks connector, click on its Materialization button.
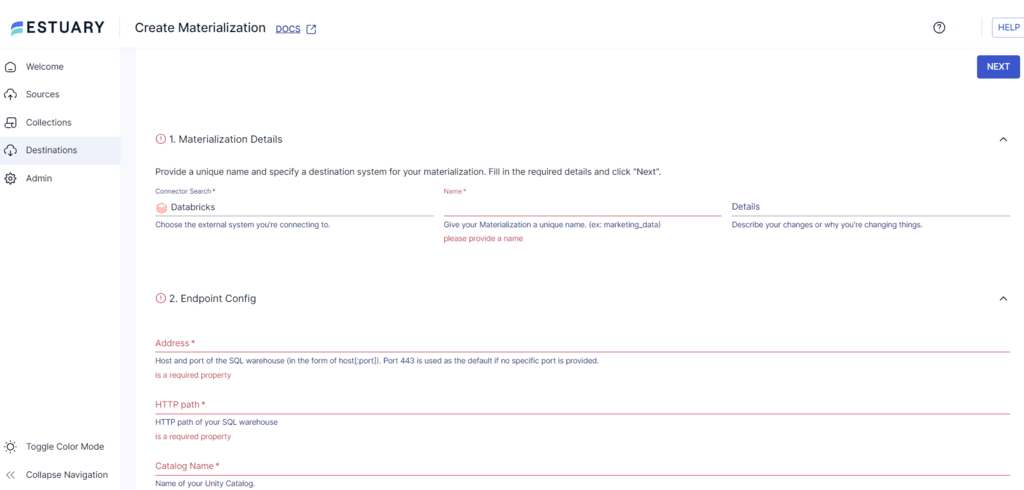
- On the Databricks connector configuration page, specify the following details:
- Enter a unique Name for your materialization.
- In the Address field, specify your SQL warehouse host and port. If you don’t provide a specific port number, Port 443 will be used as default.
- In the HTTP path field, specify your SQL warehouse HTTP path.
- Provide the Catalog Name of your Unity Catalog.
- For authentication, provide your Personal Access Token for accessing the Databricks SQL warehouse.
- Click the SOURCE FROM CAPTURE button in the Source Collections section to select the capture of your DynamoDB data to link to the materialization. You can use this option if the collection added to your capture isn’t automatically added to your materialization.
- Finally, click on NEXT > SAVE AND PUBLISH to complete the configuration process.
The real-time connector will materialize Flow collections of your MongoDB data into tables in your Databricks SQL warehouse.
Benefits of Using Estuary Flow
- Change Data Capture (CDC): Estuary Flow’s CDC capability allows you to integrate data from any source to any destination in real-time. With CDC, changes to your DynamoDB data will be immediately captured and replicated into Databricks. This ensures you have the most current data for analysis and informed decision-making.
- No-code Connectors: With 100s of no-code connectors (batch and streaming), Estuary Flow simplifies the process of syncing data between varied sources and destinations, including DynamoDB and Databricks. The connectors eliminate the need for complex codes. This helps speed up your data workflows and allows your business to scale data integration processes without any technical overhead.
- Schema Evolution: Estuary Flow supports schema evolution, which helps automatically detect and manage changes in the data schema from the source to the destination. It automatically alerts you about any potential impacts on downstream data flows, ensuring your data pipeline adapts to changes without manual intervention.
Method 2: Using Amazon S3 to Move Data from DynamoDB to Databricks
This method involves exporting your DynamoDB table data into an Amazon S3 bucket. Then, you import the S3 data into Databricks.
Step 1: Export DynamoDB Data into an S3 Bucket
You can export data from DynamoDB in two ways:
- Full Export: You can export a full snapshot of your DynamoDB table from any point in time within the PITR (point-in-time recovery) window of your S3 bucket.
- Incremental Export: You can export data from the DynamoDB table that was changed, deleted, or updated during a specific period, within the PITR window, to S3.
Prerequisites
- Enable point-in-time recovery for your DynamoDB table to use the export S3 export feature.
- Set up S3 permissions to export your table data into the S3 bucket.
NOTE: You can request export from the DynamoDB table using the AWS Management Console and AWS Command Line.
Let's look into how to export DynamoDB table data into an S3 bucket using AWS Management Console.
- Sign in to your AWS Management Console and open the DynamoDB console.
- In the navigation pane of your DynamoDB console, choose the Exports to S3 option.
- After selecting the Exports to S3 button, choose the DynamoDB source table and the destination S3 bucket to which you want to export the data.
Either use the Browse S3 button to find the S3 bucket in your account or enter the bucket URL in the s3:// bucketname / prefix format (prefix is an optional folder to help organize your destination bucket).
- Select the Full export or Incremental export option.
For Full Export:
- Select a point in time within the PITR window from which you want to export the full table snapshot. However, you can also select Current time and export the latest snapshot.
- For Exported file format, select DynamoDB JSON. This will export your table in DynamoDB JSON format from the latest restorable time of the PITR window. The file is encrypted with an Amazon S3 key (SSE-S3).
For Incremental Export:
- Select an Export period for the incremental data. You must pick a start time within the PITR window. The duration of the export period must be at least 15 minutes but at most 24 hours.
- Choose between Absolute mode or Relative mode to specify the time period for your incremental export.
- For Exported file format, select DynamoDB JSON. Your table will be exported in DynamoDB JSON format from the latest restorable time from the PITR window. The file is encrypted with an Amazon S3 key (SSE-S3).
- You can select either New and old images or New images only for the Export view type. While the new image will provide you with the latest state of the item, the old image provides the state of the item right before the specified start date and time.
- After doing the needful for full export or incremental export, click Export to start exporting your DynamoDB table data into the S3 bucket.
NOTE: DynamoDB JSON differs from normal JSON. You might want to convert the downloaded DynamoDB JSON into normal JSON using the boto3 library provided by AWS.
Step 2: Import Data from S3 Bucket into Databricks
You can use the COPY INTO command to ingest your DynamoDB data from S3 into a Unity Catalog external table in Databricks.
Prerequisites
- Ensure you have the necessary privileges, including:
- READ VOLUME privilege on the volume or READ FILES privilege for the external location.
- USE SCHEMA privilege for the schema that contains your target table.
- USE CATALOG privilege to access the parent catalog.
- Ensure that your administrator has configured a Unity Catalog volume or external location for accessing source files in S3.
- Obtain your source data path, formatted as a cloud object URL or the volume path.
To load data from your S3 bucket into a Databricks table using the Unity Catalog external location, run the following command in the Databricks SQL editor.
plaintextCOPY INTO my_json_data
FROM 's3://landing-bucket/json-data'
FILEFORMAT = JSON;
In the above code:
- The COPY INTO command is to load data into the my_json_data table in Databricks.
- FROM ‘s3://landing-bucket/json-data’ indicates the S3 bucket and folder where the JSON files are stored.
- FILEFORMAT = JSON specifies the source files are in JSON format.
Limitations of Using S3 Bucket for a Databricks DynamoDB Connection
- Manually exporting data from DynamoDB into S3 and then importing it into Databricks can introduce significant latency. This delay makes this method unsuitable for applications requiring real-time data integration and analysis.
- Integrating data between DynamoDB and Databricks using S3 involves several manual steps, such as writing SQL commands and setting up export/import tasks to load the data into Databricks. This adds to the complexity of the process.
- The manual data transfer process is prone to human errors, especially with incorrect configurations or SQL command syntax errors. Such errors compromise data integrity, leading to inconsistencies between datasets in the two platforms.
- The time-consuming nature of the process likely results in data being duplicated, lost, or outdated by the time it is analyzed in Databricks. This impacts the accuracy of the insights you derive from the data.
Conclusion
Integrating DynamoDB with Databricks can significantly enhance your data analysis capabilities for actionable insights. This integration allows you to leverage Databricks' robust data management and advanced analytics capabilities to optimize your business operations.
To move your data from DynamoDB to Databricks, you can use an intermediary S3 bucket. While this method is effective, it involves multiple manual steps, which can be time-consuming and error-prone.
Using a robust ETL platform like Estuary Flow can help overcome these limitations. By setting up an automated data pipeline in Estuary Flow, you can seamlessly transfer data from DynamoDB into Databricks. This reduces the need for manual intervention or extensive coding.
Sign up for an Estuary account today for real-time data synchronization between DynamoDB and Databricks.
FAQs
Can you use Databricks without using Apache Spark?
No, Databricks is built on Apache Spark, and its core functionalities depend on Spark as the underlying engine. While Databricks integrates with many open-source libraries and supports various workloads, Apache Spark is central to its data processing, analytics, and machine learning operations.
How can you connect DynamoDB to Databricks?
You can connect DynamoDB to Databricks using Estuary Flow. Estuary Flow provides ready-to-use, no-code connectors that simplify the integration process, enabling you to transfer data with just a few clicks—no complex setup required

About the author
Dani is a data professional with a rich background in data engineering and real-time data platforms. At Estuary, Daniel focuses on promoting cutting-edge streaming solutions, helping to bridge the gap between technical innovation and developer adoption. With deep expertise in cloud-native and streaming technologies, Dani has successfully supported startups and enterprises in building robust data solutions.


