Shaking up the old ways, transferring data from Kafka to Elasticsearch has caused quite a stir in how we handle information. Data management and analysis have always been like trudging through mud – slow and messy. However, when you integrate Kafka and Elasticsearch, the landscape changes.
The synergy between Kafka's high-throughput, fault-tolerant data streaming capabilities and Elasticsearch's advanced search and analytics engine creates an environment where data flows smoothly, insights are gathered swiftly, and decision-making becomes more proactive than reactive.
On the face of it, it may appear pretty simple but transferring data from Kafka to Elasticsearch can be tricky, especially when deciding on the best approach. Each option comes with its own trade-offs and striking the right balance requires careful deliberation.
To help you with this ordeal, we have put together 3 ways to stream data from Kafka to Elasticsearch:
- Using Estuary Flow
- Applying a combination of Kafka Connect and the Elasticsearch sink connector
- Creating a custom Kafka consumer application
Let's get started.
Kafka & Elasticsearch: Building Modern Data Pipelines
Kafka and Elasticsearch are extremely powerful when used together for building modern data-driven applications and pipelines. They provide a strong system that helps in data storage and retrieval.
Kafka provides a durable, scalable log for streaming data. It acts as a broker sitting between data producers and consumers and buffers and routes streams of records or events. Kafka’s architecture handles high throughput ingestion and replication of streams. Its consumer model replays data streams to rebuild downstream systems, often used in a data warehouse setup.
Elasticsearch, on the other hand, is a powerful search and analytics engine that provides storage, indexing, and analysis capabilities over data. It can ingest streams of data from Kafka, store structured and unstructured data at scale, and run aggregations and searches across petabytes of data. Its speed and flexibility make it well-suited for powering analytics applications.
Some examples of common patterns using Kafka and Elasticsearch are:
- Stream processing: Use Kafka Streams or ksqlDB to transform and enrich data from Kafka topics before loading into Elasticsearch.
- Microservices: Have microservices publish domain events to Kafka topics which are then routed to Elasticsearch as well as other destinations.
- Observability: Stream metrics, logs, and tracing data into Elasticsearch via Kafka topics to power visualizations, monitoring, and debugging for applications.
- Data pipelines: Build scalable data ingestion pipelines by streaming from Kafka topics into Elasticsearch for indexing. Replicate databases, stream log files, and more.
- Rebuilding Indexes: Replay data from Kafka topics to recreate Elasticsearch indices from scratch. It is useful for reprocessing with new mappings or for index migrations.
- Search & Analytics: Store high volumes of data in Elasticsearch indices that are continuously updated via Kafka topic streams. It provides fast search and aggregations.
3 Methods To Send Data From Kafka To Elasticsearch
Here are 3 ways to get data from Kafka over to Elasticsearch.
Method I: Using Estuary Flow - A No-Code Platform For Data Pipelines
Flow is our data movement and transformation platform designed to enhance data integration. If you’re working with multiple databases, you’ll find Flow especially handy. Its powerful command-line interface lets backend software engineers efficiently manage data integration.
Similarly, Flow lets data analysts and other user cohorts meaningfully contribute to the same data pipelines using the web application. If your organization is struggling with issues like repeated expensive OLAP queries, operating separate batch and streaming systems, managing continuous processing workflows, or if you’re simply trying to reduce data engineering bottlenecks, Flow can be instrumental.
Flow offers fully integrated pipelines that simplify the complexity of building, testing, and evolving pipelines to continuously capture, transform, and materialize data across systems. It uses a mix of architectural techniques to deliver high throughput, avoid latency, and minimize operating costs.
When Should You Turn To Estuary Flow?
- When you want to avoid manual intervention and associated challenges.
- When your goal is to get your data streamed directly to various downstream applications like Elasticsearch.
- When your focus is on orchestrating real-time data pipelines that flexibly respond to the dynamic demands of modern business.
- When you’re looking for a user-friendly solution to facilitate the smooth transfer of data, especially if you're dealing with complex database ecosystems.
- When efficiency, reliability, and scalability are key elements in your data integration strategy.
Let’s go through the steps to integrate Kafka with Elasticsearch using Estuary Flow.
Step 1: Prerequisites To Move Data From Kafka To Elasticsearch With Estuary Flow
- An active Estuary Flow account.
- A configured Kafka cluster with bootstrap.servers and connection security enabled using TLS.
- An Elasticsearch cluster with a known endpoint and appropriate user privileges.
- At least one Flow collection.
Step 2: Initiate The Flow
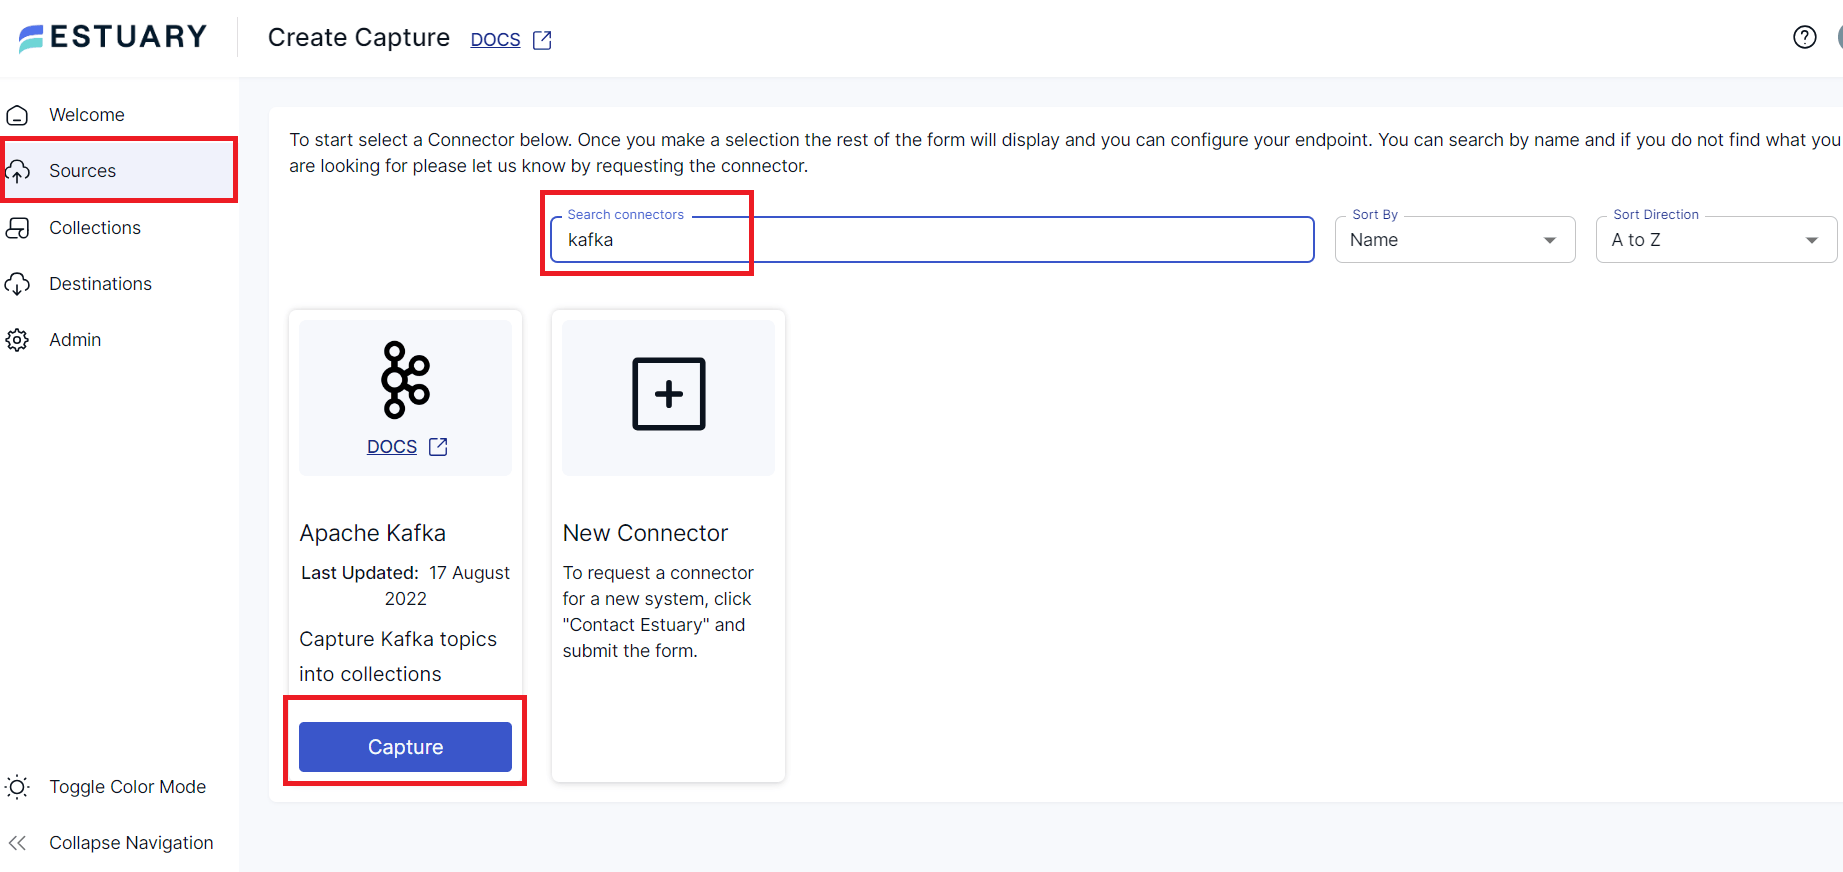
Log into your Estuary Flow account. Once done, navigate to Capture and click on + New Capture.
Step 3: Connect Kafka
Search for the Kafka connectors and click ‘Capture’.
- Provide a unique name for your capture.
- For Endpoint Config, fill in the details such as Bootstrap Servers, TLS connection settings, and Authentication.
- Flow will use these details to connect to Kafka. Once connected, a list showcasing collections (representing Kafka topics) will appear. Deselect any connections you don’t wish to capture.
- You can inspect and modify the generated capture definition and schema for each collection in the Specification Editor. This schema defines how the data will be mapped to Elasticsearch.
- Once satisfied, click ‘Save and Publish’. Wait for a success notification.
Step 4: Materialize To Elasticsearch
Post a successful capture publication, choose ‘Materialize Collections’.
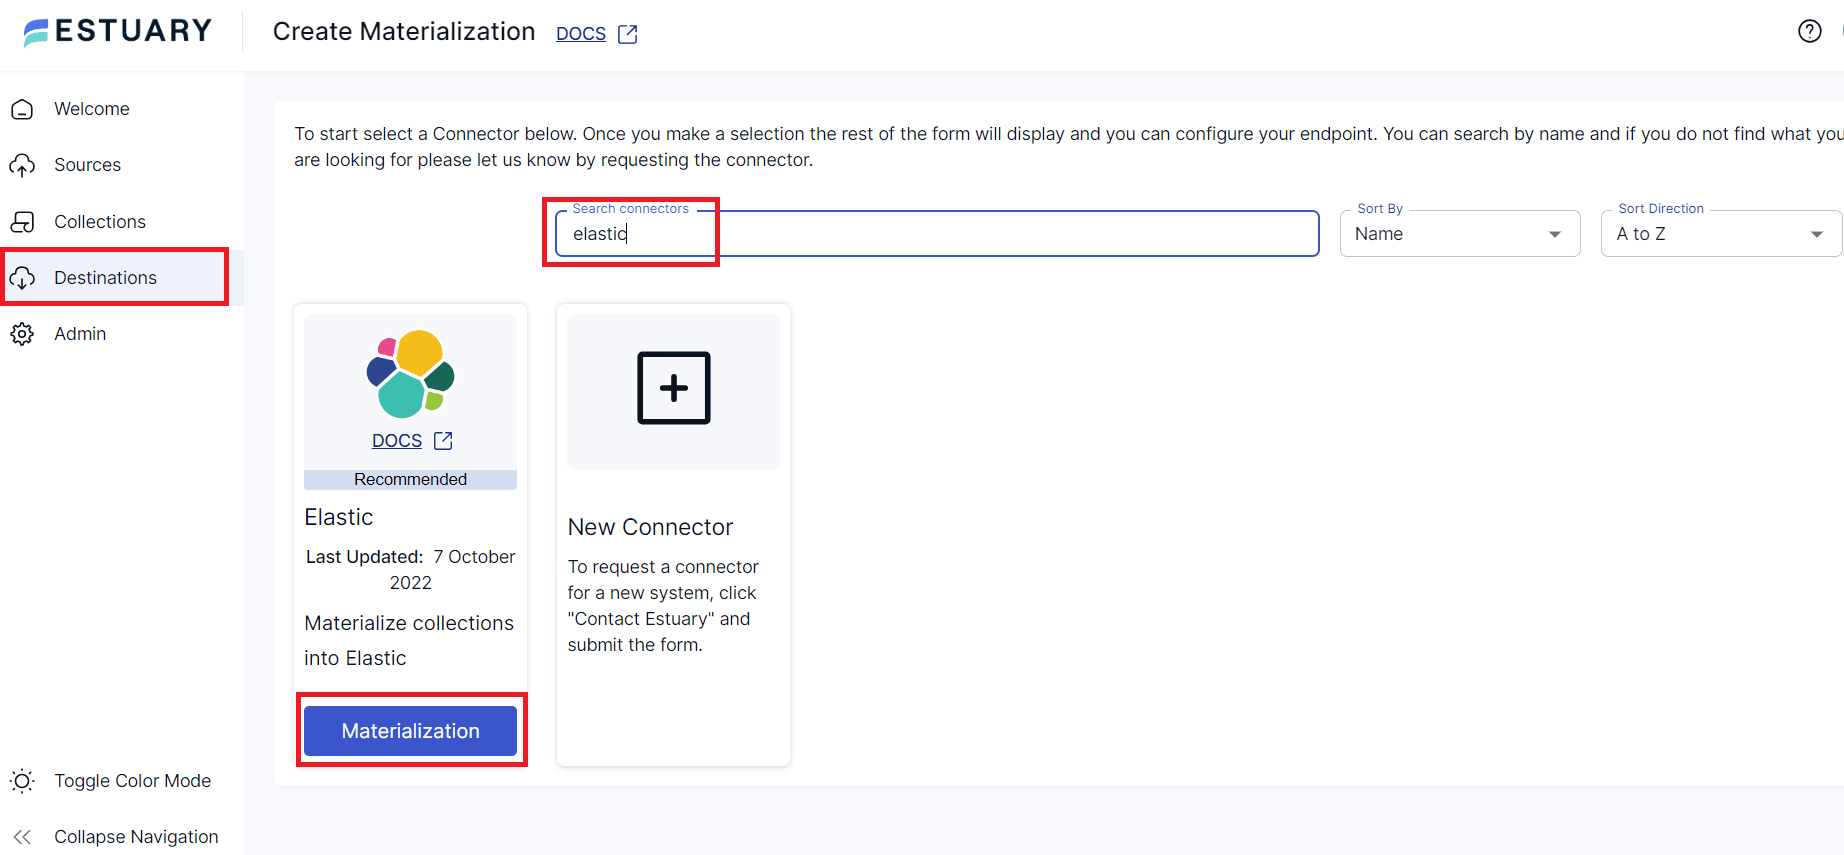
- In the search connectors, input ‘Elastic’ and select it.
- Click on ‘Materialize’ on the Elastic tile.
- Provide a unique name for this materialization process and fill in the necessary Endpoint Config details. This connector will help materialize Flow collections (from your Kafka topics) into indices in your Elasticsearch cluster.
- After configuring, click ‘Save and Publish’. You should receive a notification confirming the successful creation of the data flow.
Step 5: Data Streaming
Once set up, new data streaming through your Kafka topics will be sent to the appropriate Elasticsearch indices in real time.
Special Notes For Kafka To Elasticsearch Flow
- The connector supports Kafka messages containing JSON data. However, the upcoming BETA version will also support Avro Kafka messages.
- Flow recommends using SASL mechanisms for authentication, especially for production environments. TLS encryption is suggested for connection security.
- For Elasticsearch, dynamic runtime mappings are used when the connector creates indices automatically. It’s good practice to add explicit mappings when identified so that Elasticsearch queries stay swift.
- The connector also supports both standard and delta updates.
Method II: Using Elasticsearch Sink Connector
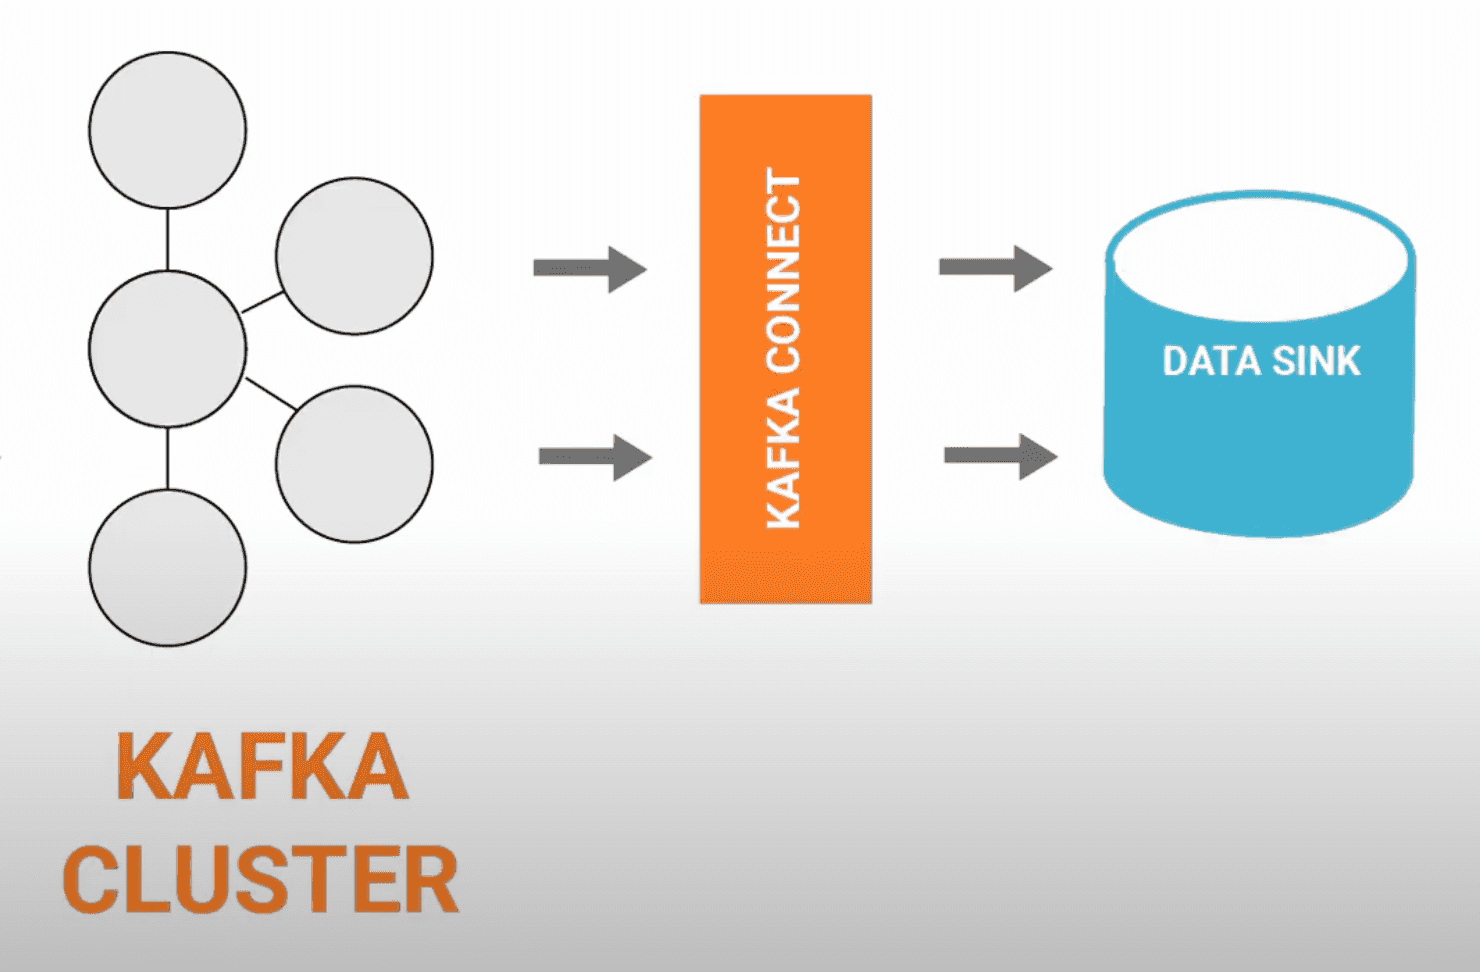
The Kafka Connect Elasticsearch Sink Connector lets you ingest JSON documents and data from Kafka into Elasticsearch. It uses the power of Kafka Connect’s ETL tool where you just need to provide a configuration that specifies the source (data sources from Kafka topic) and the destination (Elasticsearch).
The Elasticsearch Kafka connector delivers several features:
- Dead Letter Queue (DLQ): This functionality handles records that fail to be processed and written to Elasticsearch.
- Schema evolution: It handles schema evolution and can manage backward, forward, and fully compatible schema changes in Connect.
- Mapping inference: From Connect schemas, the connector can infer mappings, creating Elasticsearch mappings based on the schemas of Kafka messages. However, the inference is limited to field types and default values when a field is absent.
- Multiple tasks: The connector supports the execution of one or more tasks, as specified by the ‘tasks.max’ configuration parameter. This feature can enhance performance when parsing multiple files.
- Exactly once delivery: With Elasticsearch’s idempotent write semantics, the connector achieves exactly once delivery. If Kafka messages include keys, these are translated into Elasticsearch document IDs. In the absence of keys, the connector uses topic+partition+offset as the key which guarantees that every Kafka message corresponds to a single document in Elasticsearch.
Let’s take a look at the steps to stream data from Kafka to Elasticsearch.
Step 1: Prerequisites
Before proceeding, make sure the following are installed and configured on your machine:
- Kafka Broker: Confluent Platform 3.3.0 or later, or Kafka 0.11.0 or later
- Connect: Confluent Platform 3.3.0 or later, or Kafka 0.11.0 or later
- Java 1.8
- Elasticsearch 7.x
- Elasticsearch assigned privileges: create_index, read, write, and view_index_metadata
- Confluent Hub Client
You need to assign the necessary privileges to Elasticsearch. You can do so with the following commands:
plaintextcurl -XPOST "localhost:9200/_security/role/es_sink_connector_role?pretty" -H 'Content-Type: application/json' -d'
{
"indices": [
   {
      "names": [ "-" ],
      "privileges": ["create_index", "read", "write", "view_index_metadata"]
   }
]
}'

curl -XPOST "localhost:9200/_security/user/es_sink_connector_user?pretty" -H 'Content-Type: application/json' -d'
{
"password" : "seCret-secUre-PaSsW0rD",
"roles" : [ "es_sink_connector_role" ]
}'
These commands create a user ‘es_sink_connector_user’ and a role ‘es_sink_connector_role’ with the necessary privileges.
Step 2: Installation Of The Connector
To install the latest connector version, navigate to your Confluent Platform installation directory and run the following command:
plaintextconfluent-hub install confluentinc/kafka-connect-elasticsearch:latestReplace ‘latest’ with a specific version if you want a particular version, like:
plaintextconfluent-hub install confluentinc/kafka-connect-elasticsearch:14.0.5Step 3: Starting The Connector
We will now use the Avro console producer to send a few records to Kafka which will then be transferred to Elasticsearch via the connector. Run the following command to start the producer:
plaintext<path-to-confluent>/bin/kafka-avro-console-producer \
--broker-list localhost:9092 --topic test-elasticsearch-sink \
--property value.schema='{"type":"record","name":"myrecord","fields":[{"name":"f1","type":"string"}]}'
Enter the following records in the console producer:
plaintext{"f1": "value1"}
{"f1": "value2"}
{"f1": "value3"}
Now these 3 records have been published to the Kafka topic ‘test-elasticsearch-sink’ in Avro format.
We need to load our predefined Elasticsearch connector to send the Kafka topic data to Elasticsearch.
To list available predefined connectors, use the following command:
plaintextconfluent local services connect connector listThen load the elasticsearch-sink connector:
plaintextconfluent local services connect connector load elasticsearch-sinkYou will get a response similar to:
plaintext{
  "name": "elasticsearch-sink",
  "config": {
    "connector.class": "io.confluent.connect.elasticsearch.ElasticsearchSinkConnector",
    "tasks.max": "1",
    "topics": "test-elasticsearch-sink",
    "key.ignore": "true",
    "connection.url": "http://localhost:9200",
    "type.name": "kafka-connect",
    "name": "elasticsearch-sink"
  },
  "tasks": [],
  "type": null
}
The Kafka Connect Elasticsearch Sink Connector will start reading data from the Kafka topic and writing it into Elasticsearch. To verify that data is available in Elasticsearch, execute the following command:
plaintextcurl -XGET 'http://localhost:9200/test-elasticsearch-sink/_search?pretty'This command fetches data from the ‘test-elasticsearch-sink’ index in Elasticsearch and you will see the documents you’ve added via the Kafka Avro console producer.
Now you have successfully sent data from Kafka to Elasticsearch using Kafka Connect Elasticsearch Sink Connector.
Keep in mind that if you need to handle large-scale data or achieve better performance, you can set the ‘tasks.max’ configuration property to adjust the number of tasks. In case the data schema evolves over time, this connector supports schema evolution. However, remember that some incompatible schema changes are not supported.
This connector can also handle retries to the Elasticsearch service in case it’s temporarily overloaded, thanks to its exponential backoff technique.
Method III: Using Custom Consumer Application In Java
A custom consumer application is an approach for streaming data from Kafka to Elasticsearch that involves writing a program to consume messages from Kafka and then sending that data to Elasticsearch. This method provides greater flexibility compared to using Kafka Connect because it includes the option for custom logic or transformations as needed. However, it also comes with increased development effort and maintenance.
Step 1: Building The Kafka Consumer
In Java, you’d use the KafkaConsumer class from the Kafka clients library. Below is a simple example of a Kafka consumer that reads from a topic named ‘my_topic’.
javaimport org.apache.kafka.clients.consumer.ConsumerRecord;
import org.apache.kafka.clients.consumer.ConsumerRecords;
import org.apache.kafka.clients.consumer.KafkaConsumer;

import java.util.Collections;
import java.util.Properties;

public class MyConsumer {
    public static void main(String[] args) {
        Properties props = new Properties();
        props.put("bootstrap.servers", "localhost:9092");
        props.put("group.id", "my_group");
        props.put("key.deserializer", "org.apache.kafka.common.serialization.StringDeserializer");
        props.put("value.deserializer", "org.apache.kafka.common.serialization.StringDeserializer");

        KafkaConsumer<String, String> consumer = new KafkaConsumer<>(props);
        consumer.subscribe(Collections.singletonList("my_topic"));

        while (true) {
            ConsumerRecords<String, String> records = consumer.poll(100);
            for (ConsumerRecord<String, String> record : records) {
                System.out.printf("offset = %d, key = %s, value = %s%n", record.offset(), record.key(), record.value());
            }
        }
    }
}
Step 2: Processing The Data
With a custom consumer, you can add any logic you need right after reading the data from Kafka. Let’s say, we want to filter out any records with an empty value:
javafor (ConsumerRecord<String, String> record : records) {
    if (record.value() != null && !record.value().isEmpty()) {
        System.out.printf("offset = %d, key = %s, value = %s%n", record.offset(), record.key(), record.value());
    }
}
Step 3: Writing To Elasticsearch:
To write data to Elasticsearch, you can use Elasticsearch’s RestHighLevelClient. Below is a simple example of indexing a document:
javaimport org.elasticsearch.action.index.IndexRequest;
import org.elasticsearch.client.RequestOptions;
import org.elasticsearch.client.RestHighLevelClient;
import org.elasticsearch.common.xcontent.XContentType;

// ...

RestHighLevelClient client = new RestHighLevelClient(
    RestClient.builder(new HttpHost("localhost", 9200, "http")));

IndexRequest request = new IndexRequest("my_index");
request.id("1");
String jsonString = "{" +
    "\"user\":\"kimchy\"," +
    "\"postDate\":\"2013-01-30\"," +
    "\"message\":\"trying out Elasticsearch\"" +
    "}";
request.source(jsonString, XContentType.JSON);

client.index(request, RequestOptions.DEFAULT);
Step 4: Error Handling & Retry Mechanism
You should wrap your data processing and Elasticsearch index code with try/catch blocks to handle any exceptions that might occur:
javatry {
    // Processing and Elasticsearch indexing code...
} catch (Exception e) {
    e.printStackTrace();
    // You can add a retry mechanism here, if appropriate.
}
Step 5: Scaling & Performance Tuning
To scale your custom consumer application, you can increase the number of consumer instances, each running in a separate process, and they will automatically divide the topic’s partitions among themselves.
Kafka’s consumer configuration can be tuned for performance and adjust various properties like fetch.min.bytes, fetch.max.wait.ms, max.partition.fetch.bytes, and so on.
Step 6: Monitoring & Maintenance
To keep a close eye on the health and performance of your application, integrate application-specific logging, use Kafka’s built-in metrics, and tap into Elasticsearch’s monitoring features.
For a full overview, use a log aggregation tool (like the ELK stack or Splunk), an application performance monitoring (APM) tool (like New Relic or Datadog), and Elasticsearch's _cat APIs or Kibana's monitoring app.
3 Real World Examples Of Organizations Using Apache Kafka & Elasticsearch
Let’s now discuss 3 real-life examples where we will explore how renowned organizations used Apache Kafka and Elasticsearch to overcome obstacles and enhance their operations.
Case Study 1: New York Times
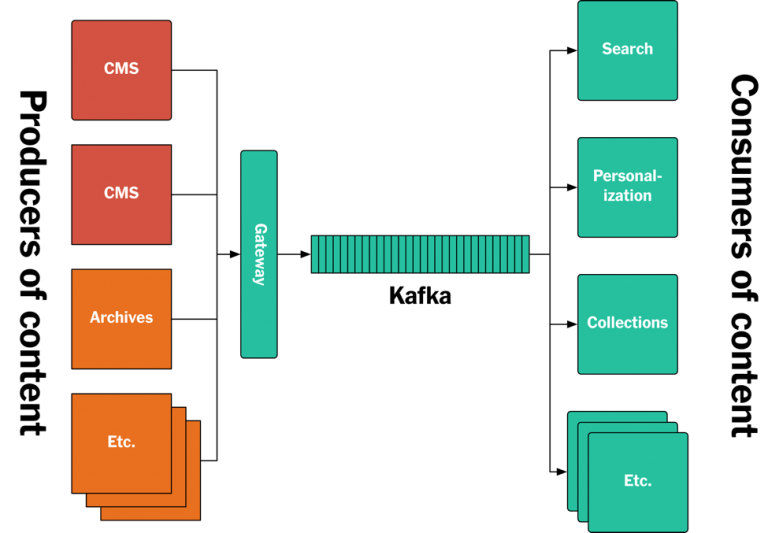
The New York Times faced challenges with fragmented APIs and schemas for publishing content to various systems like search and personalization engines. Their old API-based architecture was unreliable for streaming archives and inefficient for accessing historical data.
Solution
NYT adopted a log-based architecture centered on Apache Kafka as the streaming platform. A "Monolog" topic stores all content assets in normalized form. The ‘Denormalizer’ service consumes this and writes bundled denormalized assets to another topic.
For search, NYT streams the denormalized topic into Elasticsearch. This powers the nytimes.com site search. Kafka Streams applications transform the data and index it into Elasticsearch.
Benefits
- Unified log consumption simplified access to historical data.
- Elasticsearch-powered fast search and analytics on content.
- Decoupled architecture via Kafka improved flexibility and dev velocity.
- Kafka provides a scalable and durable log for ingesting content updates.
- The replayability of logs makes it possible to rebuild indexes and data store.
Case Study 2: Netflix
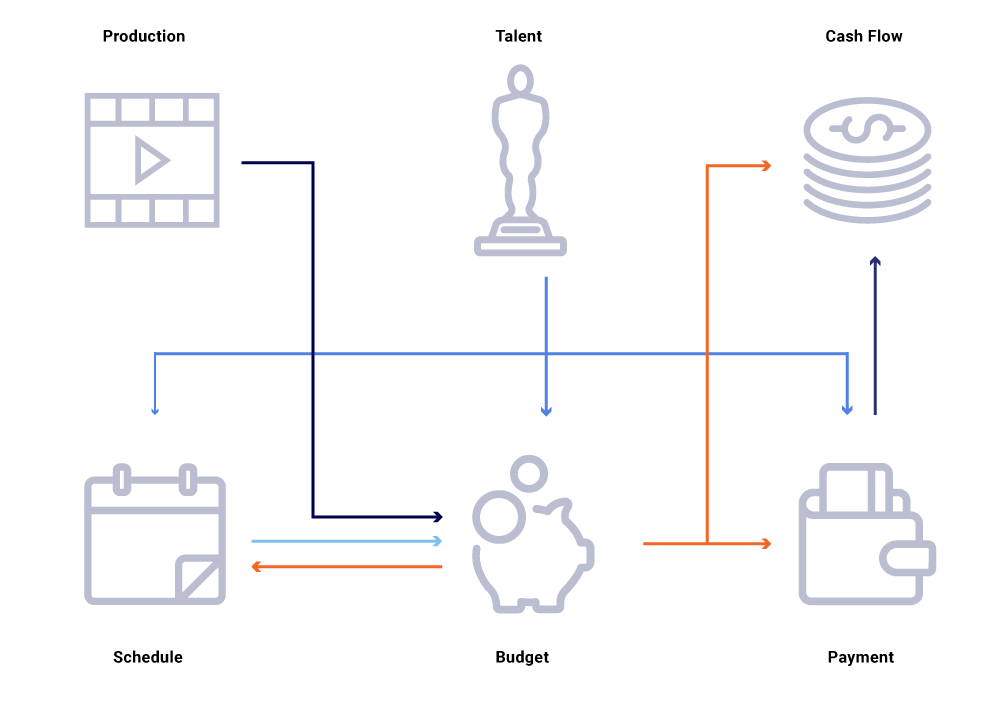
Netflix, with an expenditure of around $15 billion on producing original content in 2019, faced immense complexities in planning, budgeting, and accounting for its vast content. The stakes were high as any discrepancy could result in a loss of millions of dollars.
Their architecture was largely built around microservices with every financial application modeled and implemented as a separate microservice. This was in line with Netflix’s policy of distributed governance to promote velocity and data abstraction.
However, as the business scaled, the services interacted through complex graphs of synchronous, request-based interaction, which could potentially cause disruptive issues, including system instability and loss of data consistency.
Solution
Netflix used Apache Kafka for creating an event-driven architecture. Changes in the state of a microservice were published as events into Kafka which other dependent services consumed to adjust their states. This managed the ripple effects of any change efficiently.
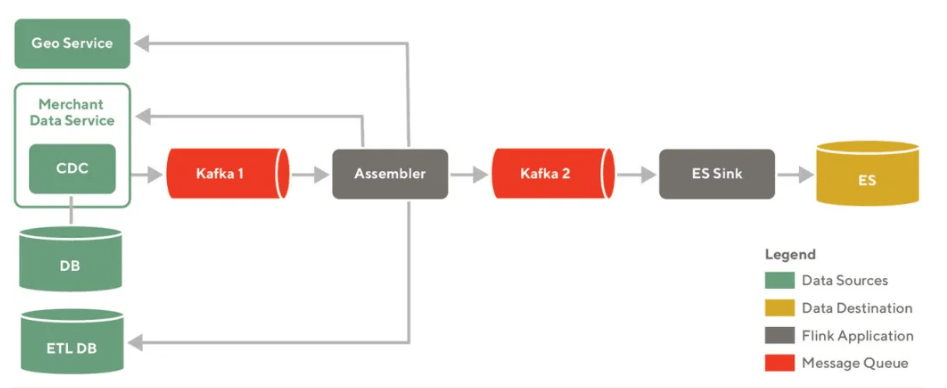
Enriched datasets were also created by reading data from Kafka and feeding it back into other Kafka topics. Database changes were turned into events using Change Data Capture (CDC) tools, allowing data replication across data centers and into Elasticsearch.
Benefits
- Kafka provided a reliable, fault-tolerant infrastructure.
- Better decoupling of services and improved transaction traceability.
- Kafka offered a solution that could handle the growing transaction volume.
- Improved data enrichment and distribution to data stores, enhancing search and analysis capabilities.
Case Study 3: Accelerating Data Insights & Enhancing Decision-Making With Real-Time Analytics
The organization had trouble getting quick insights from its data. Their old methods of data processing and analytics were slow and didn’t offer real-time results. This delay hindered their ability to make informed decisions and rapidly adapt to market changes.
Solution
The organization turned to Apache Kafka for real-time data streaming which helped them to ingest and process data in real-time and ensured a consistent flow of data for analytics.
Elasticsearch was incorporated as a distributed search and analytics engine. The setting up of efficient data pipelines connecting Kafka and Elasticsearch facilitated seamless data transfer, supporting real-time data analytics. This integration guaranteed quicker insights and expedited decision-making processes.
Benefits
- Improved productivity and resource allocation through real-time data analysis.
- Rapid indexing and retrieval of data with Elasticsearch for near real-time analysis.
- Achieved a 3X improvement in speed of obtaining insights, enhancing response to market trends and opportunities.
Conclusion
Moving data from Kafka to Elasticsearch opens the door to powerful real-time analytics. With Kafka acting as a durable streaming platform and Elasticsearch providing lightning-fast search and aggregations, these technologies help organizations to unlock timely insights. However, manually building custom integrations between Kafka and Elasticsearch can be complex and error-prone.
This is where Estuary Flow provides immense value. Flow offers a reliable, cost-effective solution for streaming data from Kafka topics into Elasticsearch indices. Its code-free GUI streamlines the process of setting up Kafka-to-Elasticsearch pipelines. Flow’s advanced architecture handles hefty workloads with ease while maintaining data accuracy.
If you are looking to build a real-time analytics stack using Kafka and Elasticsearch, Estuary Flow is the ideal choice. Sign up for free and give Flow a try today or reach out to us if you need any assistance.

About the author
With over 15 years in data engineering, a seasoned expert in driving growth for early-stage data companies, focusing on strategies that attract customers and users. Extensive writing provides insights to help companies scale efficiently and effectively in an evolving data landscape.


