HubSpot is a popular choice for organizations to connect marketing, sales, service, and operations teams for synchronized functioning. However, to maximize its potential, it’s important to integrate HubSpot with a robust data warehouse solution like Snowflake. This will empower your data-driven decision-making, ultimately leading to improved marketing and sales growth.
Wondering where to start with HubSpot to Snowflake integration? Let’s take a brief look at these two platforms before we explore the different integration methods.
An Overview of HubSpot
HubSpot is a cloud-based CRM platform that allows you to seamlessly connect your data, teams, and customers on a single platform.
With five hubs for Marketing, Sales, Service, CMS (content management), and Operations, HubSpot provides a curated set of tools for each purpose. You can either mix and match these hubs or use them simultaneously to achieve the best results.
The HubSpot CRM makes the foundational layer of HubSpot tools to organize, score, and track customers and leads across hubs.
Here are the main functions of the CRM platform:
- Increase collaboration between sales, marketing, and service teams
- Streamline the sales process with tracking of leads and activities
- Consolidation and management of customer data
- Track and report key business insights
An Overview of Snowflake
Snowflake is a fully-managed, enterprise-ready SaaS platform built on Microsoft Azure, Amazon Web Services, and Google Cloud infrastructure. It is a highly scalable data warehousing solution that you can use to store structured, unstructured, and semi-structured data in a centralized repository.
Here are some key features of Snowflake:
- Separation of Compute and Storage: The Snowflake architecture separates compute and storage, enabling you to scale resources independently. This allows you to allocate compute power depending on your workload requirements for cost-efficient solutions.
- Built-in Analytics: Snowflake supports SQL queries and advanced analytics functions for built-in analytics. It also supports popular analytics and reporting tools, helping you derive valuable insights from your data.
- Native Support for Semi-Structured Data: Snowflake supports semi-structured data formats like XML, Avro, and JSON. You can store, query, and analyze semi-structured and structured data together for efficient data analysis.
How to Integrate HubSpot to Snowflake: 3 Easy Methods
Unlock the full potential of your data with these three methods for HubSpot to Snowflake integration:
- Method #1: Using HubSpot’s sync feature
- Method #2: Using the manual method
- Method #3: Using SaaS alternatives like Estuary
Method #1: Using HubSpot’s Sync Feature for HubSpot to Snowflake Integration
Existing HubSpot users can use Snowflake Data Share—HubSpot’s native integration with Snowflake. Snowflake Data Share allows you to pass data from your HubSpot CRM platform to a Snowflake instance quickly and securely. You can also retrieve HubSpot data in Snowflake by running SQL queries.
Step 1: First, navigate to the HubSpot Data listing in Snowflake Marketplace and click on the Request button, then accept Snowflake’s terms.
Step 2: After completing this mandatory step, proceed to install the Snowflake integration from the HubSpot App Marketplace. The app creates Snowflake shares to deliver your CRM data. It requires HubSpot’s Operations Hub Enterprise and syncs data between the two platforms using triggers.
Step 3: With triggers, choose which HubSpot objects you want to send to Snowflake and specify the details of the data transfer, like the type and frequency of sync. This allows for a real-time sync of your HubSpot data with Snowflake.
Step 4: After setting up the triggers, HubSpot automatically sends all relevant data when an operation meets your specified conditions. You can also set up bidirectional syncing between HubSpot and Snowflake for easy updates of records whenever changes occur.
Method #2: Using the Manual Method to Integrate HubSpot to Snowflake
Although slightly more time-consuming than the previous method, you can manually extract your HubSpot data and load it to Snowflake.
Step 1: First, you must extract your data from HubSpot using HubSpot APIs that follow the REST architecture. You can use tools like Postman or CURL or use HTTP clients to interact with the APIs. The API responses will be in JSON, which is a widely used format for organizing data.
Step 2: Before moving the data into a Snowflake data warehouse instance, ensure you have a well-defined schema of your data. Snowflake data is organized around tables with a well-defined set of columns, each with a specific data type. Since Snowflake supports semi-structured data types, including JSON, you can directly load JSON data.
Step 3: To load data from HubSpot to Snowflake, create a schema to map each API endpoint to a table. Map each key of a HubSpot API endpoint response to a column of a table and ensure the right conversion to Snowflake data type.
Step 4: Once you have a well-defined schema or data model for Snowflake, you can load your HubSpot data into the Snowflake database. Use the PUT command to push the files containing data into a staging environment. Then, invoke the COPY INTO command on the Snowflake instance to copy the data.
Alternatively, you can upload all the extracted HubSpot data into a service like Amazon S3 for Snowflake to directly access the data.
Step 5: Finally, you can use the Snowflake web interface to load data from files up to 50 MB in size. The web interface acts as a data loading wizard where you can visually set up and copy your data into the data warehouse.
Method #3: Using SaaS Alternatives Like Estuary for HubSpot to Snowflake Integration
Third-party ETL (extract, transform, load) tools like Estuary Flow help simplify the real-time integration process with visual interfaces and pre-built connectors. Flow allows you to easily integrate HubSpot to Snowflake in just a few minutes. The process typically involves configuring an ETL tool to connect to your HubSpot account, extract the required information, transform the data, and load it into Snowflake.
Here are some of the key features of Estuary Flow:
- Real-time Data Streaming: Flow captures and transfers the data to the destination with millisecond latency. With the Flow data pipeline, you can ensure real-time data ingestion into data warehouses like Snowflake, keeping your data up-to-date for continuous analysis.
- Scalability: Flow seamlessly scales for growing data needs. The platform is designed to handle large volumes of data and fast data extraction and transformation.
- Built-in Connectors: With a range of pre-built connectors for data sources and destinations, you can build a data pipeline with a few clicks. And if you can’t find the connector you’re looking for, you can place a request with the Estuary team for a custom one.
Here are the steps involved in using Estuary for integrating HubSpot to Snowflake:
Step 1: Log In
You’ll need to log in to your Estuary account to get started. If you don’t have one, register for a free account.
Step 2: Create a New Capture
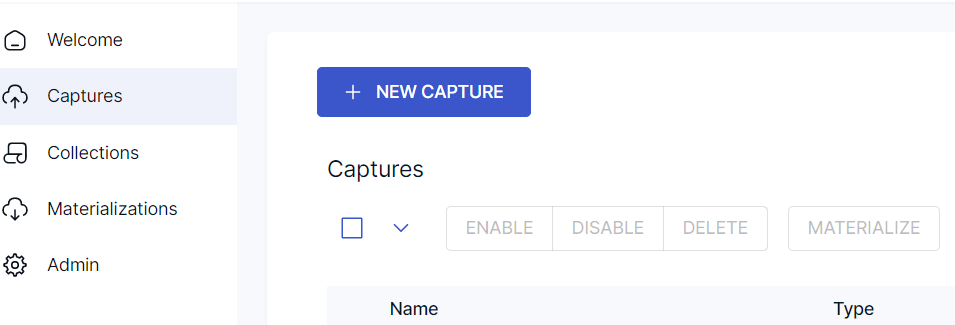
Upon logging in, you’ll be redirected to the Estuary dashboard, where you must click on Captures. A capture is the data source that forms one end of the data pipeline. Then, click on the NEW CAPTURE button.
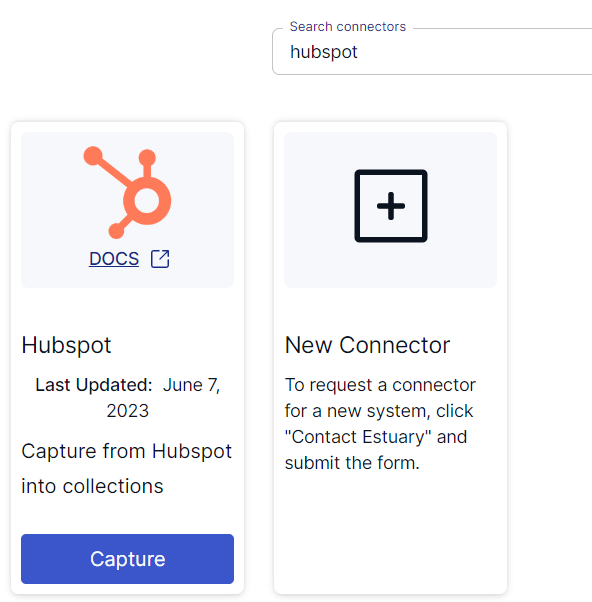
On the Create Capture page, search for HubSpot in the Search connectors box. The search results will show Estuary’s Hubspot connector. Click on the Capture button of the connector.
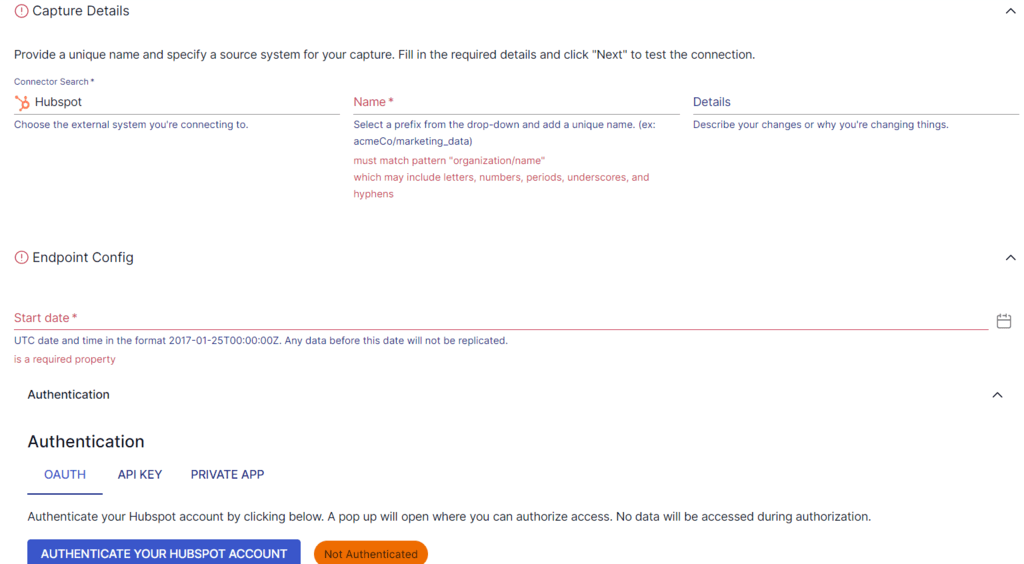
Once you’re on the HubSpot connector page, enter a Name for the connector and choose a Start Date for your capture. For Flow to connect to your HubSpot account, you must authenticate your HubSpot account using OAuth2 or a private app access token.
Collections are selected automatically, but you can also manually select/deselect collections using the Source Collections box.
Click on the Next button. Flow will connect to your HubSpot account and detect all the data resources associated with your account. To complete the source setup, click on the Save and Publish button.
Prerequisite: Before you connect Flow to Snowflake, make sure you have a user role with appropriate access permissions to your Snowflake database, schema, and warehouse. To accomplish this, you can run this script.
Step 3: Materialization
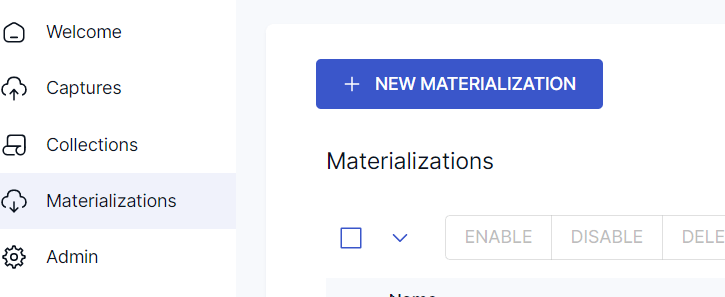
The next step is to set up the destination end of the pipeline. You can click on Materialize Connections in the pop-up window that follows a successful capture. Alternatively, you can navigate to the Estuary dashboard and click on Materializations. Next, click on the NEW MATERIALIZATION button.
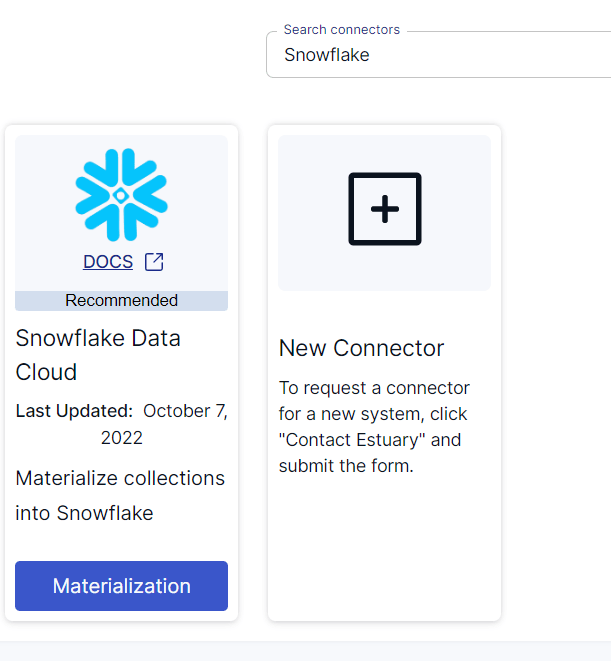
Search for Snowflake in the Search connectors box. You’ll find the Snowflake Data Cloud connector in the search results. Click on the Materialization button.
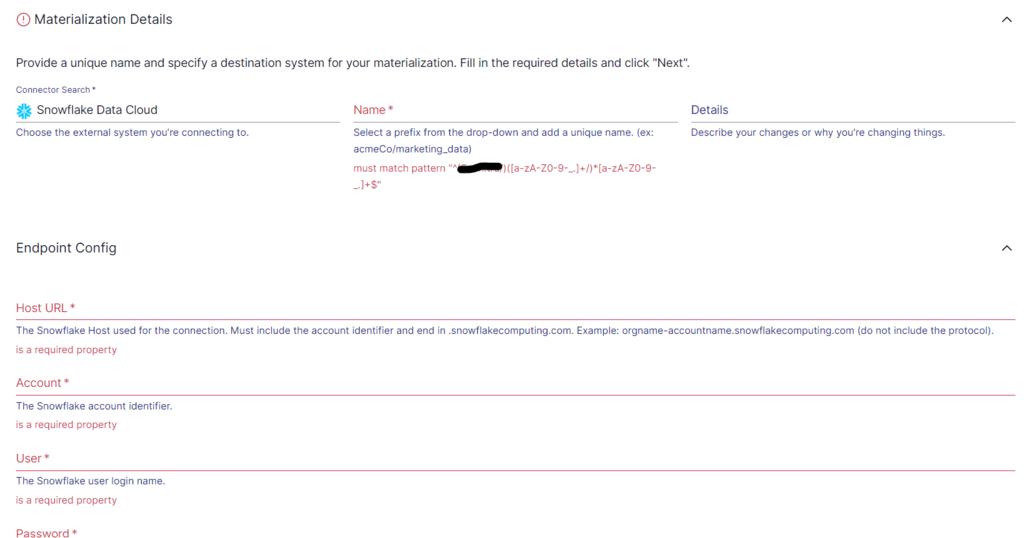
Once you’re on the Snowflake connector page, provide the required details for configuration, such as the Snowflake Host URL, Account, User, and Password. Click on the Next button, then click on Save and Publish. The connector will materialize Flow collections into tables in a Snowflake database.
This completes the process of HubSpot to Snowflake integration. For more information, refer to the Estuary documentation:
Conclusion
Integrating HubSpot with Snowflake enables you to centralize and analyze your data. By using marketing data more effectively, you’ll gain better insights to make informed decisions.
Opting for a SaaS tool provides distinct advantages, such as automation and real-time data integration, making the process easier and more convenient compared to manual approaches. Leveraging Estuary Flow’s real-time pipeline capabilities, you can seamlessly integrate HubSpot and Snowflake, enabling streaming analysis and unlocking the full potential of your data for gaining a competitive edge.
Estuary Flow makes it easy for you to establish a connection between any two platforms of your choice. Register for an account to start building your first pipeline for free!

About the author
With over 15 years in data engineering, a seasoned expert in driving growth for early-stage data companies, focusing on strategies that attract customers and users. Extensive writing provides insights to help companies scale efficiently and effectively in an evolving data landscape.
Popular Articles


