Advertising platforms play a vital role in shaping businesses to promote your products and services, reach your target customers, and maximize return on investment. Criteo, for example, excels at providing personalized ads for your marketing requirements. However, as businesses harness the capabilities of platforms like Criteo, it leads to vast amounts of data that need to be analyzed.
Managing such huge volumes of data poses a significant challenge. Fortunately, that’s where modern data warehouses (like Snowflake) and data integration technologies come in to save the day. By connecting Criteo to Snowflake through reliable methods of integration, you gain a sophisticated solution to overcome everyday data challenges — leading to smarter decisions and better outcomes.
Let’s quickly look at both platforms before we get into the details of the automated and manual methods to move data from Criteo to Snowflake.
Criteo Overview
Criteo is an online advertising platform that uses advanced technologies like artificial intelligence and machine learning to reach target customers. It offers a range of features, including Audience Targeting, Conversion Tracking, Cross Channel Attribution, and Campaign Management. Today, Criteo caters to more than 750 Million daily active users.
Here are some of the key features of Criteo:
- Security: Criteo uses a protocol known as General Data Protection and Regulation (GDPR), which ensures that data privacy remains constant.
- Cross-Device Targeting: Criteo offers a consistent advertising experience to the target users by providing relevant ads across multiple platforms, including mobile, computers, and tablets.
- Worldwide Reach: Criteo uses its worldwide publisher network to expand its target customer reach.
- Personalization: Criteo helps you to deliver personalized ads to the users. It provides relevant ads to existing users based on their interests and browsing history.
Snowflake Overview
Snowflake is a robust, fully managed, cloud-native platform that provides a data warehouse-as-a-service solution. It offers adaptable storage capacity, capable of accommodating petabytes of data in a single operation. This includes both structured and semi-structured data, allowing for consolidation from various sources into a unified data repository.
Snowflake architecture separates both computing and storage, which helps you to scale both independently based on your needs. As the data volumes grow, the storage can be increased without impacting compute resources, and vice versa.
Here are some of the key features of Snowflake:
- Automatic Query Caching: Snowflakes offers automatic query caching, which caches the most frequently used queries. This helps you to execute the queries efficiently whenever you attempt to rerun those queries.
- Zero Copy Cloning: Snowflake creates a complete clone of your database without even copying the data. This enables you to do multiple operations on the data without affecting the original data.
- Time Travel: Snowflake’s time travel feature allows you to restore your data from back to a specific time. This will help you protect your data when there is an accidental read/write operation without having to use a traditional backup strategy.
Criteo to Snowflake Data Migration Methods
In this guide, we will explore two easy ways for loading data from Criteo to Snowflake.
- The Automated Method: Connect Criteo to Snowflake using no-code tools like Estuary Flow
- The Manual Method: Load data from Criteo to Snowflake using CSV files
Method 1: Connect Criteo to Snowflake Using No-Code Tools Like Estuary
For effective integration between the two different platforms, consider using real-time ETL (extract, transform, load) tools like Estuary Flow.
Estuary Flow is a user-friendly data integration platform that allows you to build real-time data pipelines at scale. It offers a range of built-in connectors that streamline the process of data replication and migration with its no-code approach.
Now, let’s dive in by looking at what you’ll need to connect Criteo to Snowflake using Flow.
Prerequisites:
- Your API key and Client Secret to connect Criteo to Flow.
- A Snowflake account that includes:
- A target database, to which you'll materialize data
- A schema — a logical grouping of database objects — within the target database
- A virtual warehouse
- A user with a role assigned that grants the appropriate access levels to these resources.
- A target database, to which you'll materialize data
- Know your Snowflake account's host URL. This is formatted using your Snowflake account identifier, for example, orgname-accountname.snowflakecomputing.com.
- At least one Flow collection
Step 1: Set Up the Criteo Source Connection
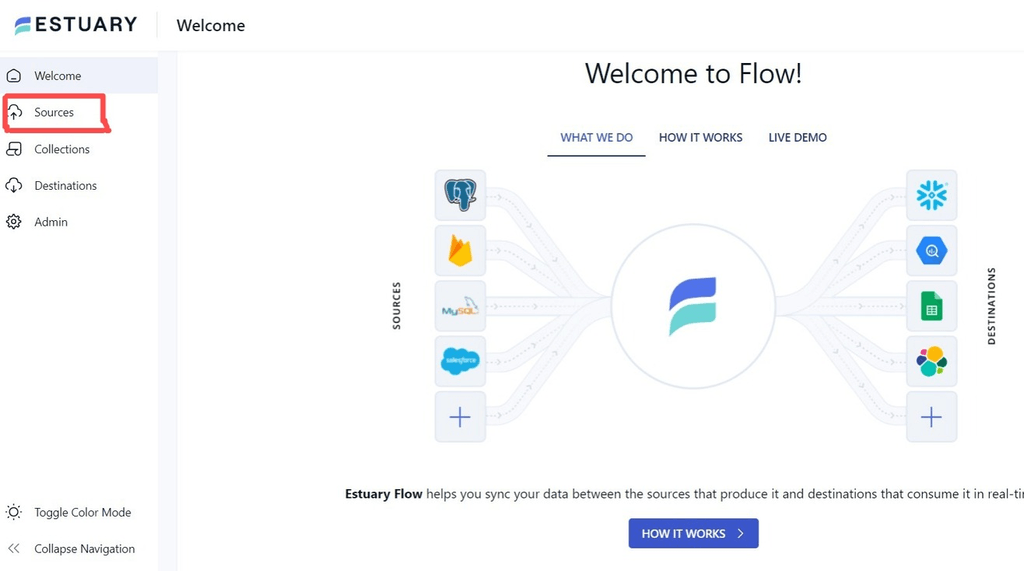
- Register for free or sign in to your Estuary account and click on the Sources option on the left-side pane of the dashboard.
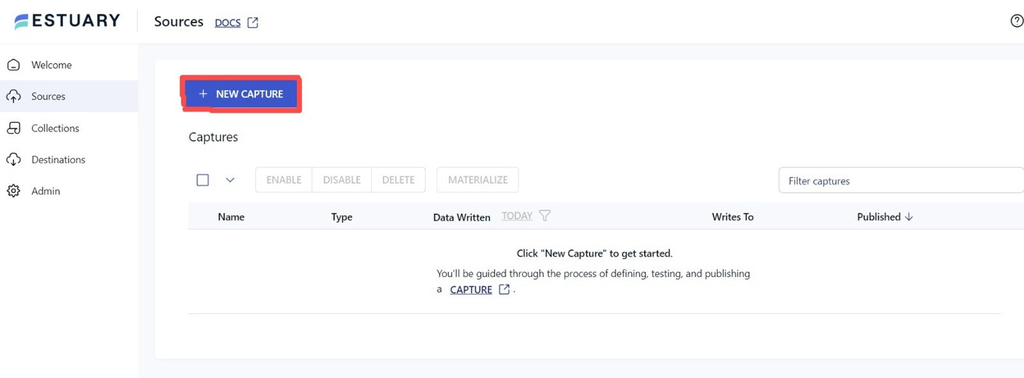
- Click on + NEW CAPTURE to start with the set up of your data source connection.
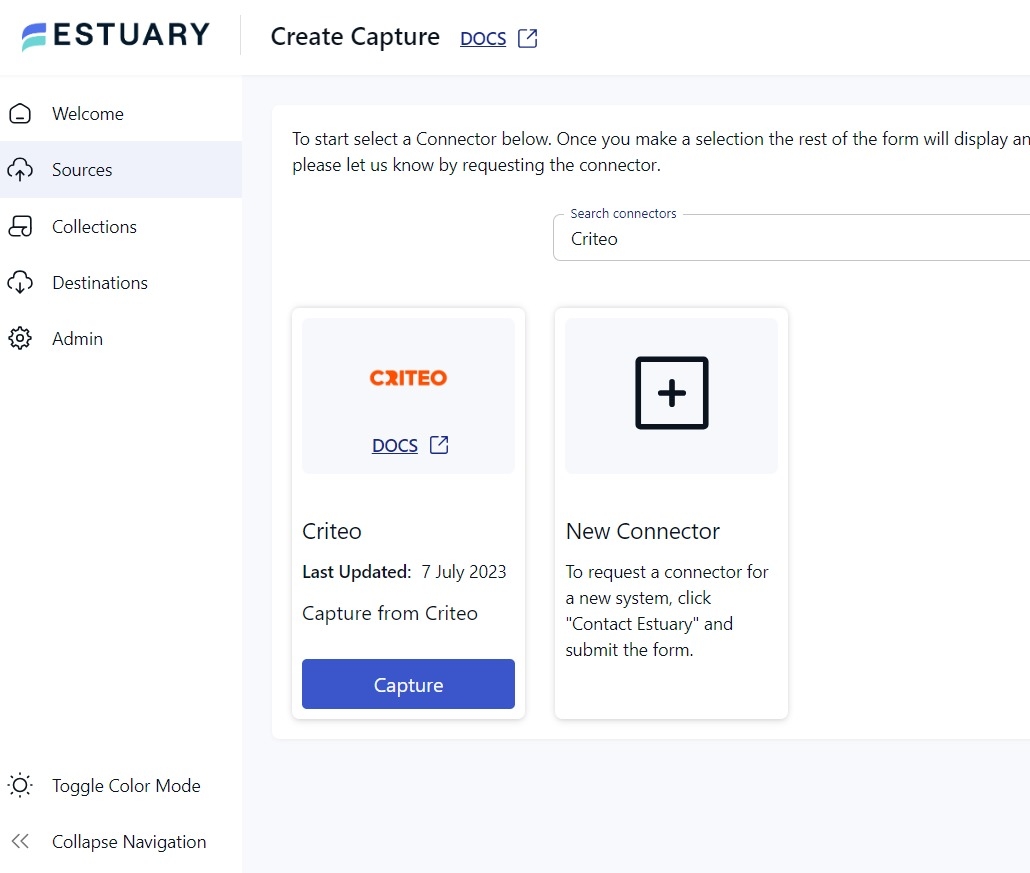
- In the Search connectors box, search for Criteo and click on its Capture button.
- On the Criteo connector page, provide a unique Name for the capture.
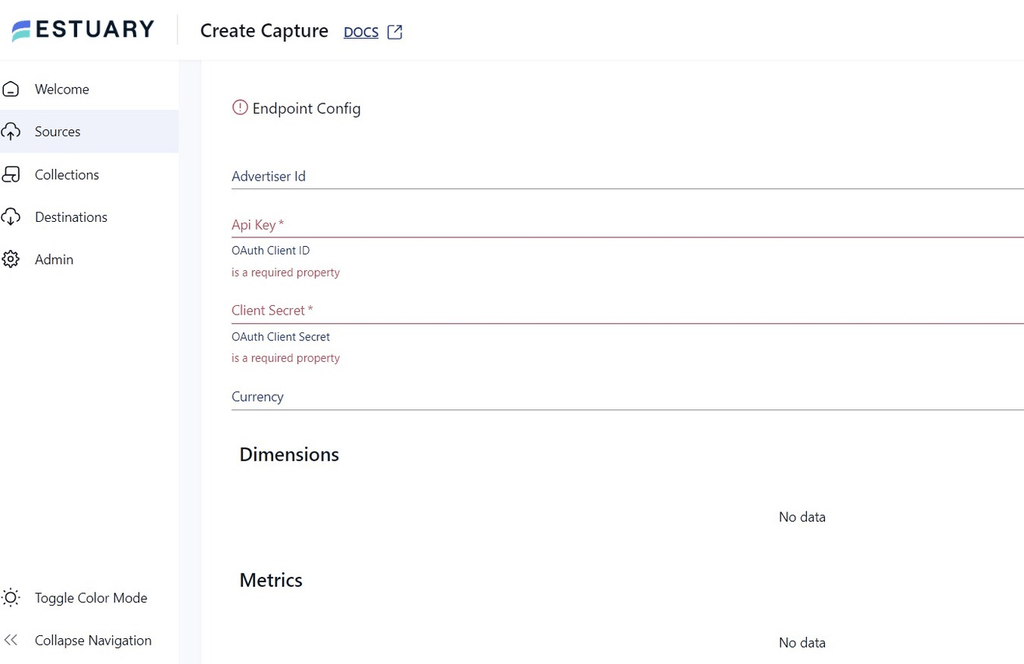
- In the Endpoint Config, specify the necessary details, such as Api Key and Client Secret.
- Now click on the NEXT, followed by SAVE AND PUBLISH.
Step 2: Set Up the Data Destination
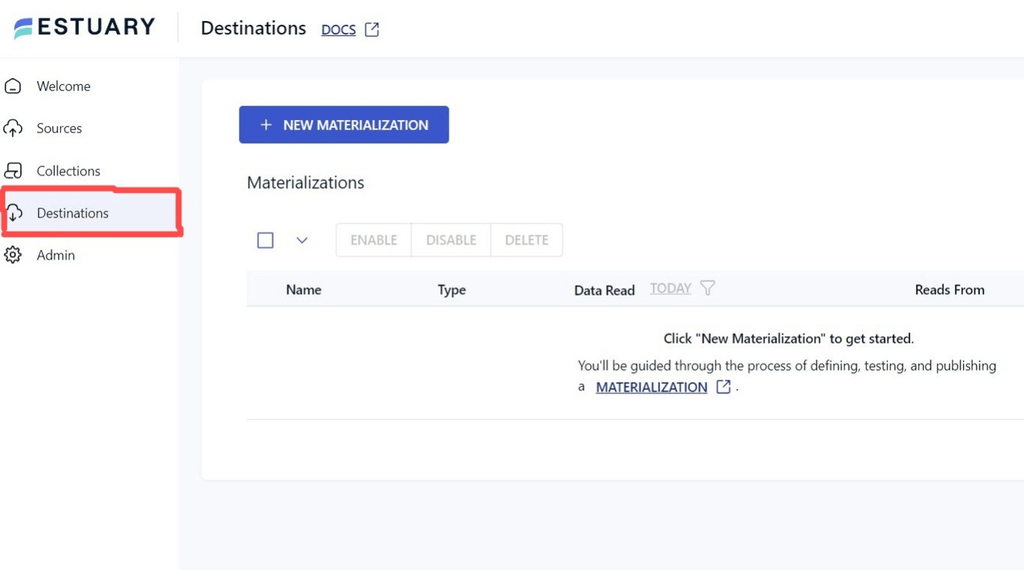
- A successful capture will result in a pop-up window with the details of the capture. You can click on the MATERIALIZE COLLECTIONS option in this pop-up window to proceed with setting up the data destination. Alternatively, navigate to the Estuary dashboard and click on the Destinations option.
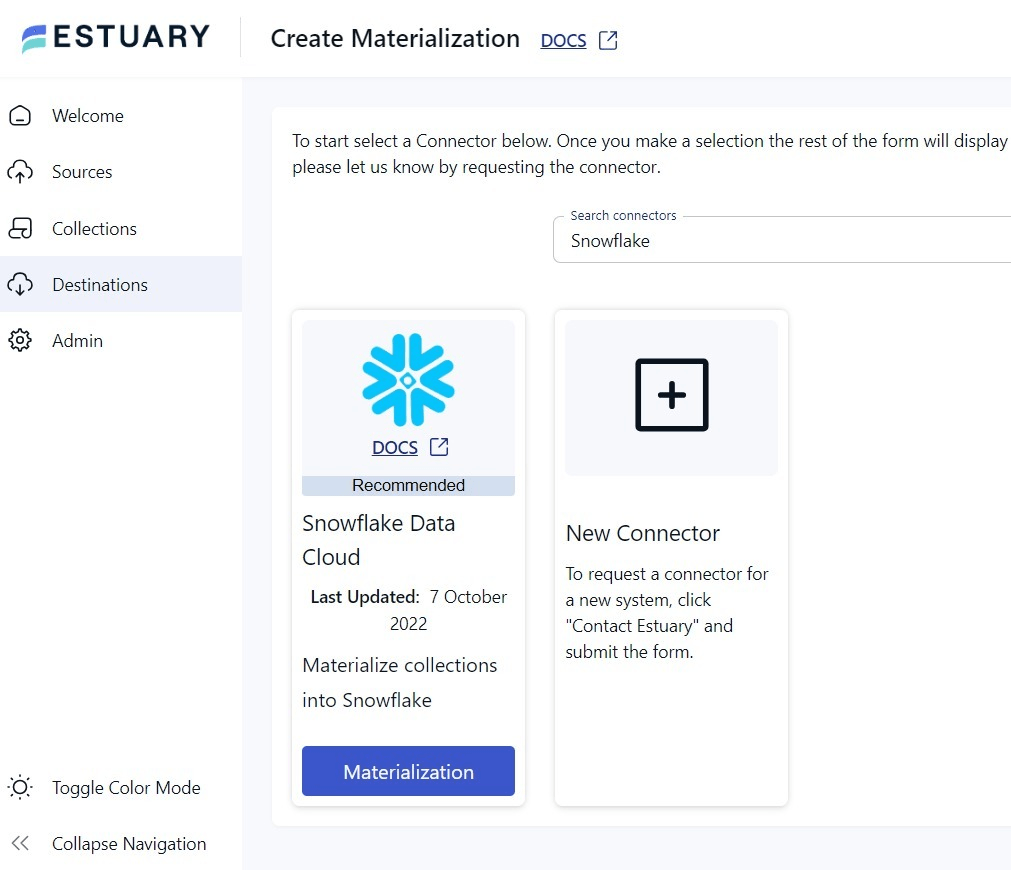
- Now click + NEW MATERIALIZATION and search for the Snowflake in the Search connectors box. When you see the connector in the search results, click on its Materialization button.
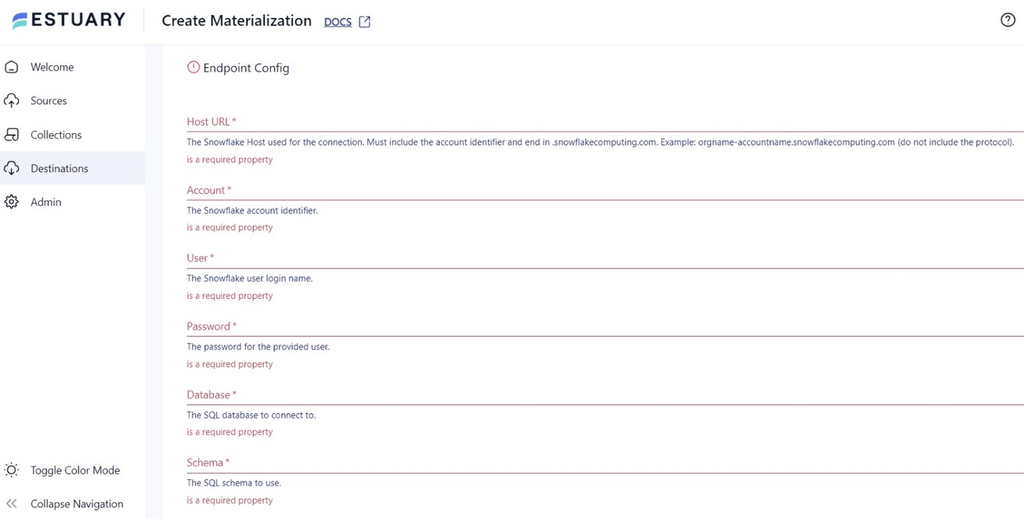
- On the Snowflake connector page, provide a unique Name for the materialization. Enter the required details like Host URL, User, Password, Account, and Database, then click on NEXT.
- If the data from Criteo wasn’t filled in automatically, you can use the Source Collections feature to manually add the data. Finally, click the SAVE AND PUBLISH button to complete the setup so that you can seamlessly replicate data from Criteo to Snowflake.
For more detailed information, refer to the Estuary Flow’s documentation on
Method 2: Load Data From Criteo to Snowflake Using CSV Files
This method involves two simple steps: extracting data from Criteo as CSV and loading it into Snowflake.
Step 1: Exporting Data from Criteo as CSV Files
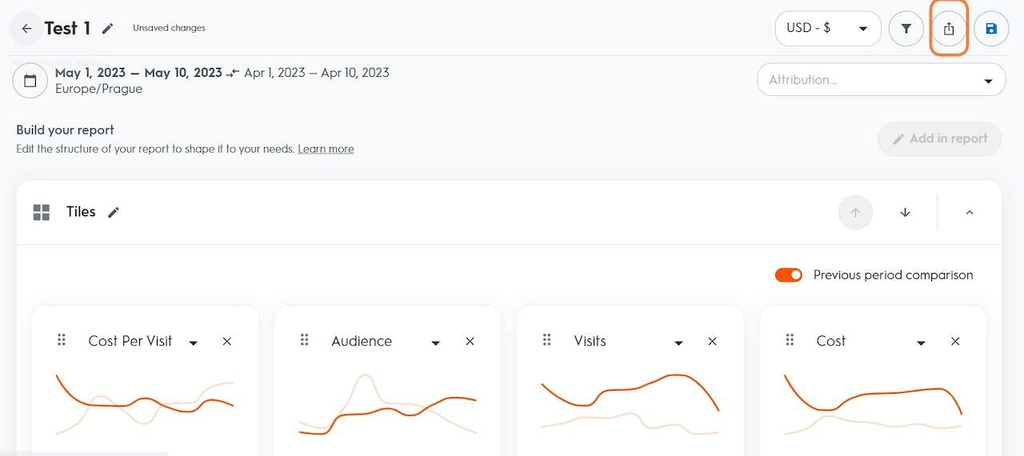
- Login to your Criteo account and navigate to the data you want to export. Now click on the built-in Export Function at the top right corner of the window.
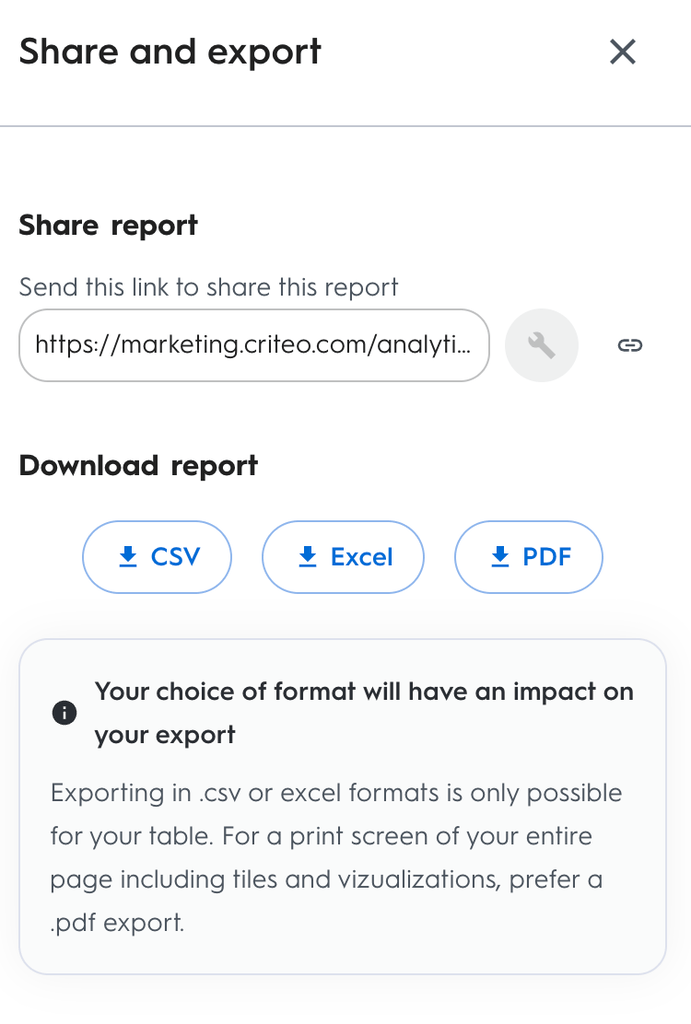
- In the Share and Export window, click on the CSV option in the Download Report section.
Step 2: Loading Data into Snowflake
- Login to your Snowflake account and create a stage using the following command.
plaintextcreate or replace stage customers_stage;- Create a file format using the command FILE FORMAT to define the format of the file to be imported.
plaintextcreate or replace file format customers_format type = 'csv' field_delimiter = ' , ' ;- Upload your CSV file from your local system to a Snowflake stage using the PUT command. Execute the appropriate command in your SnowSQL client based on your operating system.
Windows
plaintextput file://C:\test\Enterprises.csv @customers_stage;Linux/Mac
plaintextput file:///tmp/data/Enterprises.csv @customers_stage;- You must create a target table within the Snowflake database with the same structure as the CSV file. Consider the following example:
plaintextcreate or replace table customers (
   id integer,
   name varchar (100),
   location varchar(100)
)- Use the COPY INTO command to move data from a Snowflake stage into a Snowflake database table.
plaintextcopy into test.customers from @customers_stage;These steps will load data from Criteo to Snowflake successfully. However, it’s important to note that this method also has some limitations, including:
- Time-Consuming: The manual approach requires downloading Criteo data into a CSV file and uploading it to Snowflake. This process can be time-consuming, especially while handling large volumes of data.
- Security Concerns: Moving data from Criteo to Snowflake using CSV files without proper security measures can pose significant risks, particularly when handling sensitive data. It is crucial to implement adequate measures to ensure data protection throughout the migration process.
- Real-Time Data Synchronization: Using the CSV files method requires intervention and execution of data transfers at regular intervals, leading to delays in data updates. Any changes made in Criteo will not be immediately reflected in Snowflake.
Get Integrated
Moving data from an advertising platform like Criteo to a cloud data platform like Snowflake unlocks multiple benefits. The advanced analytical capabilities of Snowflake allow you to run complex queries and analytics. This provides you with deeper insights, improved audience segmentation, and effective marketing strategies.
There are two simple methods to load data from Criteo to Snowflake. One method involves CSV file export/import, which is a straightforward process. However, it also comes with a set of limitations, like security concerns and lack of real-time data sync. The other method involves the use of a third-party ETL tool, like Estuary Flow. With pre-built connectors, an intuitive interface, and real-time data syncing capabilities, Flow is the more efficient solution to migrate data from Criteo to Snowflake.
Estuary Flow is a user-friendly platform that simplifies the integration process. You can set up a pipeline between two different platforms in just a few minutes. Register for a free Estuary account and get started with your first data pipeline today!
Check out these integrations that use Snowflake as the destination connector:
3 Ways to Move Data From MongoDB to Snowflake
How to Move Data from Mailchimp to Snowflake (3 Methods)
How To Send Data From Kafka to Snowflake (3 Methods)

About the author
With over 15 years in data engineering, a seasoned expert in driving growth for early-stage data companies, focusing on strategies that attract customers and users. Extensive writing provides insights to help companies scale efficiently and effectively in an evolving data landscape.


