Organizations often use several applications to run their business operations effectively. Data generated from these applications are collected using Kafka for analytics or other downstream processes. You can use Kafka as the backbone of an event-driven architecture for processing and analyzing large volumes of real-time data. To leverage this data for analytics, integrating Kafka with data warehouses like Snowflake becomes essential. By connecting Kafka to Snowflake, organizations can centralize event-driven data and harness Snowflake’s powerful analytics capabilities.
This guide walks through how to connect Kafka to Snowflake, covering the Kafka to Snowflake connector and alternative methods for efficiently streaming data from Kafka to Snowflake.
What is Kafka: Key Features and Use Cases
Apache Kafka is an open-source, distributed event-streaming platform used for publishing and subscribing to streams of records. It plays a crucial role in sending data from Kafka to Snowflake for real-time analytics.
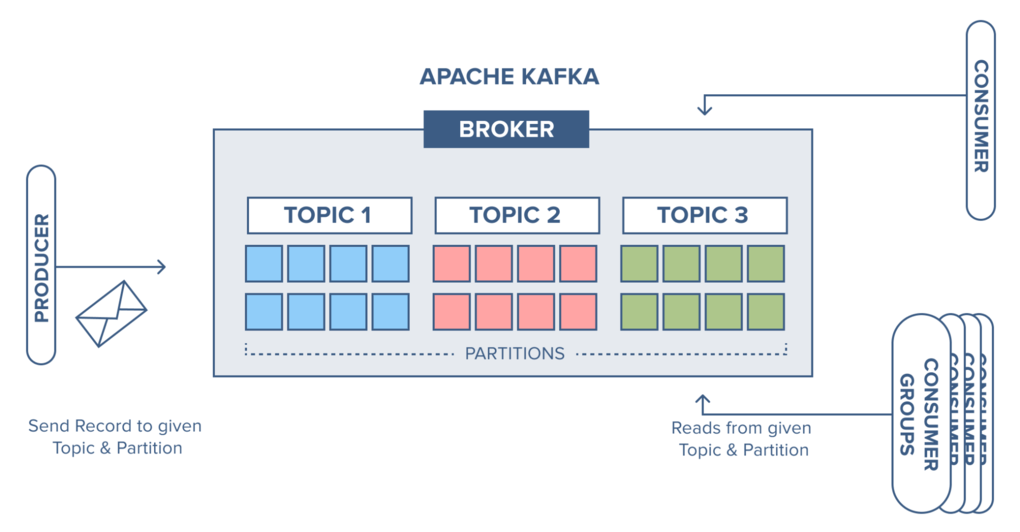
Kafka uses a message broker system that can sequentially and incrementally process a massive inflow of continuous data streams. The source systems, called the Producers, can send multiple streams of data to Kafka brokers. And the target systems, called Consumers, can read and process the data from the brokers. The data isn’t limited to any single destination; multiple consumers can read the same data present in the Kafka broker.
Here are some of Apache Kafka’s key features:
- Scalability: Apache Kafka is massively scalable since it allows data distribution across multiple servers. It can be scaled quickly without any downtime.
- Fault Tolerance: Since Kafka is a distributed system with several nodes running together to serve the cluster, it’s resistant to any cluster node’s or machine’s failure.
- Durability: The Kafka system persists the messages on the disks, which provides an intra-cluster replication. This helps in building a highly durable messaging system.
- High Performance: Since Kafka decouples the data streams, it can process messages at a very high speed, with processing rates exceeding 100k/second. It maintains stable performance even with terabytes of data loads.
Learn more: What is a Kafka Data Pipeline?
Why Snowflake is Ideal for Kafka Data Streams
Snowflake is a fully managed cloud-based data warehousing platform. It uses cloud infrastructures like Azure, AWS, or GCP to manage big data for analytics. Snowflake uses the ANSI SQL protocol that supports fully structured and semi-structured data formats, like XML, Parquet, and JSON. You can perform SQL queries on your Snowflake data to manage data and generate insights.
Here are some key Snowflake features that make it ideal for centralizing Kafka data streams:
- Centralized Repository: Snowflake consolidates different types of data from various sources into a single, unified repository. It eliminates the need for maintaining separate databases or multiple data silos by providing a centralized storage environment.
- Standard and Extended SQL Support: Snowflake supports ANSI SQL and advanced SQL functionality like lateral view, merge, statistical functions, etc.
- Support for Semi-Structured Data: Snowflake supports semi-structured data ingestion in a variety of formats like JSON, Avro, XML, Parquet, etc.
- Fail-Safe: Snowflake’s fail-safe feature ensures historical data is protected in the event of any disk or hardware failure. It provides 7-day fail-safe protection of data to ensure data recovery.
Methods for Kafka to Snowflake Integration
To convert your Kafka streams into Snowflake tables, you can use either the Kafka to Snowflake connector or a SaaS ETL tool like Estuary Flow.
Method #1: Using Snowflake's Kafka Connector
Snowflake provides a Kafka connector, which is an Apache Kafka Connect plugin, facilitating the Kafka to Snowflake data transfer. Kafka Connect is a framework that connects Kafka to external systems for reliable and scalable data streaming. You can use Snowflake’s Kafka connector to ingest data from one or more Kafka topics to a Snowflake table. Currently, there are two versions of this connector—a Confluent version and an open-source version.
The Kafka to Snowflake connector allows you to stay within the Snowflake ecosystem and prevents the need for any external tools for data migration. It uses Snowpipe or Snowpipe Streaming API to ingest Kafka data into Snowflake tables in real-time.
It sounds very promising. But how does it work? Before you use the Kafka to Snowflake connector, here’s a list of the prerequisites:
- A Snowflake account with Read-Write access to the tables, schema, and database.
- A Confluent Kafka or Apache Kafka account.
- Installed Apache Kafka or Confluent connectors.
The Kafka connector subscribes to one or more Kafka topics based on configuration file settings. You can also configure it using the Confluent command line.
The Kafka to Snowflake connector creates the following objects for each topic:
- Internal stage: Temporarily stores data files for each topic.
- Pipeline: Ingests data files from each topic partition.
- Table: Creates a Snowflake table for each Kafka topic.
Here’s an example of how data flows with the Kafka to Snowflake connector:
- Applications publish Avro or JSON records to a Kafka cluster, which Kafka divides into topic partitions.
- The Kafka connector buffers messages from the Kafka topics. Once a threshold of time, memory, or message count is met, it writes messages into an internal, temporary file.
- The connector triggers Snowpipe to ingest this temporary file into Snowflake.
- The connector monitors Snowpipe and, after confirming successful data loading, deletes the temporary files from the internal stage.
Method #2: SaaS Alternatives for Kafka to Snowflake Integration
If you prefer a more user-friendly and less manual approach, SaaS ETL tools like Estuary Flow are excellent alternatives. With minimal setup, these tools automate data migration and provide real-time data pipelines.
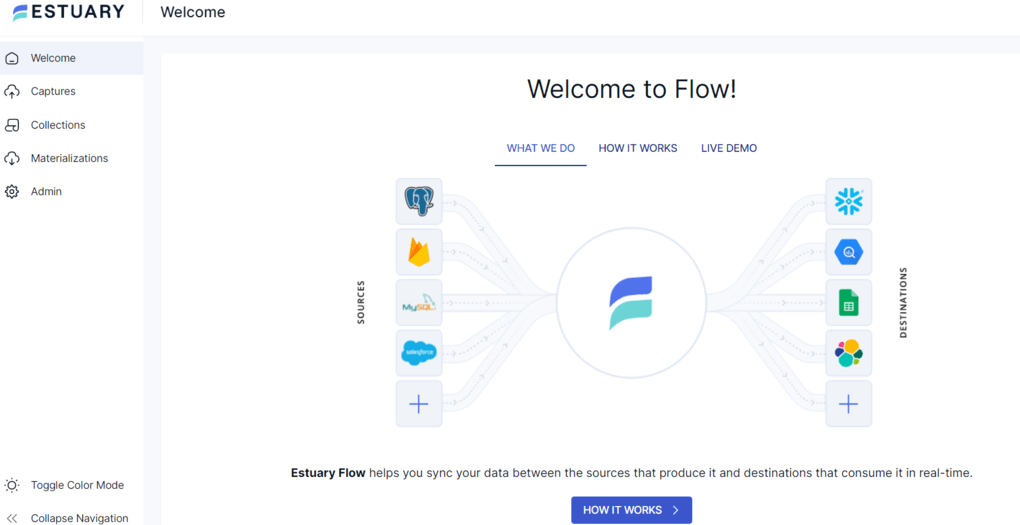
Using Estuary Flow, you can establish real-time data pipelines with Kafka as the source and Snowflake as the destination, scaling easily and efficiently.
Let’s look at Step-by-Step Kafka to Snowflake Integration with Estuary Flow:
Step 1: Capture Data from Kafka as the Source
- To start using Flow, you can register for a free account. However, if you already have one, then log in to your Estuary account.
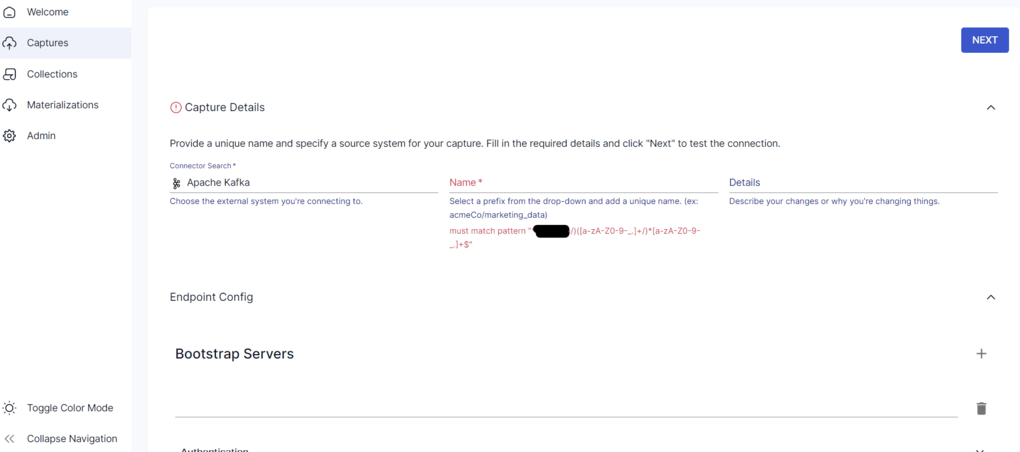
- On the Estuary dashboard, navigate to the Captures section and click on New Capture.
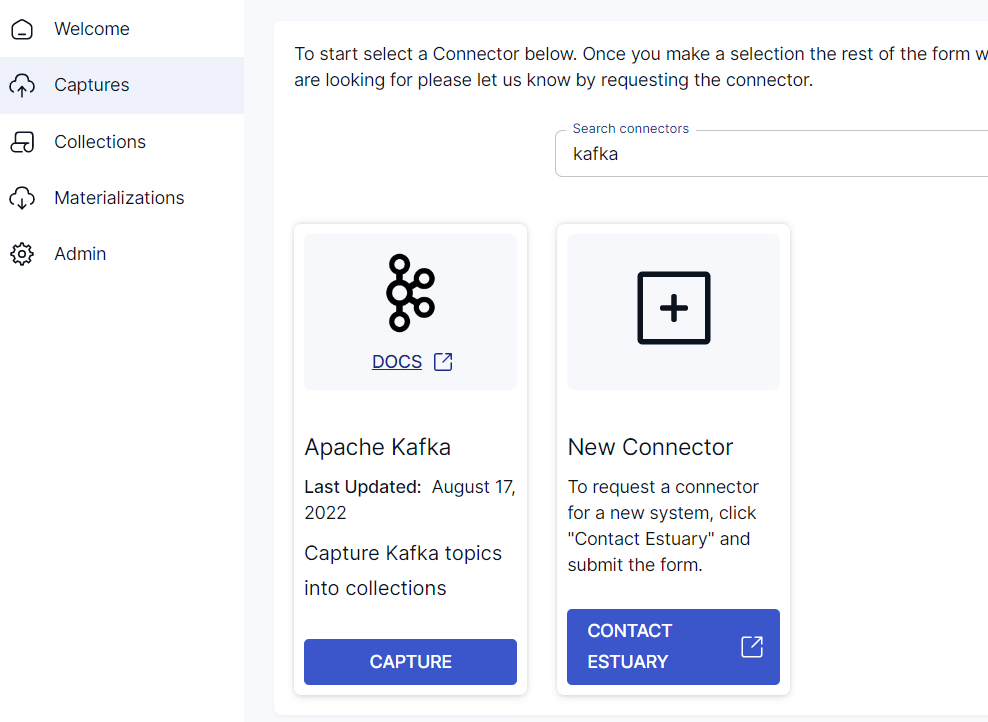
- Since you’re sourcing data from Apache Kafka, this will form the source endpoint of the data pipeline. Enter Kafka in the Search Connectors box or scroll down to find the connector. Now, click on the Capture button.
- You’ll be navigated to the Apache Kafka capture page. Within the Endpoint Config section, provide the details of the bootstrap servers. You can select a SASL authentication mechanism of your choice, like PLAIN, SHA-256, or SHA-512, and fill in the details of the same. Once you’re done providing the details, click on the Next button. Then, click on Save and Publish.
Step 3: Set Up Snowflake as the Destination
To connect Flow to Snowflake, you’ll need a user role with appropriate permissions to your Snowflake schema, database, and warehouse. You can accomplish this by running this quick script.
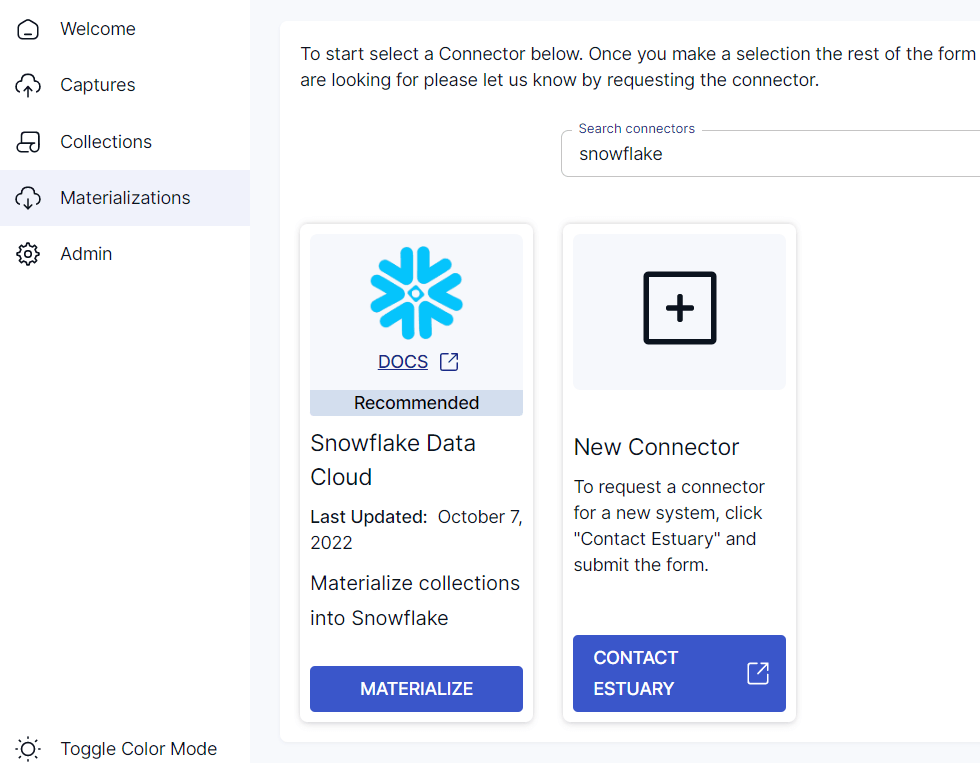
- Navigate back to the Estuary dashboard. Click on Materializations on the left-side pane of the dashboard. Once you’re on the Materializations page, click on the New Materialization button.
- Since your destination database is Snowflake, it forms the other end of the data pipeline. Enter Snowflake in Search Connectors or scroll down to find it. Click on the Materialize button.
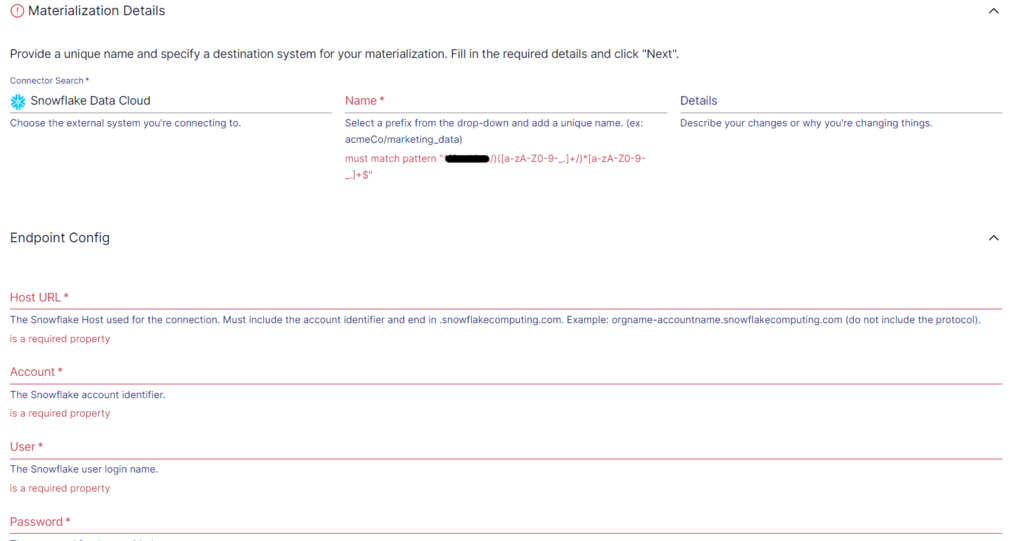
- On the Snowflake materialization page, fill in the required fields, including:
- Name for the materialization
- Endpoint Config details: User login, password, Host URL, Account Identifier, SQL Database, and Schema details.
- After entering the details, select the collections to materialize and click Next. Then, click Save and Publish.
The Estuary Snowflake integration process writes data changes to a Snowflake staging table and immediately applies those changes to the destination table.
Step 3: Initiate Real-Time Data Sync from Kafka to Snowflake
- With both source and destination set up, Estuary Flow will automatically begin real-time data replication from Kafka to Snowflake.
- The integration writes data changes to a Snowflake staging table and instantly applies those changes to the destination table, ensuring up-to-date data in Snowflake.
Why Choose Estuary Flow for Kafka to Snowflake Integration?
- Real-Time Data Integration: Supports continuous data streaming with minimal latency.
- Ease of Use: Requires no coding, with a straightforward user interface.
- Scalability: Handles large-scale data transfers efficiently.
- Broad Connectivity: Connects easily with various data sources and destinations.
For detailed guidance, refer to our documentation on the Kafka source connector and Snowflake materialization connector.
Conclusion: Choosing the Best Kafka to Snowflake Integration Method
Both the Kafka to Snowflake connector and SaaS alternatives like Estuary Flow offer effective solutions for integrating Kafka data streams with Snowflake. While the Kafka connector provides a more traditional, in-depth approach with Snowflake’s ecosystem, Estuary Flow simplifies the process with automated real-time pipelines, reducing the need for manual configuration and technical expertise.
Choosing the right method can ensure a seamless Kafka to Snowflake integration, allowing organizations to harness real-time data insights.
Get started with Estuary Flow today - Register for Flow here to start for free
Related Guides:

About the author
With over 15 years in data engineering, a seasoned expert in driving growth for early-stage data companies, focusing on strategies that attract customers and users. Extensive writing provides insights to help companies scale efficiently and effectively in an evolving data landscape.


