Relational databases are the foundation of your most crucial applications. Each day, when you run a business operation, you use a wide range of databases in the backend. Consolidating these databases into a centralized location can notably enhance their utility for analysis and drawing insights.
Cloud data warehouses like Snowflake are well-known for being the central repository where you can store huge amounts of data. If you have data stored in relational databases like Amazon RDS, migrating from RDS to Snowflake can dramatically enhance your ability to explore and analyze data.
You can move several instances of Amazon RDS, such as RDS MySQL to Snowflake or RDS MariaDB to Snowflake. Through this migration, you can explore and analyze data in a much more effective way.
In this article, we will discuss two methods for migrating data from RDS Postgres to Snowflake in detail.
What Is Amazon RDS?
Amazon RDS, also known as Amazon Relational Database Service, is a fully administered relational database service provided by AWS. It supports several database engines, including RDS for MariaDB, RDS for MySQL, and Amazon Aurora PostgreSQL-Compatible Edition, allowing easy data migration to data warehouses like Snowflake.
This functionality allows you to utilize the same applications, tools, and code you use for your databases with Amazon RDS. Furthermore, the platform is a scalable and cost-efficient solution, as it provides you with automated database management features. These include patching, provisioning, backup, failure detection, recovery, and repair.
What Is Snowflake?
Snowflake is a data warehouse that operates entirely on public cloud infrastructure. It enables efficient storage, processing, and analysis of vast volumes of data. You can get access to several tools needed to derive valuable insights from huge datasets. Snowflake can be hosted on any of the three major cloud platforms: Amazon Web Services (AWS), Google Cloud Platform (GCP), or Microsoft Azure. You don't have to worry about deploying, maintaining, or administering infrastructure for massive databases.
How to Migrate Data From Amazon RDS to Snowflake
There are several methods to migrate your data from Amazon RDS to Snowflake. The two most popular methods include:
- The Automated Way: Using Estuary to migrate data from Amazon RDS to Snowflake.
- The Manual Approach: Using RDS Snapshot to move data from Amazon RDS to Snowflake.
The Automated Way: Using Estuary to Migrate Data From Amazon RDS to Snowflake
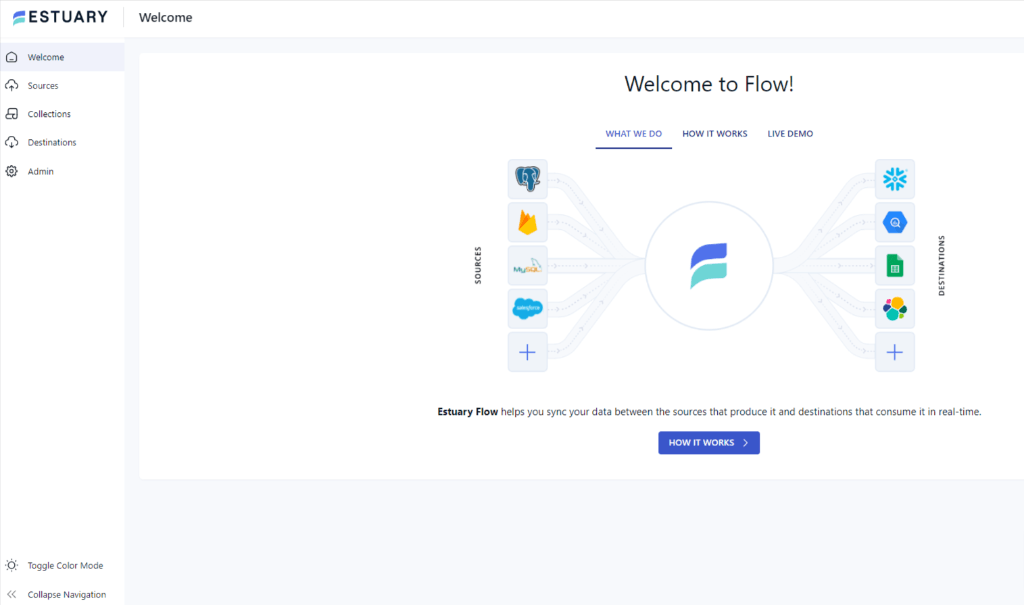
Estuary is a no-code data pipeline platform that comes with in-built connectors to streamline data migration across various platforms in close to real time. To start using Estuary, log in to your Estuary account or create one here for free.
Check out this step-by-step guide to transfer your data from Amazon RDS to Snowflake using Estuary.
Prerequisites
- Amazon RDS
- Snowflake account
Step 1: Configuring Amazon RDS as the Source Connector
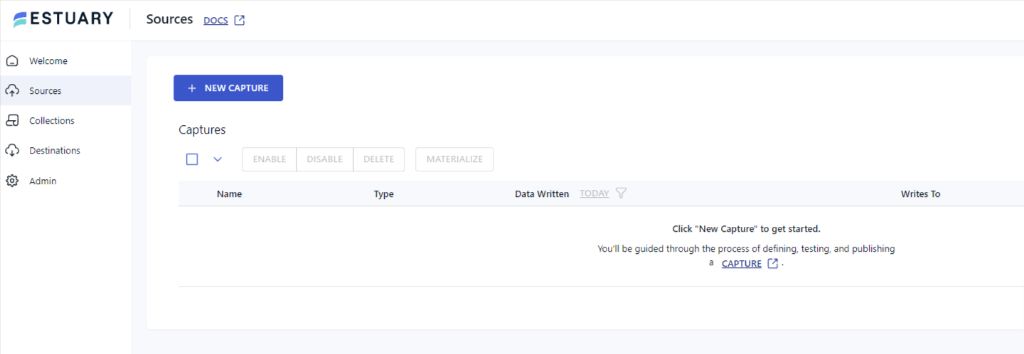
- On the Estuary dashboard, click on Sources from the left-side pane.
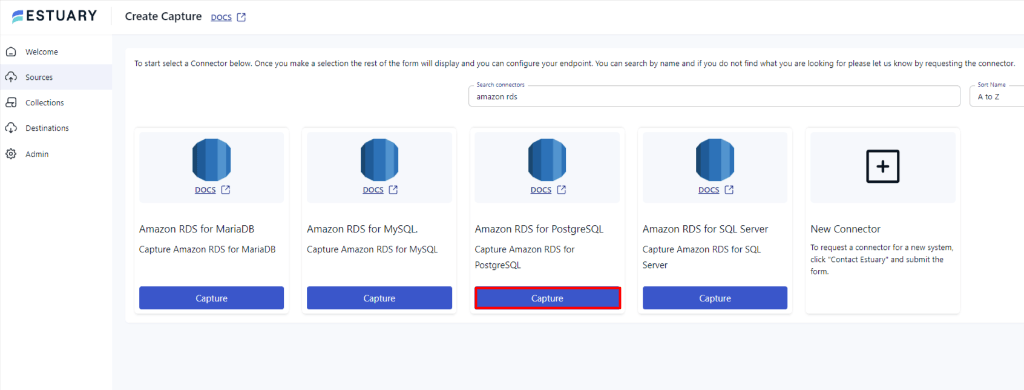
- On the Sources page, click + NEW CAPTURE and search for Amazon RDS in the Search Connectors box.
- Once you see the Amazon RDS for PostgreSQL connector, click the Capture button.
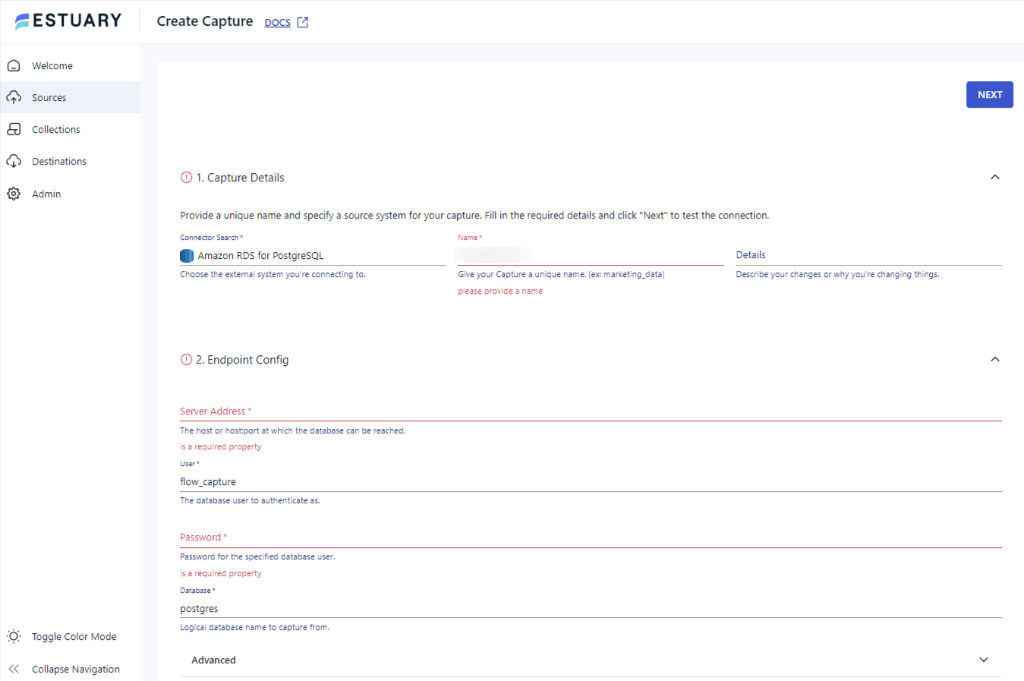
- Select the Amazon RDS for PostgreSQL connector and configure it by entering the required details (Name, Server Address, Password).
- Click NEXT > SAVE and Publish. This will capture your data from Amazon RDS to Estuary Collections.
Step 2: Configuring Snowflake as the Destination
- After setting up Amazon RDS, a pop-up will appear. Click MATERIALIZE CONNECTIONS to configure Snowflake as your destination.
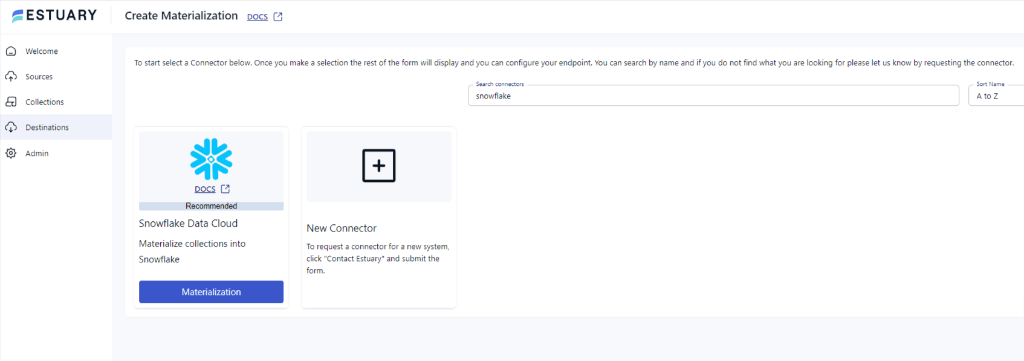
- Alternatively, you can navigate to the Destinations tab and search for Snowflake.
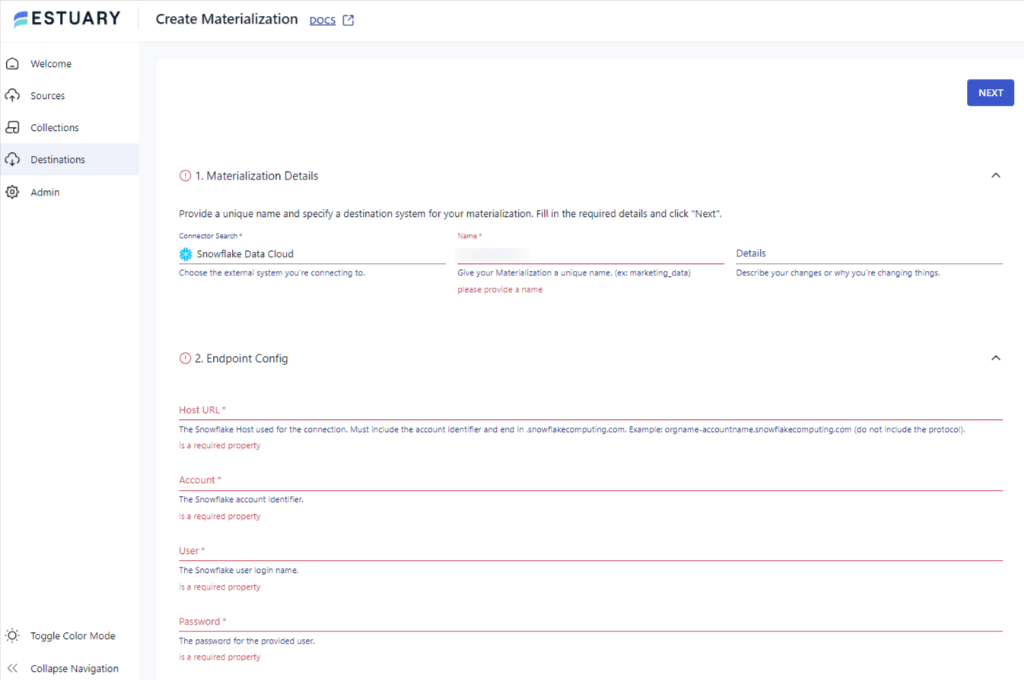
- Select Snowflake from the list of connectors and provide the required details (Name, Host URL, Account).
- Click Next > Save and Publish to complete the migration.
Key Features of Estuary:
- Extensive Connectors Library: Estuary has a sizable library of connectors that allow you to extract and migrate data to different sources and destinations.
- Transformation Processes: With Estuary, you get the autonomy of choosing real-time or batch transformations through SQL, TypeScript, or dbt. You can choose to transform and merge data before moving it to a data warehouse (ETL) or transform the data after loading it (ELT).
- Scalability: Estuary is designed to efficiently handle vast volumes of data and meet high throughput demands by scaling operations horizontally. This feature makes the platform suitable for all sizes and types of businesses.
The Manual Approach: Using RDS Snapshot to Manually Migrate Data From Amazon RDS to Snowflake
You can use the RDS Snapshot method to load data from your Amazon RDS to Snowflake. This method lets you load the data once to check what is available and whether or not it is valid before setting up continuous updates.
In this example, we will be using AWS S3 to store the data and AWS IAM to manage access to the data across platforms. Here, we will demonstrate data migration from Amazon RDS for PostgreSQL, but you can use this method for any database engines supported by Amazon RDS.
Step 1: Configuring the Environment
- You need to configure your Snowflake Virtual Warehouse before starting the integration with Amazon RDS. Here are some useful links to get you started:
- You can configure your RDS similarly using this documentation.
- Configure S3 and the IAM role for RDS to S3.
- Finally, create an AWS key.
Step 2: Create an Amazon S3 bucket
- Sign in to your AWS Management Console and open the S3 console.
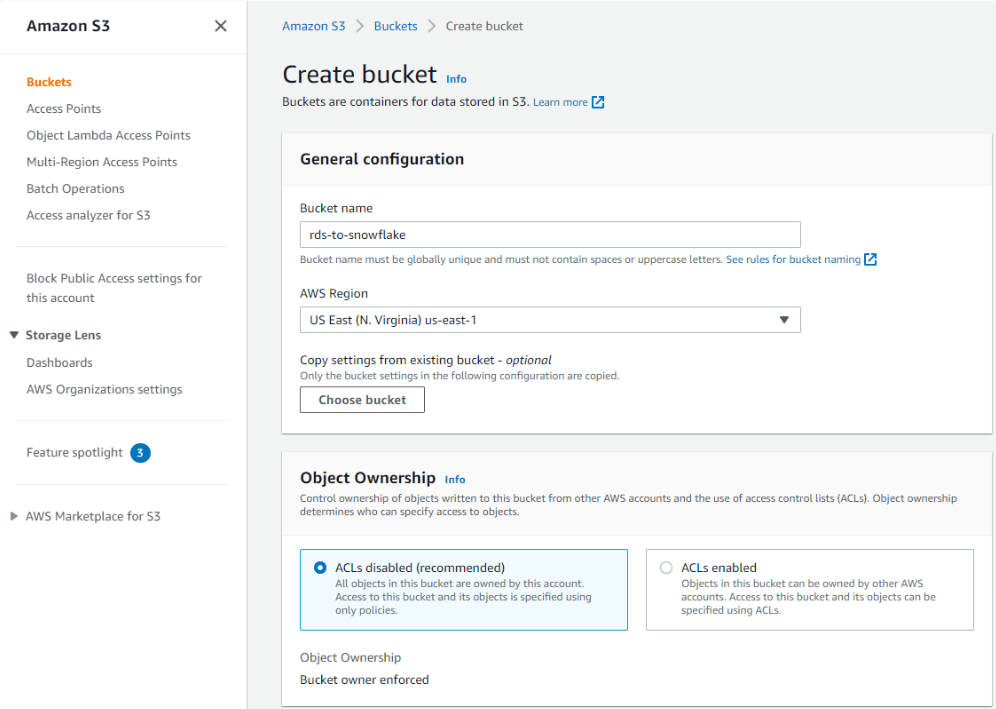
- Select the option Create bucket, name your bucket, and choose the appropriate AWS region that also has your RDS instance.
- Leave all other options to default and click on the Create bucket button at the bottom.
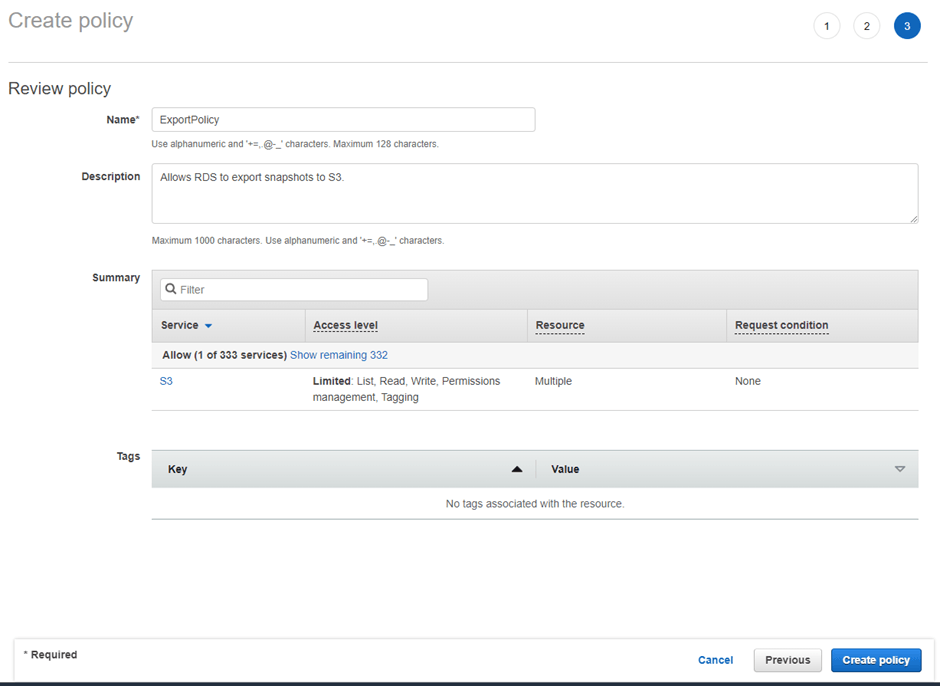
- To ensure that your Amazon RDS access to your Amazon S3 buckets, you must navigate to the IAM console. Under the Policies tab, select Create policy.
- Create a role to attach this policy by selecting Roles in your IAM console and clicking on Create role.
- Select Custom trust policy.
- Select Next to go to Permissions. Select the ExportPolicy permissions you created and click Next to review your role.
- Name the role RDS-S3-Export-Role, and click on Create role.
- You will receive a confirmation indicating the successful creation of your role.
Step 3: Take a Snapshot of Amazon RDS
- Open your AWS Management Console and go to the Amazon RDS console.
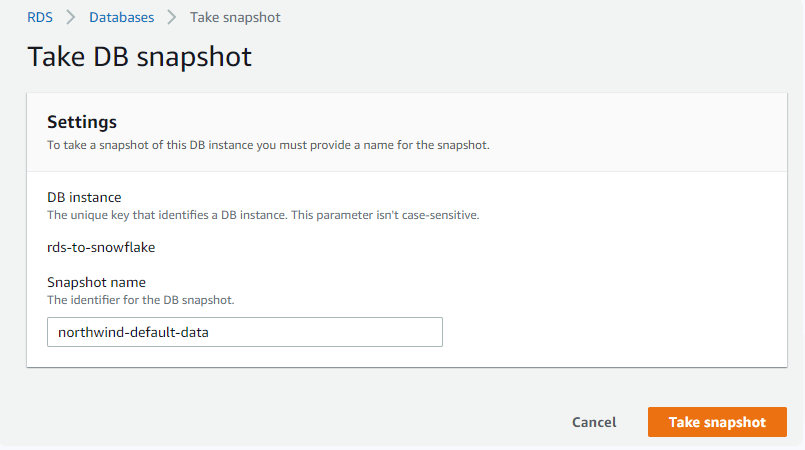
- Select your existing instance, then click on Actions > Take snapshot.
- Give a name to your snapshot and click Take snapshot.
Step 4: Export the RDS Snapshot to S3
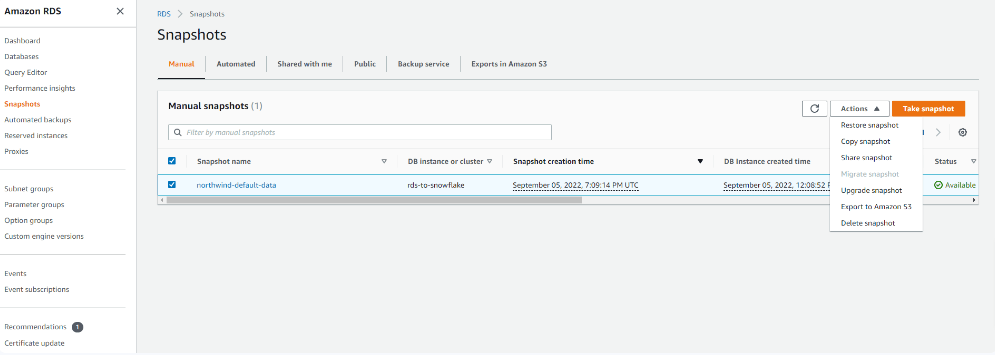
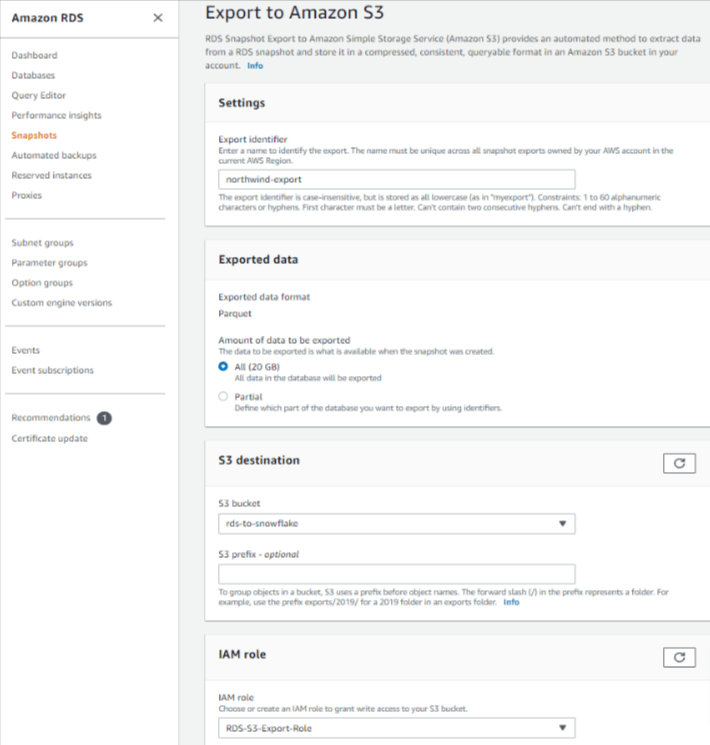
- In the RDS console, go to the Navigation pane and select the option of Snapshots.
- A list of snapshots will open up. Choose the one you wish to export.
- At the right-hand side of the Snapshot page, click on the Actions button. A drop-down menu will appear.
- Select the option Export to Amazon S3.
- A new window, Export to Amazon S3, will open up. Under the Exported Data section, choose All to export your entire dataset through the snapshot.
- Add your existing S3 bucket name, where you will be migrating your data, and an IAM role that grants you access to your chosen S3 bucket.
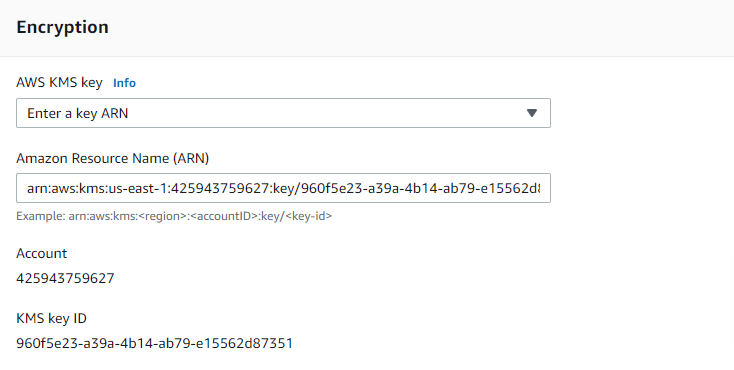
- Under the AWS KMS key section, input the ARN for the key to encrypt your exported data. If you do not have one, navigate to the AWS Key Management Service dashboard in a different tab and select Create a key.
- Finally, select the Export to Amazon S3 button.
Step 5: Load Data Into Snowflake
- To load the contents of your staged file into a Snowflake database table from Amazon S3, you must use the COPY INTO command. You can use the file format option, as shown in the following example:
plaintextcopy into abc_table
from s3://snowflakebucket/data/abc_files
credentials=(aws_key_id='$KEY_ID' aws_secret_key='$SECRET_KEY')
file_format = (type = ‘parquet’)
header = true;
Alternatively, you can use the pattern-matching option, as shown below:
plaintextcopy into abc_table
from s3://snowflakebucket/data/abc_files
credentials=(aws_key_id='$KEY_ID' aws_secret_key='$SECRET_KEY')   pattern='*test*.parquet;
Your export will then start. Once it's finished, the status will change to Complete, finalizing the process of moving your RDS data to Snowflake.
Final Thoughts: Choose the Right Method for RDS to Snowflake Migration
This post highlighted two effective methods of loading data from Amazon RDS to Snowflake. The manual method of configuring S3 buckets and taking a snapshot of the dataset in RDS is quite time-consuming. It requires you to have a sound technical understanding of how the AWS console functions and requires a fair bit of coding to move the data into Snowflake.
Powerful SaaS tools like Estuary allow you to set up a data pipeline between Amazon RDS and Snowflake in just a few minutes. Since the connectors are provided by the platform, you do not have to set up anything or write a single line of code.
Estuary is highly secure and provides you with a host of features to enhance your data operations, helping you save time and resources.
Sign up quickly to enjoy seamless data integration and experience this powerful yet user-friendly platform today.
FAQs
How do I migrate data from RDS to Snowflake?
To migrate data from RDS to Snowflake:
- Configure RDS and Snowflake environments.
- Create an S3 bucket in AWS.
- Take a snapshot of your Amazon RDS instance.
- Export the snapshot to S3.
- Load data into Snowflake using the
COPY INTOcommand.
How to connect AWS to Snowflake?
To connect AWS to Snowflake, you can use services like AWS Glue or Direct Connect, or use ETL tools like Estuary for seamless data migration.
Can Snowflake be hosted on AWS?
Yes, Snowflake can be hosted on AWS since it is an AWS partner. Snowflake offers full support for AWS-supported data warehousing, including support for AWS PrivateLink. This setup allows Snowflake customers to easily and securely connect to their Snowflake instance without requiring public internet access.
Related Articles:

About the author
With over 15 years in data engineering, a seasoned expert in driving growth for early-stage data companies, focusing on strategies that attract customers and users. Extensive writing provides insights to help companies scale efficiently and effectively in an evolving data landscape.


