Due to the simplicity, readability, and compatibility with various digital applications, JSON has contributed to its widespread adoption in the software industries. As a result, data-driven industries store data in JSON, which allows them to easily integrate with different technologies. This makes JSON an ideal choice for data exchange between systems. However, if you want to perform analysis and gain valuable insights into your data, you need to centralize data in a data warehouse like BigQuery.
Luckily, there are various ways to export data to BigQuery. This article will demonstrate two manual ways to export data from JSON to BigQuery, along with a more streamlined, automated approach. Let’s dive in!
Ready to dive into the steps? Skip the basics and go directly to the methods for loading JSON data into BigQuery.
What Is JSON?
JavaScript Object Notation (JSON) is a lightweight, text-based way of representing Javascript objects. JSON is typically used to serialize and exchange data over a network—between client-server web applications. The data in JSON is stored in a Key:Value pair, where each key is a string, and each value can be any JSON-supported data type. The key is followed by a ‘:’ and its respective value.
Multiple key-value pairs are separated by commas ‘,’. This structure of JSON key-value pair makes it easy for humans to read and write as well as for machines to parse and generate. As a result, JSON is a popular choice for data serialization and exchange in organizations.
What Is BigQuery?
Google Bigquery is a fully-managed, serverless data warehousing and analytics platform built on Google’s cloud infrastructure. It is an enterprise-ready data warehouse that allows businesses to store, manage, analyze, and visualize petabytes of data rapidly. To query and analyze data, BigQuery supports a robust SQL-like query language. It enables data engineers familiar with SQL syntax to interact with large datasets quickly, thereby eliminating the need for a steep learning curve.
To help you with large-scale data loading and transferring processes, BigQuery seamlessly integrates with data ingestion tools. It can also be connected with Google Cloud Services like Dataflow for data processing and Cloud Storage for data storage. Its hassle-free integration, scalability, and high-speed make it a preferred choice for analyzing and deriving insights from massive datasets.
How to Load JSON Data to BigQuery
While there are several approaches for loading data from JSON to BigQuery, we will explore the more popular methods in this article.
- Method #1: Load JSON to BigQuery using BQ Command Line Tool
- Method #2: Load JSON to BigQuery using no-code platforms for data pipelines
- Method #3: Load JSON to BigQuery using Google Cloud Console
Method #1: Load JSON to BigQuery Using BQ Command Line Tool
The bq load command-line tool is a command-line interface (CLI) provided by Google BigQuery. With the help of the bq load command, you can easily create, update, and load data into tables. It allows you to load data from sources, such as CSV, Parquet, JSON, Avro, and more, to the BigQuery table.
Here's a step-by-step guide for using the bq load command to load JSON data to BigQuery:
Step 1: Go to the Google Cloud Console and log in to your account. If you don’t have an existing account, you can create a new one. Then, go to the BigQuery page.
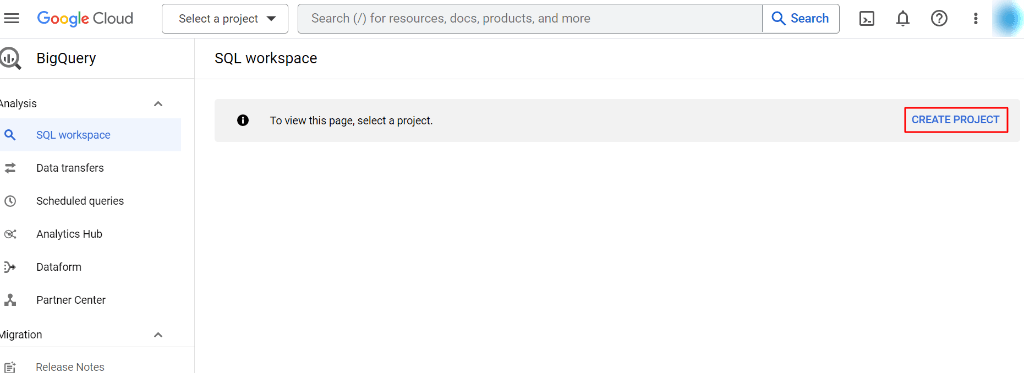
Step 2: Click on the Create Project button and enter a new project name, which should differ from your other Google Cloud projects’ names. Then, fill in the organization details to attach it to a project, and click on Create.
Step 3: Next, activate the cloud shell from the cloud console. Cloud shell is an online development environment that comes preloaded with helpful tools for interacting with your cloud resources. If you have not activated Cloud Shell yet, search for it in the search bar and select Cloud Shell. Click on the Continue button to proceed. It will connect to the cloud shell in a few minutes.
Step 4: Cloud Shell needs permission to use your credentials for the gcloud command. To check if you are an authenticated user, run the following command in the terminal.
plaintextgcloud auth listIf you’re an authorized account user, the command will return the details of the active account. Otherwise, you’ll get an Authorize Cloud Shell window with Authorize and Reject buttons. Click on the Authorize button to grant permission.
Step 5: Run the following command to check the list of available projects.
plaintextgcloud config list projectStep 6: Once you have opened the list of your projects, set your target project using the following command.
plaintextgcloud config set project <PROJECT_ID>Step 7: The next step is to create a dataset that will contain tables, for which you can use the following command.
plaintextbq mk bq_emp_datasetThe bq mk command is used to create a new dataset, and bq_emp_dataset specifies the name of the dataset.
Step 8: Check if the dataset was created successfully by using the bq show command.
plaintextbq show bq_emp_datasetStep 9: Now load the JSON file into the BigQuery table using the bq load command.
plaintextbq load
--source_format=NEWLINE_DELIMITED_JSON
bq_emp_dataset.myemptable
gs://mybucket/mydata.json
employeeid:numeric, name:string, age:numeric, salary:numeric
Let’s understand the above code:
- bq load: This command will load a JSON file to the BigQuery table.
- source_format: Name of the data format, which is JSON.
- bq_emp_dataset.myemptable: Name of the dataset and table where you want to upload JSON data to create tables.
- gs://mybucket/mydata.json: The source path of the JSON file.
- employeeid:numeric, name:string, age:numeric, salary:numeric: Define table schema here. You can also mention the path of the schema file.
Step 10: Now, the data is successfully loaded into the BigQuery table. Use the following command to view the table.
plaintextbq show bq_emp_dataset.myemptableMethod #2: Load JSON to BigQuery Using No-Code Platforms for Data Pipelines
Using the above method works perfectly, but wouldn’t you like it if the entire data integration and loading process were hassle-free, automated, and worked in real time? While there are several solutions available in the market, you can use Estuary Flow for seamless and quick data integration. Once deployed, it will continuously operate in real time.
Estuary Flow allows you to capture data from a JSON hosted at an HTTP endpoint and load that data to BigQuery seamlessly through near real-time data integration and synchronization. Flow eliminates all the repetitive and manual efforts required in the above-mentioned methods, allowing you to focus on other business tasks.
Let's explore the step-by-step process of loading JSON to BigQuery.
Step 1: Log in to your Estuary account, and if you don’t have one, register for a free account.
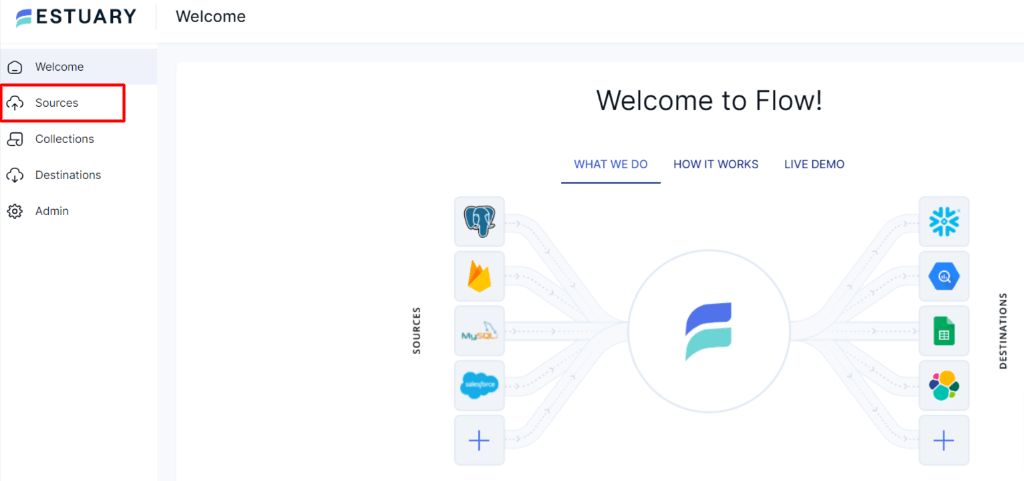
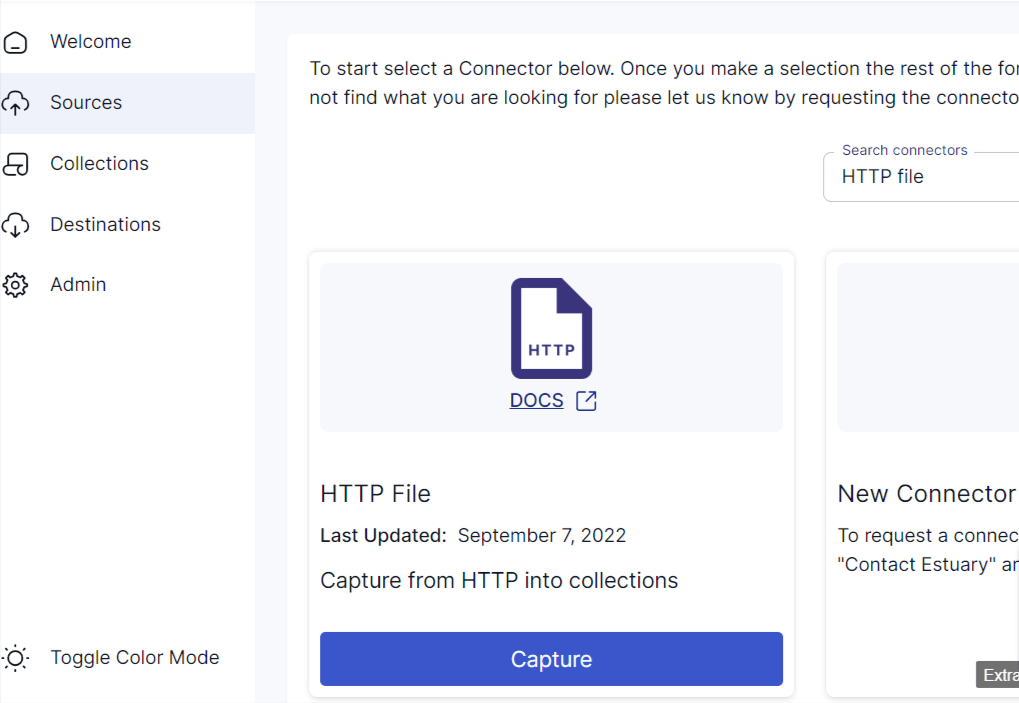
Step 2: Once you’ve logged in successfully, you will be redirected to Estuary’s dashboard. Click on Sources on the left-side pane on the dashboard. This step is to set up the source end of the data pipeline.
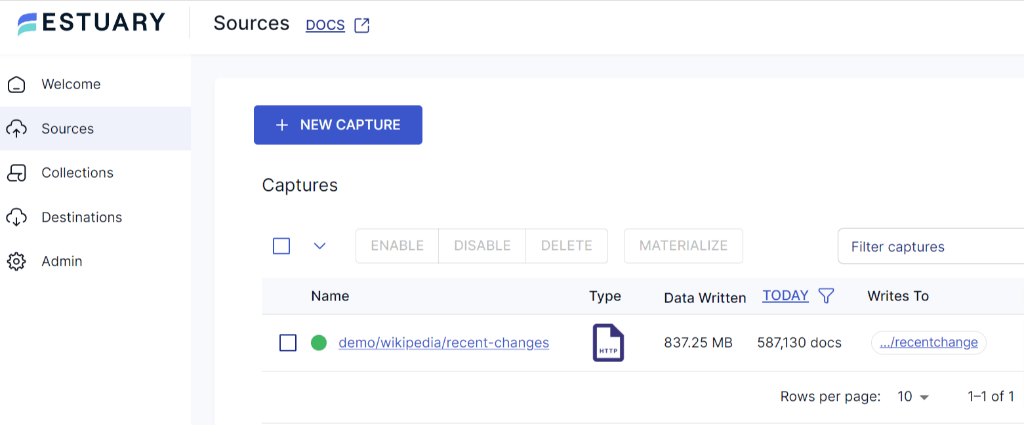
Step 3: On the Sources page, click on the + NEW CAPTURE button.
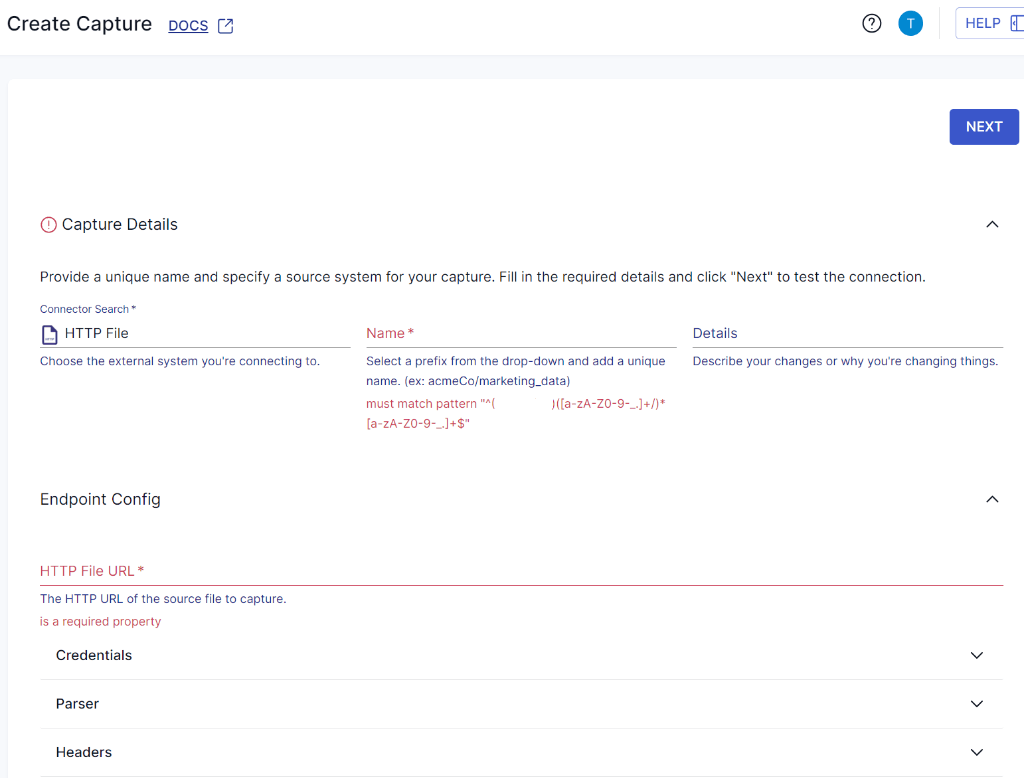
Step 4: Now, you’ll be redirected to the Create Capture page. If you have your JSON data hosted at any HTTP endpoint, search and select HTTP File connector in the Search Connector box. Click on the Capture button.
Step 5: On the HTTP File connector page, enter a Name for the connector and the HTTP File URL. Once you have filled in the details, click on Next > Save and Publish.
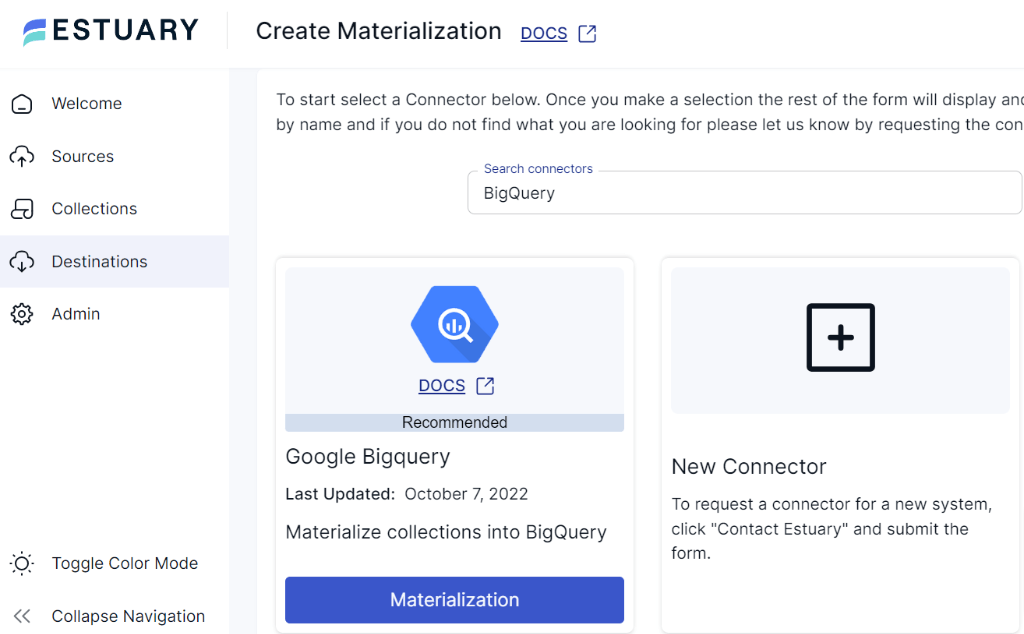
Step 6: Now, you must set the destination for your data. Click on Destinations on the left-side pane on the Estuary dashboard. Click on the + NEW MATERIALIZATION button.
Step 7: Since you are moving your data from JSON to BigQuery, search for BigQuery in the Search Connector box. Then, click on the Materialization button. You’ll be redirected to the BigQuery materialization page.
Before you begin to set up your destination, make sure you have completed the prerequisites.
Step 8: On the BigQuery materialization page, fill in the required details, such as the Name of the connector, Project ID, and the Name of the dataset. After filling in the mandatory fields, click on the Next button. Then click on the Save and Publish button. Once you deploy the data pipeline, it will operate continuously in real time.
If you’d like more detailed instructions, see Estuary’s documentation on:
Method #3: Load JSON to BigQuery Using Google Cloud Console
One of the simplest manual methods to upload JSON to BigQuery is by using Google Cloud Console. Here’s a step-by-step guide on how you can use the Google Cloud console to load JSON data to BigQuery:
Step 1: Sign in to the Google Cloud console.
Step 2: Once you’ve logged in, you’ll be directed to the BigQuery-SQL Workspace page. To create a table in BigQuery, first, you must create a dataset within a project. Click on the Create Project button located on the right-side of the dashboard. Then, fill in the organization details and click on Create.
Step 3: In the Explorer panel, expand the project that you’ve created and click on Create a dataset.
Step 4: You'll be directed to the Create dataset page, enter a unique dataset name for Dataset ID. For Location type, select a geographic location for the dataset. Click on the Create Dataset button.
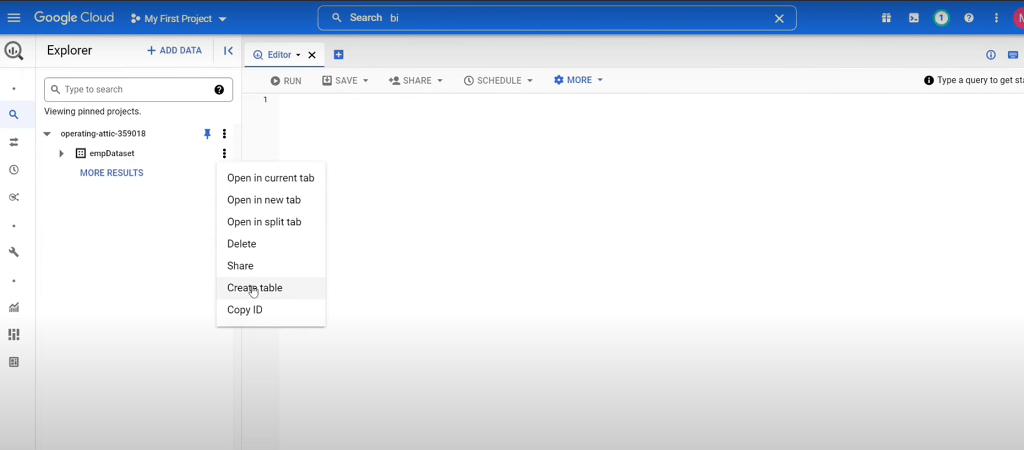
Step 5: Click on the three vertical dots next to the dataset that you’ve created and click on the Create table.
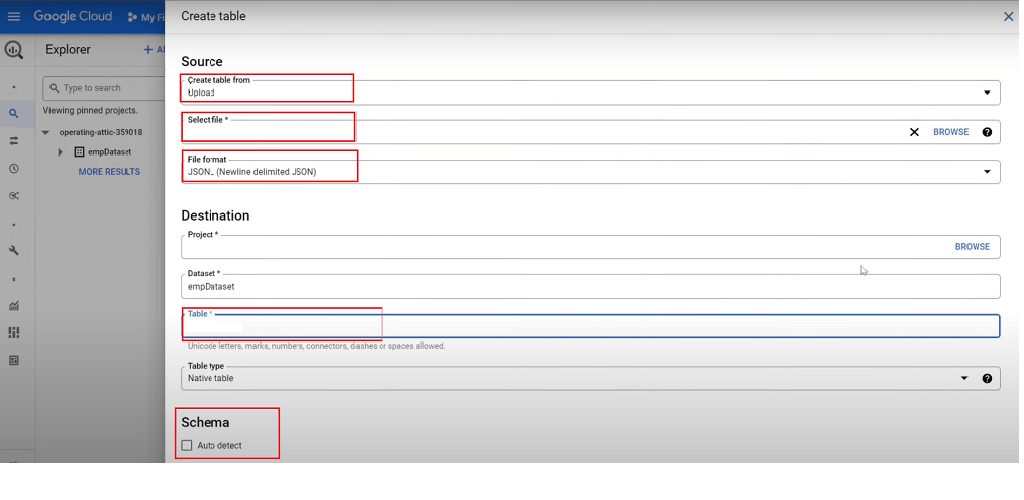
In the Create Table window, specify the following details to load the JSON data:
- Source: Select the source from where you want to create the table. Depending upon where your JSON file is located, you can select Google Cloud Storage, Upload, Drive, Google BigTable, or Amazon S3 as your source. For this article, we will proceed with Google Cloud Storage. Enter the Cloud Storage URI or select the file from the Cloud Storage bucket.
- File Format: Select the file format as JSON (Newline delimited JSON).
- Destination: In the destination section, specify the Dataset in which you want to create the table. In the Table field, enter the name of the table that you want to create and set the Table type field as a Native table.
- Schema: You can enter the schema information manually, or you can select Auto Detect to enable the detection of schema. If you opt to create a schema manually, click on add_box, then specify the field name, type, and mode for each field.
- Partition and Cluster Settings: These settings are optional. You can check more information on Creating partitioned tables and How to create and use clustered tables.
Step 6: Click on Create Table. Now, your table is created, and you have successfully loaded data in the BigQuery Table.
Step 7: Click on the table name that you have created. You can see the details of the table schema.
Limitations of Using the Manual Methods
When you load JSON data into BigQuery, you need to consider the following things:
- The bq CLI and the Cloud console tool support JSON Newline Delimited (JSONL), not the regular JSON. Hence, you have to ensure the data objects in the JSON file are on a separate line. For better understanding, check the image below that shows two types of JSON format. First is the JSON format, which has all the JSON objects separated by a comma. Second is JSON Newline Delimited, which has each JSON object on a separate line.
- In JSON files, fields consisting of DATE values must be separated by ( - ), in the year-month-date format. If your columns consist of a date with a timestamp, the date must be separated by ( - ) or ( / ). For instance, (year-month-day) or (year/month/day) and the timestamp must use ( : ) separator (hh:mm:ss). This might be time-consuming to align each date with the timestamp column as per BigQuery standards.
- In case you load data from a Cloud Storage bucket, BigQuery doesn’t support object versioning. Moreover, data consistency is not guaranteed for external data sources.
- If you select the auto-detect schema and it fails to select the data type of nested arrays, you need to enter the schema of each field manually.
While manually loading JSON data, if you fail to enter the correct BigQuery schema of respective fields, especially of nested arrays, BigQuery might not accept the file.
Conclusion
Loading data from JSON to BigQuery is one of the popular ways to store and analyze data. You can use the bq command line tool if you are comfortable with querying or choose the Google Cloud console as per your requirements. However, when JSON data is updated, both methods would require you to repeat steps as many times as needed. This will not only consume time and engineering efforts but can also be error-prone if not executed properly.
Fully-managed data pipeline tools like Estuary Flow can help you overcome manual and repetitive tasks. Flow provides hassle-free integration to transfer JSON data to BigQuery with its no-code solution. To seamlessly load your data in BigQuery in real time, give Estuary Flow a try—your first pipeline is free.
Looking to explore more data integration methods? Check out out these guides:
- How to Export Firestore Data to JSON
- 8 Google BigQuery Data Types

About the author
With over 15 years in data engineering, a seasoned expert in driving growth for early-stage data companies, focusing on strategies that attract customers and users. Extensive writing provides insights to help companies scale efficiently and effectively in an evolving data landscape.


