In today's fast-paced business landscape, staying ahead of the curve requires more than effective project management. Businesses need a strategic approach fueled by insightful analytics. While SaaS tools like Jira have revolutionized project management workflows, they often fall short when providing in-depth analysis for improved decision-making and enhancing performance.
This is where the integration of data warehouses like BigQuery comes into play. With Jira to BigQuery data integration, you can use data for valuable insights via advanced analytics. This analytical shift enables you to make data-driven decisions by analyzing historical project data to identify patterns, understand industry trends, and streamline workflows.
In this step-by-step guide, we'll delve into two popular methods to connect Jira to BigQuery. Let's explore each method in detail to see how we can efficiently connect these platforms.
Jira Overview & Features
Jira is a comprehensive project management tool that supports agile development methodologies. Its powerful features enable you to manage your projects, streamline workflows, and foster collaboration among team members.
You can assign issues to specific team members, set priorities, define due dates, and track the status of each task. Its robust issue-tracking capabilities make it the perfect choice for enterprises handling multiple projects and teams.
Let’s explore some of the key features of Jira:
- Reporting and Dashboards: Jira Software provides comprehensive reporting and dashboard features, allowing you to gain insights into project progress, performance, and potential bottlenecks. These visualizations aid data-driven decision-making.
- Automation and Workflows: With Jira's automation features, you can automate repetitive tasks, streamline processes, and trigger actions based on specific events, like time triggers and project escalations.
- Bulk Operations: While working with a large number of issues, Jira provides bulk operations that allow you to perform actions on multiple issues simultaneously. This includes changing status, assigning tasks, and adding labels.
- Improved Team: Jira's collaborative functionalities, like commenting, mentions, and file attachments, empower you and your team members to communicate effectively, fostering synergy and productivity.
BigQuery Overview & Features
BigQuery is a cloud-based data warehouse for storing, managing, and analyzing large datasets. It offers advanced data analytics for businesses to uncover changing trends and patterns for enhanced decision-making.
BigQuery’s architecture is optimized for processing petabytes of data using Google's infrastructure. From robust data storage to advanced analytics, BigQuery has become an essential tool for organizations seeking to extract maximum value from their data.
Here are some of the key features of Google BigQuery:
- Data Transfer Service: BigQuery Data Transfer Service allows you to set up scheduled, automated data transfer services from various sources into BigQuery. These sources include Google Analytics, YouTube, or third-party applications.
- Machine Learning Capabilities: BigQuery ML empowers you to build and train machine learning models directly within BigQuery. Such models enable you to execute predictive analysis tasks that result in a significant enhancement of overall performance.
- Data Partitioning and Clustering: BigQuery supports data partitioning, allowing you to organize data by date or other relevant criteria, such as transaction type, significantly improving query performance for large datasets.
How to Connect Jira to BigQuery: 2 Easy Methods
You have two main options to get Jira data into BigQuery:
- No-code method (Estuary Flow)
Use prebuilt Jira and BigQuery connectors to create a pipeline that keeps BigQuery up to date in near real time.
Best for: ongoing analytics, low maintenance, faster setup. - Manual method (Jira API)
Write scripts to call Jira REST APIs, transform JSON, stage to Cloud Storage, then load into BigQuery.
Best for: one-off exports or highly customized pipelines when you have engineering time.
Tip: Start with Estuary Flow if you need continuous sync and minimal upkeep. Choose the API route if you require custom transforms and are comfortable maintaining code.
Method 1: Jira to BigQuery Integration Using Estuary Flow (No-Code)
The most efficient way to connect Jira with BigQuery is by using Estuary Flow. Instead of writing scripts or handling exports manually, Flow lets you set up a pipeline with just a few clicks. Its prebuilt Jira and BigQuery connectors handle schema mapping, incremental updates, and ongoing synchronization automatically.
This approach ensures your BigQuery warehouse always reflects the latest Jira data — perfect for analytics, reporting, and cross-team collaboration.
Prerequisites
Before starting, make sure you have:
- A Jira domain, email, and API token. (See Jira connector docs)
- A Google Cloud project ID, dataset, and region.
- A Google Cloud Storage bucket in the same region as BigQuery.
- A service account JSON key with these roles:
- roles/bigquery.dataEditor
- roles/bigquery.jobUser
- roles/bigquery.readSessionUser
- roles/storage.objectAdmin
(See BigQuery connector docs for setup details.)
Step 1: Configure Jira as the Source
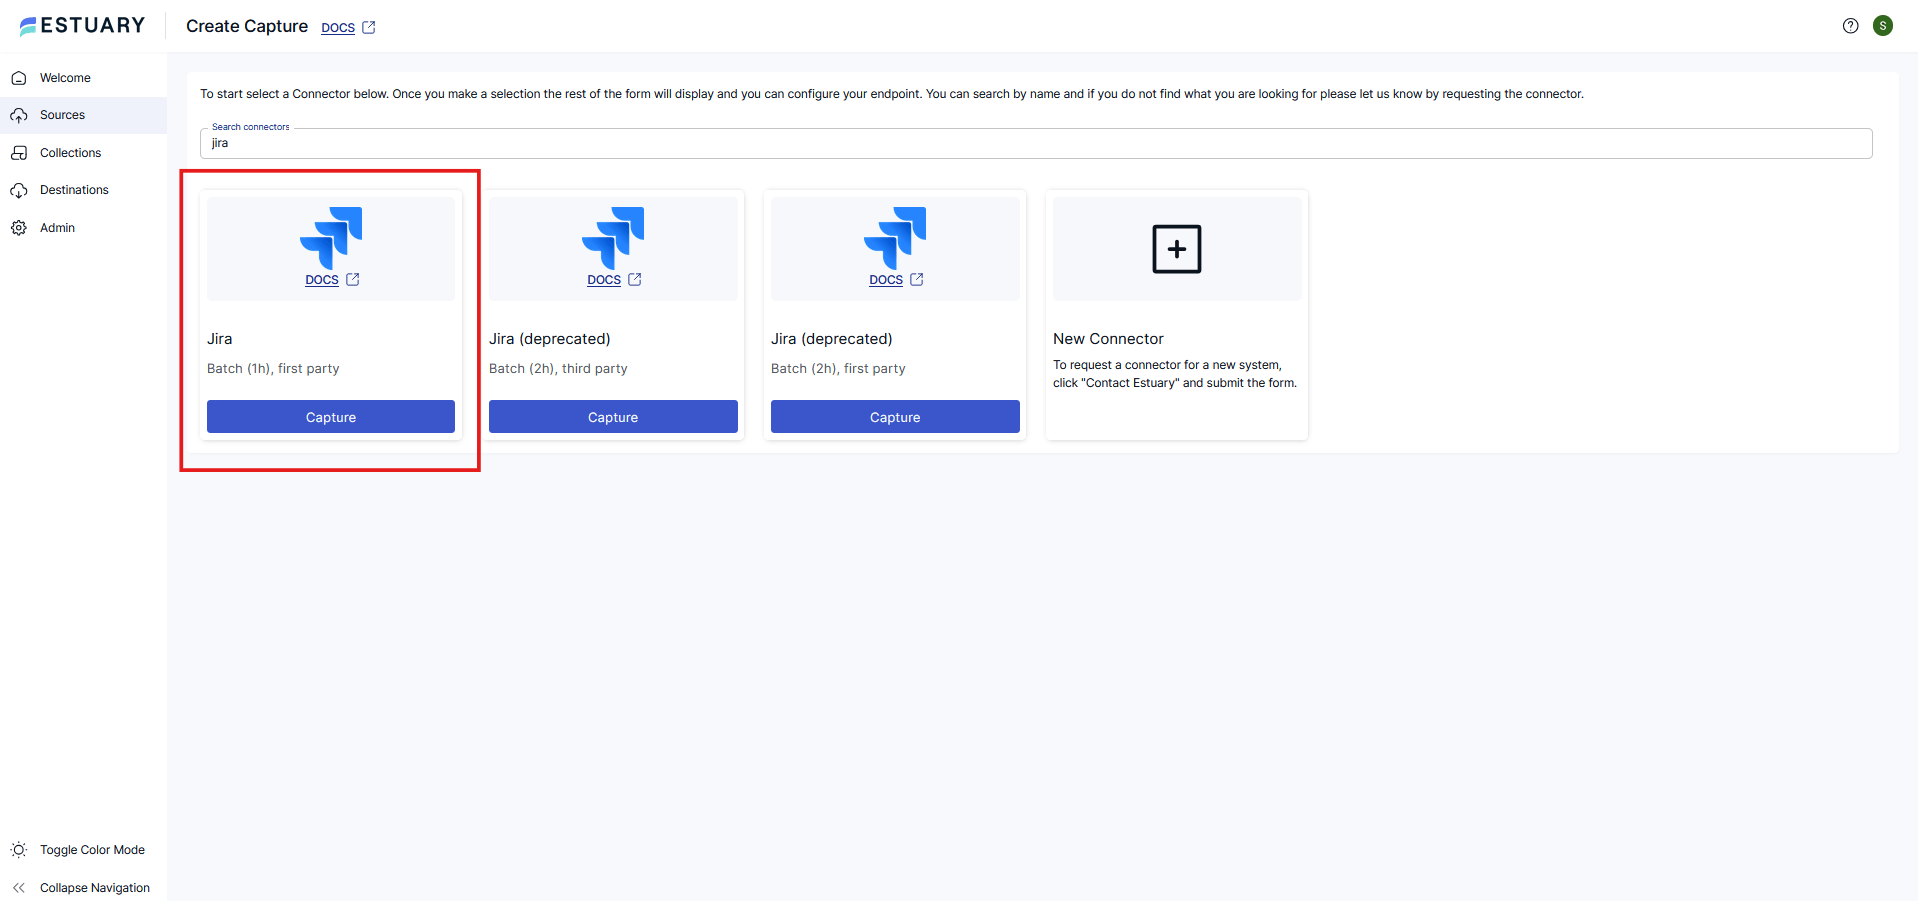
- Log into Estuary Flow and navigate to Sources.
- Click + NEW CAPTURE and search for the Jira connector.
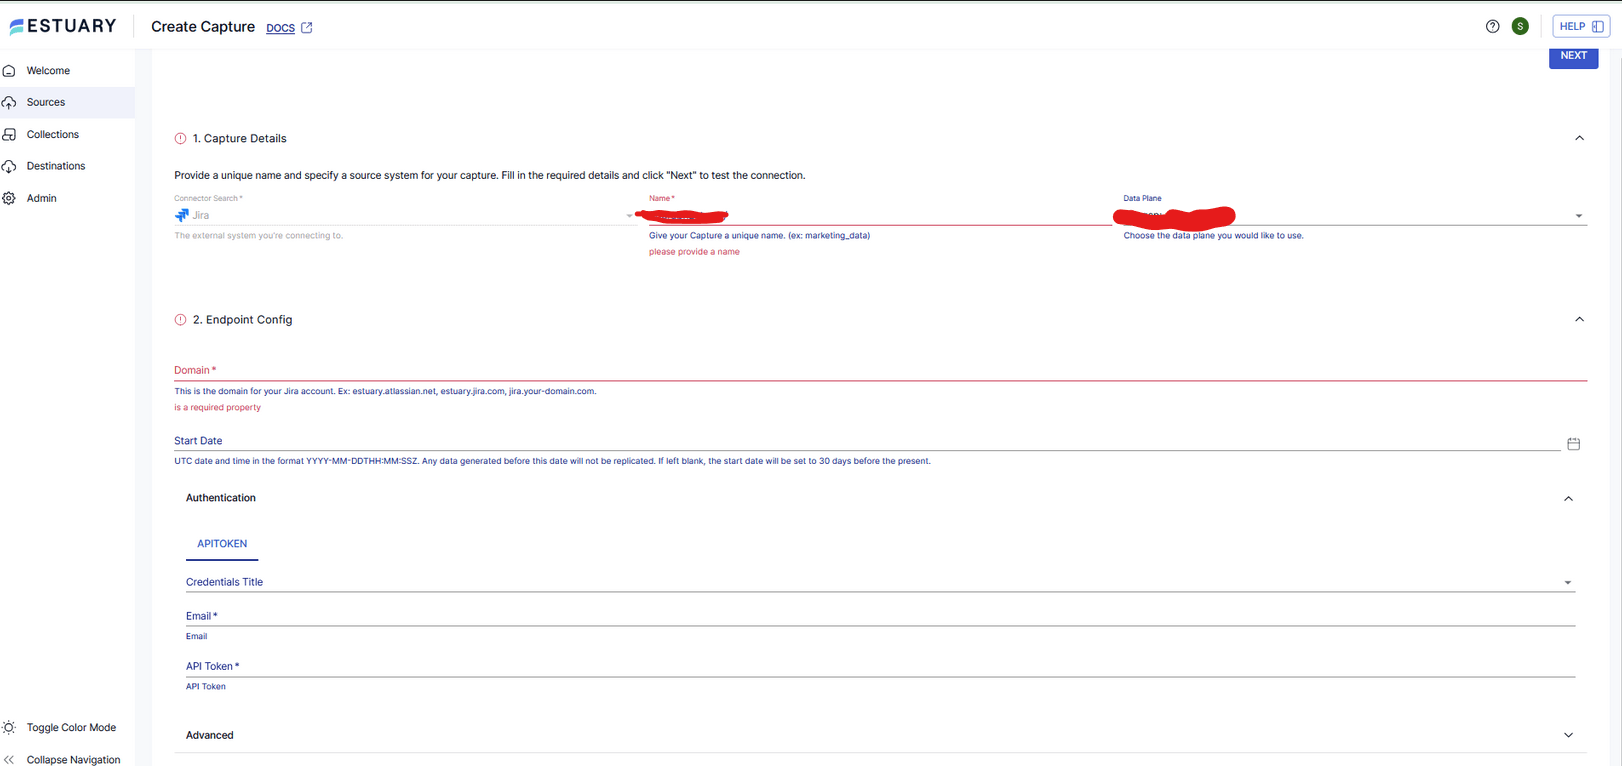
- Fill in the required fields:
- Name: a unique identifier for this capture.
- Domain: your Jira account domain, e.g. yourcompany.atlassian.net.
- Email: your Jira account email.
- API Token: generate one from Jira’s account settings.
- Start Date (optional): set a UTC timestamp (YYYY-MM-DDTHH:MM:SSZ) to capture only data after a given point. Defaults to 30 days ago if left blank.
- Projects (optional): enter project IDs as a comma-separated list if you only want specific projects.
- Click NEXT > SAVE AND PUBLISH.
Flow will now capture Jira data into collections. Supported resources include issues, boards, sprints, workflows, dashboards, comments, users, projects, and more.
Step 2: Configure BigQuery as the Destination
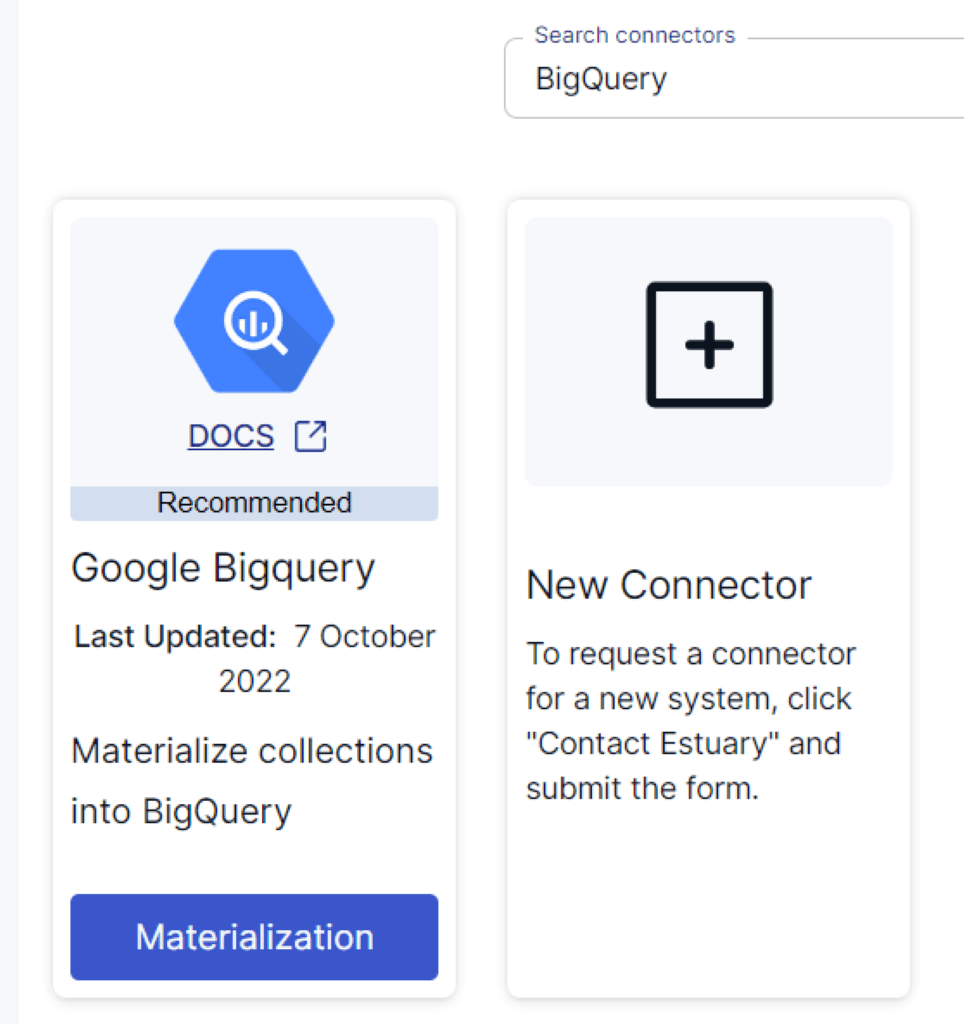
- Go to Destinations in Estuary Flow and click + NEW MATERIALIZATION.
- Search for the BigQuery connector and select it.
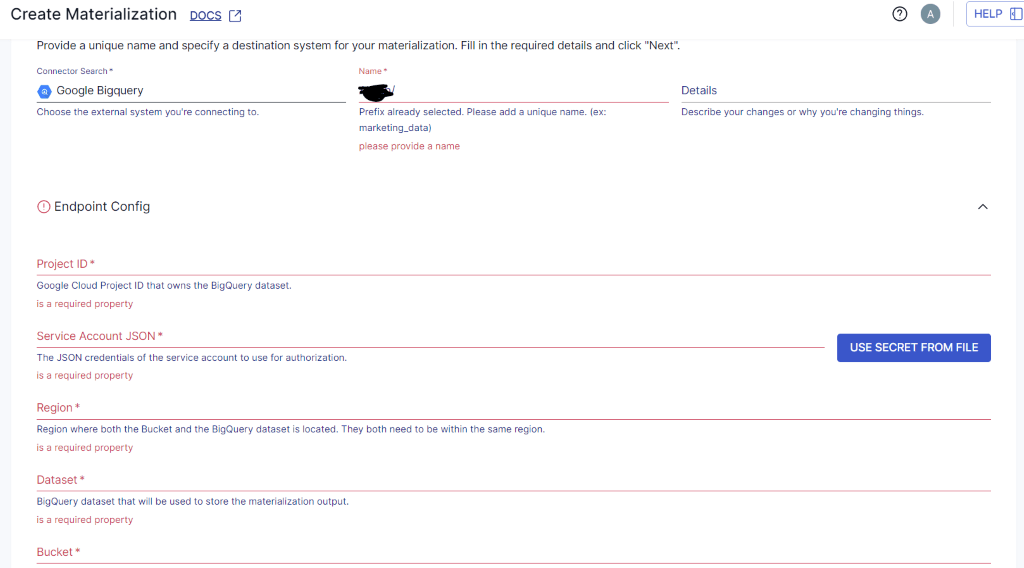
- On the setup page, enter the following details:
- Name: a unique identifier for this materialization.
- Project ID: your Google Cloud project ID.
- Service Account JSON: the key file you generated with the required roles.
- Region: the GCS region (must match the dataset and bucket).
- Dataset: the BigQuery dataset where tables will be created.
- Bucket: the name of your GCS bucket.
- Bucket Path (optional): a folder path inside the bucket for staging.
- Billing Project ID (optional): defaults to the same as Project ID, but can be customized.
- Disable Field Truncation (optional): toggle if you don’t want Flow to truncate oversized fields.
- Click NEXT > SAVE AND PUBLISH.
Estuary will now materialize your Jira collections into BigQuery tables. You can also enable delta updates per binding for faster performance and lower costs if your workflow supports it.
Why Use Estuary Flow?
- Faster setup: Build the pipeline in minutes without writing code.
- Always up-to-date: Incremental sync ensures BigQuery reflects the latest Jira updates.
- Enterprise scale: Handles high data volumes reliably with automatic scaling.
- Flexibility: Apply SQL or TypeScript transformations before loading to BigQuery.
👉 With Estuary Flow, you can unlock Jira analytics in BigQuery without worrying about API limits, manual exports, or pipeline maintenance. Sign up for free and start syncing today.
For detailed information on the above process, refer to the Estuary documentation:
Method 2: Export Jira Data to BigQuery Using Jira API (Manual)
In this manual method, you’ll need the Jira API to migrate data from Jira to Google BigQuery. Here's a breakdown of the steps involved in Jira to BigQuery migration.
Before starting the migration process, it is essential to ensure that certain prerequisites are in place:
- An active Jira account
- An active Google Cloud Console account
- Enable BigQuery API
- Generate Jira API Token
Step 1: Extracting the Data From Jira
- Jira’s REST API provides various endpoints for extracting data or retrieving essential project information. You can use Jira’s REST API to interact programmatically with Jira and retrieve specific data such as issue (task or work) details, attachments, project metadata, and more. To extract the data from Jira using REST API, you must send HTTP requests to specific API endpoints.
- You can use the GET method to extract the desired data from Jira API. For example, you can retrieve a single comment for an issue using the following request.
plaintextGET /rest/api/2/issue/{issueIdOrKey}/comment/{id}The endpoint /rest/api/2/issue/{issueIdOrKey}/comment/{id} specifies that you want to access a comment associated with a specific issue. You need to replace {issueIdOrKey} with the actual ID or key of the issue you're interested in and replace {id} with the ID of the specific comment you want to retrieve. When the request is sent to Jira's REST API, it fetches the comment that matches the provided issue ID or key and comment ID.
- When you make a request to the API for a specific issue or Jira data, the API responds in JSON format.
Step 2: Data Transformation
- This step involves shaping the data to match the desired schema and format in BigQuery. After extracting data from Jira using the REST API, the JSON data might not be suitable for the BigQuery data format. The transformation step aims to reshape, clean, and structure the data to align with the schema you want in your BigQuery table.
- During transformation, you map the attributes from the extracted JSON data to the corresponding columns in your BigQuery table. This includes specifying data types and adjusting for differences between the JSON structure and the BigQuery schema.
Step 3: Upload the Data into Google Cloud storage
After data transformation, upload the JSON data to Google Cloud Storage to optimize data loading and processing operations. For that, you need to create a bucket in Google Cloud Storage and follow these steps:
- Access your Google Cloud Console and navigate to the Bucket page under the Cloud Storage section.
- Now, click Create a Bucket page to provide information such as the Name of your bucket, choose where to store your data, and any additional settings. Click on Continue, followed by the Create button.
Step 4: Loading Data From Cloud Storage to BigQuery
After uploading the JSON data to the cloud repository, load it to BigQuery by following these steps.
- Navigate to BigQuery in your Google Cloud Console account. Within the Explorer panel, expand your designated project and choose a dataset. Under the Dataset Info section, click the +CREATE TABLE to create a new BigQuery table.
- In the Create Table section, fill in details like Cloud Storage and bucket path in the Source, File format as JSON, and where the data will go in Destination.
- Click the Create Table button to initiate the data loading process. Once the migration is complete, you have successfully loaded your Jira data to Google BigQuery.
Limitations of the Custom Scripts Method
- Technical Skills Required: For developing custom scripts, proficiency in any one programming language is essential. Common languages for writing scripts include Python, JavaScript, and Java. In addition, knowledge of Jira’s REST API on how to authenticate, make API requests and handle responses is equally important to complete the transfer process.
- Monitoring and Maintenance: Regular monitoring of the integration, error handling, and maintenance are necessary to ensure the data pipeline remains reliable and up-to-date. Ensuring data consistency across various API requests and over time can be challenging.
Conclusion
Migrating data from Jira to BigQuery enables you to perform advanced analytics to identify ongoing trends and patterns. This guide explores two methods to connect Jira to BigQuery: using data integration tools like Estuary Flow and manually using custom ETL scripts. While custom scripts offer flexibility, they come with maintenance challenges.
Automated, no-code data integration solutions like Estuary Flow offer a user-friendly data transfer setup, 200+ pre-built connectors, scalability, and real-time data synchronization. If you are looking for a hassle-free solution for Jira and BigQuery migration, consider leveraging Estuary Flow.
With a wide range of pre-built connectors, Estuary Flow makes it effortless to integrate different platforms within minutes. Simply sign up for a free account to start creating robust data pipelines.
Key Takeaways
- Jira doesn’t natively sync with BigQuery, so you need integration.
- Manual API scripts offer flexibility but require coding and maintenance.
- Estuary Flow provides a no-code Jira to BigQuery connector for automated pipelines.
- Perfect for teams that want scalable analytics without engineering overhead.
Explore more in-depth guides on how to migrate your Jira data to other destinations supported by Estuary Flow:
FAQs
What is the easiest way to export Jira data to BigQuery?
What data can I sync from Jira to BigQuery?
Can I connect Jira to other destinations besides BigQuery?

About the author
With over 15 years in data engineering, a seasoned expert in driving growth for early-stage data companies, focusing on strategies that attract customers and users. Extensive writing provides insights to help companies scale efficiently and effectively in an evolving data landscape.


