Confluence serves as an impressive knowledge-sharing and collaboration hub within organizations. However, to fully leverage the wealth of information stored with Confluence, it would benefit to integrate it with a robust cloud data warehouse like Snowflake.
By integrating Confluence with Snowflake, you gain a centralized platform for advanced analytics, enabling you to derive deeper insights that might be challenging to achieve within Confluence's native environment.
This comprehensive guide will cover the two ways to migrate your data from Confluence to Snowflake – including the manual approach and via streaming ETL.
What Is Confluence?
Confluence, developed by Atlassian, is a sophisticated collaboration tool designed to help teams organize and share knowledge efficiently. It acts as a central hub where team members can create, capture, and collaborate on projects in a dynamic workspace.
A standout feature of Confluence is its extensive use of spaces and pages, which allows teams to categorize their work into distinct areas, making it easier to manage and retrieve information. These spaces can be customized with various macros and templates, streamlining the creation of content and ensuring consistency across documents.
Another significant feature is Confluence's collaborative editing capability, which enables multiple users to edit documents simultaneously. This real-time collaboration is facilitated by a system called Synchrony, which ensures that changes made by different contributors are instantly reflected. This feature not only accelerates the editing process but also helps with instant feedback and discussion, creating a more interactive and engaged work environment.
Key Features of Confluence
- Confluence supports a built-in task management feature that allows you to create and assign tasks, set due dates, and track progress within pages.
- It facilitates the integration of various applications and files, allowing you to attach, preview, and update files directly within Confluence pages.
- It offers automatic versioning, preserving snapshots of file upload and page updates, enabling you to revert to previous versions if needed.
What Is Snowflake?
Snowflake is an advanced cloud data warehouse platform equipped with self-managed services to store and analyze vast volumes of data seamlessly. It facilitates data storage, processing, and analytical solutions that are more flexible than traditional data analytics platforms.
Unlike other solutions built on top of existing software platforms or big data technologies such as Hadoop, Snowflake employs its own distinctive approach. It relies on a comprehensive SQL query engine and an innovative shared-disk shared-nothing database architecture. This unique design allows Snowflake to function as a fully managed service, delivering all the capabilities expected from an enterprise analytics data warehouse.
Top Features of Snowflake
- Snowflake's cloud-native architecture makes scaling resources up or down easy based on user demand.
- It separates storage and computing resources, which makes it cost-effective; you need to only pay for the storage and computing resources you use.
- Snowflake employs a multi-layered security model facilitating network security, encryption, access control, and data auditing at every level. This ensures that only authorized individuals can access the data.
- Snowflake helps create clones of existing databases or specific tables, which helps develop and test use cases for performing analytics experiments without affecting the original data.
Ways to Transfer Data From Confluence to Snowflake
There are multiple approaches to achieve Confluence to Snowflake integration. Below are two methods that you can use to establish a connection between Confluence and Snowflake to transfer your data efficiently:
- Method 1: Using Estuary Flow for Confluence to Snowflake Integration
- Method 2: Using a Custom Data Pipeline to Connect Confluence to Snowflake
Method 1: Using Estuary Flow for Confluence to Snowflake Integration
Estuary Flow is a no-code, real-time data integration platform designed to streamline data migration. With an intuitive interface and ready-to-use connectors, Estuary Flow provides an effortless Extract, Transform, Load (ETL) setup process. This translates to significant time savings and minimizes the risks of errors when transferring Confluence data to Snowflake.
Benefits of Estuary Flow
- Scalability: Estuary Flow is engineered for horizontal scalability, which makes it suitable for businesses of all sizes. It is designed to manage extensive data volumes and fulfill high throughput requirements.
- Transformation Options: With Estuary Flow, you can opt for real-time or batch transformations using SQL or TypeScript. You can also choose to merge and transform data before moving it to a data warehouse (ETL) or perform transformation post-loading (ELT).
- Supports Diverse Data Sources and Destinations: Estuary Flow lets you extract data from numerous sources and effortlessly transfer it to the destination of your choice. It provides 300+ ready-to-use, no-code connectors to help do this.
- Change Data Capture (CDC): Estuary Flow supports CDC. It is a fast and low-latency technique that helps identify and capture the modifications made to the data in the data source. It tracks the changes in real time and updates them on the destination system.
Before you start using Estuary Flow to migrate data from Confluence to Snowflake, here are some prerequisites that must be in place:
Step 1: Configure Confluence as the Source
- Sign in to your Estuary account to access the dashboard.
- Click the Sources option on the left navigation pane of the dashboard.
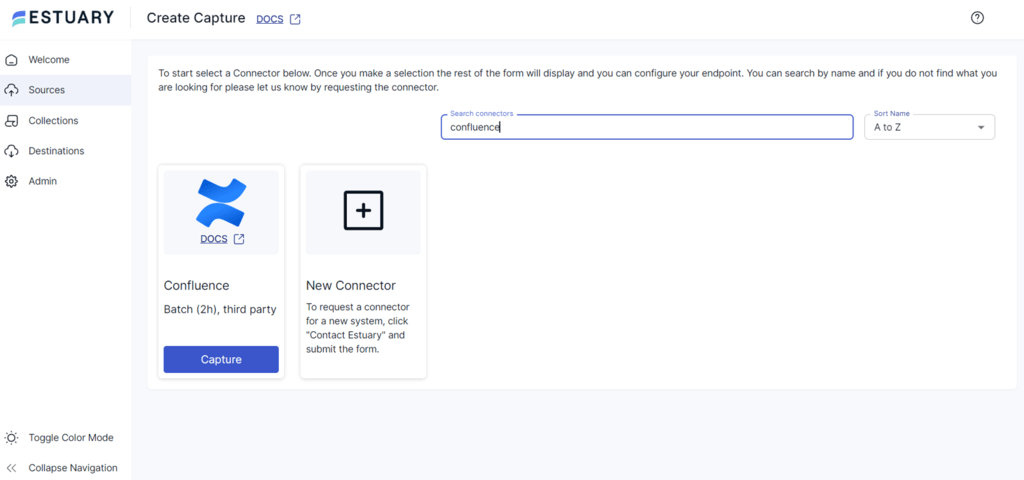
- On the Create Capture page, type Confluence in the Search connectors field. When the Confluence connector appears in the search results, click the Capture button.
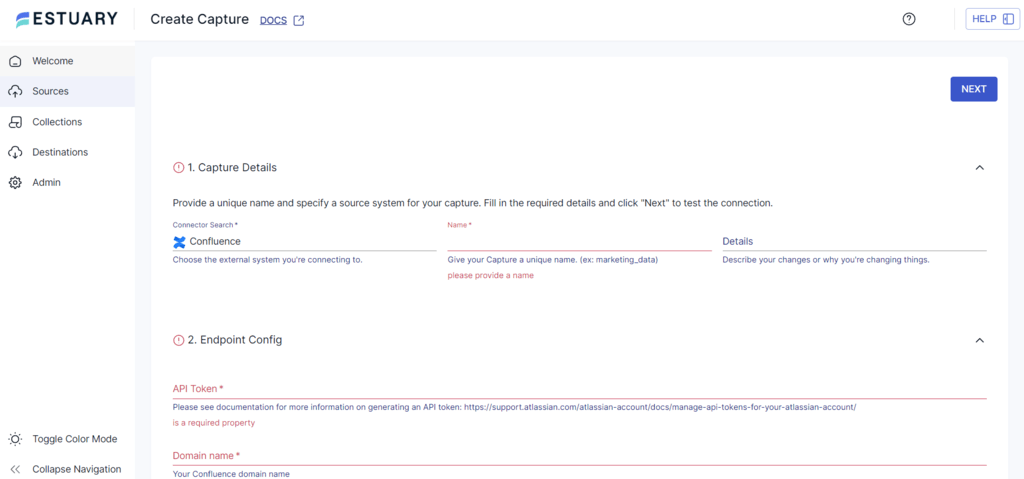
- On the Confluence connector configuration page, specify the necessary details, such as Name, API Token, Domain name, and Email.
- Finally, click NEXT > SAVE AND PUBLISH to complete the source configuration.
Step 2: Configure Snowflake as the Destination
- To configure Snowflake as the destination, click MATERIALIZE COLLECTIONS in the pop-up window after a successful capture. Alternatively, navigate the dashboard and click the Destinations option on the left-side navigation pane.
- On the Destinations page, click the + NEW MATERIALIZATION button.
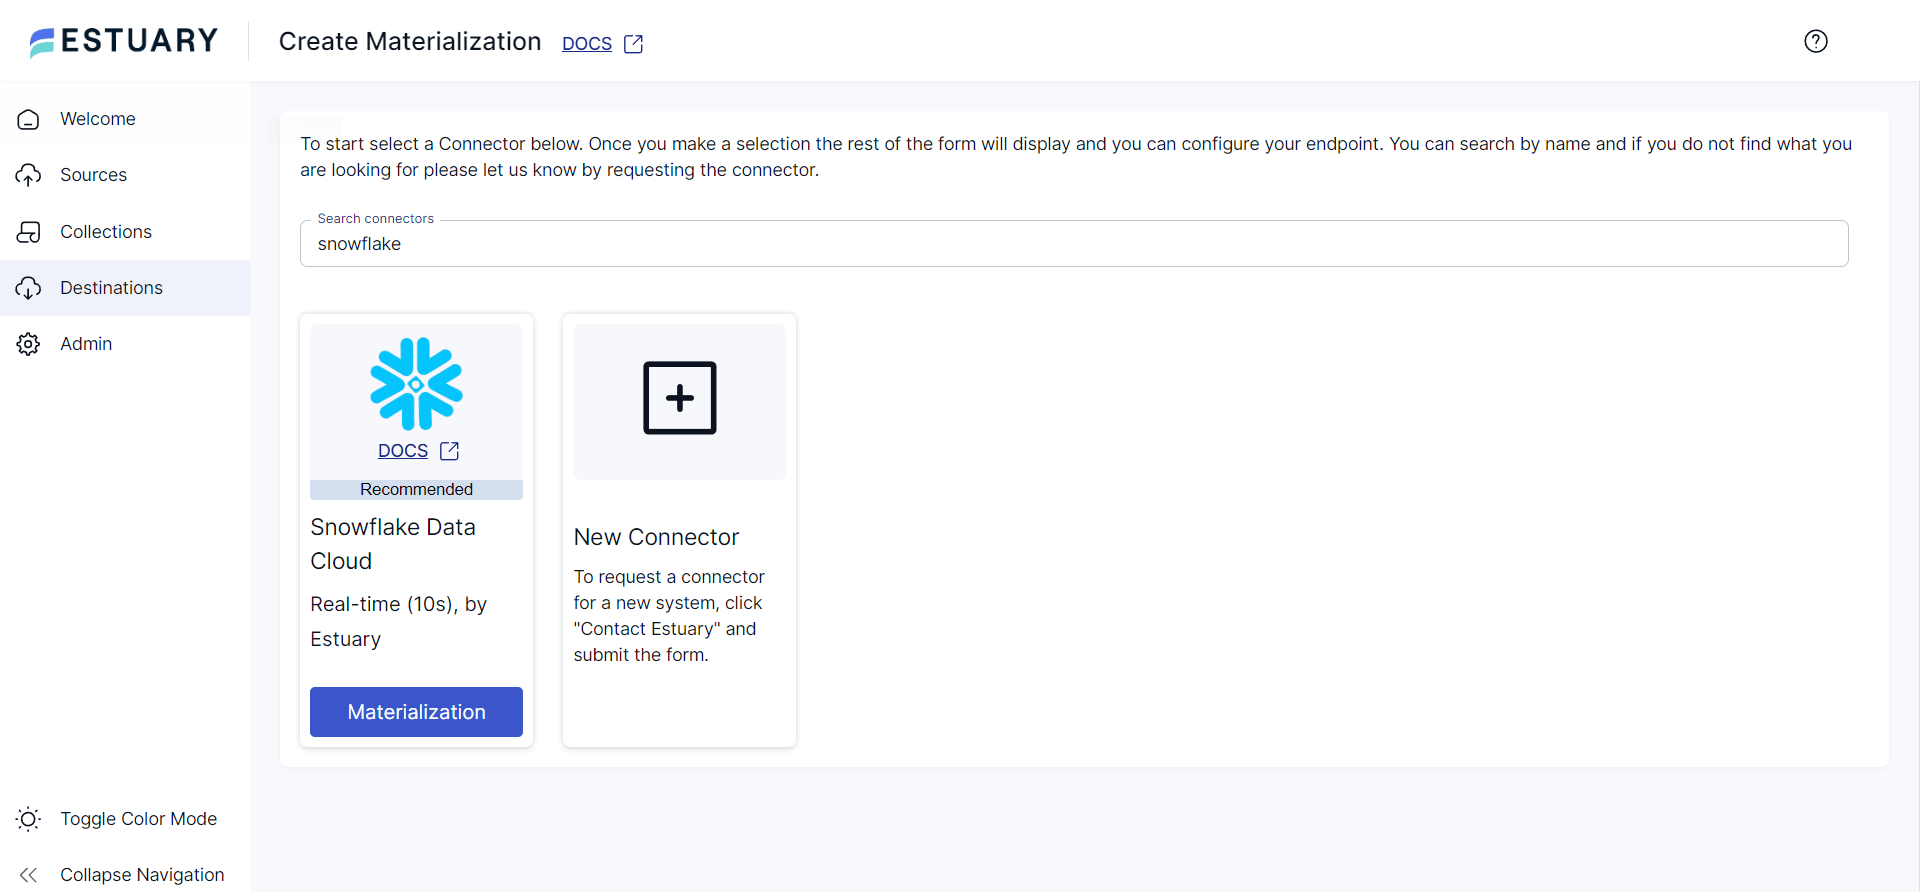
- You will be redirected to the Create Materialization page, where you can use the Search connectors field to search for Snowflake.
- Click on the Materialization button of the Snowflake Data Cloud connector when you see it in the search results.
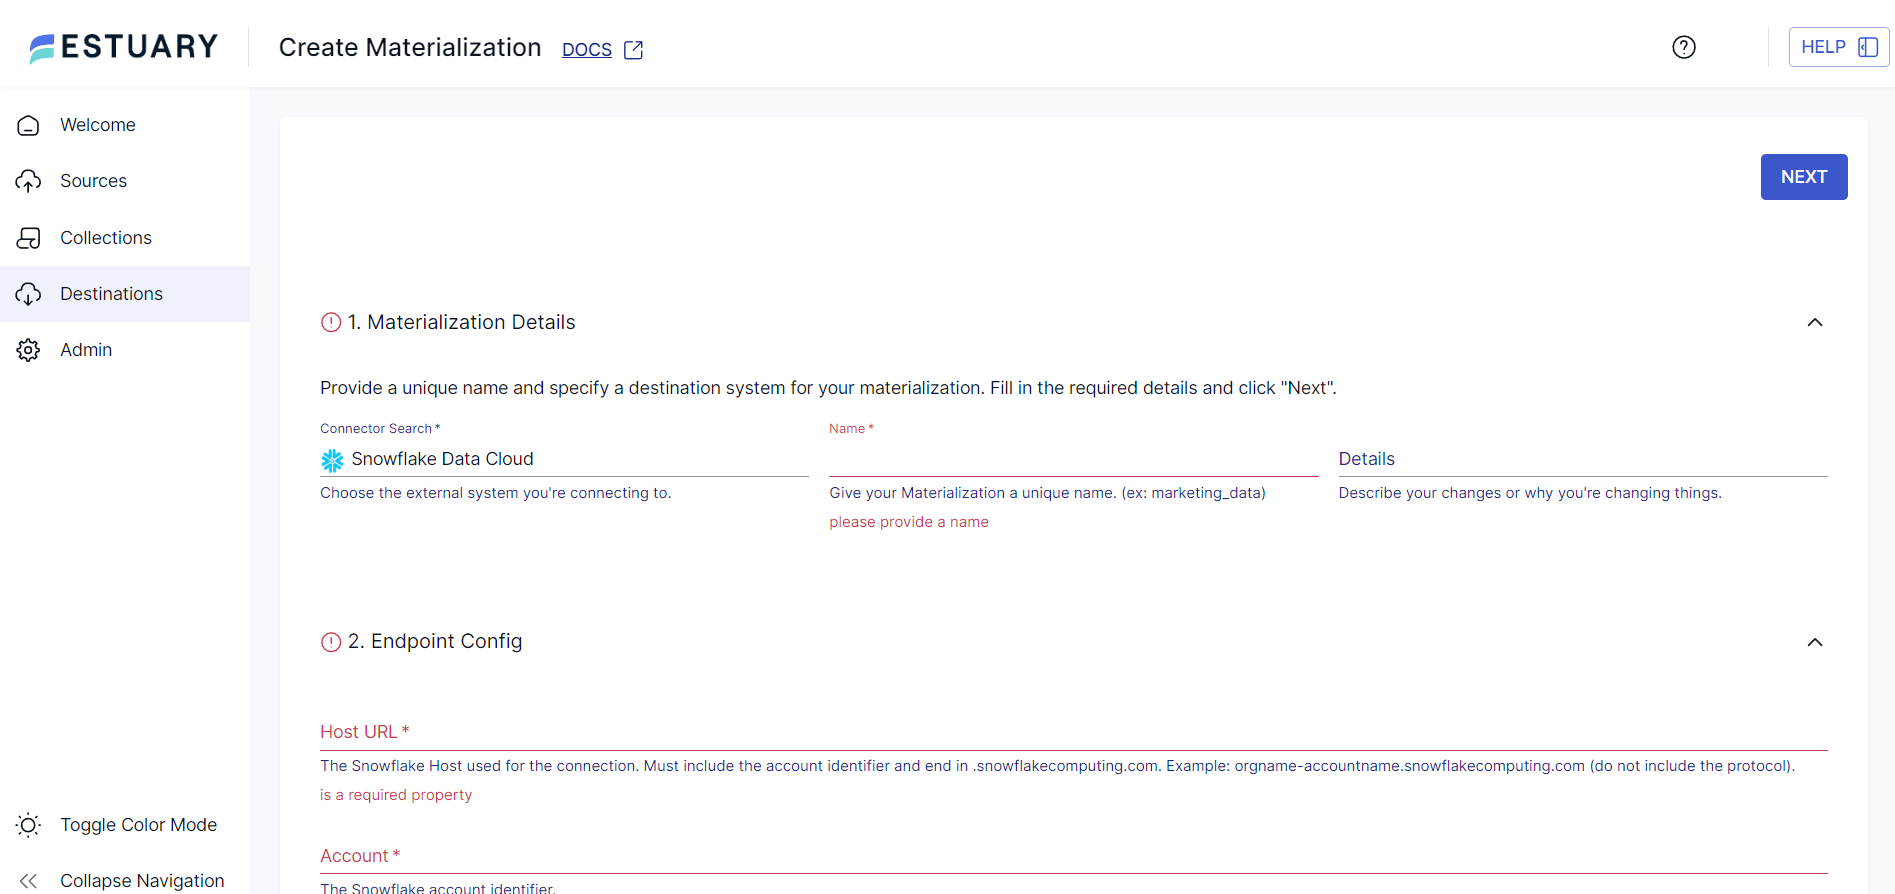
- On the Snowflake connector configuration page, fill in the necessary details, such as Name, Host URL, Account, Database, and Schema.
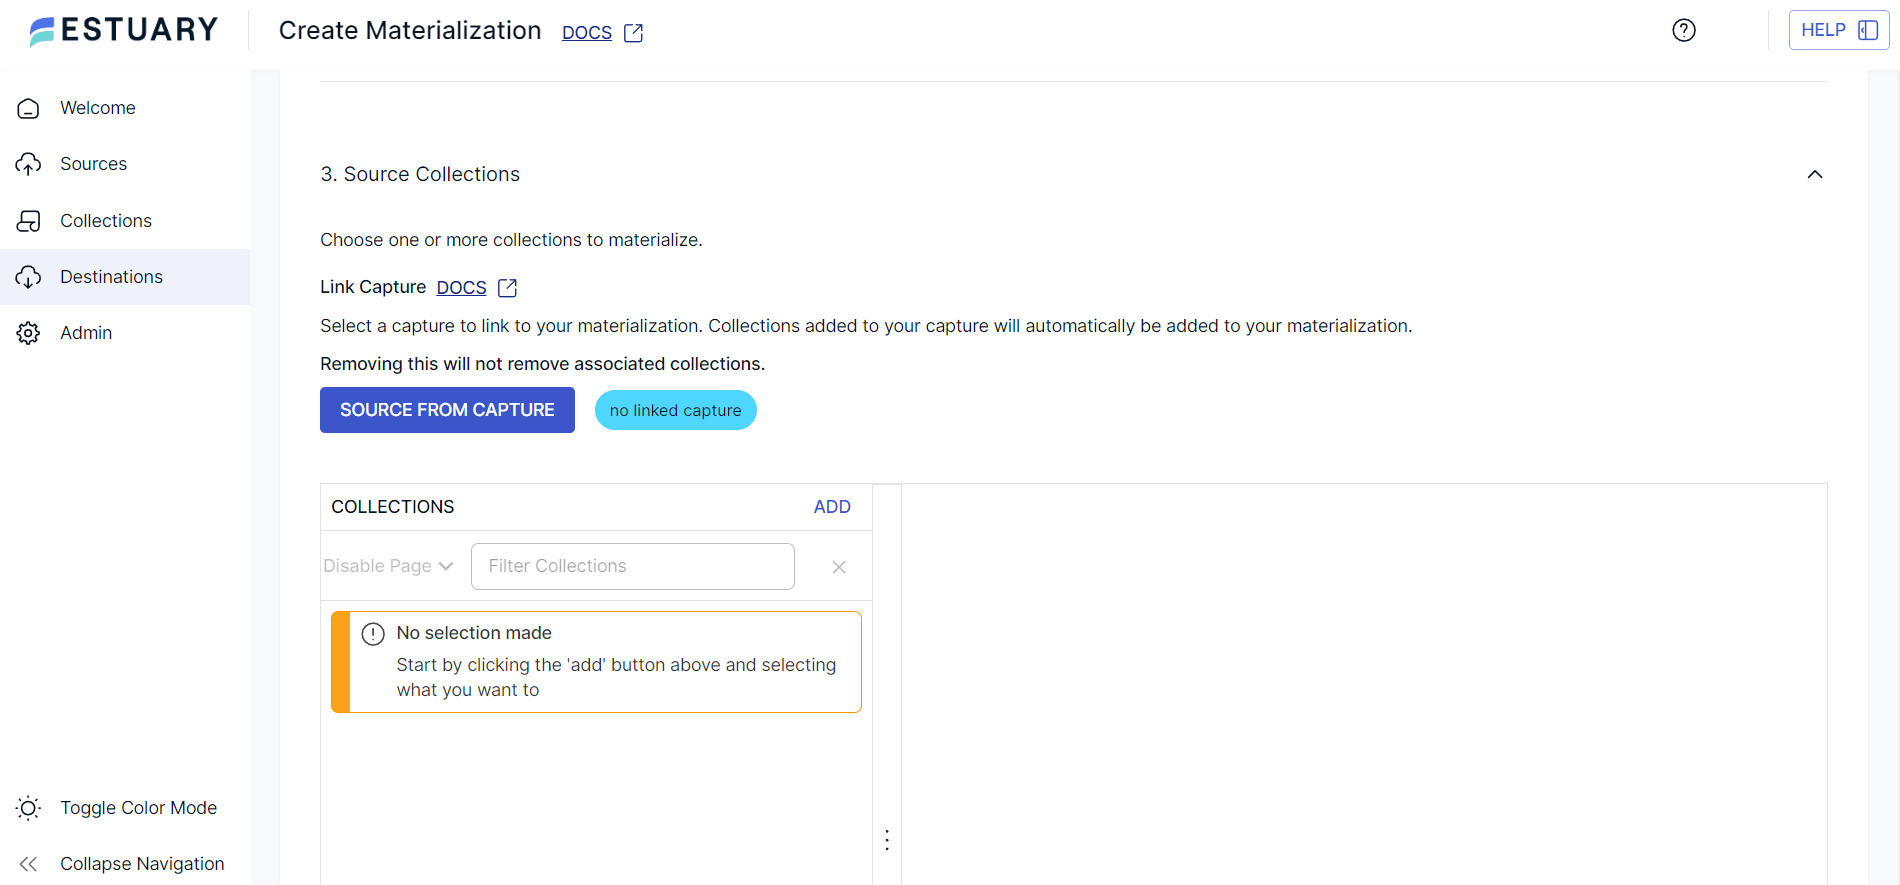
- Click the SOURCE FROM CAPTURE button in the Source Collections section to manually add a capture Flow collection to your materialization.
- Proceed by clicking NEXT > SAVE AND PUBLISH. This connector will materialize Flow collections of your Confluence data into Snowflake tables.
BONUS: Check out this tutorial on how to transfer data from Jira to Snowflake.
Method 2: Using a Custom Data Pipeline to Connect Confluence to Snowflake
The first step in setting up a custom data pipeline for transferring Confluence data to Snowflake is to understand the two authentication methods used to create your custom Confluence integration pipeline.
- Basic Authentication: The basic authentication method is built into the HTTP protocol. However, the authentication credentials can be easily deciphered, making it less optimal for the authentication method.
- Using OAuth 2.0 Provider: This is a secure means of authentication that uses access tokens rather than passwords.
To perform the manual data integration, perform these steps:
Prerequisites: The user should register an application with Atlassian that can use OAuth2.0 and enable OAuth2.0. Learn more about authentication here.
Once the OAuth is enabled, you can implement the following steps in the Application code.
plaintextRequest Authorization Code

https://auth.atlassian.com/authorize?
  audience=api.atlassian.com&
  client_id=YOUR_CLIENT_ID&
  scope=REQUESTED_SCOPE_ONE%20REQUESTED_SCOPE_TWO&
  redirect_uri=https://YOUR_APP_CALLBACK_URL&
  state=YOUR_USER_BOUND_VALUE&
  response_type=code&
  prompt=consent
Note: You can get this URL from the application on the developer console by selecting Authorization > Configure next to OAuth2.0. If successful, the authorization code is provided as a query parameter, and the user will be redirected to the app’s callback URL.
- With the authorization code, you can request an access token.
plaintext
curl --request POST \
--url 'https://auth.atlassian.com/oauth/token' \
--header 'Content-Type: application/json' \
--data '{"grant_type": "authorization_code","client_id": "YOUR_CLIENT_ID","client_secret": "YOUR_CLIENT_SECRET","code": "YOUR_AUTHORIZATION_CODE","redirect_uri": "https://YOUR_APP_CALLBACK_URL"}'
If successful, the call will return an access token, which can be used to make API calls.
- To retrieve a new access token, use refresh_token parameter.
plaintext
curl -X POST https://atlassian.example.com/rest/oauth2/latest/token?client_id=CLIENT_ID&client_secret=CLIENT_SECRET&refresh_token=REFRESH_TOKEN&grant_type=refresh_token&redirect_uri=REDIRECT_URI- Now, you can make an API request to Confluence using the access token.
- Pass the access token in the request's header to get the cloudid for the Snowflake website with a GET request.
plaintext[
  {
    "id": "1324a887-45db-1bf4-1e99-ef0ff456d421",
    "name": "Site name",
    "url": "https://your-domain.atlassian.net",
    "scopes": [
      "write:snowflake-content",
      "read:snowflake-content.all",
      "manage:snowflake-configuration"
    ],
    "avatarUrl": "https://site-admin-avatar-cdn.prod.public.atl-paas.net/avatars/240/flag.png"
  }
]- Create the request URL, for example:
plaintext https://api.atlassian.com/ex/snowflake/{cloudid}/{api}
Where cloudid is the cloudid for your site, and API is the base path and name of the API.- Setup the API call to Snowflake by passing the access token in the header.
plaintextcurl --request GET \
  --URL https://api.atlassian.com/ex/snowflake/11223344-a1b2-3b33-c444-def123456789/rest/api/8/project \
  --header 'Authorization: Bearer aBCxYz654123' \
--header 'Accept: application/json'Note: The Scope parameter can help you perform actions like READ, WRITE, ADMIN, and SYSTEM_ADMIN.
plaintextcurl -u admin: admin http://localhost:8080/confluence/rest/api/content/scan?cursor=content:false:393229&limit=2 | python -mjson.toolLearn more about the scope parameter here.
These steps will help you authenticate and initiate data transfer from Confluence to Snowflake using Confluence’s REST APIs to extract the necessary data.
Drawbacks of the Manual Method
- Lack of Monitoring and Auditing: Manual migration methods often lack built-in monitoring and auditing features, making it challenging to identify and troubleshoot issues that might arise during the data migration process.
- Time Complexity: The manual process involves repetitive data extraction, transformation, and loading tasks. These can be incredibly time-intensive, especially for large datasets, delaying project completion and diverting resources from critical business functions.
- Scalability Limitations: Manual integration methods do not scale well for increasing data volumes. It can become an effort- and resource-intensive task prone to errors for growing amounts of data.
Conclusion
The integration between Confluence and Snowflake presents a powerful solution for extracting valuable insights from massive data volumes. However, the custom data integration process can be less flexible and time-consuming and requires extensive technical expertise.
You can also consider Estuary Flow to help deliver valuable, quality data from Confluence to Snowflake. Its robust capabilities streamline operations to handle, extract, transform, and load data. Moreover, its managed services and intuitive interface simplify the data integration process. Opting for Flow can help you reap all the necessary benefits of data integration for your organization.
Are you searching for a better way to transfer data between different platforms? Estuary Flow provides a comprehensive solution for all your diverse data integration requirements. Sign up for a free account today!
Frequently Asked Questions (FAQs)
1. Why migrate data from Confluence to Snowflake?
Data migration enables centralized storage within Snowflake for advanced analytics, reporting, and integration with other data sources.
2. What types of Confluence data can be migrated?
Pages, spaces, attachments, comments, user information, and metadata can be migrated to Snowflake.
3. Can I schedule automated data integration tasks between Confluence and Snowflake?
Yes, you can schedule automated data integration tasks between Confluence and Snowflake. Tools like Estuary Flow offer built-in scheduling capabilities, allowing you to set regular intervals or event-based triggers to synchronize your data from Confluence into Snowflake.

About the author
With over 15 years in data engineering, a seasoned expert in driving growth for early-stage data companies, focusing on strategies that attract customers and users. Extensive writing provides insights to help companies scale efficiently and effectively in an evolving data landscape.


