In this guide, you'll learn how to move data from Snowflake to ClickHouse — whether you're migrating historical data or setting up a real-time sync for analytics. We’ll walk through the traditional export-import method using S3 and Parquet files, and then show you a far more efficient, real-time approach that doesn’t require writing custom scripts or managing Kafka.
Why This Matters for Data Teams
Snowflake is a powerhouse for cloud data warehousing, but its costs can become limiting if you’re constantly running queries for real-time use cases. ClickHouse, with its blazing-fast OLAP engine, is increasingly chosen for speed, cost-efficiency, and scalable reporting. However, moving data from Snowflake to ClickHouse is often painful, relying on staged exports, manual transformations, and hours of engineering work.
That’s why modern data teams are turning to low-code, real-time platforms like Estuary, which lets you set up continuous Snowflake-to-ClickHouse pipelines in minutes. No Kafka. No staging buckets. Just real-time data, streaming from source to destination — validated, transformed, and ready for use.
Why Migrate from Snowflake to ClickHouse?
ClickHouse has emerged as a top-tier choice for teams that need fast, cost-efficient analytics over large datasets. While Snowflake offers excellent scalability and SQL support, it’s not always optimized for ultra-low-latency analytics or cost-effective real-time workloads. As query volumes grow, so do Snowflake compute costs, and even short dashboard refreshes can spin up expensive warehouses.
ClickHouse, on the other hand, is designed for speed. Its columnar storage format, vectorized execution, and parallel processing make it ideal for aggregations, drilldowns, and dashboard use cases. Many data teams are now offloading high-volume workloads or long-term analytical storage from Snowflake to ClickHouse to gain performance and reduce spend.
Whether you're building real-time customer dashboards, product analytics, or operational monitoring, syncing Snowflake to ClickHouse can provide the power and agility you need.
Learn more: ClickHouse vs Snowflake
The Manual Approach: Moving Data from Snowflake to ClickHouse with S3 and Parquet
One way to move data from Snowflake to ClickHouse is through a manual, multi-step process using an object store like Amazon S3. This method is based on the official ClickHouse migration documentation and involves exporting data as Parquet files, staging them in S3, and importing them into ClickHouse using its native S3 integration.
Step 1: Export Data from Snowflake to S3
Using the COPY INTO command, you export your Snowflake tables into Parquet format and store them in an external S3 bucket. Here’s what the process typically looks like:
- Create a file format in Snowflake (e.g., Parquet)
- Create an external stage associated with your S3 bucket
- Use
COPY INTOto move data from a Snowflake dataset to the external stage, making sure to specify file size and header configuration
Parquet is preferred because it retains schema metadata and compresses well, making it suitable for analytics-focused migrations.
Step 2: Import Data into ClickHouse from S3
Once the files are in S3, ClickHouse can load them using its s3 table function. You’ll define your target ClickHouse table, then use INSERT INTO SELECT to import data from the Parquet files. Special care is needed for nested or semi-structured fields like OBJECT or VARIANT, which must be transformed into Tuples using JSONExtract.
plaintextINSERT INTO clickdata
SELECT
  timestamp,
  another_field,
  JSONExtract(some_file, 'Tuple(filename String, version String)'),
  ...
FROM s3('https://bucket.s3.amazonaws.com/*.parquet')
Drawbacks of the Manual Method
While this works for one-time migrations, it’s far from ideal for production or real-time use:
- No incremental syncs — you’ll need to rerun exports manually
- Requires S3 configuration, IAM, file management
- Doesn't support schema evolution
- Not suitable for live data feeds or continuous ingestion
A Better Way: Real-Time Snowflake to ClickHouse Sync with Estuary
For teams that need live data in ClickHouse — not yesterday’s exports — Estuary offers a no-code, real-time alternative to the manual S3 method. Instead of batch jobs and staging files, Estuary connects directly to your Snowflake tables and streams changes to ClickHouse continuously.
It works in two simple parts:
- Capture Snowflake data in real time using Estuary’s CDC connector
- Materialize to ClickHouse via Dekaf, Estuary’s built-in Kafka API layer that integrates seamlessly with ClickPipes
Why Choose Estuary?
- Change Data Capture (CDC): Capture inserts, updates, and deletes from Snowflake using its native Streams and staging tables.
- No Kafka Setup Required: Use Dekaf to expose Flow collections as Kafka topics — ClickHouse consumes them directly.
- Exactly-Once Delivery: Avoid duplicates and maintain data integrity.
- Fast, No-Code Setup: Get started in minutes without custom scripts or infrastructure to manage.
- Schema-Aware & Resilient: Estuary handles schema changes and retries automatically.
Whether you're syncing 5GB or 5TB of data, Estuary provides the scale, reliability, and simplicity needed for modern analytics.
How to Set Up a Real-Time Snowflake to ClickHouse Pipeline with Estuary
You can move Snowflake data to ClickHouse in minutes with Estuary — no Kafka brokers or staging buckets required. Here’s how to do it:
Step 1: Set Up Snowflake as the Source
- Log in to the Estuary dashboard
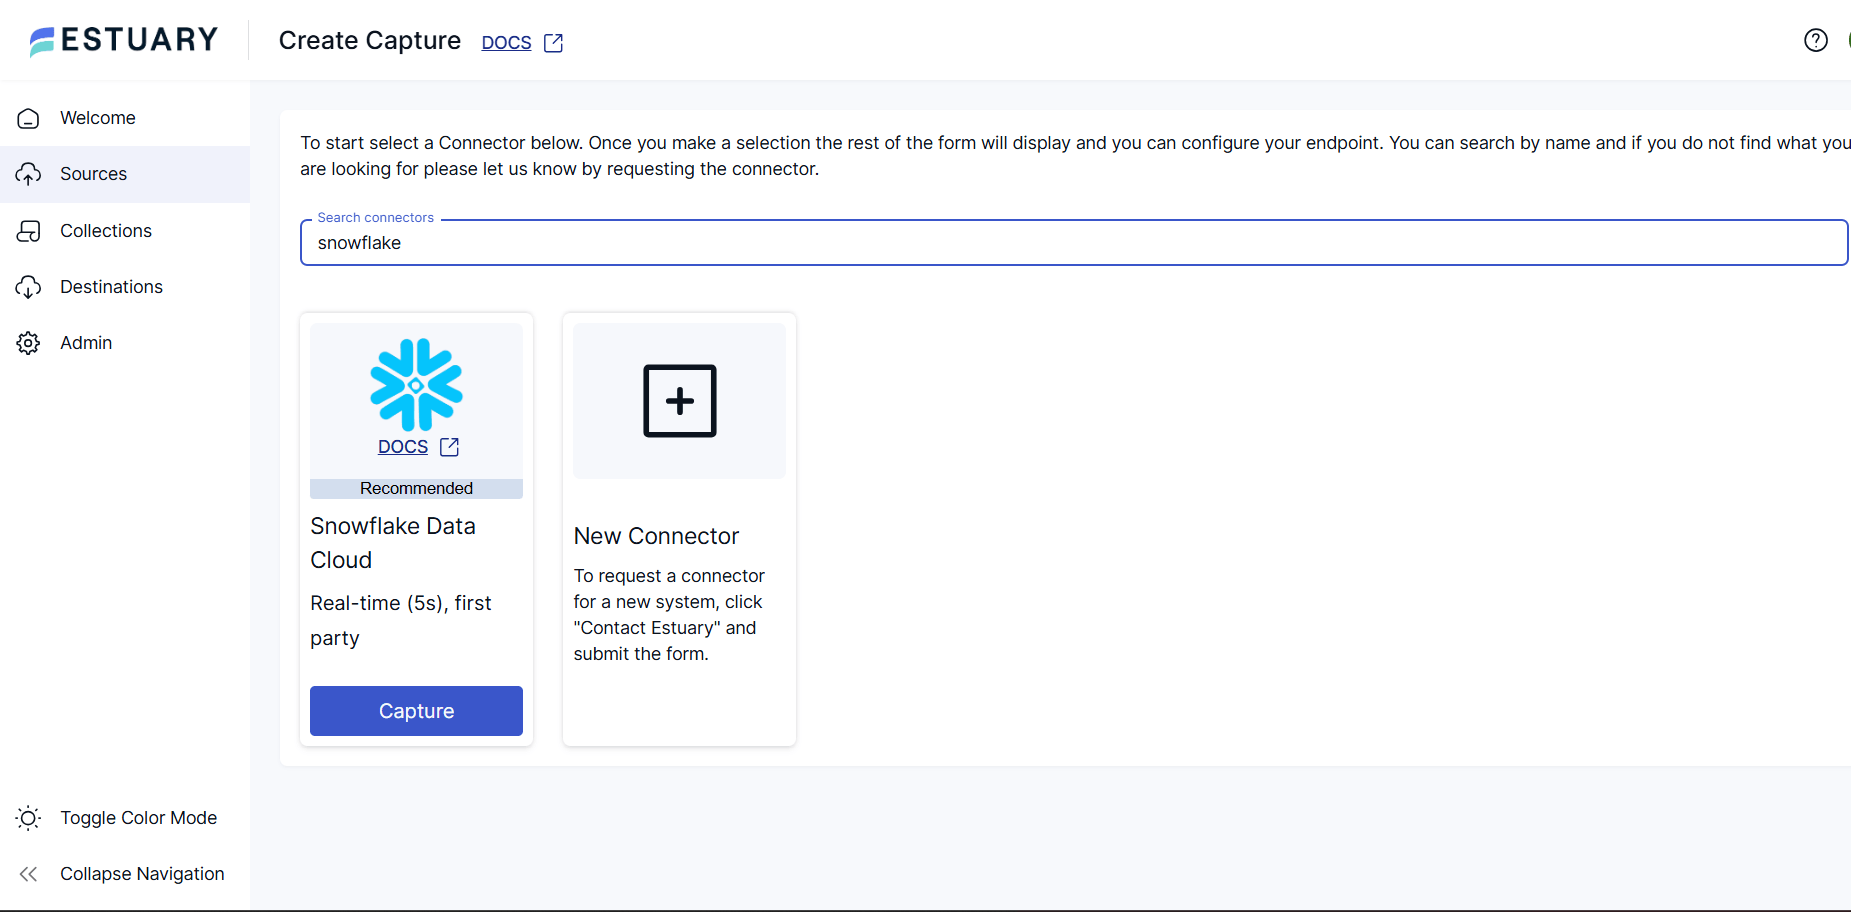
- Click “+ NEW CAPTURE” and search for Snowflake
- Enter your connection details:
- Host and account identifier
- Database name
- User and password
- Optional: warehouse name (or use default)
- Choose the tables and schemas to capture
- Click “Save & Publish” to start the real-time capture
💡 Tip: Estuary uses Snowflake’s CDC features (Streams & staging tables) to track changes efficiently.
Step 2: Set Up ClickHouse as the Destination via Dekaf + ClickPipes
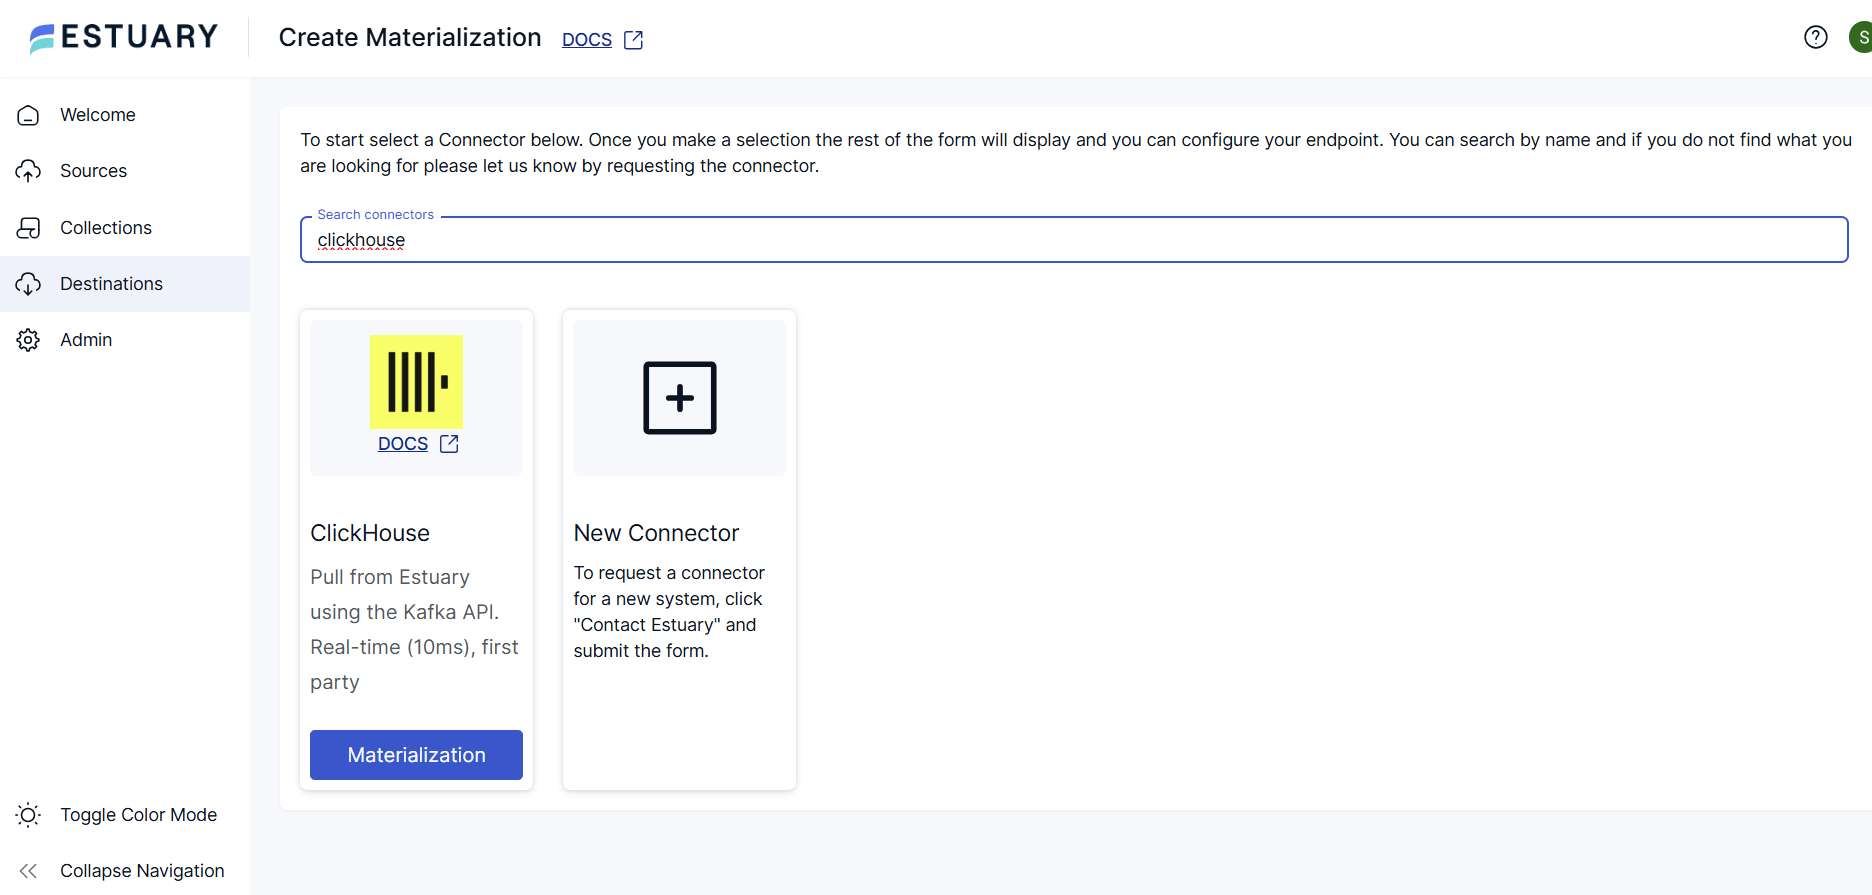
- In Estuary, start creating a new materialization from the Destinations tab.
- Search for and select the ClickHouse materialization.
- Fill out the configuration with a secure Auth Token.
- Link your Snowflake capture or select individual collections to materialize.
- Click Next and Save and Publish.
Estuary makes your data available through Dekaf, its Kafka-compatible API. No extra Kafka setup needed.
To finalize setup and connect ClickHouse to these data collections-turned-Kafka topics:
- Open your ClickHouse instance
- Use ClickPipes to configure an Apache Kafka source
- Input the following Dekaf connection details:
- Broker:
dekaf.estuary-data.com:9092 - Security Protocol:
SASL_SSL - SASL Mechanism:
PLAIN - Username: Your Flow materialization name
- Password: The auth token you set for your Estuary materialization
- Schema Registry:
https://dekaf.estuary-data.com(same user/password credentials)
- Broker:
- Choose the relevant Flow collections/topics to ingest
- Start the pipe — ClickHouse begins pulling data in real time
Step 3: Monitor and Analyze
- Use the Estuary dashboard to monitor delivery status and health
- Query ClickHouse to confirm your data is syncing
- Build real-time dashboards or alerts — powered by ClickHouse speed
That’s it. From setup to streaming in just a few minutes, and you’re free from managing export jobs, storage buckets, or middleware.
Manual vs Real-Time: Which Snowflake to ClickHouse Method Is Right for You?
There’s more than one way to move data from Snowflake to ClickHouse—but not all methods are built for speed, scale, or simplicity.
Here’s how the manual export + S3 method stacks up against a real-time pipeline using Estuary:
Feature | Manual Method (S3 + Parquet) | Estuary (Streaming CDC) |
| Setup Time | Hours to configure and script | Minutes, no-code UI |
| Real-Time Sync | No | Yes |
| Incremental Updates | Manual reruns required | Continuous CDC |
| Handles Schema Evolution | Manual schema tracking | Auto-enforced JSON schemas |
| Formula/Complex Field Support | Requires manual transforms | Native handling + JSON support |
| Middleware/Staging Required | Requires staging in S3 | Kafka-compatible via Dekaf |
| Best For | One-time historical loads | Production-grade pipelines |
If your use case involves ongoing analytics, live dashboards, or automated reporting, Estuary gives you the flexibility and performance you need, with far less effort.
Conclusion: Modernize Your Snowflake to ClickHouse Migration
Whether you’re moving historical data or building real-time pipelines, migrating from Snowflake to ClickHouse shouldn’t be a manual, error-prone process. While exporting via S3 and importing Parquet files works for one-time transfers, it’s not built for continuous use.
Estuary offers a smarter alternative—one that’s real-time, schema-aware, and low-code. With CDC-based capture from Snowflake and Kafka-compatible output to ClickHouse, you get reliable streaming pipelines without managing infrastructure.
Ready to get started?
- Build your first Snowflake to ClickHouse pipeline in minutes - Try Estuary for free
- Join our Slack community for help and ideas
- Talk to our team to plan your architecture
- Follow our Data Digest newsletter to stay up to date with Estuary’s latest features
Related Guides
- Snowflake to BigQuery — Real-time sync from Snowflake to BigQuery
- Snowflake to MotherDuck — Stream Snowflake data into DuckDB-based analytics

About the author
Team Estuary is a group of engineers, product experts, and data strategists building the future of real-time and batch data integration. We write to share technical insights, industry trends, and practical guides.


