Why Migrate from AWS DMS to Estuary Flow
Migrating from AWS Database Migration Service (DMS) to Estuary Flow can significantly improve your data replication pipelines. AWS DMS was initially built for one-time migrations, not as a low-latency streaming platform. Estuary Flow is designed for real-time change data capture (CDC) with minimal lag.
Let’s take a look at some of the key reasons to consider a DMS to Estuary migration include:
- Real-Time Performance: AWS DMS often incurs high replication latency during CDC, whereas Estuary Flow delivers millisecond-level delays for streaming updates. This means more up-to-date data for analytics in Snowflake/Redshift.
- Operational Simplicity: DMS tasks can be brittle – schema changes require manual task reloads or restarts, and mismanaging replication slots can cause issues (e.g., WAL bloat). Estuary Flow handles schema evolution automatically with zero downtime and manages backfills and streaming in one unified pipeline.
- Reduced Overhead: Running DMS involves provisioning and maintaining replication instances, monitoring tasks, and handling failovers. Estuary’s fully-managed SaaS offloads these burdens – no servers to manage and fewer failure points. It also provides exactly-once delivery guarantees and built-in durability, simplifying reliability concerns.
- Cost Efficiency: AWS DMS can accumulate high AWS fees (for replication instances, storage, data transfer, etc.) and often requires additional services (e.g., S3, Snowpipe) for complete solutions. Estuary Flow is optimized for low cost with a usage-based model and eliminates extra components by providing end-to-end replication as a service.
- Multi-Cloud Flexibility: DMS is an AWS-specific service (it’s tightly tied to AWS environments), whereas Estuary Flow works across any cloud or on-prem and natively supports targets like Snowflake (outside AWS). You can seamlessly replicate from PostgreSQL to Snowflake without building an AWS-centric workaround.
In short, AWS DMS often “bottlenecks your data strategy” with its limitations, while Estuary offers a modern, real-time CDC platform as a robust alternative.
The table below summarizes some differences:
- Schema Changes: DMS requires manual intervention or task restarts for schema edits, causing possible downtime; Estuary auto-adapts to schema changes without stopping the pipeline.
- Initial Load (Backfill): DMS typically needs a separate full reload for backfilling data; Estuary performs initial snapshots seamlessly in parallel with CDC.
- Throughput & Latency: DMS can lag on high-volume changes (higher latency); Estuary is built for streaming at scale with minimal latency.
- Supported Environments: DMS is AWS-only; Estuary works with any cloud or database (e.g., Azure, GCP, Snowflake, etc.).
- Cost & Maintenance: DMS incurs ongoing AWS infra costs and requires monitoring; Estuary’s managed service optimizes resource use for lower cost and reduces ops overhead.
To read more about why DMS is not a good choice for continuous replication, take a look at this article.
By migrating to Estuary Flow, data engineers can achieve a more performant, real-time, and lower-maintenance replication pipeline, especially for use cases like feeding analytics platforms (Snowflake/Redshift) continuously with PostgreSQL data.
How to Plan Your AWS DMS to Estuary Migration: 6 Steps
Before jumping into implementation, planning the migration is crucial to avoid data loss or downtime. Key planning considerations for moving from DMS to Estuary include:
Step 1: Establish Migration Approach
The safest method is a phased cutover with parallel pipelines. Note which tables are being replicated and plan to run the Estuary Flow pipeline alongside DMS initially so you can validate that both produce the same results before switching over. This avoids a risky “big bang” flip.
Step 2: Prepare Estuary Environment
Sign up for Estuary’s cloud service (if not done) and ensure you have the needed connectivity. Note that Estuary offers Private Deployments and BYOC (Bring Your Own Cloud) options to run the platform in your network for highly sensitive environments. This guide will assume using Estuary’s SaaS cloud, but private options exist for enhanced security.
Step 3: Schedule and Downtime Windows
Although the goal is zero downtime, schedule the final cutover during a low-traffic period as a precaution. Communicate to stakeholders that a migration is in progress so they can freeze any schema changes or heavy data operations during the transition window.
Step 4: Rollback Plan
Have a contingency plan if something goes wrong. For example, be ready to keep the DMS pipeline running (or quickly restart it) if the Estuary pipeline encounters issues. Ideally, do not decommission DMS until the new pipeline has been proven stable in production for some time.
Step-by-Step Migration Process (PostgreSQL to Snowflake Example)
These steps will help you migrate your replication pipeline from AWS DMS to Estuary Flow. We use PostgreSQL as the source and Snowflake as the target in this example (the process for Redshift is analogous, with differences noted).
Prepare the Source Database (PostgreSQL)
Source: https://stackoverflow.com/questions/52324170/aws-rds-for-postgresql-cannot-be-connected-after-several-hours
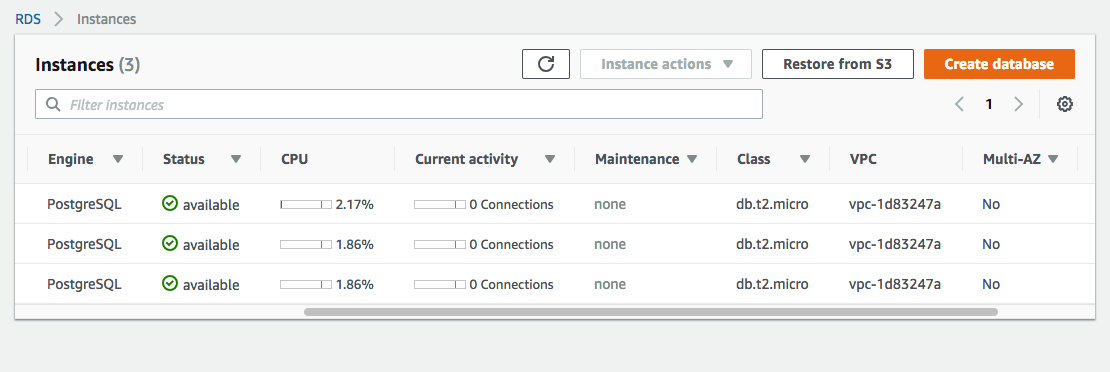
Verify that your PostgreSQL source is ready for logical replication. If DMS CDC is already running, parameters like wal_level=logical and replication slots are likely setup. Ensure you have a replication slot available for Estuary (DMS uses its slot; Estuary will create another). Create a dedicated replication user for Estuary if not reusing the DMS user.
Step 1: Configure PostgreSQL prerequisites
In RDS, the rds_replication role grants logical slot management and replication streaming permissions. Similarly, we suggest giving the capture user SELECT on relevant schemas/tables and usage on the schema. If using a self-managed Postgres, ensure the user has the REPLICATION privilege and appropriate SELECT rights. Also, create a publication for all tables you want to capture (e.g., CREATE PUBLICATION flow_publication FOR ALL TABLES;).
This publication is how Estuary will subscribe to changes.
Tip: If your source tables lack primary keys, consider adding a surrogate key or using REPLICA IDENTITY FULL – it’s needed for CDC to identify rows correctly (this is true for DMS as well).
Step 2: Set Up Estuary Flow Capture for PostgreSQL
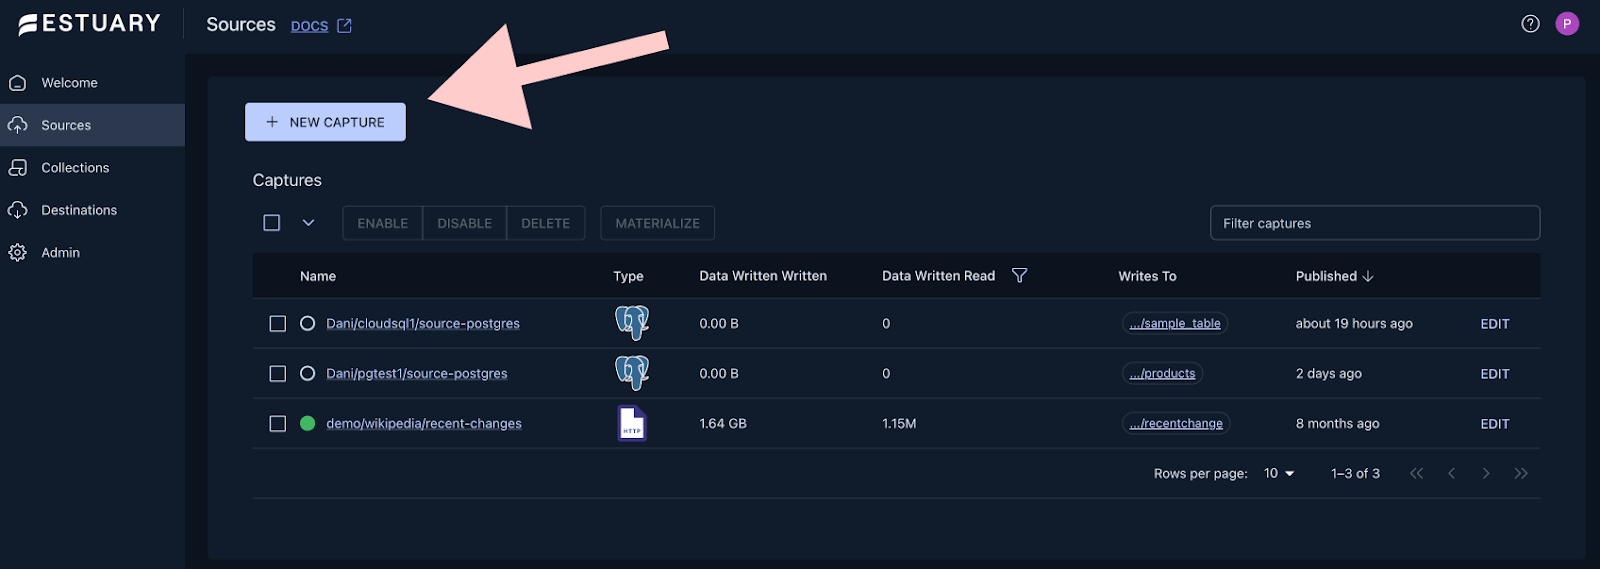
Log in to the Estuary Flow console and create a new Capture (source connector). Choose PostgreSQL as the source type. Provide the connection details for your database (host, port, database name, and the flow_capture user credentials). When configuring the capture, you can select which schemas and tables to include – mirror the selection that your DMS task was replicating.
Once configured, save and publish the capture.
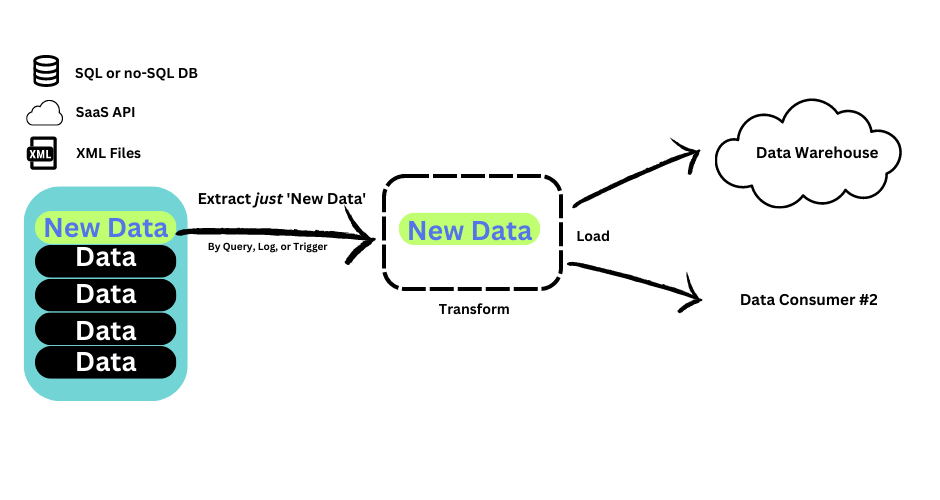
At this point, Estuary will start reading the PostgreSQL WAL (transaction log) and initiate an incremental snapshot of the existing data in each table in parallel. This parallel backfill is a powerful feature: Estuary begins streaming new changes while backfilling historical data, ensuring an up-to-date initial load without waiting hours for a complete copy. The data from the capture is stored in an internal collection (Estuary’s durable, persistent stream).
Step 3: Set Up Estuary Flow Materialization for Snowflake (or Redshift)
Next, configure a Materialization in Estuary Flow, which writes the captured data to your target (Snowflake or Redshift). In the Estuary UI, create a new Materialization and select Snowflake as the destination (the process for Redshift is similar; just choose Redshift connector). Enter the Snowflake connection details: Snowflake account URL, warehouse, database, schema, user, and password.
After entering credentials, specify the collection from Step 2 as the source for this materialization. You can map it to a target table named Snowflake. Ensure this table name doesn’t clash with the one populated by DMS (to avoid dual writes to the same table). One approach is to use a new schema or a suffix (e.g., my_table_estuary) during the parallel run.
Finally, it enables the materialization. Estuary will begin pushing data into Snowflake, backfilling existing records, and then continuous CDC changes. You can monitor Snowflake and see tables being created and loaded in near real-time.
Step 4: Run Parallel Pipelines and Validate Data
With DMS and Estuary pipelines running, you have two parallel replication streams. DMS is still writing to the original target (e.g., schema public.my_table in Redshift or Snowflake via its method), and Estuary is writing to the new target table (e.g., estuary.my_table_estuary).
Let this run for a while, allowing Estuary to catch up and process the backlog. Because Estuary’s snapshot+CDC is efficient, it should catch up to real-time quickly, but the duration depends on your data volume.
Step 5: Cut Over to the Estuary Flow Pipeline
Plan the cutover once the Estuary pipeline is correctly replicating all data. The goal is to swap out DMS for Estuary as the official replication pipeline with minimal downtime. A typical cutover strategy is:
- Sync and Pause (if needed): Choose a cutover time and ensure the source (Postgres) is as quiescent as possible (low write activity). You can often perform a live cutover without pausing the source – Estuary’s CDC will keep up. But if absolute zero data divergence is needed, you might briefly pause application writes for a minute.
- Final Delta Catch-up: Verify that Estuary fully matches the latest changes. You can check the lag metrics in Estuary (if provided) or make a last-row comparison (e.g., a transaction ID or timestamp of the last update in both pipelines).
- Disable DMS Pipeline: Stop or pause the DMS replication task so it stops applying changes. For example, stop the task in the AWS DMS console (but do not delete it yet, in case you need to roll it back).
- Point Consumers to Estuary Data: If you had Estuary writing to a separate schema or table, you need to make that data the primary source for downstream consumers. A convenient method for a data warehouse like Snowflake or Redshift is to rename tables. For instance, in Snowflake, you can do ALTER TABLE analytics.my_table RENAME TO analytics.my_table_old; and ALTER TABLE estuary.my_table_estuary RENAME TO analytics.my_table;. This swaps the Estuary-populated table into the place of the old DMS-populated table with essentially no downtime (Renames in Snowflake are atomic).
- Resume Source Writes (if paused): If you pause incoming data writes, resume them now. Estuary will pick up any new changes. At this point, Estuary Flow is the active pipeline capturing PostgreSQL changes and replicating to Snowflake/Redshift.
The cutover is complete, with Estuary Flow entirely replacing AWS DMS. The process can be done with essentially zero downtime using the above approach – often, the only “pause” is the moment of table renaming, which is instantaneous.
Step 6: Post-Cutover Monitoring and Cleanup
After the cutover, keep a close eye on the new Estuary pipeline. Monitor the Estuary dashboard for any errors or lag. Verify that new inserts/updates in PostgreSQL are showing up in real-time in Snowflake/Redshift via Estuary.
This is also when you execute your rollback plan if critical issues arise (see next section). If all looks good after a suitable monitoring period (say, a few days of normal operations), you can proceed to decommission the old DMS setup:
- Shut down the DMS replication instance (to save costs).
- Remove or archive the DMS task configurations and any artifacts.
Rollback Plan: Safely Reverting if Needed
Even with careful planning, you should be prepared if the migration runs into unexpected issues (for example, a hidden bug in the new pipeline or performance issues under load). Here’s a rollback strategy to minimize risk:
- DMS Standby: Keep DMS stopped (not deleted) after cutover. It can be restarted if needed.
- Data Backup: Back up target data in Snowflake/Redshift at cutover.
- Revert Procedure: If a severe issue occurs in Estuary, stop Estuary, redirect to the old DMS table, and restart the DMS task.
- Communication: Communicate with your team if a rollback occurs.
- Troubleshoot and Re-attempt: Identify and fix the issue in Estuary. Rollback only if the outage is prolonged.
A rollback plan mostly means keeping the old system ready and having backups. Most migrations won’t need it, but it’s a safety net.
Post-Migration Data Validation
After the migration, it’s vital to validate that all data arrived correctly and continues to sync without issues. Some post-migration validation best practices:
- Row-count and Checksum Verification: Completely compare source and target data. For each replicated table, ensure the row counts match between PostgreSQL and Snowflake/Redshift. If available, you can use SQL queries on both ends or a data comparison tool. For example, run SELECT COUNT(*), SUM(hashtext(concat_ws('||', *all_columns*))) on the source and target to compare row counts and a simple checksum.
- Continuous Monitoring: Establish monitoring to verify data freshness and accuracy continuously. For instance, you might set up a job that compares the max timestamp between source and target tables every hour and alerts if the lag exceeds a threshold or if counts diverge unexpectedly. Estuary Flow might also provide metrics or alerts on pipeline health.
- Data Quality Spot Checks: If your data has unique constraints or totals, verify those in the target. For example, if you have UNIQUE(customer_id, order_id) in PostgreSQL, ensure Snowflake doesn’t have duplicates after consolidation. Since Estuary guarantees exactly-once delivery, you should not see duplicates unless they existed in the source or DMS introduced them.
By thoroughly validating after migration, you can be confident that the Estuary pipeline is working correctly and that no subtle issues were introduced.
How Estuary Handles Schema Changes Better than AWS DMS
One common challenge in long-running pipelines is schema evolution – when the source schema changes (e.g., a new column is added, a data type changes, etc.). Handling this is an area where Estuary Flow shines compared to AWS DMS:
AWS DMS and Schema Changes
DMS does not automatically propagate schema alterations on the source. If you alter a table (add a column, drop a column, change type) while a DMS CDC task runs, the new schema change is typically not picked up. The DMS task will often continue replicating the old column or fail if a critical schema mismatch occurs.
The standard approach is to stop the DMS task and resume it with a fresh full load to incorporate the new schema, which implies downtime or at least manual intervention. This is cumbersome for ongoing pipelines.
Estuary Flow Schema Evolution
Estuary Flow was built with dynamic schema handling. When a source collection’s schema no longer matches (say, add a new column in PostgreSQL), Estuary can automatically detect the change (often through an AutoDiscover feature) and update the collection schema and downstream materializations. It allows for a coordinated update so that the pipeline doesn’t break.
In Estuary, schema changes can be applied without stopping the data flow – effectively zero downtime schema evolution. In practice, you might see a notification that the schema has evolved and needs approval to update the materialization. Once approved, the new column will flow.
Best Practices During Migration
If possible, freeze schema changes during the migration period. It simplifies validation if the schema is static. After migration, you can leverage Estuary’s flexibility for future changes.
Example – Adding a Column
Suppose you add a column email to the customer's table in PostgreSQL. In DMS, you’d have to update the task table mapping and possibly do a table reload to get that column into Redshift/Snowflake. In Estuary, the capture will notice the new column (especially if using a publication for all columns,) and you can evolve the collection schema.
Estuary’s schema evolution feature will propagate this to Snowflake by altering the target table or creating a new version of the materialization as needed. No full reloads are required – the new column’s historical data can even be backfilled via a backfill request if necessary (since Estuary can do backfills seamlessly).
Migrating Historical Data (Backfills and Snapshots)
Migrating a replication pipeline isn’t just about ongoing changes; you must also account for historical data. In the context of DMS to Estuary migration:
If your goal is to preserve all historical data changes (for audit), note that neither DMS nor Estuary retroactively captures changes that happened before the pipeline started (unless you have history stored elsewhere). DMS and Estuary both begin CDC from a point in time (usually when the task starts or a specified LSN). However, Estuary’s durable log (collections) will keep all changes from that point onward, and you can replay them or materialize them to any sink at any time. In effect, Estuary can serve as a sort of “time machine” after migration – something DMS doesn’t provide.
Troubleshooting Common Migration Issues
During the migration process or after the cutover, you might encounter some issues. Here are common problems and how to address them:
Replication Slot / WAL Bloat (PostgreSQL)
If the DMS task was stopped improperly or left running in parallel, you might notice PostgreSQL WAL files growing because an old replication slot still holds them. In one real-world case, a mismanaged DMS slot caused WAL files to accumulate until storage ran out. Solution: Before migration, monitor the source's replication slots (pg_replication_slots). After the cutover, drop the DMS slot if DMS doesn’t clean it up. Estuary will use its slot; ensure it’s active and advancing. If Estuary’s slot falls behind (e.g., if the connector was down), address the cause quickly to avoid similar WAL buildup. Estuary’s platform should alert if the capture is not keeping up.
Connection or Network Errors
It’s possible Estuary can’t connect to the source or target due to network restrictions (for instance, Estuary Cloud trying to access a database in a private VPC). Solution: Use a VPN, VPC peering, or the Estuary Private Deployment if needed. In AWS, you might use a PrivateLink or tunnel to allow the SaaS connector to reach the DB: Double-check firewall rules, security groups, and DNS resolution for your database endpoints. Enforce SSL connections – if the certificate is self-signed or from an internal CA, provide Estuary with the cert or turn off cert verification (if in a closed network). On Snowflake, ensure network policies don’t block the Estuary IP.
Schema Mismatch Errors
For example, Estuary materialization might be an error if the Snowflake table schema doesn’t match the collection (maybe someone altered the Snowflake table manually, or the schema evolution wasn’t applied). Solution: Use Estuary’s schema evolution to update the materialization. This might involve altering the Snowflake table to add the new column or adjusting data types.
Estuary’s platform may automate part of this but ensure all components (capture and materialization) agree on the schema. In a migration scenario, if you encounter this during the parallel run, it is likely a schema change happened that DMS ignored. Pause and resolve it (possibly reload DMS or proceed with Estuary, which handles it gracefully).
Cost Implications and Optimization
When comparing AWS DMS vs Estuary Flow from a cost perspective, consider both direct costs and indirect (maintenance effort):
- AWS DMS Costs: DMS is charged hourly for the replication instance. For example, a dms.c5.large or more prominent instance running 24/7 can cost a significant amount monthly. That cost grows if you need a large instance to handle high throughput or multiple tasks. Additionally, DMS may incur expenses for logging or backups.
- Estuary Flow Costs: Estuary as a cloud service likely has a subscription or usage-based pricing (for instance, based on data volumes, number of pipelines, etc.). You eliminate the need to run an EC2-like instance for replication. Estuary’s model can be more cost-effective, especially when dealing with multiple pipelines or bursty loads since it can scale internally. Also, consider that with Estuary, you consolidated numerous tools (DMS + Kafka + custom loaders or DMS + S3 + Snowpipe) into one. Fewer moving parts often means lower overall cost.
Estuary Flow can be more cost-effective than AWS DMS for continuous replication, especially when factoring in simplified architecture (no extra staging or ETL jobs) and reduced maintenance. Constantly monitor your usage and adjust configurations to optimize costs in the new system.
Security and Networking Considerations
When migrating to a new pipeline platform, it’s important to review security and network setups to ensure data remains secure:
- Access Control: In AWS, DMS’s resources were controlled by IAM (the replication instance, etc.). In Estuary, ensure firm user access control to the Estuary console – use SSO or strong passwords since this is a powerful tool (you wouldn’t want an unauthorized person altering pipelines). Estuary may support role-based access control for different environments, which you should leverage if multiple team members are involved.
- Private Deployments: For highly sensitive data (financial, healthcare, etc.), consider Estuary’s Private Deployment offering. This gives you a dedicated instance of the Estuary platform, typically running isolated from the multi-tenant SaaS. It can be within a VPC or your cloud environment, meaning all data processing stays in your network. This is akin to running your DMS instance with Estuary’s software and support. It provides enhanced security since no other customers’ data will co-mingle, and you will have complete control of networking.
- Network Bandwidth: From a networking standpoint, ensure your bandwidth is sufficient and secure. The replication traffic can be constant; using a private link ensures you’re not subject to internet variability or man-in-the-middle risk.
- Compared to DMS: One nice thing about removing DMS is that you no longer have to maintain an EC2 instance in your VPC for replication. However, that instance was under your control in terms of network. With Estuary, you trade that for a managed service. You can get a similar level of network control by using the options above.
To sum up, migration enhances security. Everything possible with DMS can be configured in Estuary Flow. Early security team engagement ensures alignment with company policies, leading to a secure, compliant pipeline and reduced attack surfaces.
Enjoy your streamlined DMS to Estuary migration and the improved data workflows that come with it!
Further Reading

About the author
Dani is a data professional with a rich background in data engineering and real-time data platforms. At Estuary, Daniel focuses on promoting cutting-edge streaming solutions, helping to bridge the gap between technical innovation and developer adoption. With deep expertise in cloud-native and streaming technologies, Dani has successfully supported startups and enterprises in building robust data solutions.


