You can connect Mailchimp to Snowflake manually, through APIs, or automatically using Estuary, the right-time data platform that unifies batch, CDC, and streaming in one dependable system. Estuary lets you move marketing data from Mailchimp into Snowflake with no code, keeping your analytics and reporting continuously up to date.
Mailchimp helps marketing teams manage customer relationships through email campaigns, automation, and audience insights. However, for advanced analysis, trend tracking, and ROI measurement, you need the scalability and flexibility of Snowflake.
By integrating the two, you can centralize campaign and engagement data in one warehouse, build unified dashboards, and uncover insights that drive smarter marketing decisions.
This guide explores three ways to move data from Mailchimp to Snowflake:
- Manual export and import
- API-based extraction
- Automated right-time integration with Estuary
An Overview of Mailchimp
Mailchimp is a leading email marketing and automation platform that helps businesses build stronger customer relationships. It provides tools to create, manage, and analyze campaigns while simplifying audience segmentation and engagement tracking.
The platform combines ease of use with advanced analytics, allowing marketers to understand customer behavior and improve conversion rates through targeted communication. Whether you are a small business or a growing enterprise, Mailchimp offers the scalability and integrations needed to support evolving marketing needs.
Key Features of Mailchimp:
- Analytics and Reporting: Mailchimp provides detailed insights into campaign performance, including open rates, click-through rates, unsubscribes, and revenue generated. These reports help marketers measure effectiveness and refine strategies.
- A/B Testing: Test variations of subject lines, content, and send times to identify what drives the most engagement.
- Automation: Create automated workflows that trigger based on customer actions, such as sign-ups, purchases, or abandoned carts.
- Third-Party Integrations: Connect with popular platforms like Shopify, WordPress, and Zendesk to enrich customer data and run more personalized campaigns.
- Audience Management: Manage lists, segments, and tags to deliver messages that resonate with each customer group.
In Estuary, the Mailchimp connector captures data from three primary resources — lists, campaigns, and email activity — using incremental syncs. This allows you to collect data updates efficiently and move them into Snowflake without duplicating or reloading entire datasets.
An Overview of Snowflake
Snowflake is a fully-managed, cloud-based data warehouse that is built on top of AWS, Azure, and Google Cloud infrastructure.
The architecture of Snowflake decouples storage and computing, allowing you to scale independently. This lets you scale up or down as needed and pay only for the resources you use. While computation is billed on a per-second basis, storage is billed in terabytes stored per month.
Here are some other essential features of Snowflake, making it a popular choice for data warehousing:
- Cloning Functionality: You can use Snowflake’s Zero Copy Cloning feature to quickly create a copy of any table, schema, or entire database in real time. Instead of deep copies, it stores pointers to the original data, helping save a lot of space when compared to copy functions of other data warehouses.
- Multi-Cloud Support: Snowflake offers support for public cloud providers like Microsoft Azure, Amazon Web Services (AWS), and Google Cloud Platform (GCP). This gives you the flexibility to choose the cloud provider of your choice or opt for a multi-cloud strategy.
- Supports Semi-structured Data: Snowflake has built-in support for importing or exporting data in semi-structured formats like JSON, Avro, ORC, XML, and Parquet. It also provides native data types like VARIANT, OBJECT, and ARRAY to store semi-structured data.
Integrating Snowflake with Mailchimp enables marketing and analytics teams to unify email campaign metrics, audience data, and engagement trends in one centralized platform. This integration allows deeper insights into customer behavior, campaign performance, and overall marketing ROI.
Mailchimp to Snowflake Integration Methods
You can use one of the following methods to move data from Mailchimp to Snowflake.
- Method #1: Using manual import and export
- Method #2: Using APIs
- Method #3: Using SaaS alternatives like Estuary
Method #1: Using Manual Import and Export to Move Data From Mailchimp to Snowflake
The simplest way to move data from Mailchimp to Snowflake is by manually exporting it from Mailchimp and importing it into Snowflake. While this method requires no additional tools, it can be time-consuming and is best suited for occasional data transfers or small datasets.
Step 1: Export Data from Mailchimp
Mailchimp allows you to export account data for backup or analysis. You can export the following data types:
- Audiences
- Reports
- Templates
- Campaigns
- Content Studio files
- Events
To export data:
- Log in to your Mailchimp account.
- Go to Account → Settings → Manage My Data.
- Choose the data you want to export.
- Mailchimp will process your request and send an email once the export is ready.
- Download the ZIP file that contains your data in CSV, TXT, or HTML format.
Note: Mailchimp limits full account exports to once every 24 hours, and large exports may take time to process.
After exporting, you may need to clean or reformat the data to match Snowflake’s schema requirements.
Step 2: Import Data into Snowflake
Once your Mailchimp data is ready, you can load it into Snowflake using one of the following methods:
- Snowflake Web UI: Use Snowsight to upload and load CSV files directly into a target table.
- SQL Commands: Run COPY INTO or INSERT statements from your SnowSQL client.
- Snowpipe: Automate file ingestion by monitoring a stage and loading new data automatically.
For example, you can create a stage, define a file format, and load CSV data as shown below:
plaintextCREATE OR REPLACE STAGE mailchimp_stage;
CREATE OR REPLACE FILE FORMAT mailchimp_csv
  TYPE = 'CSV'
  FIELD_DELIMITER = ','
  SKIP_HEADER = 1;
PUT file://C:\exports\mailchimp_campaigns.csv @mailchimp_stage;
CREATE OR REPLACE TABLE campaigns (
  id STRING,
  campaign_name STRING,
  status STRING,
  send_time TIMESTAMP
);
COPY INTO campaigns
FROM @mailchimp_stage
FILE_FORMAT = (FORMAT_NAME = 'mailchimp_csv');
After the import, you can query and analyze your Mailchimp data within Snowflake.
Limitations of the Manual Method
- Time-Consuming: Exporting and importing data manually can take hours, especially for large or frequent updates.
- Error-Prone: Manual preprocessing increases the risk of inconsistencies or data loss.
- No Automation: You must repeat the process each time new data is needed.
- Lack of Freshness: Data in Snowflake quickly becomes outdated without automatic syncs.
For organizations that rely on regular marketing updates, manual migration is often not sustainable. The next method offers more flexibility using Mailchimp’s REST API.
Method #2: Using APIs to Move Mailchimp Data to Snowflake
Mailchimp has a rich REST API that you can use to extract your account data. The API exposes a large number of endpoints for resources like Automations, Campaigns, Lists, Reports, and Templates, among others, for you to interact. Use tools like CURL or Postman, or HTTP clients such as Apache HTTPClient for Java, Python HTTP-client, etc.
When you use the Mailchimp API to extract data, a user might appear in more than one list, so you must reduplicate the results accordingly. After extracting the data, it must be processed to align with the Snowflake data model before loading it. Data in Snowflake is organized into tables with a well-defined set of columns, each with a specific data type. For more information on the data types that Snowflake supports, read the Snowflake data types documentation. Before you load your Mailchimp data into Snowflake, there are some data loading considerations you must take into account.
To load the data into Snowflake, you can use SnowSQL, Snowflake’s CLI, to execute SQL queries. Alternatively, you can also use Snowpipe REST API to load the transformed data into Snowflake.
Method #3: Using SaaS Tools Like Estuary to Move Data From Mailchimp to Snowflake
For an easier and more time-efficient integration between the two platforms, consider using third-party ETL tools like Estuary.
Estuary provides pre-built connectors, which simplifies the process of setting up data integration pipelines. An added advantage of Flow is that it’s a real-time data operations platform. You can use the variety of connectors to receive real-time data from a range of sources and then materialize the data in different formats.
Here are the steps you can follow for Mailchimp to Snowflake integration using Estuary Flow.
Step 1: Register or Log In
You will need an Estuary account to get started. Register for a free account if you don’t already have one, and then sign in.
Step 2: Set up the Data Source
Prerequisite: A Mailchimp account
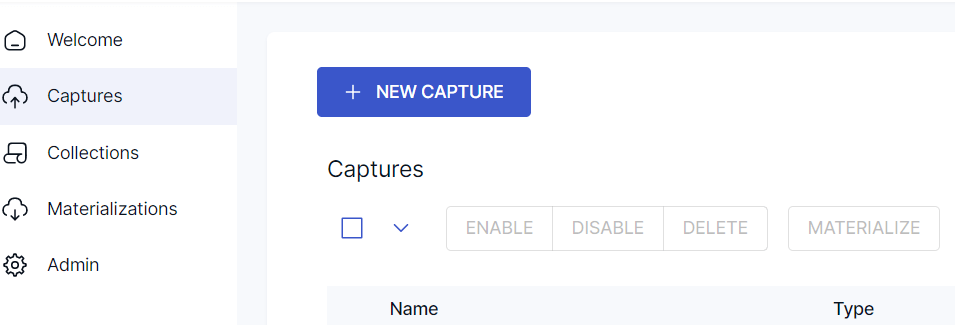
Upon logging in, you will be redirected to the Estuary dashboard with an easy-to-use interface. Now, you must set up the source end of the data pipeline, which is Mailchimp. On the left-side pane of the dashboard, click on Captures. Then, click on the NEW CAPTURE button.
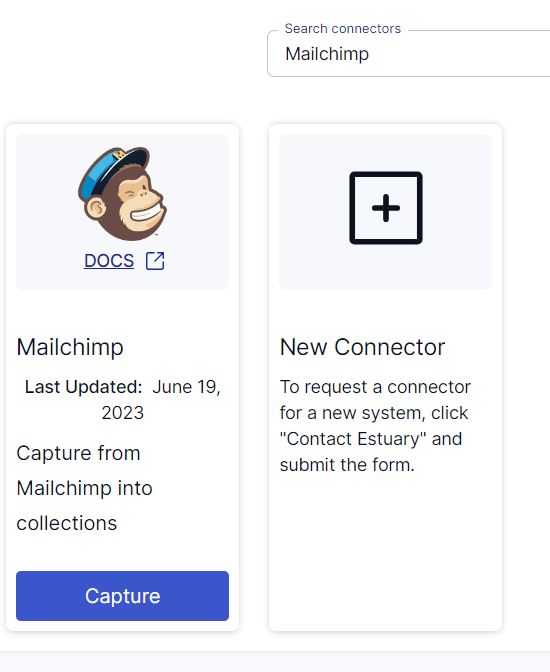
In the Search connectors box, search for Mailchimp. The connector will appear in the search results, following which you can click on the connector’s Capture button.
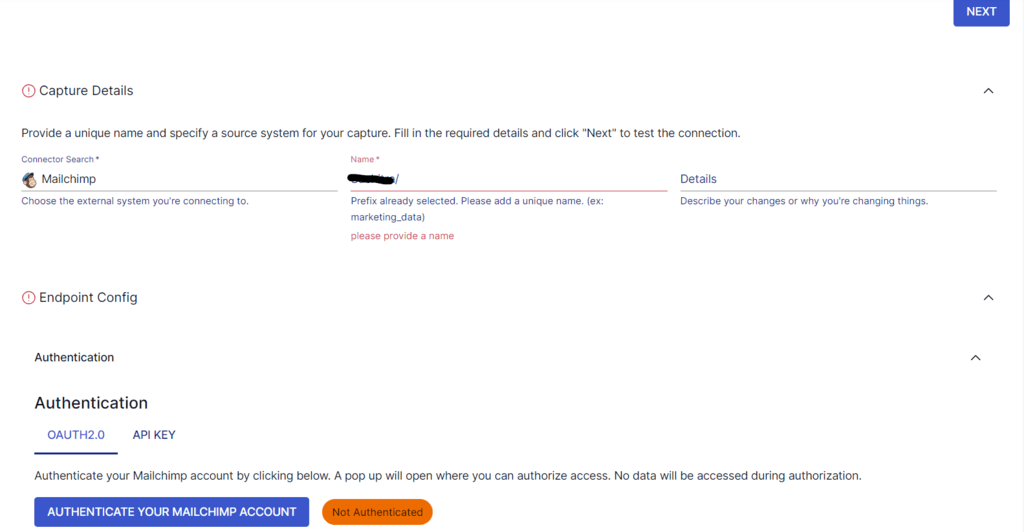
Once you’re on the Mailchimp connector page, provide a Name for the connector, and authenticate your Mailchimp account using OAuth2.0 or API Key. After completing the authentication, click on the Next button, then click on Save and Publish.
Estuary’s Mailchimp connector captures data from three key resources:
- Lists
- Campaigns
- Email Activity
These are synced incrementally, ensuring new or updated records are captured without reloading entire datasets.
Step 3: Set up the Data Destination
Ensure you have a user role with appropriate permissions to your Snowflake database, schema, and warehouse for connecting to Flow. You can run this quick script to accomplish this.
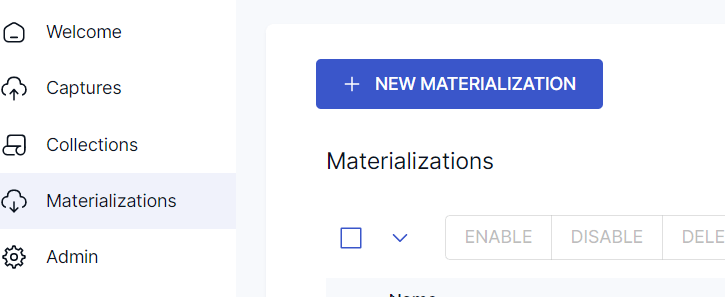
The next step is to set up the destination end of the pipeline, which is Snowflake. You can do this by clicking on Materialize Connections in the pop-up following the successful capture from your Mailchimp account. Alternatively, you can navigate to the Estuary dashboard and click on Materializations, then click on the NEW MATERIALIZATION button.
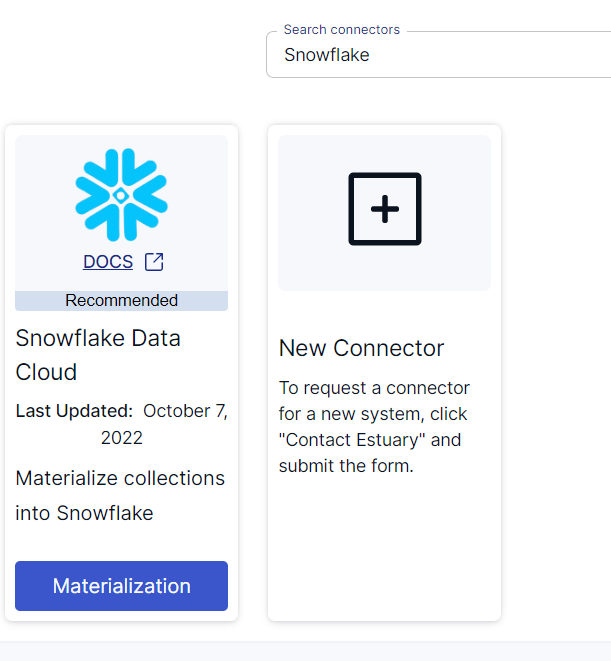
Either search for Snowflake in the Search connectors box or scroll down and search for it. Then, click on the Materialization button of the Snowflake Data Cloud connector.
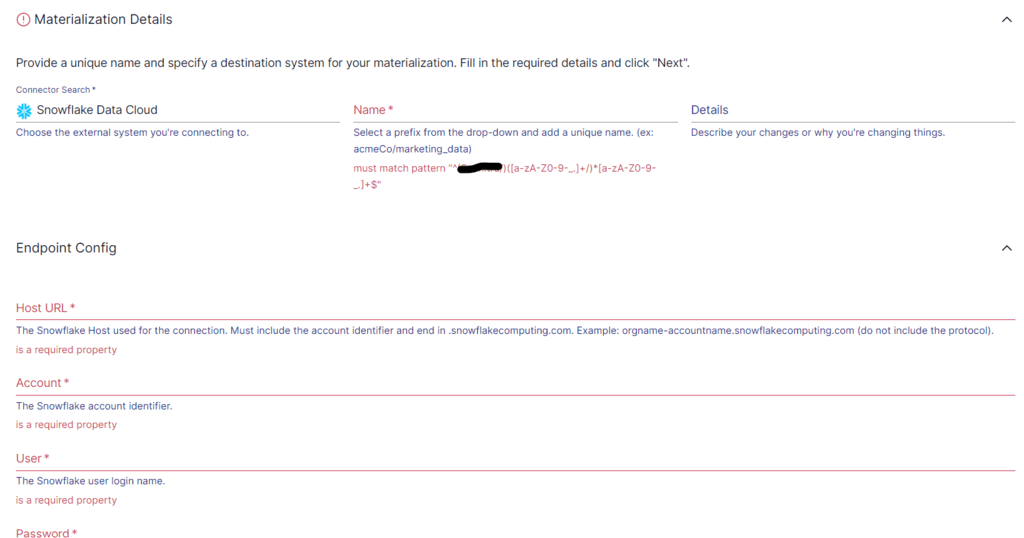
On the configuration page, provide the required connection details, including your Host (Account URL) such as orgname-accountname.snowflakecomputing.com, the Database where data will be stored, the Schema for organizing tables, the Warehouse that will handle compute operations, and the Role associated with the Snowflake user that has the necessary access privileges.
Secure Authentication with Key-Pair (JWT)
Snowflake now requires key-pair authentication instead of username and password.
Generate a key pair using these commands:
plaintextopenssl genrsa 2048 | openssl pkcs8 -topk8 -inform PEM -out rsa_key.p8 -nocrypt
openssl rsa -in rsa_key.p8 -pubout -out rsa_key.pub
Add the public key to your Snowflake user:
plaintextALTER USER ESTUARY_USER SET RSA_PUBLIC_KEY='MIIBIjANBgkqh...';Then paste your private key into Estuary’s Private Key field for authentication.
- Choose the Mailchimp source collections you want to sync.
- Click Save and Publish to begin materializing your data into Snowflake.
Estuary materializes Mailchimp data into Snowflake tables automatically, keeping them up to date on your chosen schedule.
For more detailed information, refer to the Estuary documentation on
Conclusion
Among the three methods to move data from Mailchimp to Snowflake, the one that requires the least manual effort and time is Estuary Flow. The manual export and import method can be time-consuming and error-prone, especially for large volumes of data or frequent updates. Unlike Estuary Flow, the manual method is unsuitable for real-time data transfer.
Using APIs involves building a custom script. Apart from requiring development skills for the script, it also requires maintenance for any API updates.
But, by using Estuary’s streaming capabilities, you can successfully execute real-time Mailchimp to Snowflake integration with minimal effort. This will enable you to gain real-time insights for efficient data-driven decision-making.
Estuary Flow has a range of connectors that allow you to integrate any two platforms in only a few minutes. Register for a free account to start building data pipelines. Your first pipeline is free!
Here are some other integrations that use Snowflake as the destination:

About the author
With over 15 years in data engineering, a seasoned expert in driving growth for early-stage data companies, focusing on strategies that attract customers and users. Extensive writing provides insights to help companies scale efficiently and effectively in an evolving data landscape.


