How to Move Data From Zendesk to Redshift: A Complete Guide
Unlock insights with Zendesk & Redshift! Learn how to enhance customer experiences by migrating critical customer data from Zendesk to Amazon Redshift. Optimize strategies using advanced analytics. Read on for a comprehensive guide
Zendesk is a leading customer support platform that holds critical customer data. Businesses can benefit from this untapped data to enhance customer experiences through data-driven decision-making. An effective approach is to centralize all the customer data into a reliable data warehouse like Amazon Redshift. By migrating your Zendesk data to Redshift, you can consolidate and leverage your customer support data for advanced analytics and comprehensive reporting. This, in turn, will help unlock valuable insights for optimizing customer service strategies.
Let’s look into an overview of Zendesk and Redshift before getting to the methods you can use to move Zendesk data to Redshift.
Zendesk: An Overview
Zendesk is a cloud-based customer service and support platform that lets you connect with customers effectively. It brings data of all your customer interactions or touchpoints—phone, email, chat, social media, or any other channel—to a single, easy-to-use platform. This makes it relatively straightforward to keep track of all support requests, quickly answer queries, and monitor the effectiveness of customer service agents.
Here are some key features of Zendesk:
- Ticketing System: A fully-integrated ticketing system helps you track, organize, manage, and solve tickets on customer inquiries, issues, and support requests. You can also send tickets to the best agent on the job to ensure timely resolution.
- Knowledge Base: Zendesk’s knowledge base software allows you to create a knowledge base, like a FAQ page for self-service options for customers. You can also use it for specific departments, agents only, or the public, apart from customers.
- Chat: Zendesk Chat lets you engage in real-time chat with customers right on your mobile app, website, social media, or business channels. Bots and integrations help customers do more themselves, and agents get involved only when necessary.
- Analytics and Reporting: Zendesk provides analytics and reporting capabilities for insights into how customers interact with your brand. It offers pre-built dashboards for sales and service performance. You can also use customizable charts and dashboards to track and analyze key metrics.
Redshift: An Overview
Amazon Redshift is a cloud-based, fully-managed data warehousing solution that is a part of Amazon Web Services (AWS). The architecture of an Amazon Redshift data warehouse has clusters as the core infrastructure component. Redshift clusters comprise one or more compute nodes that perform data storage and processing functions. A cluster provisioned with two or more compute nodes will have an additional leader node to coordinate the compute nodes and handle external communication.
Here are some useful features of Redshift that make it an ideal storage solution:
- Columnar Storage: Redshift uses columnar storage for its data and transparently converts incoming data to a columnar format. This helps speed up query execution since only the columns required for a query are read.
- Massively Parallel Processing (MPP): Redshift distributes its data and query execution across multiple nodes in a cluster, allowing parallel processing of queries. This enables fast query execution even on large volumes of data.
- Workload Management (WLM): This feature enables users to manage workload priorities flexibly such that short, fast-running queries won’t get stuck behind long-running queries in the queue.
- Automatic Data Compression: Redshift automatically manages compression encoding for all columns of a table. Some supported compression encodings include run-length, delta, and byte-dictionary encoding. Data compression helps minimize storage requirements and improves query performance.
Methods To Move Data From Zendesk to Redshift
You can move Zendesk data to Redshift tables using three different methods:
- Method #1: Using custom scripts
- Method #2: Using export and COPY
- Method #3: Using SaaS tools like Estuary
Method #1: Using Custom Scripts to Move Data From Zendesk to Redshift
Zendesk provides different APIs for you to integrate. The APIs are based on the REST API architecture and can be accessed using HTTP clients or tools like Postman or CURL. Conveniently, Zendesk also offers a few SDKs and libraries for you to access the API from your choice of framework without dealing with any HTTP-related technicalities.
To ensure secure access, Zendesk's APIs are SSL-only, requiring users to be verified before making API requests. Authentication methods include using your email address and password, email address and API token, or an OAuth access token.
Another factor to consider when using this method is that the Zendesk API always returns the results in JSON format. You must ensure that the Zendesk JSON files are compatible with the Redshift schema before transferring the data.
It’s also important to note that you cannot use line-by-line updates or SQL “upsert” operations with Redshift. So, you must use an intermediary source like Amazon S3 before moving the data to Redshift. Here’s how you can do this:
Step 1: First, create an S3 bucket by executing an HTTP PUT on the Amazon AWS REST API endpoints for S3. Use a tool like CURL or Postman, or Amazon-provided libraries to create the bucket.
Step 2: Once the bucket is created, you can send your extracted Zendesk data to Amazon S3 using the same AWS REST API.
Step 3: Then, you can use the Redshift COPY command to move your data from S3 into Redshift.
Method #2: Using Export and COPY to Move Data From Zendesk to Redshift
Zendesk allows you to export account data like users, tickets, or organizations to CSV or JSON format, depending on requirements.
First, you must enable data exports in your Zendesk account, for which the account owner must contact Zendesk Customer Support.
The different export options include:
- Full JSON export
- Full XML export
- CSV export
- User XML export
Upon completion of the export, Zendesk will send you an email with a download link to your data file. You can use the link to download the zip file.
After exporting your Zendesk data, you may need to transform it to match the schema of your Redshift database. Then, load the downloaded and transformed file in an AWS S3 bucket.
Alternatively, you can load the file to an Amazon EMR cluster or a remote host accessed using an SSH connection.
After loading the data to the intermediary storage, use the Redshift COPY command to load the CSV or JSON files to your Redshift cluster.
Method #3: Using SaaS Tools Like Estuary to Move Data From Zendesk to Redshift
Third-party ETL tools make it convenient to move data between platforms, often achieving the same in minutes. These tools are best suited for reducing the manual extraction and deployment of data.
Estuary Flow is one such SaaS tool that can simplify the process of moving data from Zendesk to Redshift. The range of readily-available, built-in connectors and an easy-to-use interface allow you to create a data pipeline between the two platforms in a few clicks. Once deployed, the pipeline will operate in real time without manual effort.
Follow these steps to move data from Zendesk to Redshift using Estuary Flow:
Step 1: Log In
You must log in to your Estuary account to get started. If you don’t have an account yet, register for a free account.
Step 2: Create a New Capture
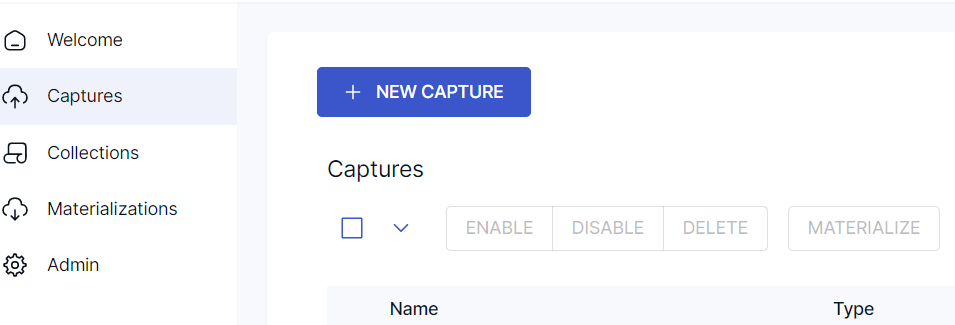
Upon logging in, you’ll see the Estuary dashboard. Click on Captures on the left-side pane of the dashboard to start setting up the source end of your pipeline.
Next, click on the NEW CAPTURE button.
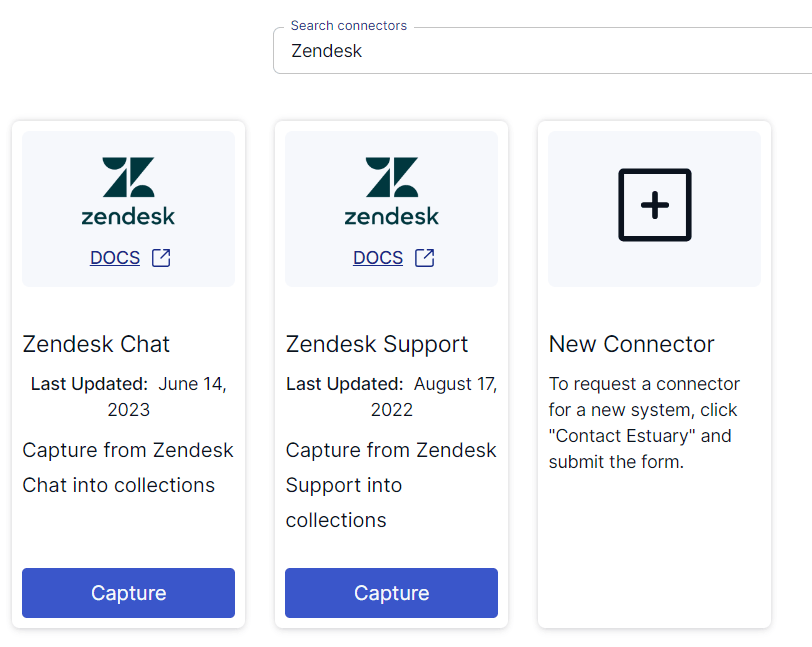
Search for Zendesk in the Search connectors box. The search results will provide you with two connector options—Zendesk Chat and Zendesk Support.
If you want to capture data from Zendesk Chat, then click on the Capture button of the connector. You’ll be redirected to the Zendesk Chat connector page.
Before you use the Zendesk Chat connector, ensure that you complete the prerequisites.
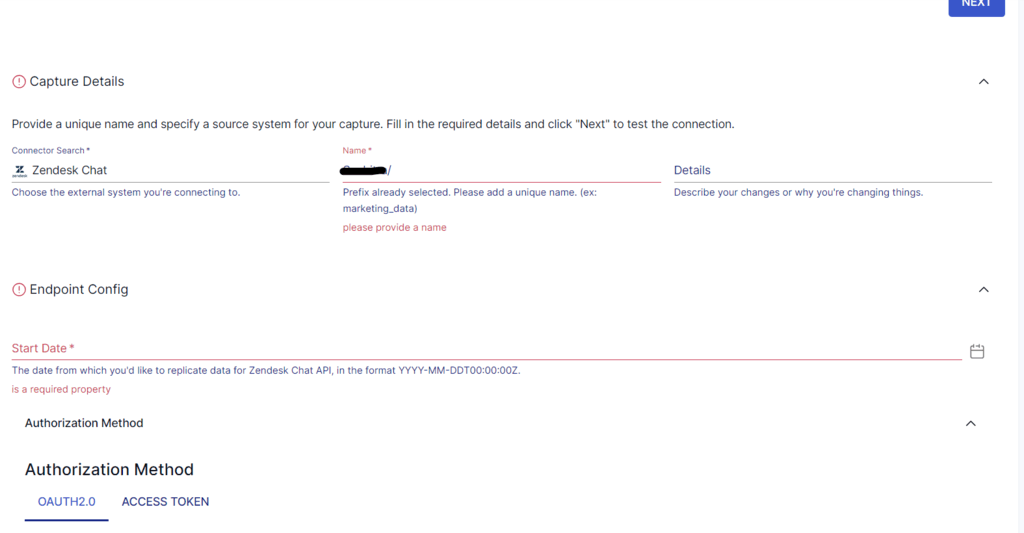
Provide a unique Name for the connector and the Start Date for the date from which you’d like to replicate the data. You can authenticate your Zendesk account with OAuth2 or an access token. Click on the NEXT button, then click on Save and Publish. The connector will successfully capture data from Zendesk into Flow collections.
However, if you want to capture data from Zendesk Support, click on the Capture button of the connector in the search results.
Before you use the Zendesk Support connector, complete the prerequisites.
On the Zendesk Support connector page, enter a Name for the connector, Start Date, and your Zendesk Subdomain. For authentication, you can use OAuth2 or API Token. After completing authentication, click on the NEXT button, then click on Save and Publish. This will capture your Zendesk data into Flow collections.
Step 3: Set Up the Destination End of Your Data Pipeline
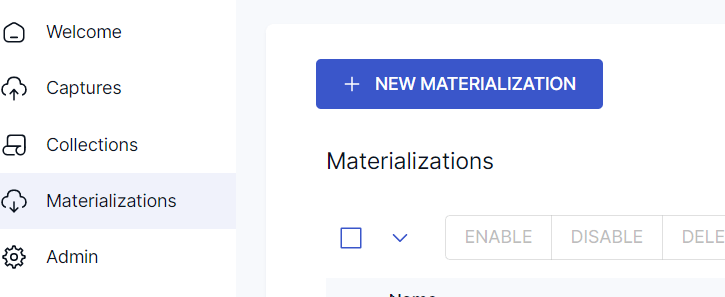
Click on Materialize Connections in the pop-up that appears after a successful capture. Alternatively, click on Materializations on the left-side pane of the Estuary dashboard. Then, click on NEW MATERIALIZATION.
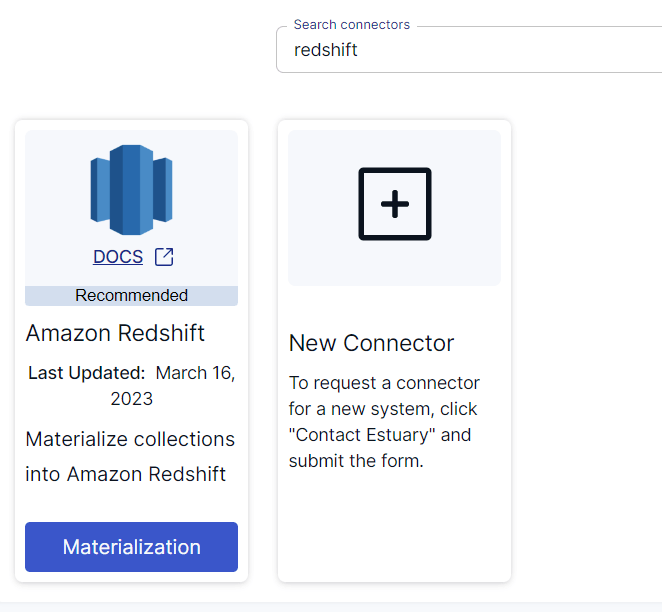
Search for Redshift in the Search connectors box. You’ll find the Amazon Redshift connector in the search results.
Click on the Materialization button of the connector to get to the Amazon Redshift connector page.
Before proceeding, you must set up Redshift to connect with Flow. Learn how to do this here.
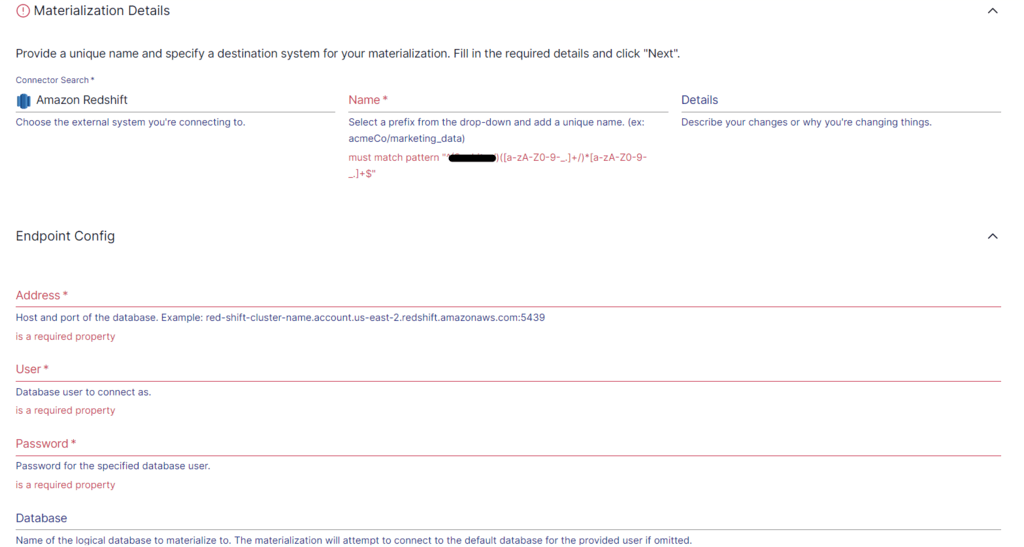
On the Redshift connector page, fill in the required details like a unique Name for the connector, the Address of the database, the User, and the Password.
Collections will be automatically selected for you, but you also have the option to use the Source Collections feature for manual selection of the collections you want to materialize into your Redshift database.
Click on NEXT, then click on Save and Publish.
The connector will materialize Flow collections into tables in your Amazon Redshift database.
If you’d like more information on this process, refer to the Estuary documentation:
- Zendesk Chat source connector
- Zendesk Support source connector
- Amazon Redshift materialization connector
- Creating a data flow
Conclusion
By migrating your data from Zendesk to Redshift, you can leverage Redshift’s analytical capabilities for valuable insights and improved decision-making. Among the three different methods that can move data from Zendesk to Redshift, the easiest and most efficient way is to use Estuary Flow. By creating a real-time data pipeline between the two platforms, Estuary Flow allows you to harness the power of real-time insights.
Use Estuary Flow to establish a real-time connection between different platforms with its range of integrated connectors. Register for an account to get started today.
Here are some other connections involving Redshift as the destination database:

About the author
With over 15 years in data engineering, a seasoned expert in driving growth for early-stage data companies, focusing on strategies that attract customers and users. Extensive writing provides insights to help companies scale efficiently and effectively in an evolving data landscape.


