When it comes to real-time information transmission, Webhooks have an important role in facilitating the exchange of data when specific events occur within an application. These events act as a trigger and enable swift delivery of alerts to designated destinations.
The data integration of Webhooks to Amazon Redshift is an efficient approach to capturing live events and insights directly into a powerful data warehousing solution. It ensures a quick response time and enables you to analyze and respond to data as it becomes available immediately. The integration enhances the efficiency of data flow between applications, thereby contributing to a more streamlined and effective data analysis process.
In this guide, we’ll cover all the important information you need to start loading Webhooks to Amazon Redshift.
What Is a Webhook?
Webhooks, also referred to as web callbacks or HTTP push APIs, serve as a method for programs to deliver real-time data to other applications. Programs can use webhooks to automatically notify other applications when an event occurs instead of requiring those applications to poll for data frequently.
When any change or update occurs at the source system, it triggers an HTTP call-back mechanism. It informs the destination system about the change, allowing it to process this new information.
Unlike traditional APIs, a Webhook transfers data immediately, eliminating the latency and thereby ensuring real-time results. The efficiency benefits both the provider and the consumer by enabling quicker reactions to events and reducing the resources required for constant polling. However, the drawback lies in the initial complexity of setting up webhooks.
With the increasing prevalence of event-driven actions, Webhooks offer cost-effective solutions for building event reactions, ensuring seamless data integration, and creating an interconnected web ecosystem.
Introduction to Amazon Redshift
Amazon Redshift is a fully managed, cloud-based data warehousing service provided by Amazon Web Services (AWS). Designed for large-scale data storage and analysis, Redshift supports complex queries on datasets ranging from hundreds of gigabytes to more than a petabyte.
Redshift offers you the flexibility to start with just what you need and seamlessly scale up to align with your evolving requirements for varied business needs. This is possible due to the Redshift architecture that involves leader nodes and compute nodes. The leader node is responsible for managing client collections and handling queries, along with multiple compute nodes that store data and execute queries.
With massively parallel processing (MPP) and columnar storage, Redshift performs query executions efficiently. Redshift’s architecture also supports high concurrency, allowing multiple users to perform queries simultaneously without degradation.
An added advantage of Redshift is that it can seamlessly integrate with other AWS services, such as Amazon S3, Amazon DynamoDB, and AWS Data Pipeline.
Methods to Load Data Using Webhook to Redshift
You can use two methods to load data from Webhooks to Amazon Redshift.
- The Automated Way: Using Estuary Flow for Webhooks to Amazon Redshift Integration
- The Manual Approach: Using Custom Scripts to Load Data From Webhooks to Amazon Redshift
The Automated Way: Using Estuary Flow for Webhooks to Amazon Redshift Integration
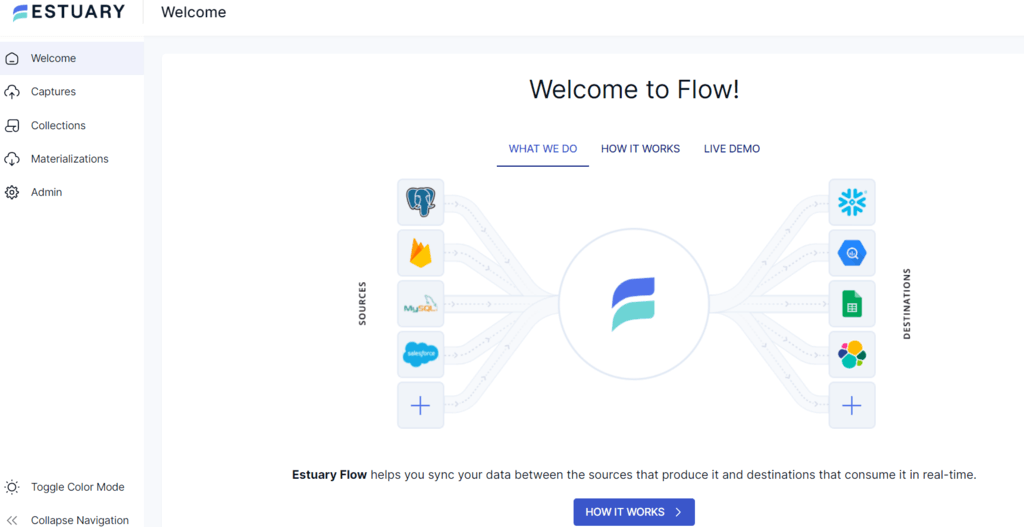
With powerful SaaS tools like Estuary Flow, the integration of Webhooks to Redshift will only take you a few minutes to set up. It is an efficient no-code data integration tool that will transfer data in real time. You can use Estuary Flow to create an optimized real-time integration pipeline that guarantees reduced pipeline latency. This is especially useful for high-performance needs and fluctuating data volumes.
With 200+ pre-built connectors and an intuitive interface, all it takes are a few clicks to transfer data from Webhook to Redshift.
Pre-requisites
Step 1: Configure Webhook as the Source
- Sign in to your Estuary account and click on the Sources option on the left-side pane of the dashboard.
- Click the + NEW CAPTURE button.
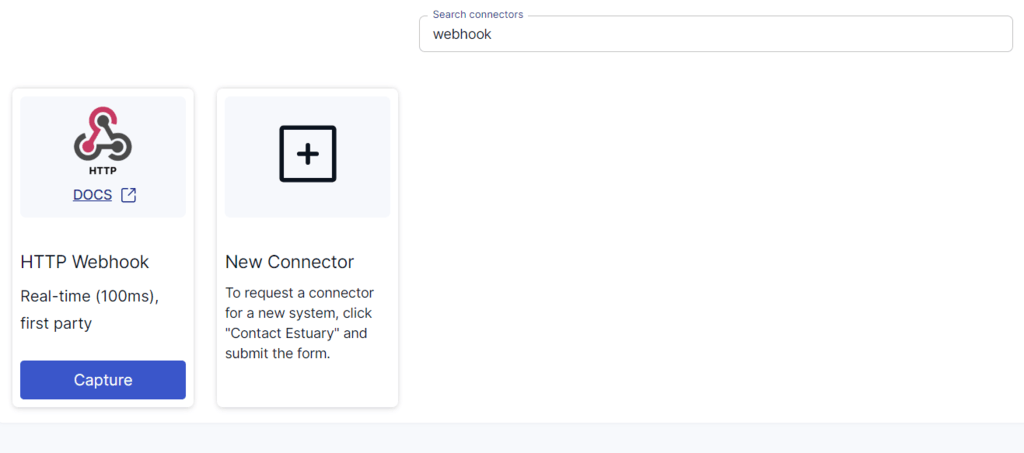
- Use the Search connectors field to search for the Webhook connector. When you see it in the search results, click its Capture button.
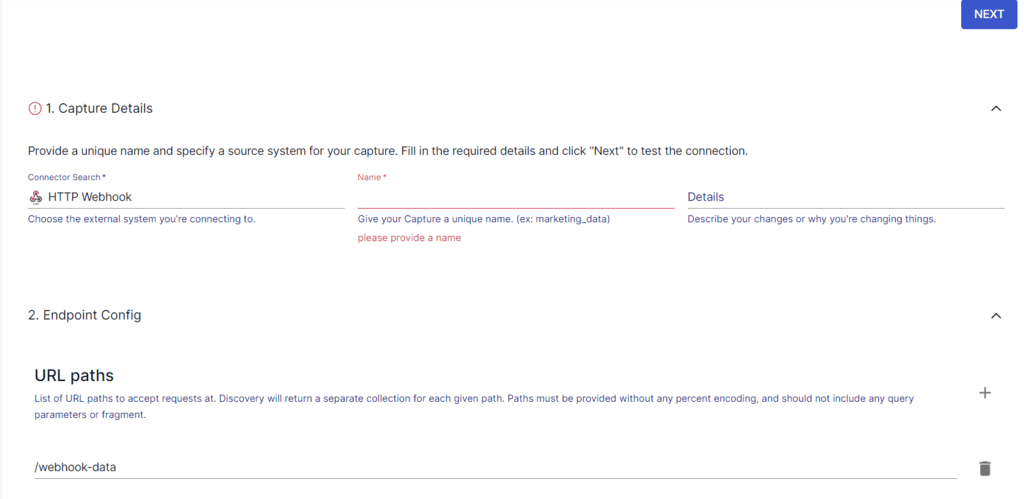
- You will be redirected to the Create Capture page, where you can configure the Webhooks connector. Enter the relevant information, including a Name for the capture and URL paths.
- After filling in the required details, click NEXT > SAVE AND PUBLISH. The connector will capture data from incoming HTTP requests and turn them into a Flow collection.
Step 2: Configure Redshift as the Destination
- After configuring the source, you will see a pop-up window with the details of the capture. Click MATERIALIZE COLLECTIONS in the window to start setting up the destination end of the data pipeline.
Alternatively, you can select Destinations from the Estuary dashboard, followed by clicking + NEW MATERIALIZATION.
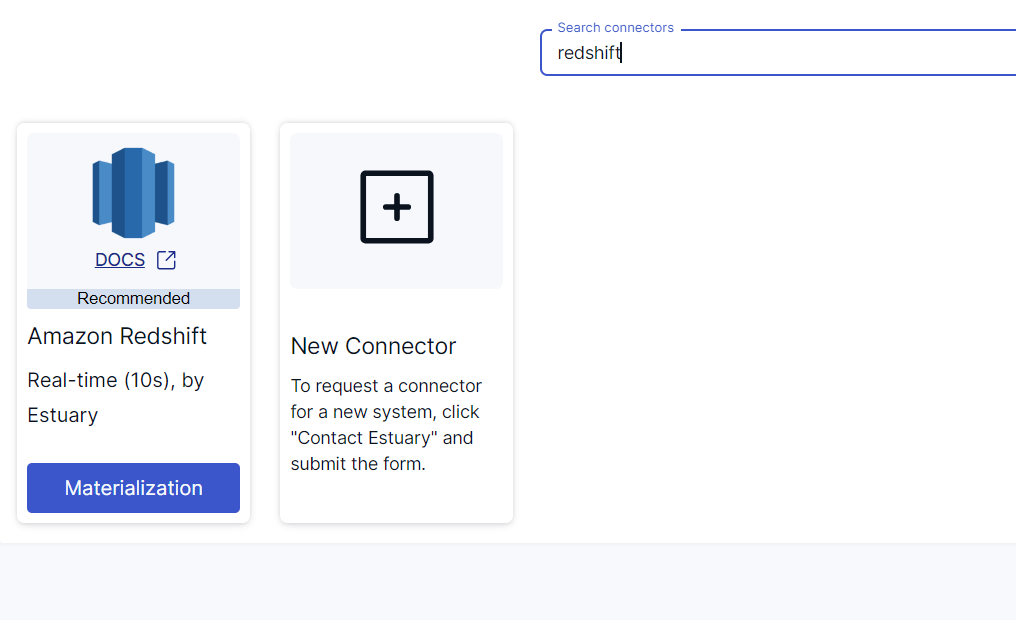
- Search for the Redshift connector using the Search connectors field. Click on the connector’s Materialization button when you see it in the search results.
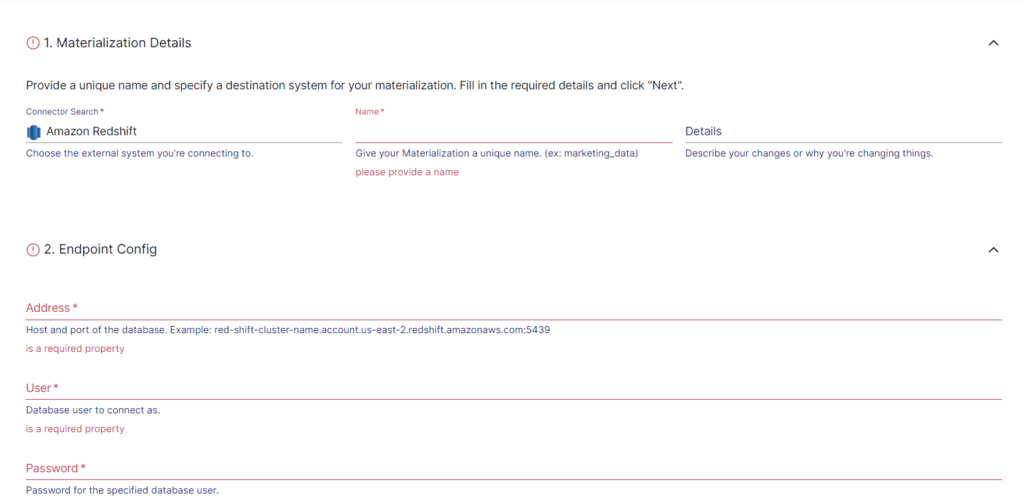
- You will be redirected to the Redshift connector configuration page, where you must provide all the mandatory details, such as Address, User, Password, and S3 bucket details.
- Click on NEXT > SAVE AND PUBLISH. This will materialize Flow collections into tables in Redshift.
The Manual Approach: Using Custom Scripts to Load Data From Webhooks to Amazon Redshift
Here’s another method that uses custom scripts to load data from Webhooks to Redshift.
Step 1: Set Up a Webhook Receiver
- Create a webhook receiver to accept incoming webhook data. This receiver should be able to process HTTP POST requests.
- Secure the webhook receiver to ensure the request is coming from the expected source.
Let’s consider the example of setting up Intercom webhooks. You can use cURL to make requests to Intercom REST API for user and conversation data.
plaintext# Get user data
curl https://api.intercom.io/users \
-u pi3243fa:da39a3ee5e6b4b0d3255bfef95601890afd80709 \
-H 'Accept: application/json'

# Get conversation data
curl https://api.intercom.io/conversations?type=admin&admin_id=25&open=true \
-u pi3243fa:da39a3ee5e6b4b0d3255bfef95601890afd80709 \
-H 'Accept: application/json'
Step 2: Design Redshift Schema
- Plan and create Redshift tables based on the data structure you’ll be importing.
Example SQL for creating Redshift tables:
plaintextCREATE TABLE users (
    id VARCHAR(255),
    -- Define other columns as needed
);

CREATE TABLE conversations (
    id VARCHAR(255),
    created_at TIMESTAMP,
    -- Define other columns as needed
);
Step 3: Upload Data to Amazon S3
- Use AWS REST API to create an S3 bucket and upload the webhook-extracted data. This is a staging area before loading the data into Redshift. Ensure the data is in a format compatible with Redshift (e.g., CSV, JSON, Avro).
plaintext# Create S3 bucket
aws s3api create-bucket --bucket your-bucket-name --region your-region

# Upload data to S3
aws s3 cp your-file-path s3://your-bucket-name/
Step 4: Load Data into Redshift Using COPY Command
- Use the Redshift COPY command to load data from the S3 bucket into Redshift.
Here’s an example COPY command to load S3 to Redshift.
plaintextCOPY users
FROM 's3://your-bucket-name/users_data.csv'
CREDENTIALS 'aws_access_key_id=your-access-key;aws_secret_access_key=your-secret-key'
CSV;
Step 5: Automate the Loading of Data into Redshift
- Consider utilizing AWS Data Pipeline, AWS Glue, AWS Kinesis Firehose, or an AWS Lambda function, or writing a script to capture webhook data and store it in any of these AWS services before loading it into Redshift.
- Use AWS REST API to create necessary resources (bucket, stream, etc.) based on the chosen data source.
plaintext# Create a delivery channel for Kinesis Firehose
aws firehose create-delivery-stream --delivery-stream-name your-delivery-stream-name --s3-destination-configuration BucketARN=your-s3-bucket-arn
Kinesis Firehose is a suitable option for real-time streaming into Redshift.
- Decide between the INSERT command or COPY command for loading data into Amazon Redshift. While INSERT works for individual records, COPY is for batch-loading.
- Execute the chosen loading method (INSERT or COPY) to insert data into Redshift.
Here’s an example INSERT command.
plaintextINSERT INTO category_stage VALUES (12, 'Concerts', 'Comedy', 'All stand-up comedy performances');Here’s an example COPY command.
plaintextCOPY listing
FROM 's3://your-bucket/data/listing/'
CREDENTIALS 'aws_access_key_id=your-access-key;aws_secret_access_key=your-secret-key';
Limitations of Using Custom Scripts to Load Data From Webhooks to Amazon Redshift
- Effort-intensive: Setting up a secure system to capture, process, and load webhook data into Redshift requires significant effort. Additionally, maintaining this pipeline, especially with changing data structures or APIs, can be time-consuming.
- Error Handling: It’s challenging to ensure error handling of failed data transfers or processing errors.
- Scalability: Increasing data volumes may cause the initial setup to struggle to handle the scale efficiently. It can be challenging to scale the infrastructure to handle high volumes of incoming webhook data.
- Data Transformation: Webhook data may not match the schema or format of Redshift tables. Additional efforts are required to transform and clean the data before loading it.
Why Use Estuary Flow?
- Real-time Processing: Estuary Flow specializes in real-time streaming and integration. It can continuously capture data from the source and load it into the selected destination with minimal latency. This ensures immediate data availability.
- Scalability: It can horizontally scale to handle large data volumes and meet high throughput demands. This makes it a suitable choice for small and large enterprises.
- Many-to-many Data Pipeline: Estuary Flow allows you to extract data from many sources and load it into many destinations using the same data pipeline.
- Streaming and Batch ETL or ELT: It lets you choose from ETL (Extract, Transform, Load), ELT (Extract, Load, Transform), or both — ETLT. It supports streaming or batch transforms using SQL or TypeScript (ETL) and dbt (ELT).
- Wide Range of Connectors: Estuary Flow supports over 200 sources and destinations, allowing you to connect to any source and destination of your choice without coding.
Final Thoughts
Webhooks to Amazon Redshift is a handy real-time data integration option, especially essential for dynamic business environments. There are two ways to go about this: using Estuary Flow or custom scripts.
The limitations of using custom scripts involve being complex, time-consuming, resource-intensive, and requiring scripting expertise. Data integration platforms like Estuary Flow provide streamlined solutions to simplify these complexities.
Consider using Estuary Flow to save time from having to perform repetitive and resource-intensive tasks. You can easily connect different sources of data without having to build everything from scratch.
Would you like to load data between different platforms in real time? Sign up for a free account with Estuary Flow and get started with your first integration right away. All it takes is a few clicks!
FAQs
What is the fastest way to load data to Redshift?
The fastest and most efficient way to load data into Redshift is using the COPY command, as it can read from multiple files or data streams simultaneously. It is significantly more efficient than using individual INSERT commands, especially for large datasets.
Can we store JSON data in Redshift?
Yes, Amazon Redshift provides two methods to store JSON documents using the COPY command. The first method involves storing the JSON document in a SUPER data type column, which is designed to handle semi-structured data. The second method is to shred the JSON document, extracting the data into individual columns in a Redshift table.
What are webhooks used for?
Webhooks allow real-time communication between web-based applications, allowing them to transfer data instantly. It enables automation and seamless integration across different systems, triggering actions automatically when specified events occur.

About the author
With over 15 years in data engineering, a seasoned expert in driving growth for early-stage data companies, focusing on strategies that attract customers and users. Extensive writing provides insights to help companies scale efficiently and effectively in an evolving data landscape.


