The growth of e-commerce and online payment platforms leads to the generation of massive amounts of transaction data. By accessing and analyzing real-time transactional data, you can gain actionable insights for informed decision-making. Stripe is among the leading payment processing platforms that benefit businesses of all sizes. So, moving data from Stripe to Redshift will allow you to harness the full potential of your payment data.
The high-performance analytical capabilities of Redshift can provide a comprehensive understanding of revenue patterns, customer behavior, and market trends. This will lead to improved data-driven decisions and accelerated growth for the business.
There are different methods to ingest data from Stripe to Redshift. But, before we learn about the methods, let’s quickly look at both platforms to gain a better understanding of how connecting Stripe to Redshift could benefit your data management and analysis processes.
What Is Stripe?
Stripe is an online payment processing platform that enables businesses to accept payments over the Internet. It offers advanced subscription management tools that allow setting up recurring payments and subscription billing models. This makes it convenient for subscription-based businesses to automate customer payments and recurring billing.
Businesses can accept payments from customers worldwide using Stripe. The various payment methods it supports include debit and credit cards, digital wallets like Google Pay and Apple Pay, and bank transfers. Stripe prioritizes security and supports 3D Secure 2 for frictionless authentication, helping reduce fraud and providing added security to online payments. It also uses fraud detection tools to help reduce the risk of fraudulent transactions.
Here are some key features of Stripe:
- Developer-Friendly API: Stripe provides a robust set of APIs that allows you to integrate payment functionality directly into your websites and applications. The well-documented API supports different programming languages like Ruby, Python, Java, and .NET.
- Global Availability: The platform supports payments in 135+ currencies and operates in 46 countries. This makes it an ideal choice if your business has an international customer base.
- Stripe Connect: This allows you to build and manage platforms that facilitate payments between multiple parties. Stripe Connect allows you to split funds between multiple users, instantly route payments across borders, and specify your earnings on each transaction.
What Is Redshift?
Amazon Redshift is a cloud-based data warehousing service provided by Amazon Web Services (AWS). It is a fully managed and high-performance platform that can store and analyze petabyte-scale data workloads efficiently.
One of the factors that contribute to Redshift’s efficiency is the columnar storage of data. Redshift organizes its data in columns instead of rows, contributing to improved query performance. It only accesses the required columns to execute a query, thereby reducing I/O overhead. You can use your existing BI tools to analyze your data stored in Redshift, making it a cost-effective solution.
Some of the key features of Amazon Redshift include:
- Massively Parallel Processing (MPP): Redshift has a distributed architecture with multiple nodes and slices. Large processing jobs are broken into smaller jobs that are distributed across a cluster of compute nodes. It executes queries in parallel across these nodes, resulting in faster processing of complex queries, even on large datasets.
- Integration with other AWS Services: Redshift can seamlessly integrate with other AWS Services, including Amazon S3, AWS Glue, and Amazon QuickSight.
- Automatic Data Backup: Redshift automatically creates incremental data backups and stores them in Amazon S3, which is internally managed by Amazon Redshift. It also replicates data to different nodes to ensure high availability and data durability.
How to Ingest Data From Stripe to Redshift
There are three different methods you can use to move data from Stripe to Redshift:
- Method #1: Using Stripe Data Pipeline
- Method #2: Data integration tools like Estuary Flow
- Method #3: Custom scripts
Method #1: Using Stripe Data Pipeline to Sync with Redshift
The Stripe Data Pipeline is a no-code product that sends all your Stripe data and reports to Amazon Redshift. It is fully integrated with Stripe’s financial platform and ensures the same level of security and data integrity.
Data Pipeline currently supports only certain Amazon Redshift data regions. It is also important to note that, as of now, Data Pipeline doesn’t support any non-AWS instances, like GCS or Microsoft Azure.
Before you get started, you must subscribe to Data Pipeline by clicking on the Subscribe button in the Data Pipeline settings of your Stripe dashboard. After you subscribe, Stripe will send the communication of data share (a unit of sharing data in Redshift) to your Amazon Redshift account. Upon accepting this data share communication, Stripe will perform an initial load to capture all the historical data in Redshift within 12 hours. Post the initial load, your Stripe data refreshes once every 9 hours.
Read more about the steps here to set up the connection between Stripe Data Pipeline and Redshift.
Here are some benefits of using Stripe Data Pipeline for this integration:
- Automatically export your Stripe data to Redshift in a fast and reliable way.
- Combine data from different Stripe accounts into a single data warehouse.
- Stop relying on third-party ETL tools or home-built API integrations.
- Supports large data volumes for improved data integrity or quality with scaling businesses.
However, this method is also associated with certain limitations:
- There is a 12-hour delay for the initial load of Stripe data upon subscribing to Data Pipeline.
- Some data regions aren’t supported.
Method #2: Using Fast and Reliable Data Integration Tools Like Estuary to Load Data from Stripe to Redshift
No-code data integration platforms can help overcome the limitations and challenges associated with the manual methods of integration. With a fully managed integration tool like Estuary, there is no need to develop complicated scripts to extract or load data.
Estuary Flow is an excellent choice for setting up real-time data integrations in merely a few minutes. A range of in-built connectors provided by Estuary simplifies the tasks of extracting data from a source and loading it to the destination. As a robust DataOps solution, Flow doesn’t require constant monitoring and dedicated resources to handle the integrations.
To start using Estuary for ingesting data from Stripe to Redshift, sign in to your Estuary account. If you don’t already have one, register for an Estuary account.
Here are the steps to follow to set up the integration between the two platforms:
Step 1: Setting up Stripe as the Data Source
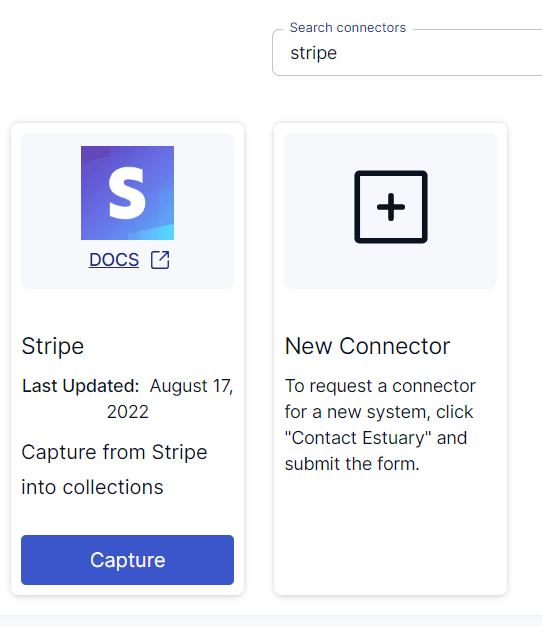
Click on Sources on the left-side pane of the Estuary dashboard. Then, click on the + NEW CAPTURE button. Search for Stripe in the Search connectors box. The Stripe connector will appear in the search results. Click on the Capture button of the connector.
Image Source: Estuary
There are a few prerequisites you must fulfill before you use the Stripe connector to capture data. You can read about the prerequisites here.
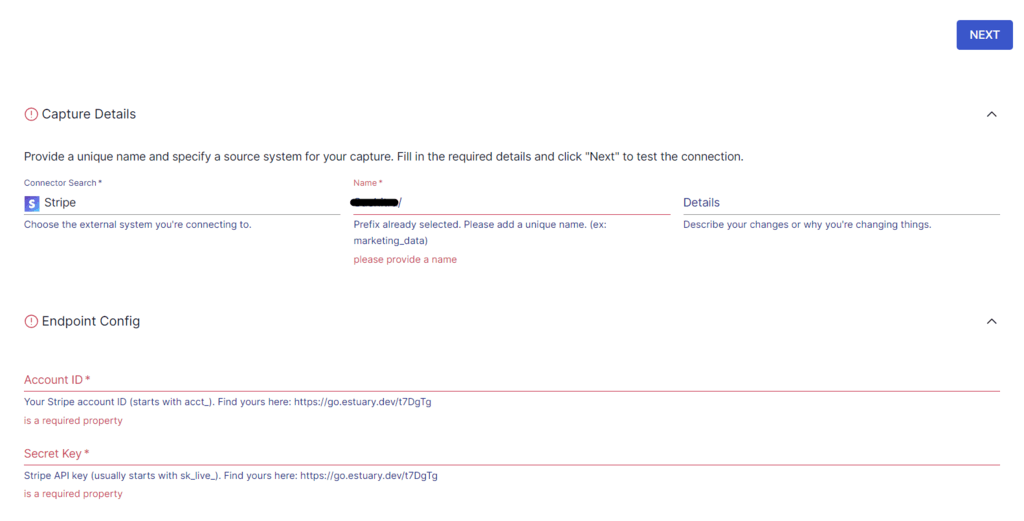
On the Stripe connector page, fill in the mandatory fields like a Name for the connector, Account ID, Secret Key, and Replication start date.
Image Source: Estuary
After providing all the details, click on NEXT, then click on Save and Publish. This connector will capture data from Stripe into Flow collections. You can use the connector to capture data resources, including:
- Bank accounts
- Checkout sessions
- Coupons
- Events
- Invoices
- Plans
- Refunds
- Subscription items
Step 2: Setting up Redshift as the Destination
There are a few prerequisites you must fulfill before setting up Redshift to connect with Flow. You can read about these prerequisites here.
To set up the destination end of the pipeline, click on Materialize Connection in the pop-up that follows a successful capture. Alternatively, navigate to the Estuary dashboard and click on Destinations. Then, click on the + NEW MATERIALIZATION button.
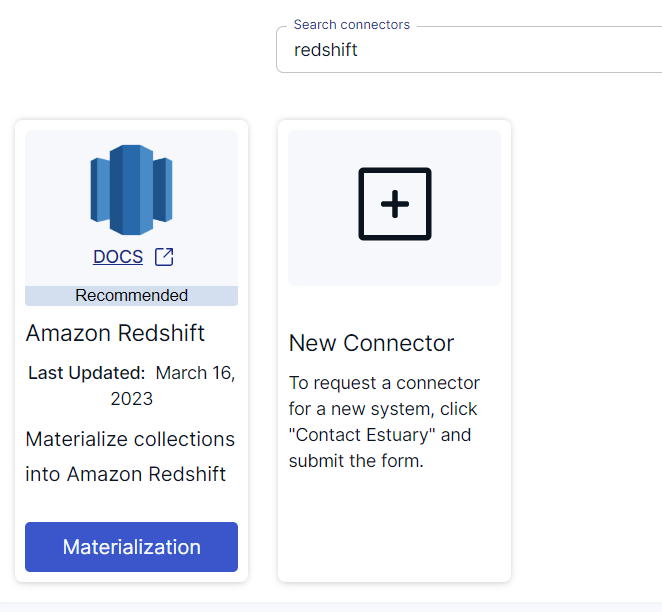
Search for Redshift in the Search connectors box. The Amazon Redshift connector will appear in the search results. Click on the Materialize option of the connector to proceed.
Image Source: Estuary
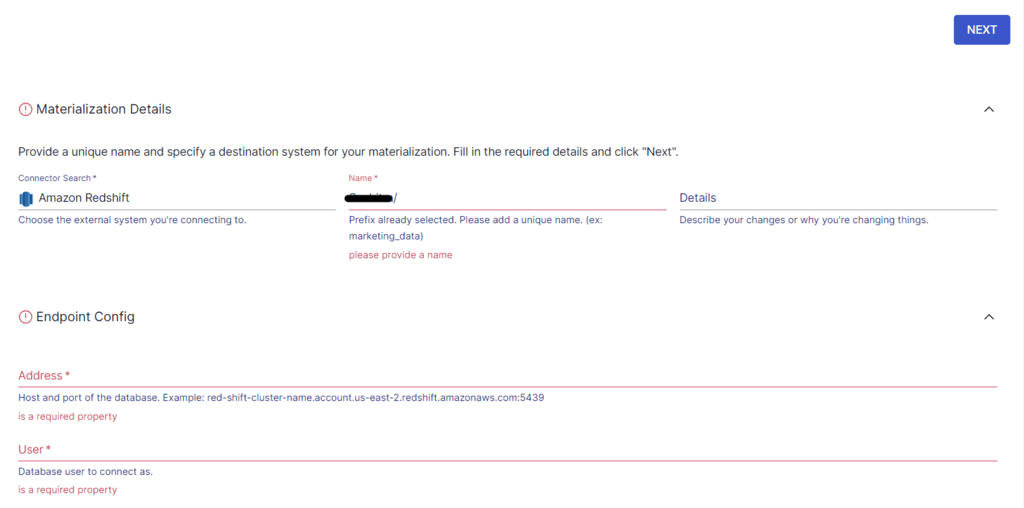
On the Redshift connector page, provide a Name for the connector. Then, specify the other details, such as Address, User, Password, Access Key ID, and Region.
Image Source: Estuary
After filling in the required information, click on Next and then click on Save and Publish. This connector will materialize Flow collections of your Stripe data into an Amazon Redshift database. It uses an S3 bucket as a temporary staging area for data storage and retrieval.
To learn more about the integration process, refer to the Estuary documentation:
Method #3: Using Custom Scripts to Move Data from Stripe to Redshift
Stripe supports REST API to access and retrieve data from the platform. The API responses are in JSON format. With Stripe, you can use two different types of keys for authentication, one for live mode and one for testing mode. You can use the testing mode to test every aspect of API without messing up your actual data.
To access the API, you can use tools like CURL, Postman, or an HTTP client for the language or framework of your choice. Stripe API is built around ten core resources, including Customers, Disputes, Tokens, and Transfers.
This method involves extracting data from Stripe and using Webhooks to stream it into your data warehouse. Since data exports from Stripe are in JSON format, you must map your data with an appropriate data type supported by Redshift.
Once the data is extracted from Stripe, load it into an intermediary source, like Amazon S3. Then, use the Redshift COPY command to load the S3 files to Redshift.
Your data has then been successfully loaded from Stripe to Redshift.
Some of the limitations of the method include:
- Prior knowledge of APIs and Webhooks is necessary. Those without the required technical know-how will find it difficult to implement this method.
- Dedicated resources are required to create the custom scripts and maintain them. This makes it time-consuming and resource-intensive.
- If the script encounters errors during data extraction, transformation, or loading, it results in data integrity issues and incomplete or inaccurate data.
Conclusion
Ingesting data from Stripe to Redshift can help businesses unlock the true potential of their payment data. The seamless integration of these two platforms provides real-time insights that result in improved data-driven decision-making.
To move data from Stripe to Redshift, you can use Stripe Data Pipeline, custom scripts, or no-code, real-time ETL tools like Estuary Flow. While all of these methods get the job done, using a reliable data integration solution like Estuary is the easiest way to build a real-time data pipeline in minutes.
Estuary Flow has an easy-to-use interface, a wide range of in-built connectors, and streaming capabilities to move data between different platforms. Sign up for an Estuary account to try it out now; your first pipeline is free!

About the author
With over 15 years in data engineering, a seasoned expert in driving growth for early-stage data companies, focusing on strategies that attract customers and users. Extensive writing provides insights to help companies scale efficiently and effectively in an evolving data landscape.


