Are you struggling to make Snowflake work for real-time analytics or full-text search? By connecting Snowflake to Elasticsearch, you can optimize data workflows for faster search and deeper insights.
The best way to connect data from Snowflake to Elasticsearch is by using Estuary, a real-time ETL tool that allows seamless integration with pre-built connectors.
In this blog, we will explore how to connect Snowflake to Elasticsearch, the advantages of doing so, and two efficient methods to achieve this integration. But if you're well-versed in both platforms, jump straight into the methods!
Snowflake: An Overview
Snowflake is a cloud-based data warehousing platform. Compared to traditional warehousing platforms, Snowflake offers faster, more scalable, and more flexible data storage and querying solutions.
Among Snowflake's key features is its separation of compute and storage; you can scale each independently. By adjusting compute resources based on query load, there won’t be any impact on storage costs, resulting in optimized performance and cost.
Snowflake also uses multi-cluster shared architecture for increased efficiency. It involves all users and applications sharing a single copy of data but operating on multiple compute clusters. With this separation, query processes don’t interfere with each other, leading to additional concurrency and improved performance.
Elasticsearch: An Overview
Elasticsearch is a modern search and analytics engine developed by Elastic NV, built on the Apache Lucene library. It is a NoSQL database that can work with unstructured data. The storage and retrieval techniques of Elasticsearch set it apart from traditional SQL databases.
Unlike most NoSQL databases, Elasticsearch provides full-text search capabilities with advanced analytics. This makes it ideal for applications requiring extensive search functionalities.
Elasticsearch has many other noteworthy features, including:
- Scalability: Elasticsearch can scale horizontally by adding more nodes to a cluster. This ensures high availability and fault tolerance. The scalability makes Elasticsearch effective for large-scale applications with dynamic processing demands.
- Full-Text Search (FTS): Elasticsearch offers full-text search capabilities. It stores data in JSON format within documents, which are then distributed across different shards in a cluster. The setup enhances the platform’s ability to handle large data volumes in addition to optimized search efficiency and speed.
- Aggregations: Elasticsearch allows you to execute various aggregation operations, such as sum, average, and calculating percentiles on your data. These capabilities help you efficiently summarize and analyze large datasets, enabling comprehensive insights into data patterns and trends.
Snowflake vs Elasticsearch: Why Connect the Two?
Although Snowflake offers advanced data warehousing capabilities, it isn't optimized for handling unstructured data or real-time analytics. Elasticsearch, on the other hand, specializes in these areas with its robust full-text search engine and real-time data exploration capabilities.
Benefits of Connecting Snowflake to Elasticsearch:
- Elasticsearch’s distributed, flexible architecture excels at storing and analyzing time series data. On the contrary, Snowflake isn’t very efficient for this task. Finance, marketing, and IoT applications that rely on such data can benefit from using Elasticsearch.
- Elasticsearch provides a robust full-text search engine that supports complex querying, aggregations, and real-time data exploration. This helps you perform more efficient analysis of large datasets to gain better insights.
- Elasticsearch’s real-time analytical capabilities can help your organization detect and respond to fluctuating trends. This is essential for applications such as monitoring systems, real-time personalization, and dynamic pricing, which depend on current data.
How to Connect Data from Snowflake to Elasticsearch: 2 Best Methods
- Method 1: Using Estuary to Connect Data from Snowflake to Elasticsearch
- Method 2: Using CSV Export/Import to Move Data from Snowflake to Elasticsearch
Method 1: Using Estuary to Load Data from Snowflake to Elasticsearch
Estuary is a real-time ETL (Extract, Transform, Load) and CDC (Change Data Capture) solution. It allows seamless data integration between diverse sources and destinations.
Some of Estuary’s essential features include a library of 200+ ready-to-use connectors and an intuitive user interface that allows you to easily design, monitor, and manage complex data workflows.
The platform caters to both technical and non-technical users, making it a valuable tool for optimizing data integration processes.
Prerequisites
- A Snowflake account and its host URL.
- An Elasticsearch cluster with a known endpoint.
- An Estuary account
Step 1: Configure Snowflake as the Source
- Sign in to your Estuary account.
- Select Sources from the left-side navigation pane.
- On the Sources page, click the + NEW CAPTURE button.
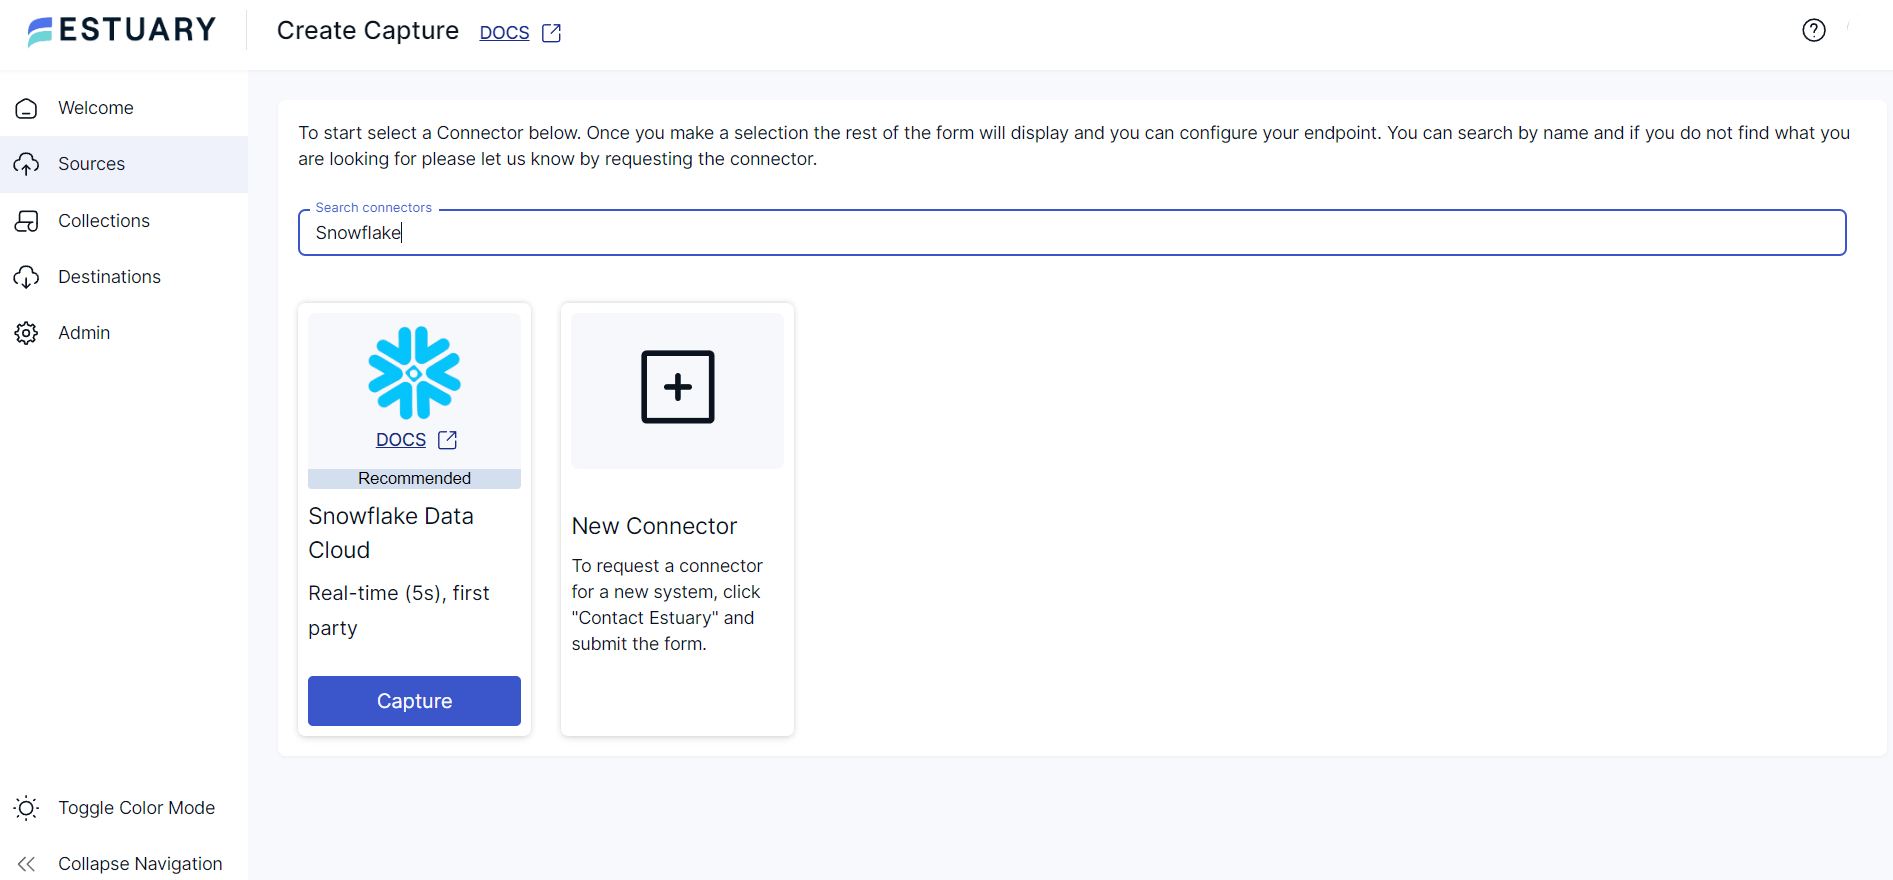
- You will be redirected to the Create Capture page, where you will see a Search connectors field. Type Snowflake in this field.
- Click the Capture button of the Snowflake Data Cloud connector in the search results.
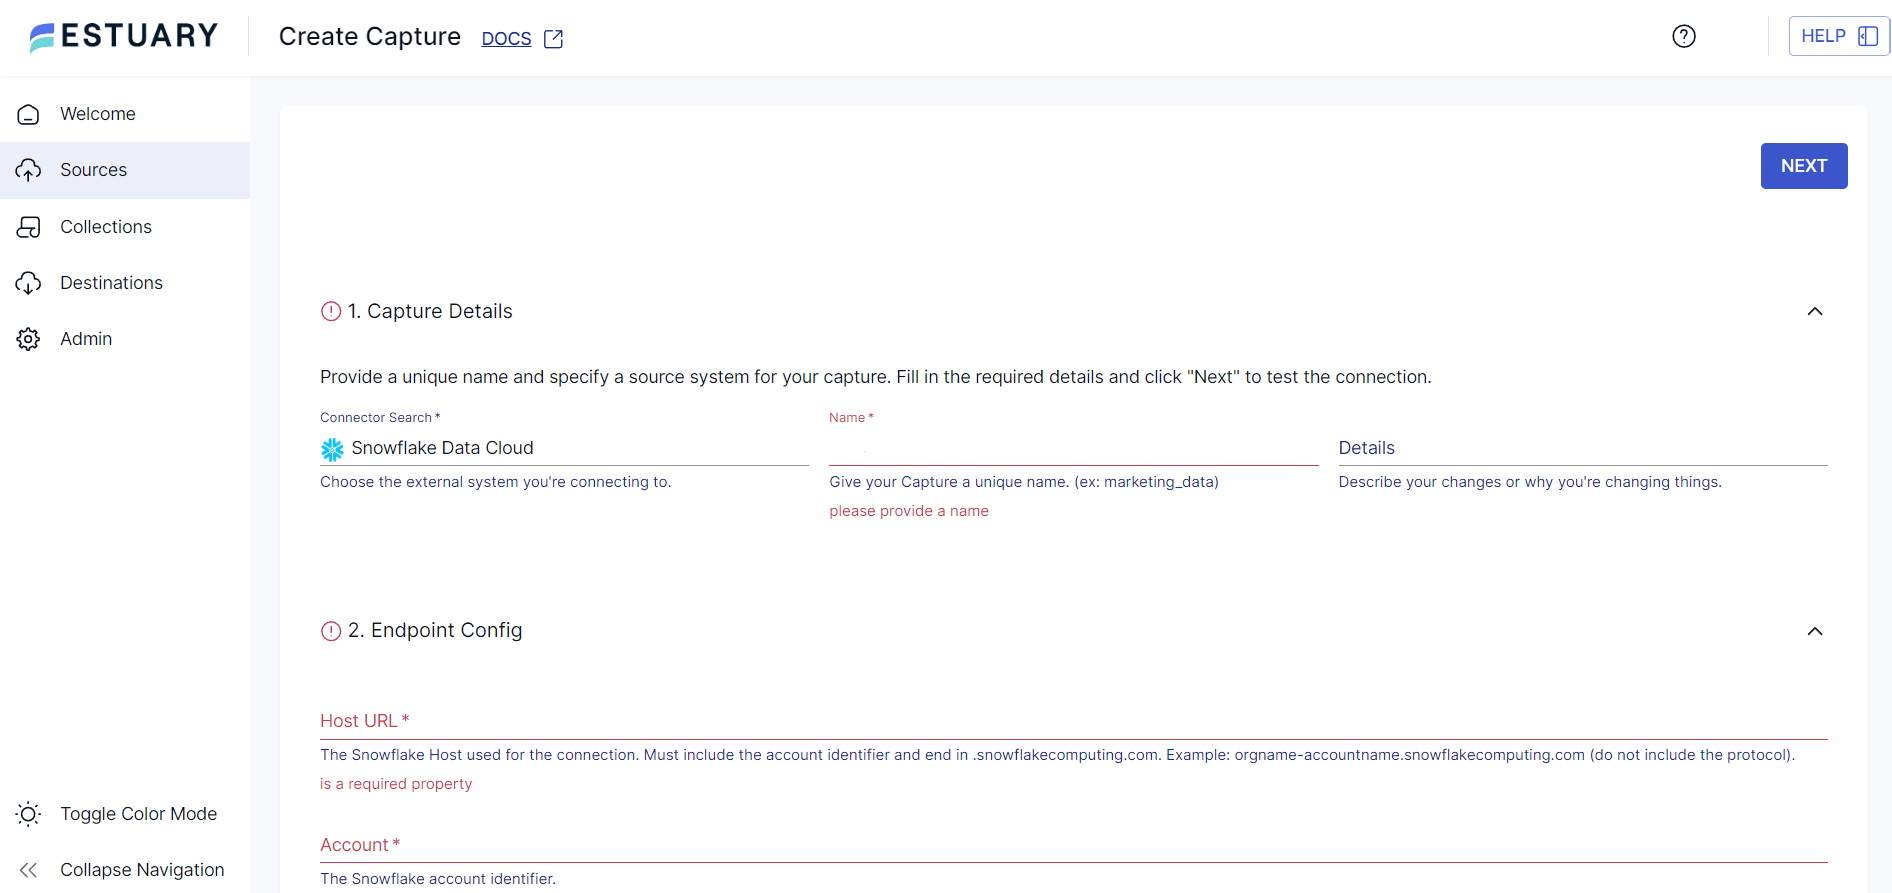
- On the Snowflake connector configuration page, specify the following details:
- Name: A unique name for your capture.
- Host URL: The Snowflake host, including the account identifier, used for the connection.
- Account: The Snowflake account identifier.
- User: Your Snowflake login name.
- Password: The password for the provided user.
- Database: The SQL database to connect to.
- To complete the source configuration, click the NEXT button on the top right corner and then SAVE AND PUBLISH.
- This real-time connector will capture change events from source tables in your Snowflake database collections into an Estuary collection.
Step 2: Configure Elasticsearch as the Destination
- To configure Elasticsearch as the destination end of the integration pipeline, click MATERIALIZE COLLECTIONS in the pop-up window appearing after the successful capture.
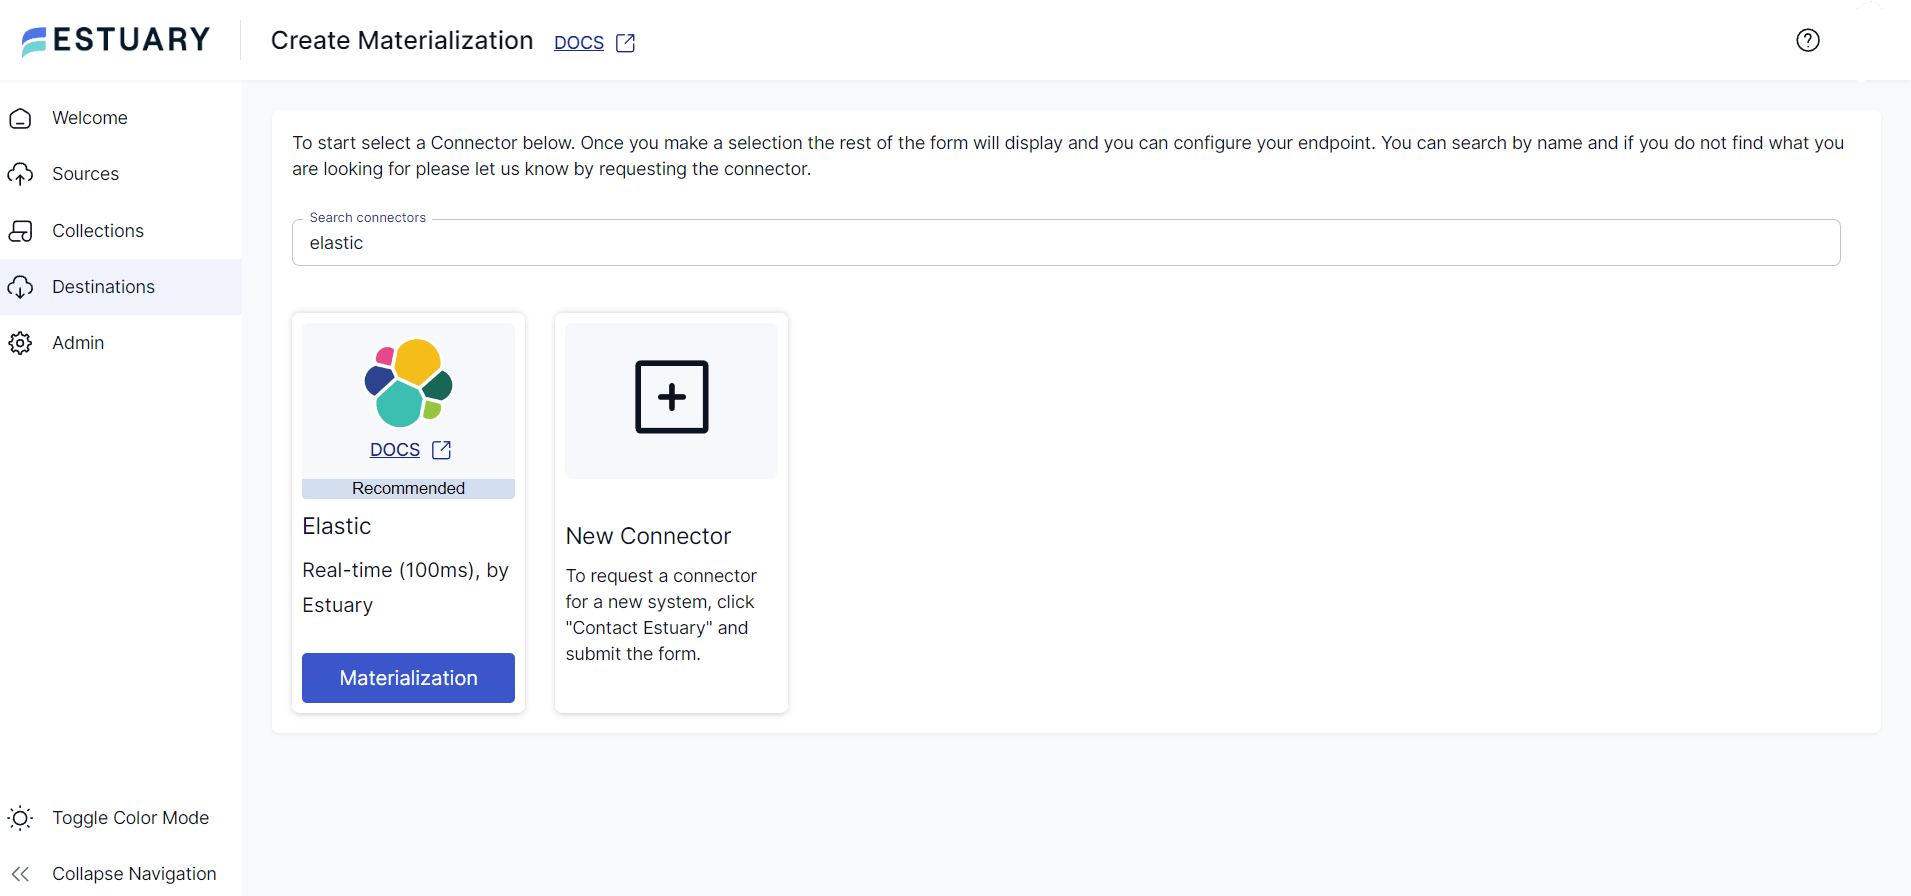
Alternatively, click the Destinations option on the left pane of the dashboard. Then, click + NEW MATERIALIZATION and navigate to the Create Materialization page.
- Type Elastic in the Search connectors field. When the connector appears in the results, click its Materialization button.
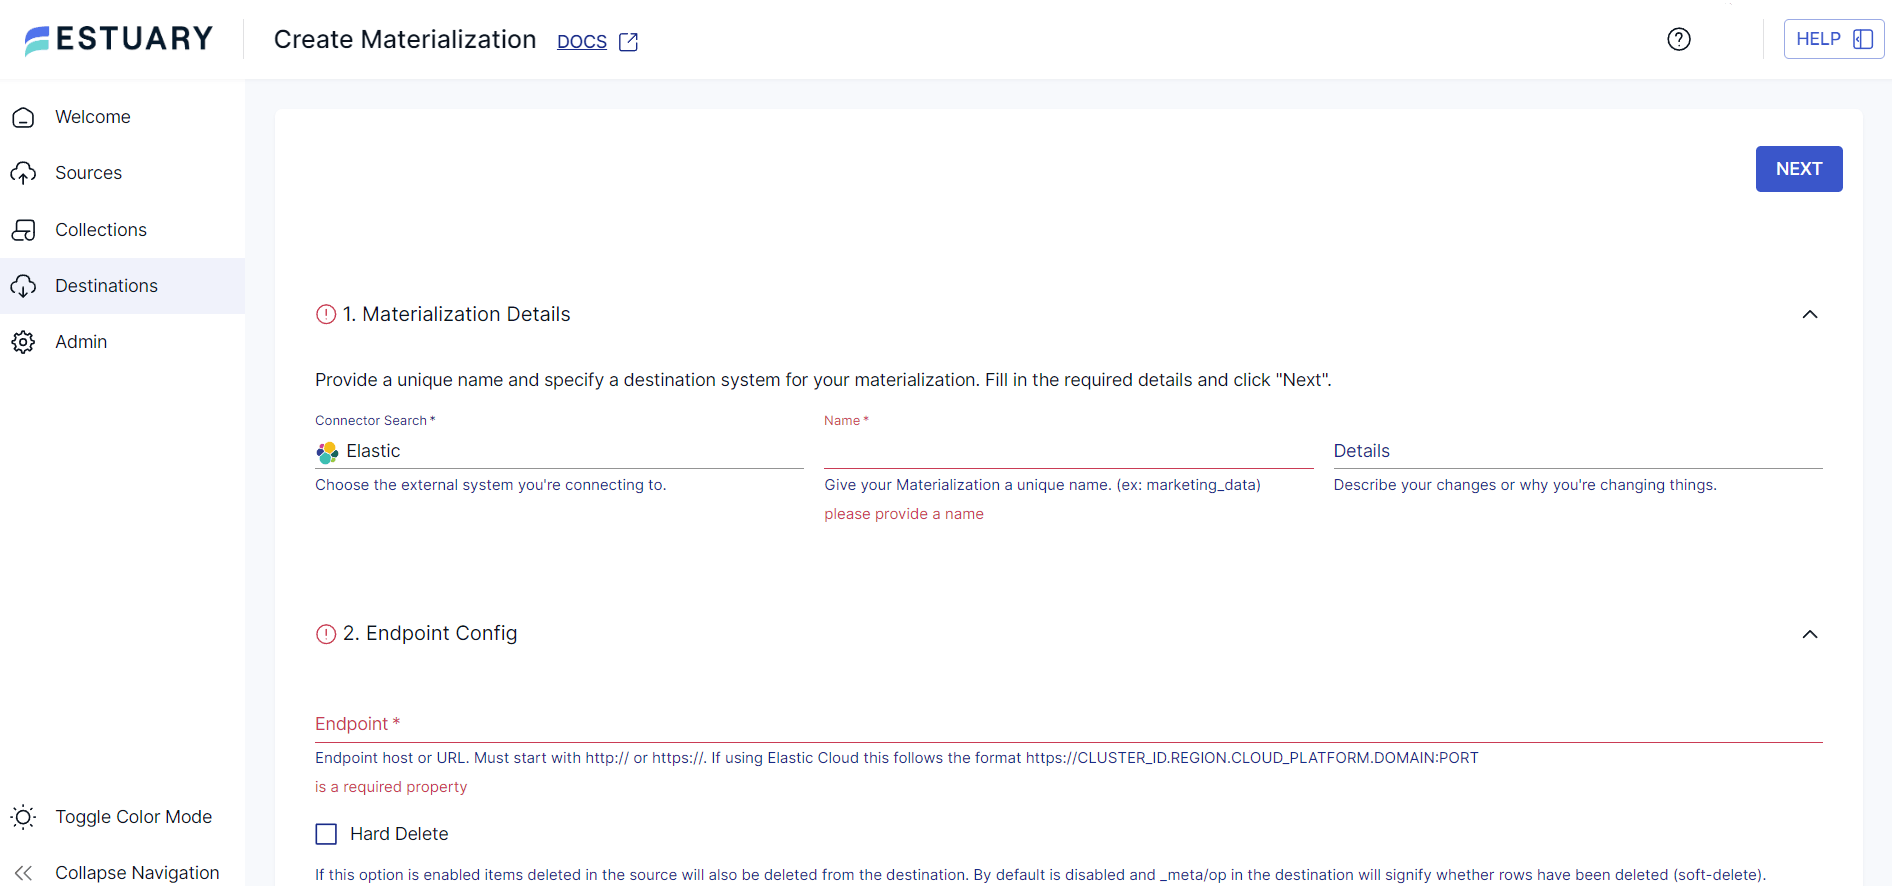
- On the Elasticsearch connector configuration page, fill in the required details, such as a unique Name for the capture and Endpoint host or URL.
- To authenticate to Elasticsearch, you can use a username and password or an API key.
- Use the Source Collections section to choose the collection of your Snowflake data and link it to your materialization.
- Finally, click the NEXT button on the top right corner and then SAVE AND PUBLISH to complete the destination configuration.
The real-time connector will materialize the Estuary collection of your Snowflake data into indices in an Elasticsearch cluster.
Key Offerings of Estuary
- Change Data Capture (CDC): Estuary’s CDC capability helps you keep your data up-to-date across different systems. With access to current data, you can perform real-time analytics to gain timely insights for improved decision-making.
- Derivations: Estuary’s derivations allow you to transform collections by filtering, adding calculations, unpacking nested arrays, and aggregating or merging data. This enables you to apply transformations to source collections to transform data according to your needs.
- Schema Association: Estuary ensures that every document and collection has an associated schema defining structure, constraints, and representation. Schema enhances the data quality since Estuary verifies every document against its schema during read and write operations, ensuring the collections hold only clean data.
Method 2: Using CSV Export/Import to Move Data from Snowflake to Elasticsearch
This method involves exporting Snowflake data in CSV format to your local system and then loading it into Elasticsearch. While it's cost-effective, it lacks real-time capabilities and can be effort-intensive for large datasets.
Step 1: Exporting Snowflake Data as a CSV
You can use the SnowSQL command-line editor to download Snowflake data to your local system.
Prerequisites
- Ensure SnowSQL is installed on your system.
- Snowflake account credentials.
- Permission to read data from the Snowflake database and table.
Use SnowSQL to connect to Snowflake
Open your command prompt and type:
plaintextsnowsql-a <account_identifier> -u <user_name>This command helps you connect to your Snowflake account using SnowSQL. When prompted, enter your password to connect to your Snowflake account.
Set the output format to CSV
Before running a query, set SnowSQL's output format to CSV
plaintextALTER SESSION SET OUTPUT_FORMAT = ‘CSV’; Select Snowflake Database Table
Execute the following SQL command to select the data to export:
SELECT * FROM your_database.your_schema.your_table;
Export Data as a CSV File
Direct the output of your query to a CSV file using ‘>’ filename.csv syntax in your command.
plaintextSELECT * FROM your_database.your_schema.your_table > /path/to/your/outputfile.csv;Replace the path of your output file with the actual path and filename to save the CSV file.
Exit SnowSQL
Type exit to close the SnowSQL command line session after the export is complete.
Verify the output CSV file for correctness
Open the exported CSV file with a text editor or a spreadsheet program to ensure the data has been correctly exported and formatted.
Step 2: Import Data into Elasticsearch Using Kibana
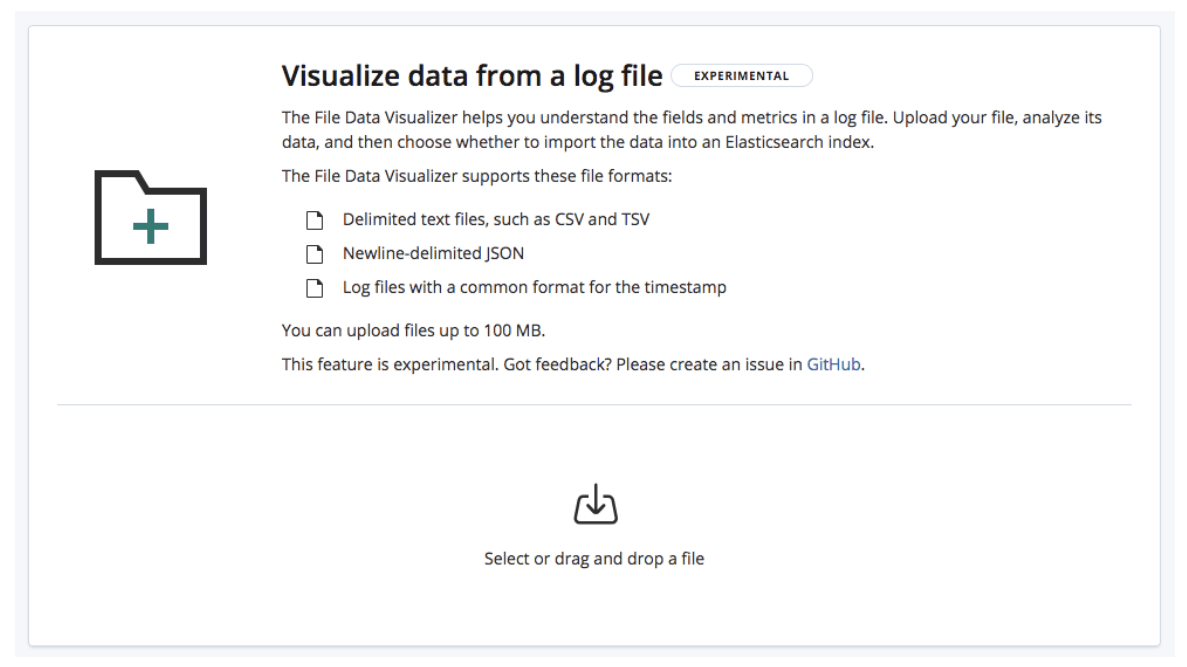
You can use the File Data Visualizer feature of the Kibana stack to import a CSV file into Elasticsearch. The feature allows you to explore your data with Kibana and import small amounts into Elasticsearch without data ingestion.
- Navigate to Kibana.
- Open the Machine Learning section and select Data Visualizer.
- Choose a CSV file to upload; the maximum file size for CSV uploads is 100 MB.
- Kibana sends the first 1000 lines of your CSV file to the find_file_structure endpoint, which runs its analysis and returns the findings.
- Review the automatically generated analysis and verify the data structure.
- Use the Override settings button to adjust settings, especially if your CSV file lacks a header row or requires other specific configurations.
- After you’re done verifying the settings, click on the Import button at the bottom left of the page.
- There are two modes of importing the CSV file:
- Simple: You can provide a new unique index name and choose whether to create an index pattern.
- Advanced: You can customize index settings, mappings, and ingest pipelines to create the index.
- The import process involves the following steps:
- Processing File: This involves the conversion of data into NDJSON documents, which is suitable for data ingestion using the Elasticsearch bulk API.
- Creating Index: Create an index using specific settings and mapping objects.
- Creating Ingest Pipeline: Create an ingest pipeline using the ingest pipeline object.
- Uploading Data: This step involves loading data into the newly created index.
- Create Index Pattern: You can create a Kibana index pattern (only if opted).
Challenges of Using CSV Export/Import to Move Data from Snowflake to Elasticsearch
- Effort-intensive: Manually moving data from Snowflake to Elasticsearch requires a lot of effort. This process can be slow, especially with limited bandwidth and large data volumes.
- Lack of Real-time Capabilities: There are significant delays involved in manually extracting Snowflake data and loading it into Elasticsearch. As a result, this method isn’t a good choice if you require real-time analytics or decision-making.
- Data Integrity Issues: Maintaining consistency, efficiency, and accuracy throughout the migration process can be difficult without automation. The frequent manual intervention to execute and monitor tasks cause inconsistencies such as incorrect mapping of data, leading to data integrity issues.
Conclusion
A Snowflake to Elasticsearch connection offers excellent analytical capabilities to help with critical decision-making. To integrate Snowflake into Elasticsearch, you can use the manual CSV export/import technique or Estuary.
The manual CSV export/import method, while cost-efficient, can be effort-intensive and lacks real-time integration capabilities. However, Estuary can help overcome these limitations. With pre-built connectors that support no-code configuration and a user-friendly interface, it’s an almost effortless integration of Snowflake to Elasticsearch.
Estuary ensures real-time synchronization between Snowflake and Elasticsearch. If you don’t have an Estuary account, sign up today to start creating efficient data migration pipelines!
Related Blogs:
FAQs
What data types are best handled in Elasticsearch vs Snowflake?
Can I perform real-time analytics after integrating Snowflake and Elasticsearch?

About the author
Rob has worked extensively in marketing and product marketing on database, data integration, API management, and application integration technologies at WS02, Firebolt, Imply, GridGain, Axway, Informatica, and TIBCO.


