In the dynamic landscape of data-driven organizations, cloud data warehouses have become indispensable. The simplicity, low cost of administration, and elastic scale of cloud warehouses align perfectly with fast-changing business needs. Cloud data warehouses have also managed to address data availability and security concerns as they’ve added features over time including multi-regional support and private cloud support.
Two popular solutions, Amazon Redshift and Snowflake, offer a diverse set of features that excel in different aspects of data management and analysis. As your organizational needs and cloud usage evolve, you might need to migrate from one data warehouse to another.
This article guides you through the intricacies of migrating data from Amazon Redshift to Snowflake, providing a comprehensive understanding of each tool and ensuring a seamless transition to elevate your data infrastructure.
Amazon Redshift Introduction
Offered by Amazon Web Services (AWS), Redshift is a fully managed petabyte-scale data warehouse in the cloud. It allows you to store and analyze enormous volumes of data using SQL queries.
For effective management of extensive datasets, Redshift uses Massively Parallel Processing (MPP), which helps you handle large-scale analytical workloads. MPP is a key feature of Redshift’s architecture that divides computational tasks across multiple nodes. Each node operates independently, processing its portion of data in parallel, ensuring optimal query performance.
Snowflake Introduction
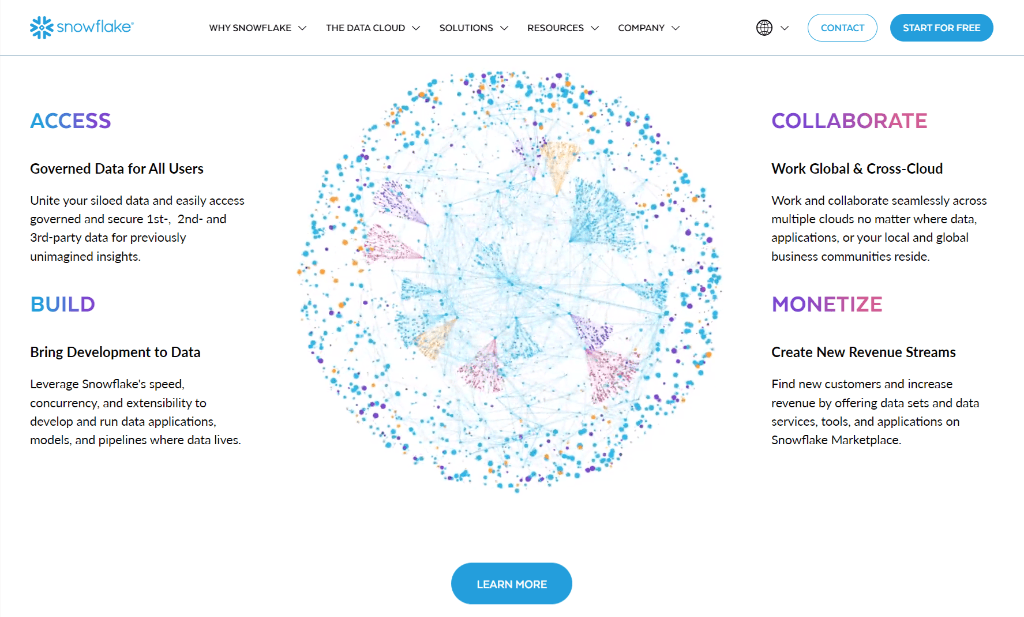
Snowflake is one of the first cloud data warehouses to offer decoupled storage and compute. This enables you to easily store any amount of data independently of the amount of compute you use. With a focus on simplicity, Snowflake has made using SQL for querying structured and semi-structured data easy. This helps you to more easily gain deeper insights and unlock the full potential of your data for informed decision-making.
Why Migrate From AWS Redshift to Snowflake?
Considering a Redshift to Snowflake migration can provide several crucial advantages for organizations looking for better analytics by enhancing their data warehousing capabilities. Let’s look at a few of the most important advantages when deciding to make the switch to Snowflake.
- Performance - Snowflake is built on an architecture that is half of the cloud and half of the data center, and because the machine managing the queries is distinct from the storage handling the data, it processes queries more quickly than Redshift. This approach helps endorse efficient utilization of resources and also assists in attaining reliability in performance as the data volumes increases.
Snowflake’s architecture is intentionally designed for query acceleration, thus making it suitable for organizations that thrive in ensuring their data is analyzed quickly and effectively.
- Data Sources - Snowflake, for example, will accept structured as well as semi-structured data with the format of: JSON, Avro as well as Parquet. What it means is that you can bring many kinds of data together, into one place and access it with SQL or any other programming language. Because it is highly scalable, Snowflake databases can effectively integrate data and load them into the target environment for analysis without any complications.
- Cost Efficiency - In fact, Snowflake has been found to be more cost-efficient than Redshift with a lower Total Cost of Ownership (TCO). One of the core strengths is the flexible pricing that does not imply pre-paid blocks of usage but rather adapts to the current usage pattern of the client. This means that you only pay for the number of instances in the fleet that you actually use.
- Scalability - Snowflake is capable of handling very large volumes of data and can grow or shrink depending on assumed workloads. It also has an architectural design where it separates the compute nodes and storage nodes, and hence makes it possible to grow every of them depending on your needs.
If you’re exploring other Redshift migration paths, check out our guides on Redshift to Databricks, Redshift to Apache Iceberg, and Redshift to BigQuery.
How to Migrate Data from Redshift to Snowflake: Step-by-Step
There are various approaches for loading data from Redshift to Snowflake. In this article, we will explore two popular methods:
- No-Code Method (Estuary Flow) – Use a streaming ETL tool with Redshift and Snowflake connectors for real-time sync.
- Manual Method (COPY INTO Command) – Export Redshift data to S3 and load it into Snowflake manually with SQL.
Method 1: Connecting Data from Amazon Redshift to Snowflake Using a Streaming ETL Tool
Streaming ETL (Extract, Transform, Load) tools are designed to process, handle, and analyze data as it is generated, providing insights in real-time. These tools are particularly useful if you need to manage and respond to data in real-time scenarios.
One popular solution is Estuary Flow, which caters to the growing demand for timely data processing, allowing you to make up-to-date decisions and gain insights from diverse streaming data sources.
Here are some of the key features of Estuary Flow:
- No-code connectivity: with native support for over 150 sources and destinations, including Redshift and Snowflake, and additional support for 500+ connectors from Airtable, Meltano, and Stitch, Estuary can be used to connect just about any sources and destinations in minutes, without coding.
- Streaming and batch ETL or ELT: Estuary Flow offers the flexibility to adapt to your data processing needs. You can transform and merge data from many different sources before you load it into the data warehouse, known as ETL (Extract, Transform, Load). Alternatively, you can do the transformations after the data is loaded, known as ELT (Extract, Load, Transform), which uses Estuary primarily for data replication and dbt within Snowflake. For a more comprehensive approach, Estuary Flow also supports ETLT, combining the best of both ETL and ELT methodologies.
- Many-to-many data pipeline: With Estuary Flow you can extract data from many sources and load it into many targets with the same data pipeline.
- Stream store: As data arrives from each source, and as each transform happens, Estuary can store the resulting data in your own cloud storage. This is used to ensure transactionally guaranteed exactly-once delivery. It also enables you to add other targets at a later date to your data pipeline, and automatically backfill new data to targets.
- Proven Scalability: With increasing data volumes and complexities, Estuary Flow is designed to handle varying data integration needs. It supports data transfer speeds of 7 GB/s CDC for 10TB+ tables in production.
- Streaming and Batch Transformations: You can efficiently clean, enrich, and transform data as it moves from source to destination, or within Snowflake. Estuary Flow supports any streaming or batch transforms using SQL or TypeScript (ETL), and dbt (ELT).
- Change Data Capture (CDC): With built-in CDC, Estuary Flow enables the identification and capture of changes in the source in real-time. This feature keeps Snowflake up-to-date without the need for unnecessary data transfers.
- Monitoring and Alerting: You can track the status and health of your Redshift to Snowflake data pipeline in real-time with Estuary Flow’s comprehensive monitoring features. In addition, you can set alerts to notify of any anomalies, ensuring proactive issue resolution.
Prerequisites
- To use the Estuary Flow’s Redshift connector, you'll need access credentials to connect to your Redshift cluster and configure IAM roles for the necessary permissions.
- For the Snowflake connector, you’ll need a Snowflake account that includes a target database, schema, virtual warehouse, user with necessary access, account's host URL, and at least one Estuary Flow collection.
Step 1: Connect the Redshift Source
- Log in to your Estuary Flow account if you already have one, or sign up for free.
- After logging in, you’ll be directed to the Estuary Flow dashboard. To configure the source-end of the pipeline, move to the left-side pane and select Sources.
- On the Sources page, click the + NEW CAPTURE button.
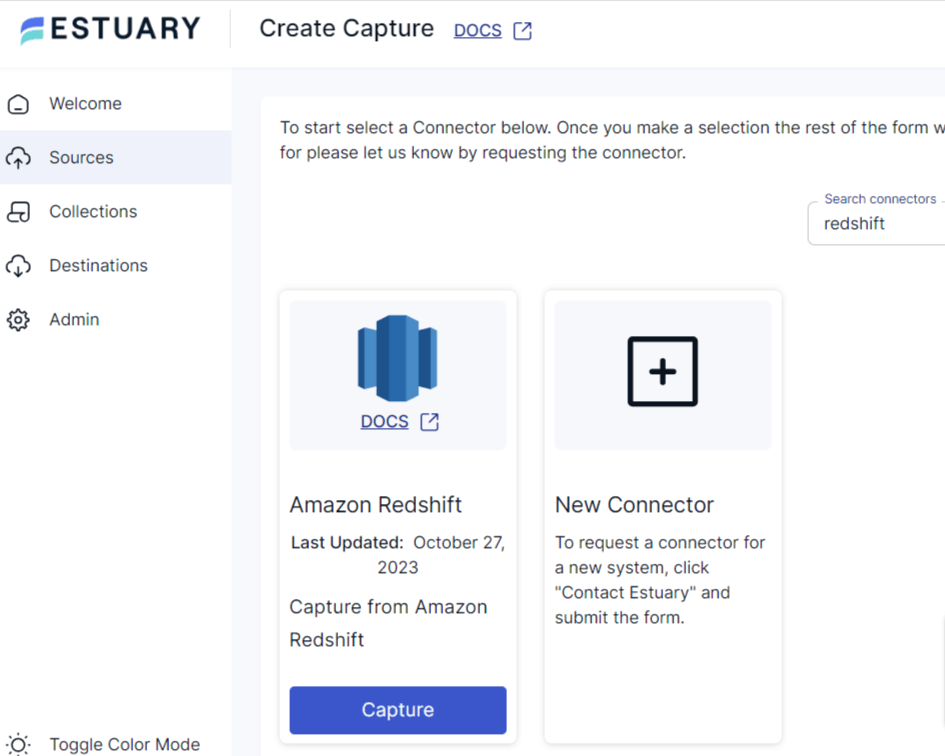
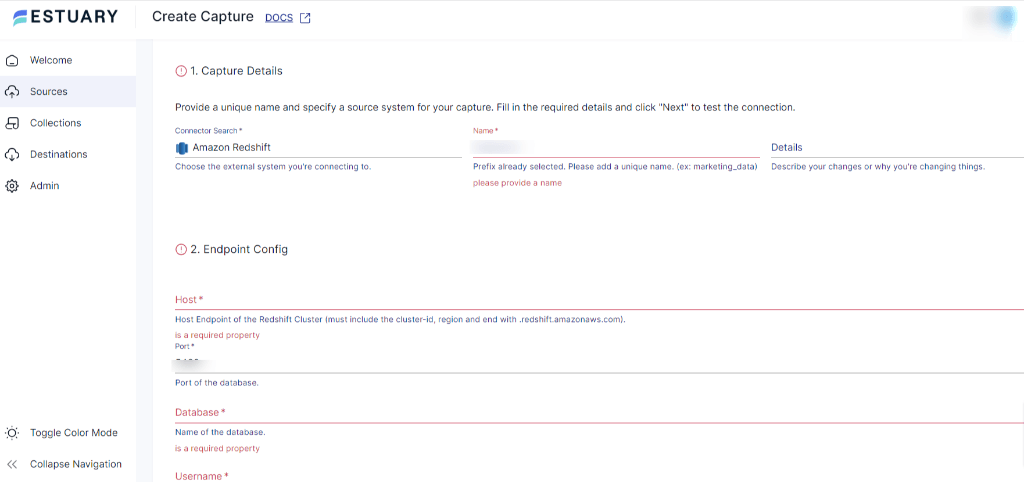
- Search for the Amazon Redshift connector in the Search connectors box on the Create Capture page. Once you find the source connector, click the Capture button.
- On the Redshift connector page, provide a unique Name and specify a source system for your capture in the Capture Details section. In the Endpoint Config section, add the Host endpoint of the Redshift cluster, Port, name of the Database, Username, and Password.
- Once you’ve filled in all the details, click NEXT to test the connection. On a successful connection, click SAVE AND PUBLISH to finish the process.
Step 2: Connect to the Snowflake Destination
- Go back to the Estuary dashboard. On the left-side pane, select Destinations.
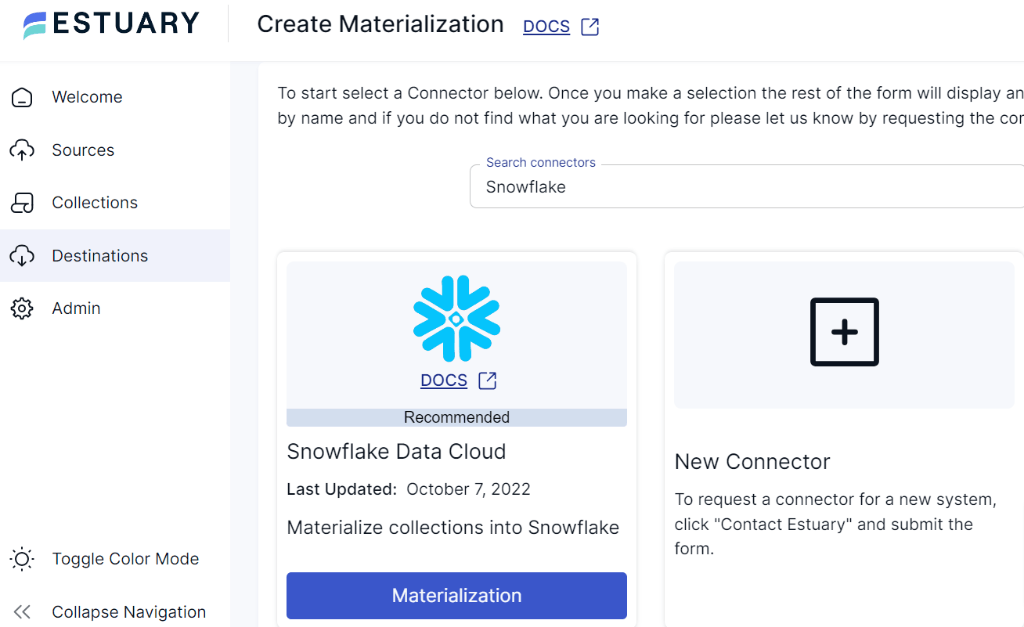
- On the Destinations page, click the + NEW MATERIALIZATION button.
- Search for the Snowflake connector in the Search connectors box on the Create Materialization page. Once you find the destination connector, click the Materialization button.
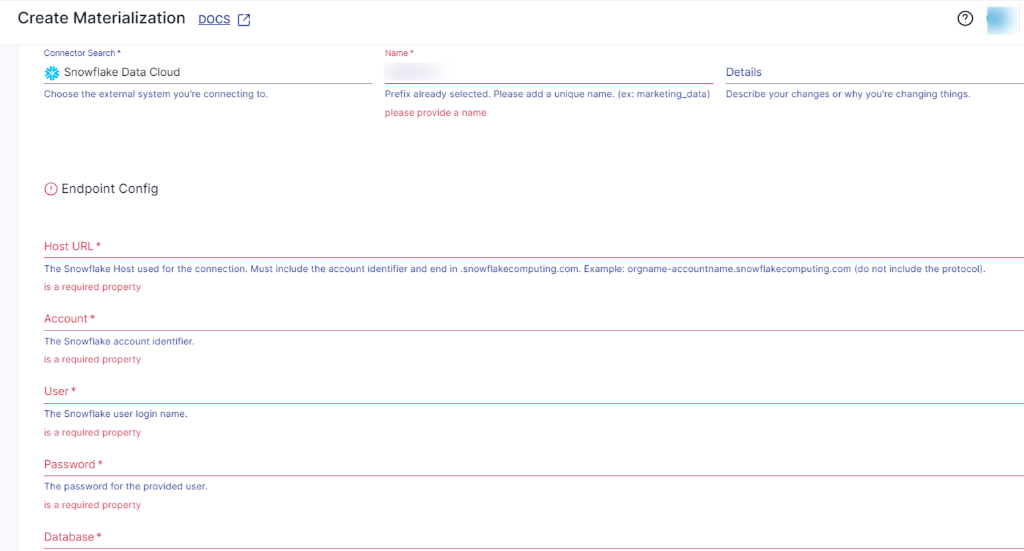
- On the Snowflake connector page, provide a unique Name and specify a destination system for your materialization in the Capture Details section. In the Endpoint Config section, add the Host URL, Snowflake Account identifier, Snowflake User, Password, and Database.
- Once you’ve filled in the required details, click NEXT to test the connection. On a successful connection, click the SAVE AND PUBLISH button to finish the process.
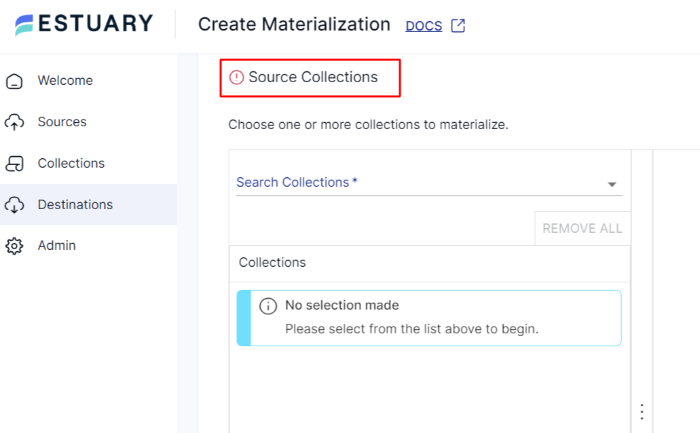
- If your collections weren’t filled in automatically, you have the option to enter it manually from the Source Collection section.
By following these steps, Estuary Flow will automatically replicate your data from Redshift to Snowflake in real-time. For detailed information on how to create an end-to-end data flow, refer to Estuary’s documentation:
Skip the manual steps and set up a no-code, real-time data pipeline with Estuary Flow. Sign up for free and start your first migration in minutes, or contact us for customized support.
Estuary Flow also supports pipelines from Redshift to Databricks, Apache Iceberg, and BigQuery, so you can extend your architecture without re-engineering pipelines.
Method 2: Manually Copy Data from Amazon Redshift to Snowflake Using the COPY INTO Command
Manually transferring data from Redshift to Snowflake involves two main steps. First, run the SQL commands in Redshift to export data to an AWS S3 bucket. Then, use Snowflake’s COPY INTO command to load data directly from the S3 bucket into Snowflake tables.
Here’s a step-by-step guide for manual Redshift to Snowflake data migration.
Prerequisites
- Access to Redshift and Snowflake accounts with necessary permissions
- AWS S3 bucket
- Well-defined schema design and target table in Snowflake
Step 1: Data Extraction from Redshift
- Log into the AWS Management Console and navigate to the Amazon Redshift service. Identify the tables that you want to extract.
- Open the AWS S3 and create a new bucket if you don’t have one, or use the existing one to store the data extracted from Redshift.
- In Redshift, you can use the UNLOAD command to export data to S3. Execute SQL commands in the Redshift Query Editor within the AWS console.
plaintextUNLOAD ('SELECT * FROM redshift_table_name')
TO 's3://s3-bucket/path/'
CREDENTIALS =
AWS_KEY_ID='access-key-id' AWS_SECRET_KEY='secret-access-key'
ALLOWOVERWRITE
DELIMITER ',';
Ensure that you specify the correct S3 bucket path, credentials, and other options as needed.
Step 2: Data Loading into Snowflake
Use Snowflake’s COPY INTO command to load data from S3 to Snowflake. This command in Snowflake is used to load data from an external stage (S3 bucket) into a Snowflake table.
plaintextCOPY INTO snowflake_table
FROM 's3://s3-bucket/path/'
CREDENTIALS = (AWS_KEY_ID='access-key-id' AWS_SECRET_KEY='secret-access-key')
Specify the snowflake_table where the data will be loaded. Add the location of the external stage, which is s3://s3-bucket/path/.
Challenges of Manual ETL from Redshift to Snowflake
Manual data integration from Redshift to Snowflake may seem straightforward, but you’d need to repeat the process for each data transfer (table). This repetition introduces challenges in maintaining data integrity. Here are some challenges you may encounter:
- Complexity and Error-Prone Process: Manually running SQL commands for the extraction and loading of each table introduces complexity, particularly in managing file paths and data formats. The overall process can require extensive resources and time.
- Scalability Concerns: As the data volume in Redshift expands, manually handling the ETL process can become difficult. This leads to decreased efficiency if you’re dealing with a significant amount of data and can impede seamless migration.
- Lack of Monitoring: In manual transfer, you need to actively monitor and track logs. Failure to do so can make troubleshooting issues more challenging within the process.
Conclusion
You’ve learned the ins and outs of both manual and automated approaches for replicating data from Redshift to Snowflake. Using the automated approach with platforms like Estuary Flow streamlines tasks, saving time and resources. On the other hand, using the manual approach can work for one-time migrations, but it involves manual intervention and can potentially lead to delays in the process.
We highly recommend using Estuary Flow, a no-code, reliable, scalable, and real-time data integration tool. It empowers you to streamline complex data workflows effortlessly, ensuring efficient data replication from Redshift to Snowflake.
Sign up for a free account to set up your first pipeline in minutes.
FAQs
Why should I consider migrating from Amazon Redshift to Snowflake?
What are the common challenges to avoid during a Redshift to Snowflake migration?
Is Estuary Flow better than manual migration from Redshift to Snowflake?

About the author
With over 15 years in data engineering, a seasoned expert in driving growth for early-stage data companies, focusing on strategies that attract customers and users. Extensive writing provides insights to help companies scale efficiently and effectively in an evolving data landscape.


