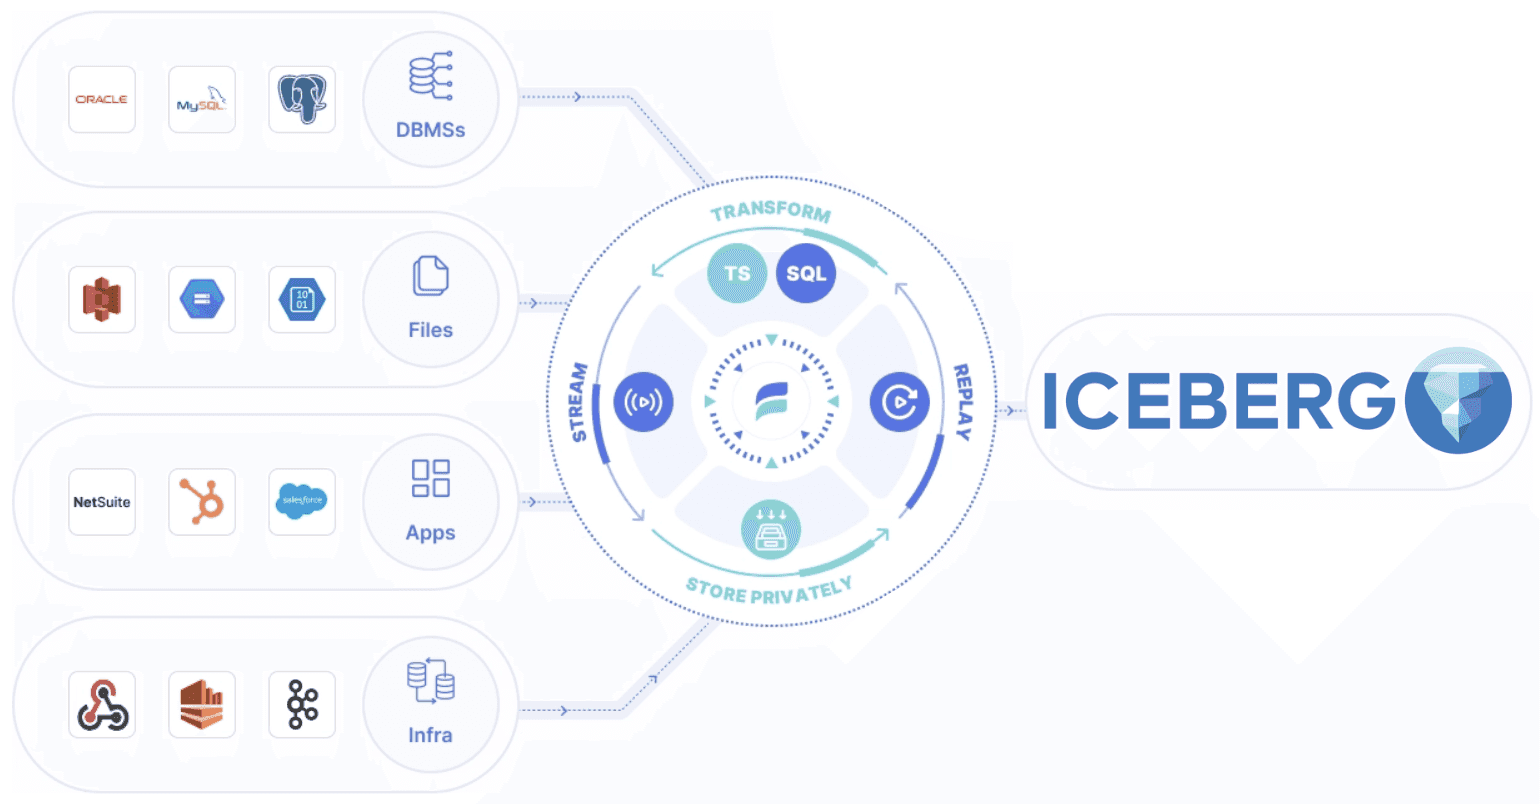
You can migrate data from Amazon Redshift to Apache Iceberg using two proven approaches: an automated pipeline using Estuary, or a manual export-and-load process using Redshift UNLOAD and Apache Spark. The right approach depends on whether you need continuous updates, operational simplicity, or a one-time batch migration.
Estuary is the Right-Time Data Platform that lets teams move data when they choose, including near real-time or batch. This makes it well-suited for keeping Iceberg tables continuously in sync with Redshift without custom scripts or Spark jobs.
Key Takeaways
- There are two practical ways to migrate from Redshift to Iceberg:
- automated sync using Estuary, or
- manual export using CSV files and Apache Spark.
- Estuary is the best option for ongoing pipelines and low operational overhead, especially when Iceberg tables need to stay up to date as Redshift data changes.
- UNLOAD plus Spark is suitable for one-time or infrequent migrations, but requires more engineering effort, infrastructure management, and manual error handling.
- Apache Iceberg provides capabilities Redshift does not, including schema evolution, hidden partitioning, and time travel through table snapshots.
- The choice comes down to latency, maintenance cost, and reliability, not just data volume.
Redshift to Iceberg Migration Options: How to Choose the Right Method
There are multiple ways to move data from Amazon Redshift to Apache Iceberg, but in practice, most teams choose between two approaches: an automated pipeline or a manual export-and-load workflow. The best option depends on how often your data changes, how much operational effort you can support, and whether you need Iceberg tables to stay continuously updated.
Redshift to Iceberg: Method Comparison
| Criteria | Method 1: Estuary Automated Sync | Method 2: UNLOAD + Spark |
|---|---|---|
| Primary use case | Continuous or ongoing data pipelines | One-time or periodic batch migration |
| Setup effort | Low | Medium to high |
| Ongoing maintenance | Minimal | Requires job scheduling, monitoring, retries |
| Data freshness | Right-time options (near real-time or batch) | Batch only |
| Schema changes | Handled automatically | Manual handling required |
| Operational complexity | Low | High |
| Failure recovery | Built-in checkpointing | Custom logic required |
| Best for | Analytics teams, platform teams, production pipelines | One-off migrations, experiments |
When to Use an Automated Redshift to Iceberg Pipeline
An automated approach is best when Redshift data changes regularly, and Iceberg tables need to stay current. This is common in analytics, reporting, machine learning feature pipelines, and data lake architectures where Iceberg acts as the system of record.
Choose an automated pipeline when:
- Redshift tables receive frequent inserts or updates
- You want Iceberg tables to reflect changes without rebuilding jobs
- You want to avoid maintaining Spark infrastructure
- You need predictable and repeatable data movement
Estuary fits this model by continuously materializing Redshift data into Iceberg tables on S3, using a managed pipeline rather than custom code.
When to Use UNLOAD and Apache Spark
The UNLOAD plus Spark approach is better suited for one-time migrations or infrequent batch loads where operational simplicity is less important than full control over the process.
Choose this method when:
- You are performing a one-time historical backfill
- You already operate Apache Spark infrastructure
- Data does not need to stay continuously in sync
- Engineering teams can maintain export and load scripts
This approach trades automation and reliability for flexibility, and typically requires additional work to handle schema changes, retries, and performance tuning.
Best Tools to Load Data from Redshift to Apache Iceberg
Several tools and approaches can be used to load data from Amazon Redshift into Apache Iceberg tables. However, most solutions fall into two categories: managed data movement platforms or custom engineering pipelines built on Spark and AWS services.
The best tool depends on how frequently your data changes, how much operational complexity you are willing to manage, and whether Iceberg tables need to stay continuously updated.
1. Estuary (Automated Redshift to Iceberg Pipelines)
Estuary is the Right-Time Data Platform designed for moving data reliably between operational systems, warehouses, and open table formats like Apache Iceberg. It enables teams to load data from Redshift into Iceberg tables on Amazon S3 with minimal configuration and without writing custom Spark jobs.
Estuary is well-suited for:
- Continuous or recurring Redshift to Iceberg pipelines
- Analytics and machine learning workloads that require fresh data
- Teams that want to avoid managing Spark clusters or batch jobs
Key characteristics:
- Supports right-time data movement, allowing near real-time or batch delivery
- Automatically handles schema changes and table evolution
- Writes directly to Iceberg tables using S3 object storage and a catalog such as AWS Glue
- Reduces operational overhead by eliminating custom export, transform, and load scripts
Because Estuary manages state, retries, and checkpointing internally, it is commonly used when Iceberg tables must remain accurate and up to date over time.
2. Apache Spark (UNLOAD + Custom Load Jobs)
Apache Spark is a common choice for teams that prefer to build and control their own migration pipelines. In this approach, data is first exported from Redshift, typically using the UNLOAD command, and then loaded into Iceberg tables using Spark SQL or PySpark.
Spark is best suited for:
- One-time migrations or historical backfills
- Teams with existing Spark infrastructure and expertise
- Scenarios requiring custom transformations during migration
Key characteristics:
- Requires manual export from Redshift, usually to Amazon S3
- Requires Spark configuration, Iceberg runtime dependencies, and catalog setup
- Schema changes and retries must be handled manually
- Higher operational cost due to cluster management and job orchestration
While Spark offers flexibility, it introduces additional complexity and is less suitable for keeping Iceberg tables continuously in sync with Redshift.
3. AWS-Native Export Pipelines (Limited Scope)
AWS-native tools such as Redshift UNLOAD, AWS Glue jobs, and AWS SDKs can be combined to move data into Iceberg tables. These approaches are typically used as building blocks rather than complete solutions.
They are best suited for:
- Simple batch exports
- Teams already invested heavily in AWS-managed services
- Low-frequency data movement
However, these solutions generally require custom Glue or Spark jobs to write Iceberg tables and do not provide built-in handling for schema evolution, retries, or incremental updates.
Tool Selection Summary
- For ongoing, production-grade pipelines: Estuary provides the simplest and most reliable path.
- For one-time or experimental migrations: Apache Spark offers flexibility at the cost of complexity.
- For basic batch exports: AWS-native tooling can work but requires additional engineering.
Step-by-Step: Automated Redshift to Iceberg Migration Using Estuary
This method uses Estuary to automate data movement from Amazon Redshift into Apache Iceberg tables stored on Amazon S3. It is best suited for teams that want Iceberg tables to stay continuously in sync with Redshift without building and maintaining custom export jobs.
Estuary manages extraction, state tracking, retries, and delivery so that Redshift data can be reliably materialized into Iceberg with minimal operational overhead.
Watch this quick video to learn how Apache Iceberg structures data lakes and how Estuary enables seamless Redshift-to-Iceberg migration.
Prerequisites
Before you begin, make sure you have the following:
- An active Estuary account
- An Amazon Redshift cluster with network access and credentials
- An S3 bucket for Iceberg table storage
- An Iceberg catalog, such as:
- AWS Glue Catalog, or
- A REST-based Iceberg catalog
- IAM permissions allowing access to Redshift and S3
Step 1: Configure Amazon Redshift as the Source
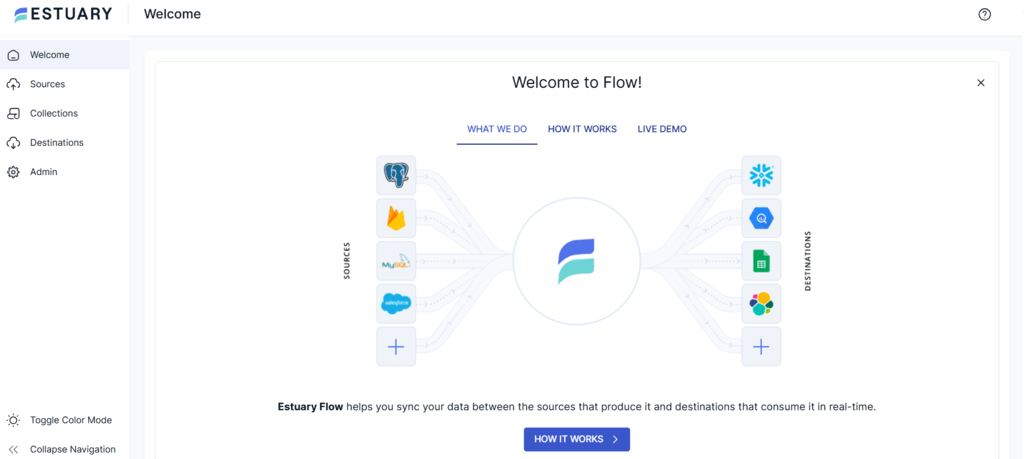
- Sign in to your Estuary account.
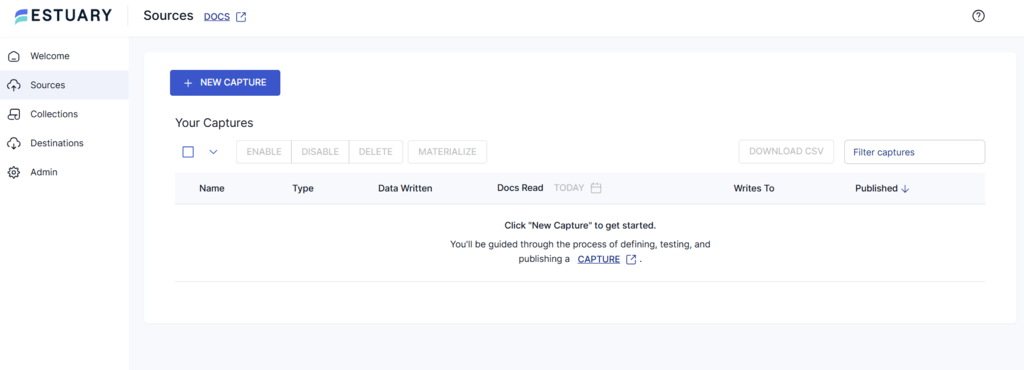
- Click on the Sources tab from the left pane of the dashboard. You will be redirected to the Sources page.
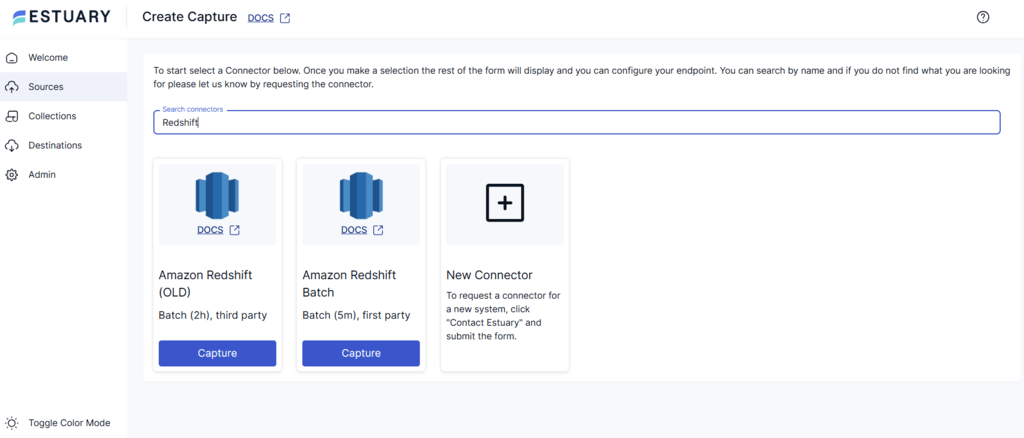
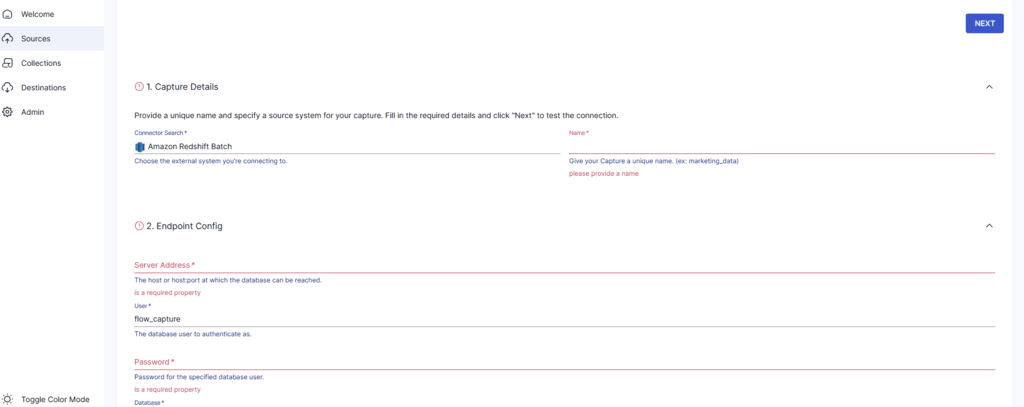
- Click the + NEW CAPTURE button and enter Amazon Redshift in the Search connectors field.
- Select the Amazon Redshift Batch connector and click on the Capture button.
- You will be redirected to the connector’s configuration page, where you must enter all the required fields, including:
- Name: Give a unique name to your capture.
- Server Address: This is the host or host:port to connect to your database.
- User: Provide the Redshift user name for authentication.
- Password: Enter the password for the specified user name.
- After providing all the details, click NEXT, followed by SAVE AND PUBLISH.
Once configured, Estuary reads data from Redshift and represents it internally as collections. These collections form the source for downstream materializations.
Step 2: Configure Iceberg as Destination
- After the source connector configuration, you will see a pop-up summarizing the details of the capture. Here, click the MATERIALIZE COLLECTIONS button to start configuring Iceberg as the destination.
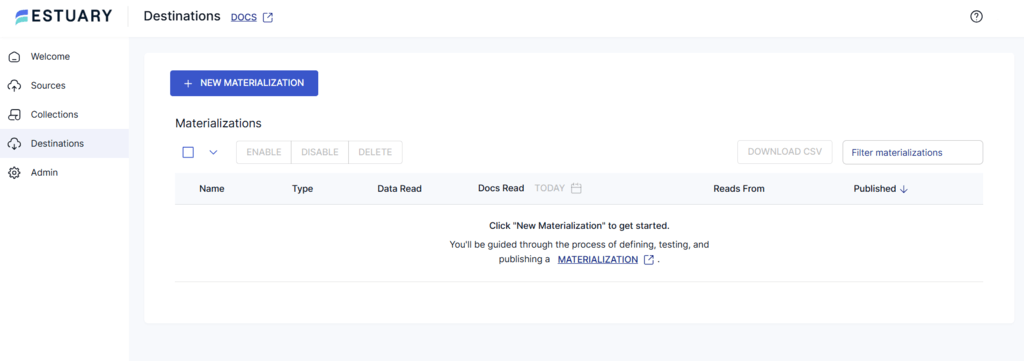
- Alternatively, you can click on the Destinations tab from the left pane of the dashboard. This will redirect you to the Destinations page.
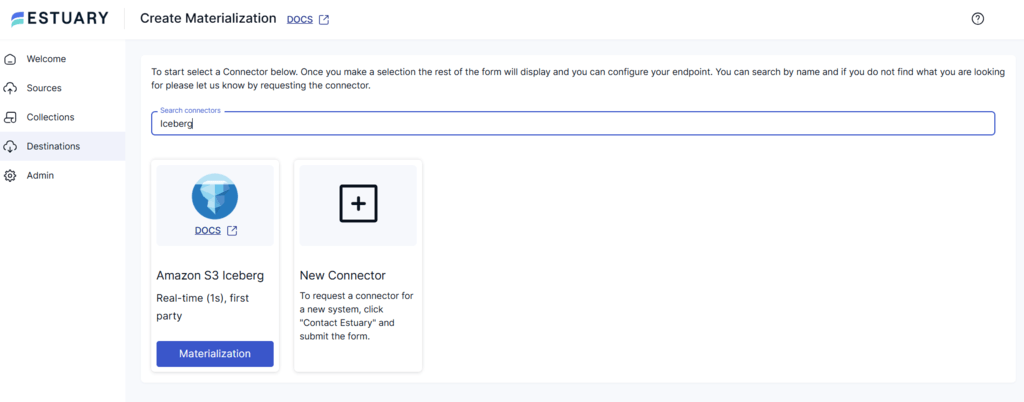
- Click on the + NEW MATERIALIZATION button and type Amazon S3 Iceberg in the Search connectors field.
- The search result will display the Iceberg connector. Click the connector’s Materialization button to proceed with the configuration.
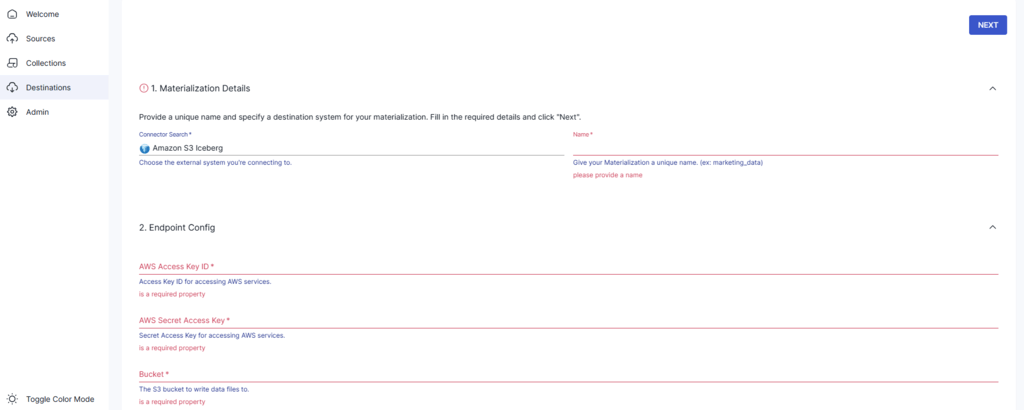
- On the Create Materialization page, fill in the following details:
- Name: Give a unique name for the materialization.
- AWS Access Key ID: Enter the Access Key ID to access AWS services.
- AWS Secret Access Key: Provide the Secret Access Key to utilize AWS services.
- Bucket: Enter the S3 bucket name to write data files.
- Region: Mention the AWS region.
- Namespace: Enter the namespace of bound collection tables.
- While configuring Iceberg as a destination, you can opt for the AWS Glue Catalog if you are an AWS root or IAM user. If you are using the REST Catalog, you must provide the name of the warehouse to which you want to connect. You should also provide the URI and credentials to connect to the catalog.
- If you materialized your collections directly from capture creation, your Redshift collections will already be selected. Otherwise, you can link a source collection.
To do this, click the SOURCE FROM CAPTURE button in the Source Collections section. Then select your Redshift data capture.
- Finally, click NEXT and SAVE AND PUBLISH to complete the configuration process.
Estuary will now write data from Redshift into Iceberg tables on S3, maintaining table metadata through the selected catalog.
When This Method Is the Best Choice
Use this approach when:
- Redshift data changes regularly
- Iceberg tables must stay up to date
- You want to avoid managing Spark jobs or batch scripts
- Reliability and low maintenance are priorities
Because Estuary manages pipeline state and delivery, this method is commonly used for production analytics, machine learning feature pipelines, and shared data lake architectures.
Why This Method Is Highly Reliable
Compared to manual export approaches, this method:
- Eliminates custom UNLOAD scripts
- Avoids long-running Spark batch jobs
- Reduces failure handling and retry logic
- Keeps Iceberg tables synchronized without manual intervention
Try out Estuary for free. If you have any questions, join our Slack group or contact us today!
Step-by-Step: UNLOAD from Redshift and Load into Iceberg Using Apache Spark
This method migrates data from Amazon Redshift to Apache Iceberg using a manual export-and-load workflow. It is best suited for one-time migrations, historical backfills, or scenarios where teams want full control over the migration process and already operate Apache Spark infrastructure.
The workflow consists of two phases:
- Exporting data from Redshift to Amazon S3
- Loading that data into Iceberg tables using Apache Spark
Prerequisites
Before starting, ensure you have:
- An Amazon Redshift cluster with permission to export data
- An Amazon S3 bucket for staging exported data
- An IAM role allowing Redshift to write to S3
- A Spark environment (local, EMR, Databricks, or Kubernetes)
- An Iceberg catalog, such as AWS Glue or a Hadoop catalog
- Iceberg Spark runtime dependencies compatible with your Spark version
Step 1: Export Data from Redshift Using UNLOAD
The most reliable way to export large datasets from Redshift is the UNLOAD command, which writes query results directly to Amazon S3.
Example UNLOAD command:
plaintext language-sqlUNLOAD ('SELECT * FROM your_table')
TO 's3://your-bucket/redshift-export/your_table_'
IAM_ROLE 'arn:aws:iam::123456789012:role/RedshiftUnloadRole'
FORMAT AS CSV
ALLOWOVERWRITE
PARALLEL OFF;
Key points:
- Data is written as one or more CSV files in S3
PARALLEL OFFproduces a single file per slice, which can simplify downstream loading- You can export filtered or transformed data by modifying the SELECT query
This step creates a static snapshot of the Redshift table at the time of export.
Step 2: Configure Spark with Iceberg
To write Iceberg tables, Spark must be started with Iceberg extensions and a configured catalog.
Example Spark SQL configuration:
plaintext language-bashspark-sql \\
  --packages org.apache.iceberg:iceberg-spark-runtime-3.5_2.12:1.7.1 \\
  --conf spark.sql.extensions=org.apache.iceberg.spark.extensions.IcebergSparkSessionExtensions \\
  --conf spark.sql.catalog.local=org.apache.iceberg.spark.SparkCatalog \\
  --conf spark.sql.catalog.local.type=hadoop \\
  --conf spark.sql.catalog.local.warehouse=s3://your-bucket/iceberg-warehouse
In this example:
localis the catalog name- Iceberg table data and metadata are stored in the specified S3 location
You may replace the Hadoop catalog with AWS Glue or a REST catalog depending on your environment.
Step 3: Load CSV Data into Iceberg Tables
Once Spark is running, load the exported CSV files and write them into Iceberg tables.
Example PySpark workflow:
pythonspark.sql("CREATE DATABASE IF NOT EXISTS analytics")

df = spark.read \\
    .option("header", "true") \\
    .option("inferSchema", "true") \\
    .csv("s3://your-bucket/redshift-export/your_table_*")

df.writeTo("local.analytics.your_table") \\
  .using("iceberg") \\
  .createOrReplace()
Optional enhancements:
- Apply explicit schemas instead of
inferSchemafor better type control - Add Iceberg partition transforms such as
days(timestamp_column) - Run compaction jobs after loading to optimize file sizes
After this step, the data is available as an Iceberg table and can be queried by Spark, Trino, Flink, or Redshift Spectrum.
Limitations of the UNLOAD + Spark Approach
While this method offers flexibility, it introduces several trade-offs:
- Manual effort: Schema mapping, retries, and job orchestration must be handled explicitly
- Operational overhead: Spark clusters must be provisioned, monitored, and maintained
- Batch-only behavior: Data is not continuously synchronized
- Higher risk of drift: Schema changes in Redshift require manual updates to Spark jobs
Because of these limitations, this approach is typically used for migrations rather than long-running pipelines.
When This Method Makes Sense
Choose this method when:
- You are performing a one-time or infrequent migration
- You already operate Spark infrastructure
- Data freshness is not critical
- Engineering teams want full control over transformations
Operational Considerations and Best Practices for Redshift to Iceberg Migration
Migrating data from Amazon Redshift to Apache Iceberg is not just a data transfer exercise. To ensure correctness, performance, and long-term maintainability, teams should account for schema behavior, file layout, partitioning, and ongoing maintenance.
The following best practices apply regardless of whether you use an automated pipeline or a manual Spark-based approach.
Schema Mapping and Data Type Alignment
Redshift and Iceberg use different type systems, so careful schema mapping is essential.
Best practices:
- Explicitly validate mappings for
DECIMAL,TIMESTAMP, andVARCHARcolumns - Normalize timestamps to UTC to avoid timezone inconsistencies
- Avoid relying on implicit schema inference for production pipelines
- Track nullable vs non-nullable fields to prevent silent data quality issues
Iceberg supports schema evolution, but incompatible type changes (for example, string to integer) should be handled with care.
Partitioning Strategy for Iceberg Tables
Partitioning has a significant impact on query performance and storage efficiency.
Recommended practices:
- Prefer low-cardinality columns such as dates or regions
- Use Iceberg partition transforms like
days(timestamp_column) - Avoid over-partitioning, which increases metadata overhead
- Design partitions based on query patterns, not source table structure
Iceberg’s hidden partitioning allows partition logic to evolve without rewriting data, which is a key advantage over traditional Hive-style partitioning.
File Size and Compaction
Iceberg tables often receive data in small files, especially when ingesting incrementally.
Best practices:
- Periodically compact small files into larger ones
- Target file sizes in the 256 MB to 512 MB range for analytical workloads
- Schedule compaction as a background maintenance task
- Monitor snapshot and metadata growth over time
Compaction improves query performance and reduces the cost of metadata operations.
Handling Incremental Updates and Late-Arriving Data
Redshift tables may receive updates or corrections after initial ingestion.
Considerations:
- Ensure your pipeline correctly handles updates, not just inserts
- Decide how to manage late-arriving records
- Validate primary key or merge key behavior if updates are expected
- Confirm how deletes are represented in Iceberg tables
Automated pipelines typically handle these scenarios more reliably than custom batch jobs.
Failure Recovery and Idempotency
Failures during migration can lead to duplicate or partial data if not handled correctly.
Best practices:
- Use checkpointing or stateful ingestion when available
- Ensure load jobs are idempotent
- Avoid re-running full loads unless necessary
- Validate row counts and checksums after migration
This is especially important for Spark-based workflows, where retries are often manual.
Security and Access Control
When moving data into Iceberg, security boundaries often change.
Recommendations:
- Apply IAM policies consistently across S3, Glue, and compute engines
- Use separate buckets or prefixes for raw exports and Iceberg tables
- Restrict write access to Iceberg metadata locations
- Audit access patterns for shared data lake environments
Monitoring and Validation
After migration, validate that Iceberg tables behave as expected.
Recommended checks:
- Compare row counts between Redshift and Iceberg
- Validate sample queries across engines (Spark, Trino, Redshift Spectrum)
- Monitor query latency and file scan sizes
- Track snapshot growth and metadata health
Early validation prevents subtle issues from propagating downstream.
Conclusion: Choosing the Right Way to Migrate from Redshift to Iceberg
Migrating data from Amazon Redshift to Apache Iceberg is a practical step for teams that want more flexibility, lower long-term costs, and modern data lake capabilities such as schema evolution and time travel. Iceberg removes many of the constraints associated with traditional data warehouses while remaining compatible with popular query engines.
There are two proven ways to perform this migration:
- An automated pipeline using Estuary, which is best for ongoing, production-grade data movement where Iceberg tables must stay up to date with minimal operational effort.
- A manual UNLOAD plus Apache Spark workflow, which is better suited for one-time migrations or historical backfills where teams want full control and already operate Spark infrastructure.
For most teams building long-lived analytics or machine learning pipelines, automation reduces risk and maintenance overhead. For short-term or experimental use cases, batch-based migration can be sufficient.
The right choice depends on data freshness requirements, operational maturity, and long-term ownership of the pipeline.
Sign up for Estuary today to efficiently integrate data across multiple platforms and develop scalable data pipelines for cutting-edge applications!
Related Syncs With Redshift
FAQs
What are the best tools to load data from Redshift to Iceberg?
Is Apache Iceberg suitable for near real-time analytics?
When should I choose Iceberg over Redshift?

About the author
Dani is a data professional with a rich background in data engineering and real-time data platforms. At Estuary, Daniel focuses on promoting cutting-edge streaming solutions, helping to bridge the gap between technical innovation and developer adoption. With deep expertise in cloud-native and streaming technologies, Dani has successfully supported startups and enterprises in building robust data solutions.


