PostgreSQL and Amazon Redshift are both popular database management systems. However, they’re designed for different purposes. While Postgres is a powerful and flexible database, it’s probably not the best choice for quickly analyzing large volumes of data. On the other hand, Redshift is a columnar database that supports data warehousing and massive analytics workloads. So, you’ll want to move data from Postgres to Redshift for analytic tasks.
However, migrating data from PostgreSQL to Amazon Redshift can be challenging and time-consuming. This is especially true for large datasets.
Let’s look into the capabilities of PostgreSQL and Redshift and the different methods that can help you migrate data from Postgres to Redshift in minutes.
What is PostgreSQL?
PostgreSQL, or Postgres, is a powerful, open-source relational database management system (RDBMS). It was released as the successor to the Ingres database system in 1989 and has become popular for its scalability, reliability, and stability. Today, the platform supports both SQL and JSON querying, allowing you to handle both relational and non-relational data.
Here are some key features of Postgres:
- Open-Source: As Postgres is an open-source RDBMS, anyone can use, modify, or distribute the source code.
- Object-Relational: PostgreSQL supports the storage and manipulation of complex data types. You can store arrays, JSON, geometric data, and even traditional relational data in Postgres.
- Scalability: Postgres can quickly scale up to handle large datasets since it supports partitioning and distributed transactions.
- Foreign Data Wrappers: PostgreSQL supports foreign data wrappers that allow it to access external data sources. They can be any disk files, web services, or other databases.
- Concurrency: Postgres uses a multi-version concurrency control (MVCC) that allows simultaneous, multiple read and write transactions without blocking each other.
What is Redshift?
Amazon Redshift is a fully-managed, cloud-based data warehousing solution offered by Amazon Web Services (AWS). It’s designed to handle large-scale data analytics workloads, making it ideal for efficient and fast data processing. Redshift uses SQL to facilitate data management and analytics. However, you can use BI tools to generate analytics reports and make informed decisions.
Here are some key features of Redshift:
- Columnar Storage: Redshift stores its data in a columnar format. This allows for faster data retrieval and data compression, reducing storage requirements and costs.
- Massive Parallel Processing (MPP): Redshift uses MPP for data distribution and query processing across multiple nodes. This enables you to obtain faster query response times even on very large datasets.
- Integration with AWS Services: You can seamlessly integrate Redshift with other AWS services like EMR, S3, and Kinesis. It makes data ingestion, analysis, and transformations easier.
- SQL Compatibility: Redshift is compatible with standard SQL, making it straightforward to write and execute queries.
- Cost-Effective: Amazon Redshift offers pay-as-you-go pricing options. There are no upfront costs involved, making it a cost-effective data warehousing solution.
How To Migrate Data From PostgreSQL to Redshift?
If you want to migrate Postgres data to Redshift, you can follow one of the following methods.
- Real-time data pipeline using a Saas alternative
- Manual migration
- AWS Database Migration Service
Method #1: Real-Time Data Pipeline Using a Saas Alternative
There are several low or no-code ETL tools that simplify migration from one platform to another in real time. As SaaS-based ETL tools automate the data transfers, you don’t have to build the data pipelines manually.
Estuary Flow is one such platform that you can use to create real-time data pipelines at scale. You can use Flow’s built-in connectors to establish a connection between two platforms for data migration or replication in real time.
Here are the steps for using Estuary Flow to migrate Postgres to Redshift with change data capture (CDC). Once you complete a few database setup tasks, the entire process will take just a few clicks. Estuary Flow takes care of compatibility and schema issues for you.
- Prepare your Postgres and Redshift databases and credentials.
- See the Postgres setup steps.
- See the Redshift prerequisites.
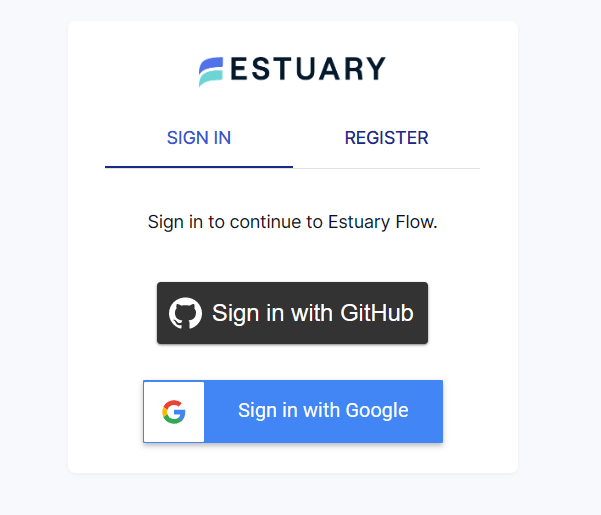
- Log in to your Estuary account, or register for a free account if you don’t have one.
You’ll be redirected to the Estuary dashboard, which has an easy-to-use and user-friendly interface. Click on Captures on the left-side pane of the dashboard to set up the source database end of the CDC pipeline. - On the Captures page, click on the New Capture button.
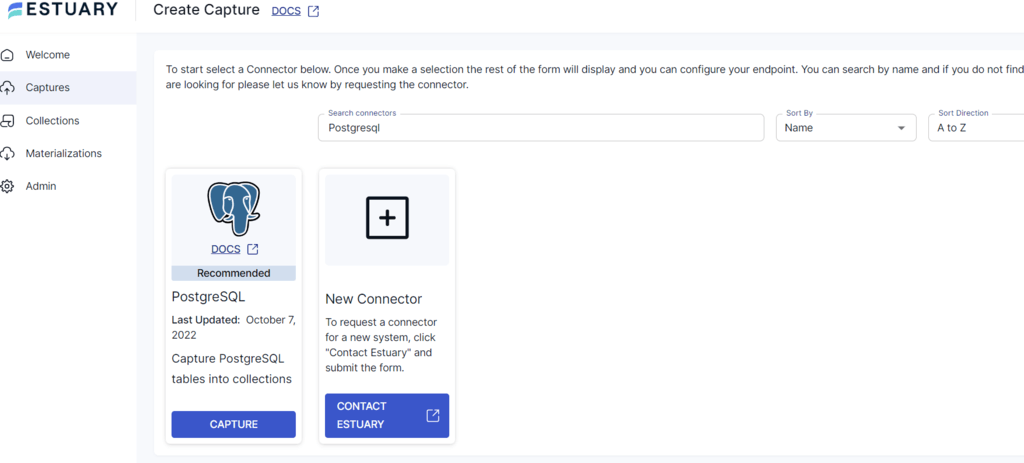
- Enter the name of your source database within the search bar to search the connector. In this case, the source database is PostgreSQL.
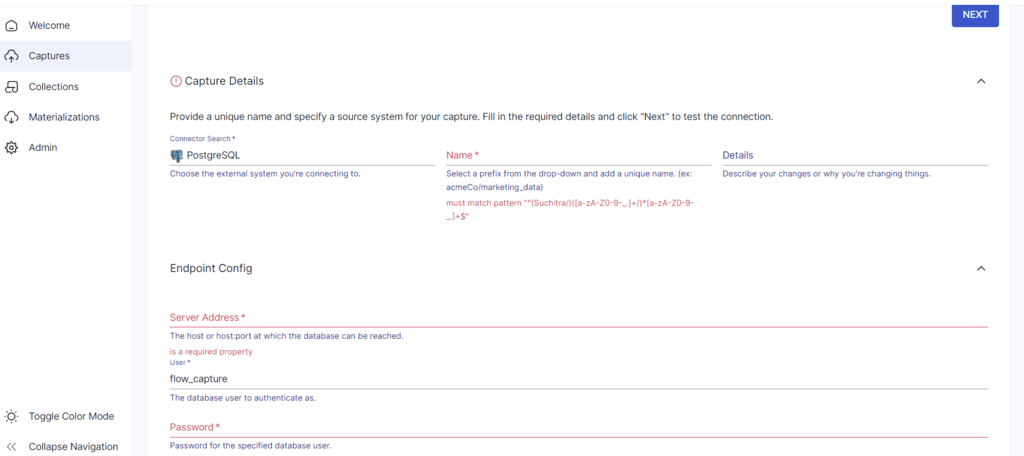
- Click on the Capture button in the PostgreSQL search result. Next, enter the capture details, like name, server address, username, and password.
- Click on Next after you’ve entered the details. Then, click on Save and Publish.
- Now, you must set up the destination for your data. Either click Materialize Connections in the pop-up or return to the Estuary dashboard. Here, click on Materializations on the left-side and click on the New Materialization button.
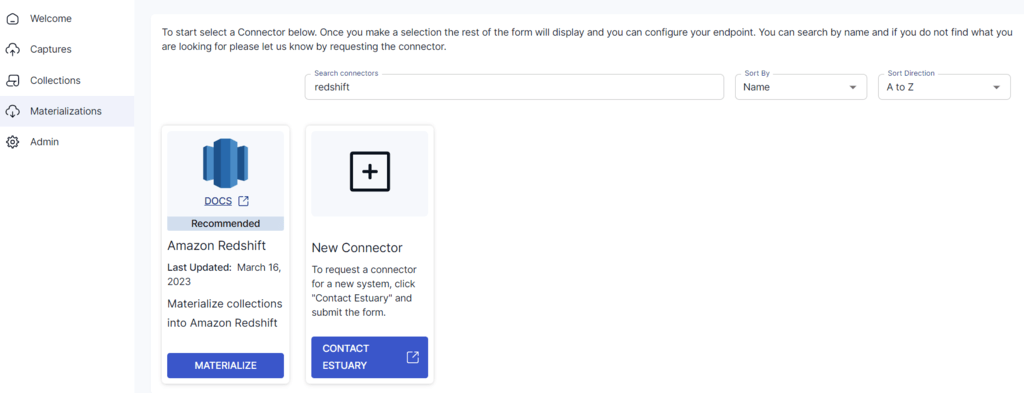
- Enter your destination database in the search bar to search the connector. In this case, it’s Redshift.
- Now, click on the Materialize button for the Redshift connection. You’ll have to fill in the server address, username, and password, just like you did with Postgres. However, there are some additional fields in Redshift that you must fill in for the S3 Staging Bucket. Once you’re done providing all the required details, click Next.
- In the Collection Selector, the data collections you captured from the Postgres table might already be listed. If they’re not, search for and select them.
If you’d like, you can also change the default name for the resulting table in Redshift. - Click Save and publish.
Flow backfills your historical data from Postgres and migrates it to Redshift. It also begins listening for new data in Postgres, which it will replicate to Redshift within milliseconds as long as the pipeline is running.
If you’d like more detailed instructions, see our documentation on:
- The PostgreSQL source connector
- The Amazon Redshift materialization connector
- Detailed steps to create a Data Flow
Method #1: AWS Database Migration Service
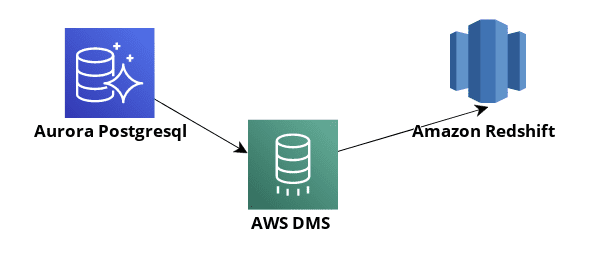
AWS Database Migration Service (AWS DMS) is a fully managed AWS service. You can use AWS DMS to migrate data from your databases to the AWS cloud platform. However, you can also move data from AWS to on-premise databases. The requirement for this is that at least one of your endpoints (target or source) should be on an AWS server.
AWS DMS uses an endpoint to access your source or target data system. A DMS source is the system from which you want to replicate data. The source could be a relational database like MySQL or PostgreSQL, a document database, or an S3 bucket. And a DMS target is the destination of the replication process. Just like with sources, targets can also be a relational or document database or an S3 bucket.
To move data, you must first create a replication instance in AWS DMS. This instance will communicate with the source and destination clusters—Postgres and Redshift. Then, you need to create the source and destination endpoints. The final step is to create a migration task in which you define the endpoints and any transformation rules. Upon creation of the migration task, you can start the migration.
AWS DMS will read the data from the source database—Postgres—and create a series of CSV files. Then, AWS DMS will move these files to Amazon S3 buckets. After the files are uploaded to Amazon S3 buckets, AWS DMS uses the copy command to move the data into Amazon Redshift.
For detailed steps on how to use AWS DMS to migrate Postgres to Redshift, follow this article.
Also Read: Critical Limitations of AWS DMS for CDC
Method #2: Manual Migration
Here’s a brief rundown of the different steps involved in the manual process:
Step 1: Build a Compatible Schema on Redshift
Certain Postgres data types aren’t supported in Redshift. You must convert the unsupported data types into Redshift-compatible types. So, it’s essential to build a Redshift-compatible schema for successful Postgres to Redshift migration.
Here’s an example command to build a table in Redshift:
plaintextCREATE TABLE CUSTOMER_INFO (ID INT, NAME VARCHAR(20), ADDRESS VARCHAR(50), BIRTH_DATE TIMESTAMP)
DISTSTYLE KEY
DISTKEY (ID)
SORTKEY (ID, BIRTH_DATE);
Note that Redshift supports a maximum character length of 65535. Any field larger than that, like text, must be truncated or split across multiple columns.
Step 2: Extract Data from Postgres and Upload it to S3 Buckets
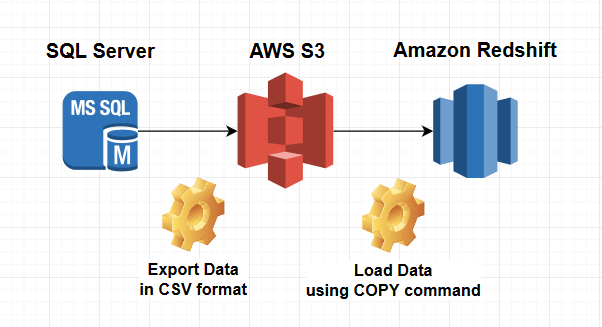
You must extract the data from Postgres and upload it into Amazon S3 buckets. You can use COPY command to extract Postgres data into CSV files.
Here’s an example of the COPY command:
plaintextCONNECT DATABASE_NAME;
COPY (SELECT(ID, NAME, ADDRESS, BIRTH_DATE) FROM CUSTOMERS_INFO) TO ‘CUSTOMERS_DATA.CSV WITH DELIMITER ‘|’ CSV;
This command connects to the PostgreSQL database and exports the data from the Customers_info table to the file named Customers_data.csv.
You can use AWS Console or Amazon CLI to upload your exported CSV file to an Amazon S3 bucket.
Step 3: Load the Data from S3 to a Temporary Table in Redshift
Now, you can load this data into the Redshift target table. Redshift isn’t designed for INSERT operations. You can use the COPY command, which is the most efficient way for bulk uploads. When you perform COPY Commands, Redshift reads multiple files simultaneously. Then, it automatically distributes the workload to the cluster nodes for quick data movement.
The best approach is to create a temporary table in Redshift and copy the data from S3 to the temporary table. Then, you can insert the data from the temporary table into the Redshift target table.
This method has a few downsides. It works only if you move data once or in batches from Postgres to Redshift. As a result, this manual migration method is useful only for one-time or infrequent replications to Redshift, not continuous replications.
Conclusion
You just read about the three different methods of Postgres to Redshift migration.
While the AWS DMS and manual ETL methods will work well for this purpose, Estuary Flow offers the most efficient path. It creates a real-time CDC pipeline that will keep your Redshift database always up-to-date with changes in Postgres.
Ready to move on from time-consuming, frustrating manual code and repetitive processes? Estuary Flow has a free tier — there’s no credit card required to get started!
Have questions? You can find our team on Slack!

About the author
With over 15 years in data engineering, a seasoned expert in driving growth for early-stage data companies, focusing on strategies that attract customers and users. Extensive writing provides insights to help companies scale efficiently and effectively in an evolving data landscape.


