MySQL and Amazon Aurora are both highly robust database management systems. While MySQL is one of the most popular open-source database management systems, offering excellent storage and manipulation capabilities, it may struggle with larger data volumes, leading to latency and slower queries. A viable solution to this problem is to migrate data from MySQL to Amazon Aurora, which offers scalability and enhanced query performance.
This guide will delve into both platforms and provide step-by-step instructions for migrating data from MySQL to Aurora using two distinct methods: the Percona XtraBackup method and Estuary tool method. The Estuary offers faster data transfer through a streamlined 3-step process:
- Setup Account in Estuary
- Configure MySQL as the Source Connector
- Configure Amazon Aurora as the Destination Connector
By the end of this guide, you'll be equipped to choose the migration method that best suits your needs, ensuring a smooth transition to the high-performance capabilities of Amazon Aurora.
MySQL Overview
MySQL is an open-source Relational Database Management System (RDBMS) developed by Oracle. It uses Structured Query Language (SQL) to structure and organize data in tables with columns and rows. This structured format allows efficient maintenance and data manipulation while ensuring data integrity.
Businesses across the globe widely use MySQL due to its efficient and reliable data management features. It is considered one of the most popular databases due to its reputable security, scalability, and transaction support.
Some key features of MySQL are:
Data Security: MySQL uses encrypted passwords and has a strong security layer to protect data from intruders. It provides businesses with secure solutions for data storage.
Scalability: MySQL supports large databases with up to 50 million columns and 150,000 to 200,000 tables.
Aurora Overview
Amazon Aurora, a fully managed relational database service offered by Amazon Web Services (AWS), is designed to provide high performance, availability, and scalability for database workloads. Aurora is compatible with MySQL and PostgreSQL, making the migration process more accessible for users who want to seamlessly switch to this cloud-native solution.
Its Multi-Availability Zone (Multi-AZ) architecture distributes data across numerous geographically separate locations, improving fault tolerance and ensuring high availability.
Aurora offers various unique features over traditional RDS. Here are some of its features:
- Storage Auto Scaling: Aurora automatically scales database volumes as your storage demands fluctuate. It also scales the input/output to match the requirements of your most demanding workloads.
- Database Backups: Aurora stores user-initiated DB snapshots in Amazon S3 until they are explicitly deleted. You can use the DB snapshots to create a new instance whenever you desire.
- Easy to Use: You can use a single API class or CLI or the Amazon RDS Management Console to create a new Aurora DB instance. Also, new instances in Aurora are preconfigured with the appropriate parameters and settings.
Two Methods to Migrate MySQL to Aurora
Here are two ways you can migrate your data from MySQL to Amazon Aurora:
- Method 1: Using Estuary Flow for migrating from MySQL to Aurora
- Method 2: Using Percona XtraBackup to migrate MySQL to Aurora
Method 1: Using Estuary Flow for Migrating From MySQL to Aurora
You can efficiently migrate your data from MySQL to Amazon Aurora using real-time ETL (extract, transform, load) tools. Estuary Flow is one such no-code, real-time ETL tool that streamlines data migration from MySQL to Amazon Aurora.
Estuary Flow is well-suited for applications that require near real-time data processing since it supports change data capture (CDC), which guarantees decreased latency. One of the platform’s main advantages is its inherent scalability, which can effectively manage massive data streams.
This is especially useful when data volumes fluctuate, and performance needs are high. Thanks to pre-built connectors and a straightforward no-code UI, Flow’s user-friendly configuration makes it simple to migrate MySQL to Aurora.
If you are new to Estuary Flow, you can follow this step-by-step guide:
Prerequisites:
But, first, be sure to check out what you’ll need for the platforms below before you build your pipeline:
Step 1: Login or Register
Step 2: Configure MySQL as the Source Connector
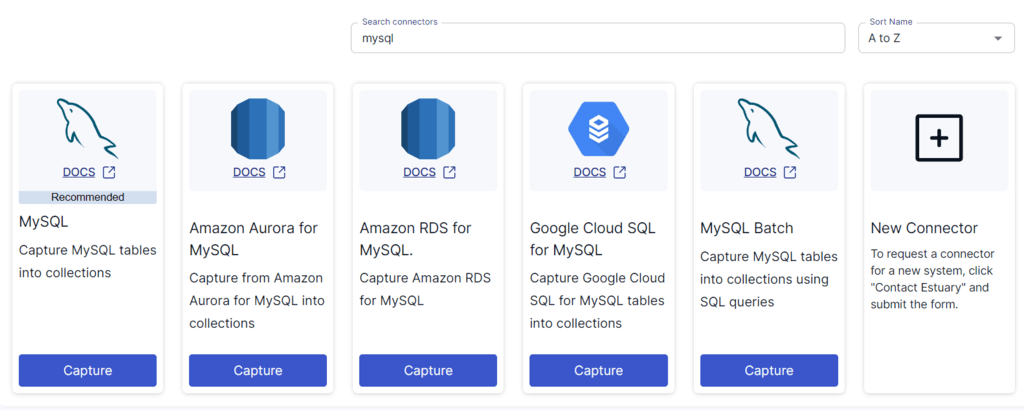
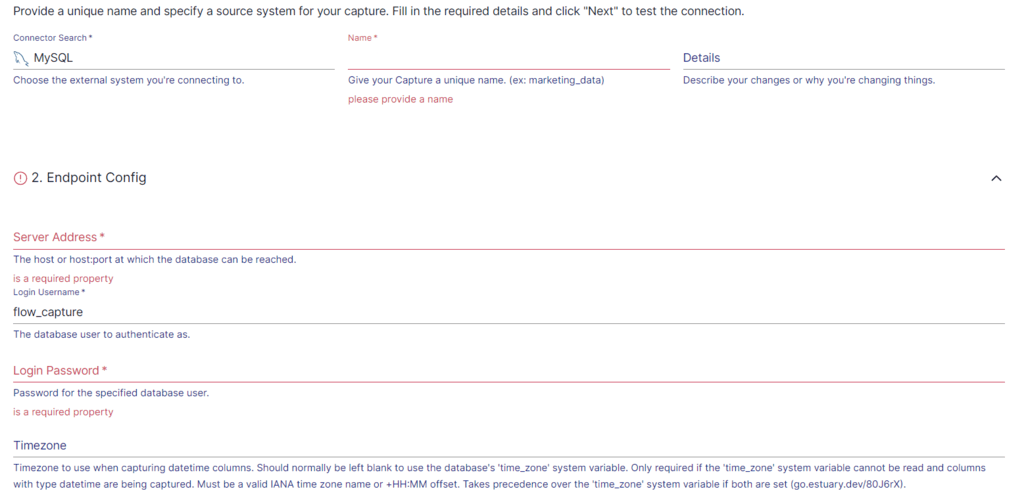
- Once logged in, select the Sources option from the left-side pane of the main dashboard. Then click the + NEW CAPTURE button on the top left corner of the source page and search for MySQL using the Search connectors box.
- Click on the Capture button on the MySQL connector.
- You’ll be taken to the MySQL connector page. On the Create Capture page, provide Name, Server Address, Login Username, Password, and Database information. Then click on NEXT > SAVE AND PUBLISH.
This will capture data from MySQL to Flow collections.
Step 3: Configure Amazon Aurora as the Destination Connector
After successfully configuring the MySQL capture, a pop-up window presenting the capture details appears. In this pop-up, click the MATERIALIZE CONNECTIONS button to start configuring the pipeline’s destination end.
Alternatively, after configuring the source, go to the Destinations option on the left-side pane of the dashboard. This will redirect you to the Destinations page.
- On the Destinations page, click on the + NEW MATERIALIZATION button.
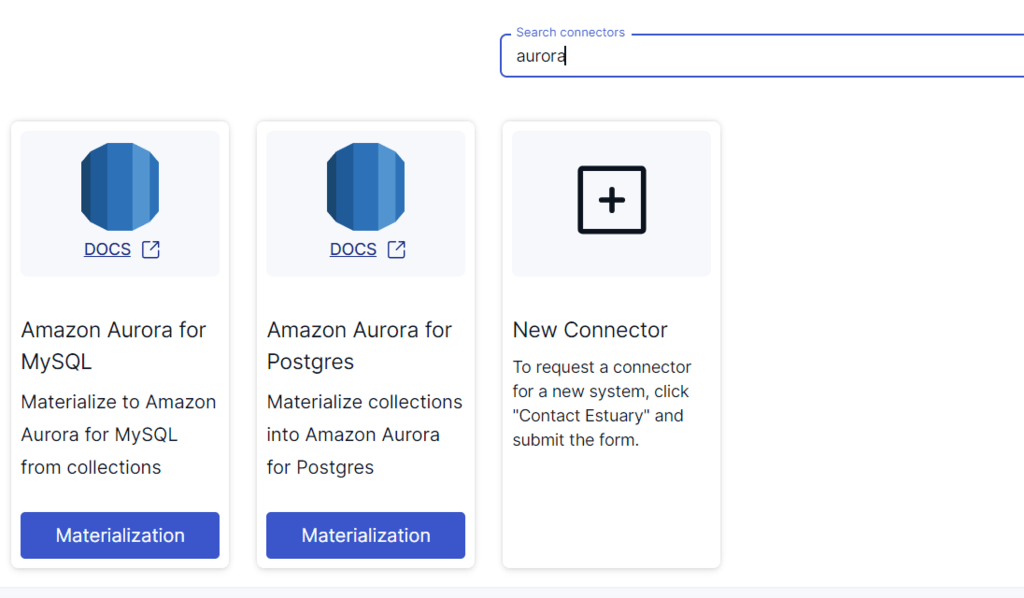
- Use the Search connectors box on the Create Materialization page to Search for Aurora.
- To configure the destination, click on the Materialization button once you see Amazon Aurora for MySQL connector.
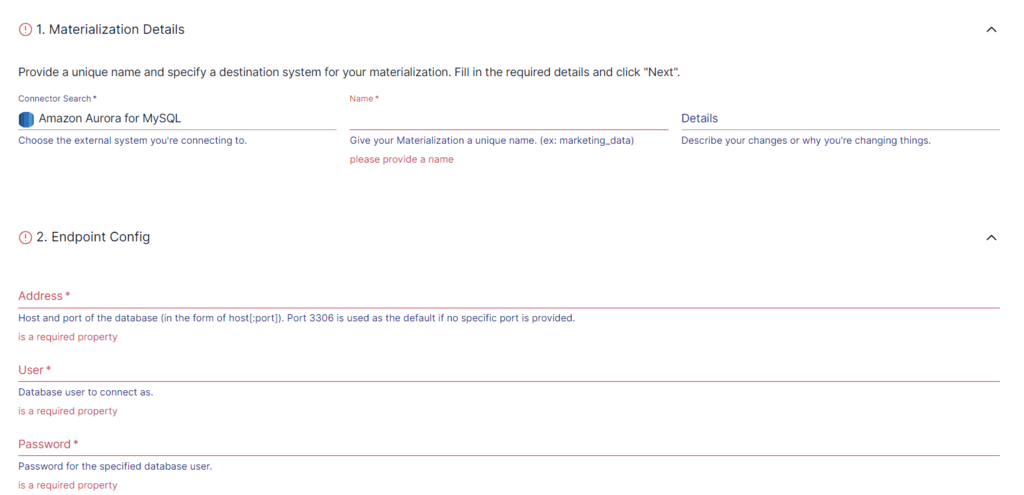
On the Amazon Aurora Create Materialization page, fill in essential information such as Name, Server Address, Login Username, Password, and Database information. Then click on NEXT > SAVE AND PUBLISH to conclude the migration from MySQL to Amazon Aurora.
Bonus: We can also use the same method to move data from MySQL to Aurora for PostgreSQL, instead of Aurora for MySQL.
Advantages of Using Estuary Flow
Here are the advantages of using Estuary Flow:
- No Code Platform: Estuary Flow has a user-friendly interface that allows users to perform the entire migration process from MySQL to Aurora with just a few clicks. Professionals with minimal technical knowledge can perform the task using this tool.
- Pre-Built Connectors: It provides a variety of 200+ pre-built connectors for connecting various sources to destinations. Estuary Flow reduces data migration mistakes and allows you to connect several databases swiftly.
- Scalability: Estuary Flow automatically scales pipelines to increase data volumes, providing consistent performance and ensuring data integrity.
Method 2: Using Percona XtraBackup to Migrate MySQL to Aurora
You can perform a migration from MySQL to Amazon Aurora by creating a backup using Percona XtraBackup, an open-source tool, and uploading it to the Amazon S3 bucket. Then, you can restore the backup to Amazon Aurora. Here are the steps to follow for this process.
Prerequisites:
Step 1: Backing Up Files with Percona XtraBackup
Use the Percona XtraBackup utility to create a full backup of your MySQL database files.
- Enter the below command in the Percona utility command line to create a backup in /on-premises/s3-restore/backup folder.
plaintextxtrabackup --backup --user=<myuser> --password=<password> --target-dir=</on-premises/s3-restore/backup>- You can use the --stream option to compress your backup into a single file or split it into multiple files. Here is an example to compress your backup to multiple Gzip (.gz) files.
plaintextxtrabackup --backup --user=<myuser> --password=<password> --stream=tar \
   --target-dir=</on-premises/s3-restore/backup> | gzip - | split -d --bytes=500MB \
   - </on-premises/s3-restore/backup/backup>.tar.gz
Step 2: Upload the Backup to an Amazon S3 Bucket
- Sign in to your Amazon S3 Console and create a bucket by clicking on Create bucket.
- On the Create bucket page, enter the required information, like Bucket name and AWS region, and click on Create bucket.
- Select the bucket from the Buckets list that you created and click on Upload on the Objects tab for your bucket.
- Click Add files under Files and folders and select the MySQL backup you want to upload. Then, click on Start Upload.
Step 3: Restore the Backup on Amazon Aurora
- Open your Amazon RDS Console and select the AWS region where you uploaded your backup.
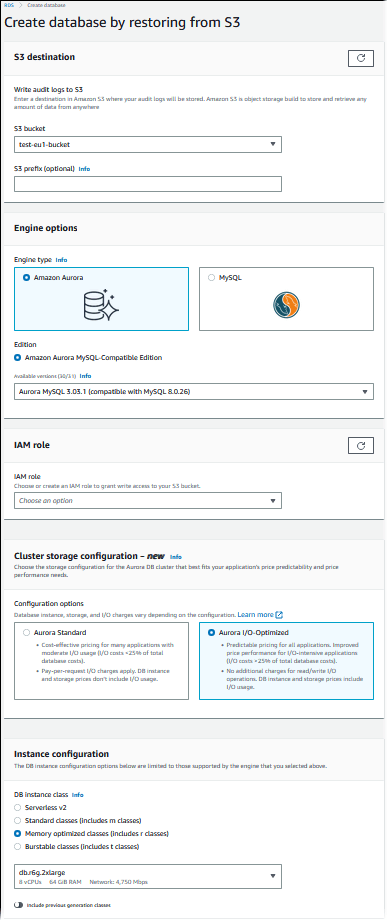
- Select Databases from the navigation pane and click on Restore from S3.
- On the Create database by restoring from S3 page, enter the required information such as S3 destination, IAM role, and Instance configuration. Select Amazon Aurora for Engine options.
- Click on Create database to launch the Aurora DB Instance.
Limitations of Using Percona XtraBackup to Migrate MySQL to Aurora
- Version Control: While using Percona to create a backup of your MySQL database, it is crucial that your Percona XtraBackup and MySQL versions are compatible.
- Technical Expertise: Performing the migration using Percona requires a strong understanding of MySQL, Percona utility, and Amazon Web Services.
- Size Restrictions: While uploading a file to an S3 bucket, Amazon S3 limits the file to 5 TB. You need to split your backup files if the size exceeds 5 TB.
To Summarize
The increased demand to migrate MySQL RDS to Aurora reflects a strategic shift towards harnessing the advantages of a global-scale database solution. This can be achieved effortlessly with two different methods—by using no-code ETL tools like Estuary Flow or by manually migrating using Percona XtraBackup.
The manual method requires technical expertise and can be time-consuming and complex, especially for large databases. Fortunately, for those looking for a faster and easier method, SaaS tools like Estuary Flow provide seamless connectivity between the two databases with just a few clicks. With over 200+ connectors, Flow offers solutions that streamline the process to migrate data from MySQL to Aurora.
Estuary Flow makes the transition from MySQL to Amazon Aurora as straightforward and effortless as possible. The fully-managed platform provides connectors to various AWS services, including MySQL and databases supported on Aurora. Get Flow today for seamless migration between any supported source and destination of your choice.
FAQs
Does AWS Aurora support MySQL?
Yes, AWS Aurora supports MySQL. Amazon Aurora offers two compatibility modes: one with MySQL and another with PostgreSQL. Aurora MySQL supports MySQL features, and applications can generally run without modification. It can also deliver up to 5x better performance than MySQL.
How to migrate from MySQL to AWS?
To migrate from MySQL to AWS, you must prepare the AWS environment with an account and access permissions. Then, configure the target instance in AWS. You can use AWS Database Migration Service (DMS), perform a manual migration with mysqldump, or use ETL tools like Estuary Flow for the migration.
Is Aurora faster than MySQL?
Yes, Amazon Aurora is faster than MySQL; it offers up to five times the throughput of standard MySQL. The impressive performance is mainly due to Aurora’s unique architecture, faster failover times, and effective scaling.

About the author
With over 15 years in data engineering, a seasoned expert in driving growth for early-stage data companies, focusing on strategies that attract customers and users. Extensive writing provides insights to help companies scale efficiently and effectively in an evolving data landscape.


