In a digital world, gaining valuable insights from marketing data is an indispensable element of business growth. However, to make the most of their marketing data residing on platforms like Marketo, you should centralize the information in a data warehouse. For centralization, you can use Amazon Redshift, a cloud-based data warehouse. By moving your Marketo data into Redshift, you can optimize your marketing efforts, gain better insights, and improve decision-making.
Let’s start by looking at an overview of both platforms before getting to the methods you can use for integration.
What is Marketo?
Marketo is a SaaS-based marketing automation platform owned by Adobe. You can use Marketo to streamline your organization’s marketing campaigns and automate marketing tasks, workflows, and engagement.
Here are some key features of Marketo:
- Marketing Campaign Automation: Marketo enables you to automate marketing workflows and campaigns. You can use its visual campaign builder to create automated campaigns for personalized messages based on customer behavior, like website visits, clicks, and email opens.
- Analytics and Reporting: The comprehensive analytics and reporting features of Marketo help measure the performance and effectiveness of your marketing campaigns. It provides advanced reporting on crucial metrics like engagement, conversion rates, and ROI.
- Lead Management: Marketo allows you to capture, manage, and nurture leads effectively. It provides tools for lead scoring, multi-channel automation, CRM integration, lead segmentation, and lifecycle management. This enables you to identify and prioritize leads, helping in higher conversion rates.
- Account-Based Marketing: This feature helps you to name target accounts and roles that you wish to reach. You can use Marketo Account-Based Marketing (ABM) tools to create a list of leads to target. Then, you can optimize your website experience for those leads and engage them across channels like Email, Web, Ads, etc.
What is Redshift?
Amazon Redshift is a fully-managed data warehouse service provided by Amazon Web Services (AWS). It is designed to store and analyze petabyte-scale data workloads efficiently to help businesses make informed decisions.
Here are some essential features of Amazon Redshift:
- Columnar Storage: It organizes its data in columns, making it convenient for optimized query performance. To execute your queries, it only accesses the required Redshift columns, thereby reducing I/O overhead. This, in turn, makes it a cost-effective solution to analyze your data using your existing BI tools.
- Massively Parallel Processing (MPP): This is a distributed design approach implementing a parallel processing architecture. Large processing jobs are broken down into smaller jobs that are distributed across a cluster of compute nodes. These nodes perform parallel computations instead of running them sequentially, thereby expediting the query execution.
- Advanced Analytics: You can perform complex analytics in Redshift with SQL queries. It provides several analytical functions like window functions, spatial functions, and support for data aggregation, formatting, and filtering.
- Integration with Other AWS Services: Redshift can integrate with other AWS tools and services like AWS Glue, Amazon S3, Amazon QuickSight, and AWS IAM. You can use such integrations to leverage the full potential of Redshift for different data needs.
Methods for Marketo to Redshift Integration
The two different methods you can use to integrate Marketo with Redshift are:
- Method #1: Manual Integration of Marketo to Redshift
- Method #2: Using SaaS alternatives like Estuary
Method #1: Manual Integration of Marketo to Redshift
This method of integrating Marketo to Redshift involves the manual extraction of Marketo data using its API, then loading it into Redshift.
The different steps involved in the manual integration method are as follows:
Step 1: Generate an Access Token for Marketo API
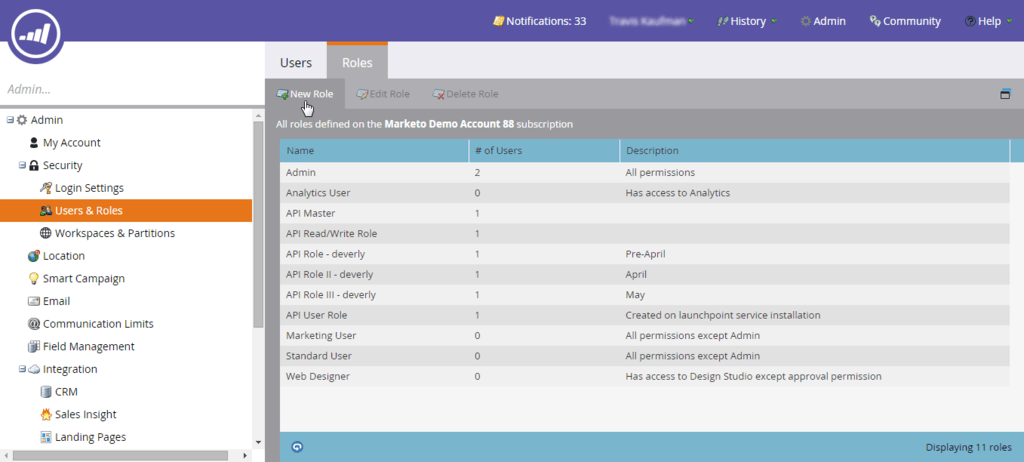
First, sign in to your Marketo account and open the Admin page. Click on Users & Roles on the left-side panel of the dashboard, then click on New Role.
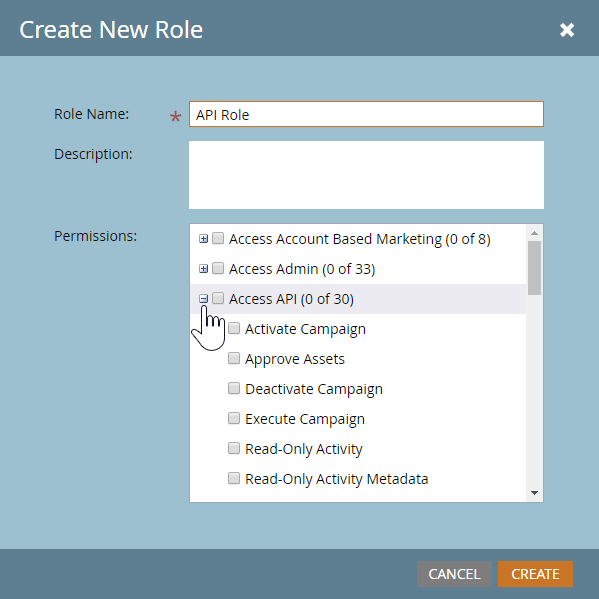
Provide a suitable Role Name and Description (optional), then expand the Access API section in Permissions.
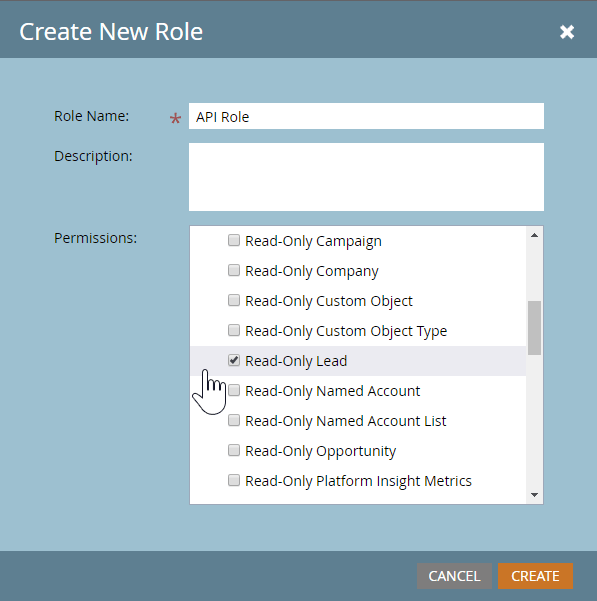
Scroll through the different Access APIs and select only the required permissions. In this example, we’ll select Read-Only Lead.
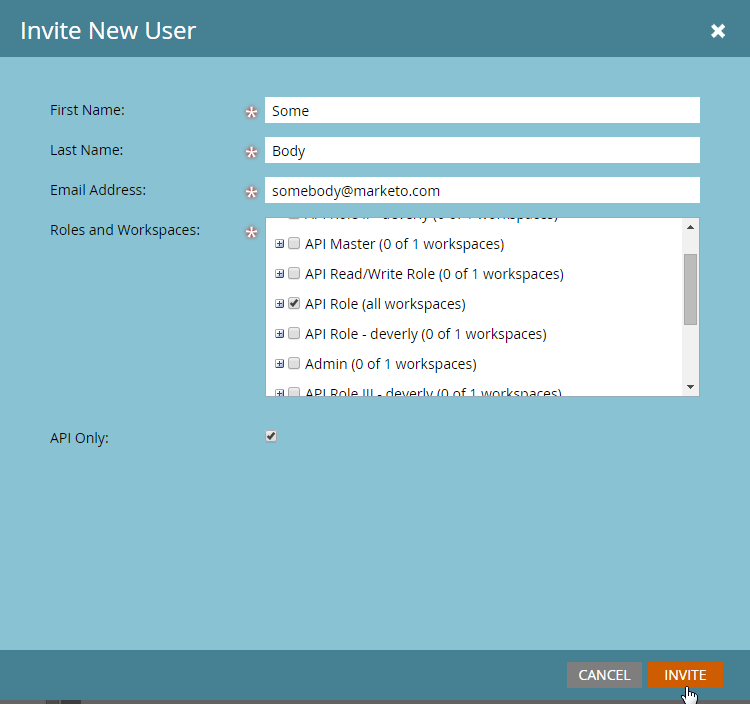
Next, create an API-only user to associate with the API role you created. You can do this by checking the API Only box when creating a new user, then clicking on the INVITE button.
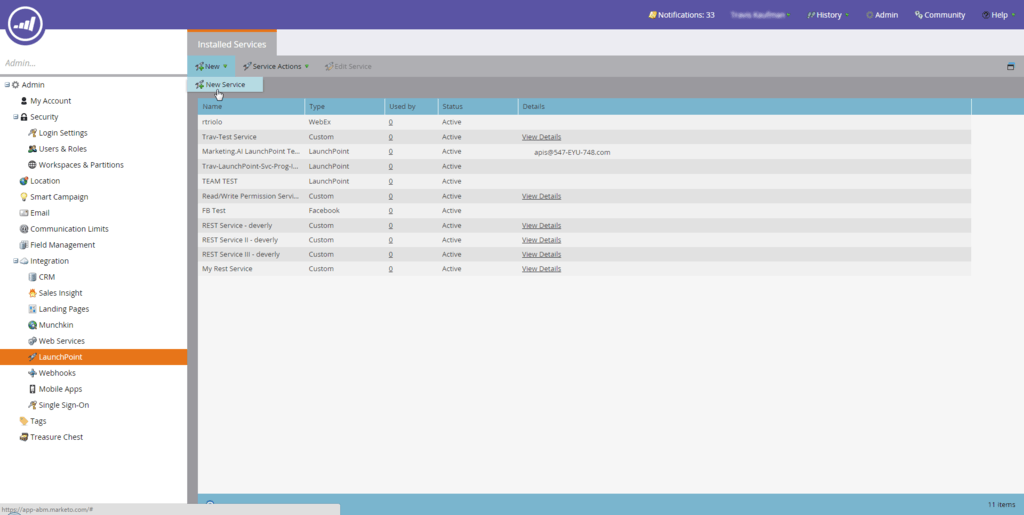
To uniquely identify your client application, a custom service is required. Go to Admin > LaunchPoint, then click on New Service.
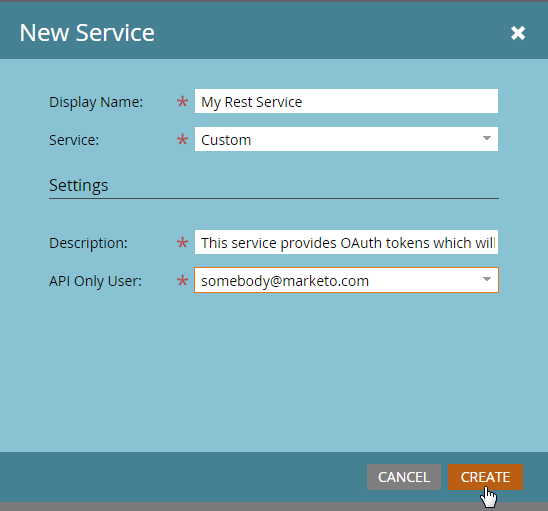
Provide the details like Display Name, Service (choose Custom), Description, and API-only user that you created in the API Only User field. Then, click on the CREATE button.
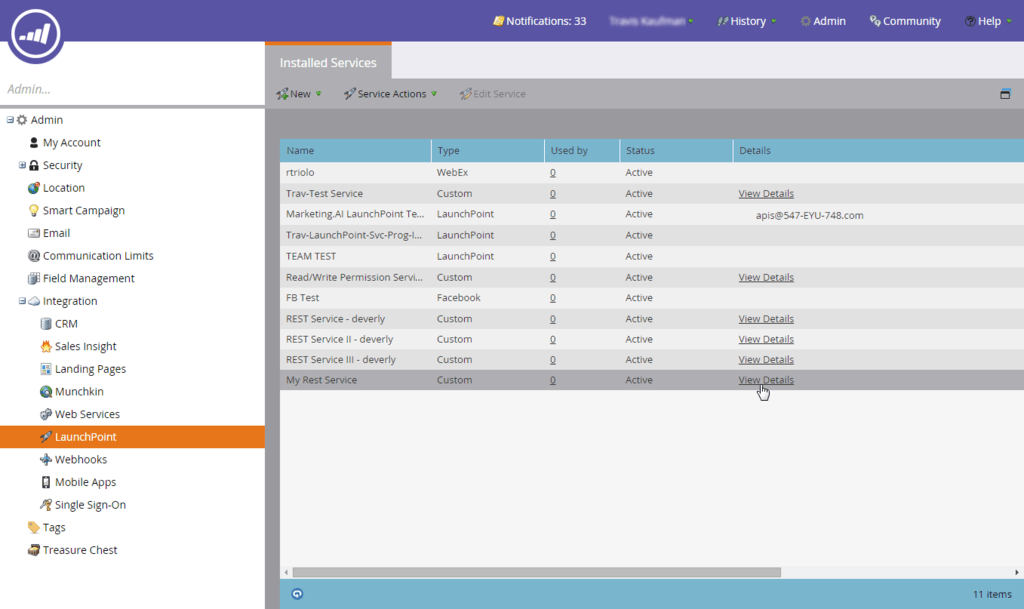
After creating the new service, click on the View Details link on the grid next to the service you had created.
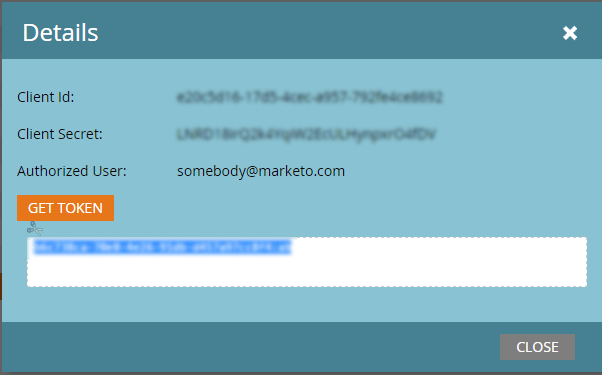
You will see the Client Id and Client Secret, which your client application can use. Click on GET TOKEN to generate an authentication token, and copy the token into a text editor.
You can use this token to extract Lead details from your Marketo account.
Step 2: Extract Data using Marketo API
The following command helps extract Lead details in JSON form.
plaintextcurl -o marketo_leads.json <Identity URL>/rest/v1/leads.json?access_token=<Access Token>This command will output the details into the marketo_leads.json file.
Marketo can only return 300 results per request. Suppose there are more than 300 entries in the result, use the nextPageToken parameter to access the next batch of results.
Step 3: Transform Extracted Data to CSV
Redshift doesn’t support native JSON data type, so it’s best to convert the JSON output to CSV format.
Step 4: Load the CSV Data to Redshift
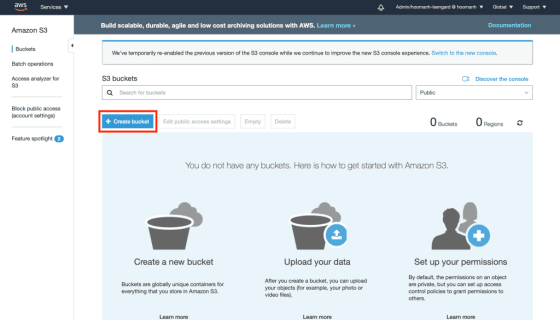
The next step is to load the Marketo data, which is now in CSV format, to Redshift. First, sign in to the AWS Management Console and open the Amazon S3 console, then click on the Create bucket button.
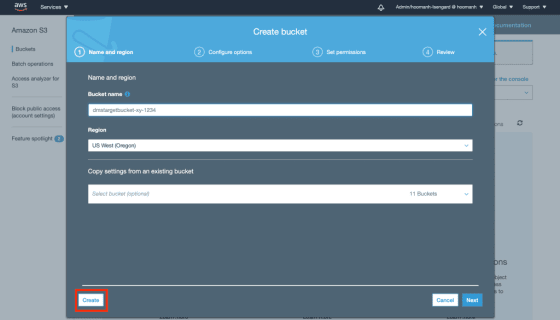
Enter a suitable Bucket name and choose a region, then click on Create.
Image Source
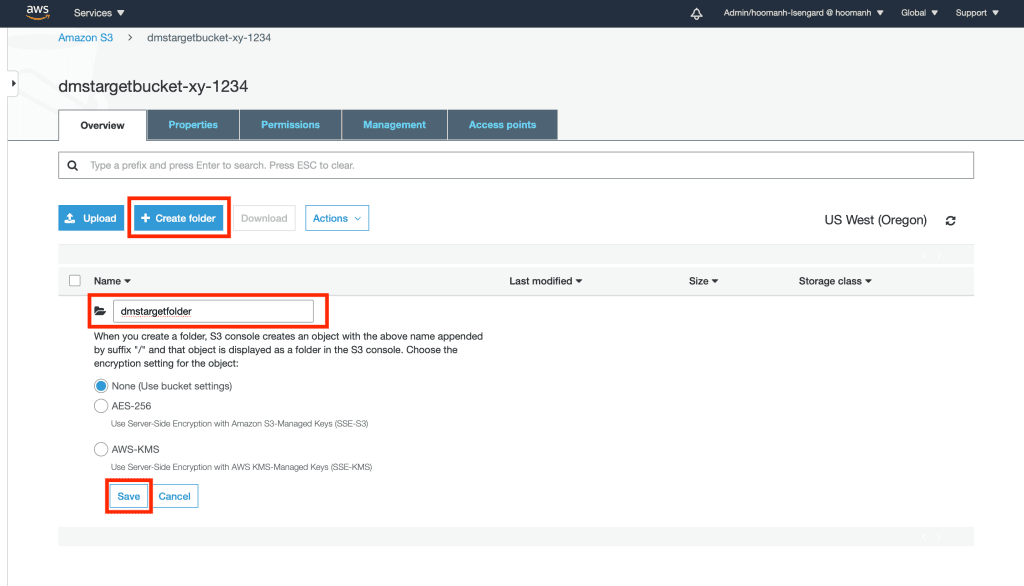
Now, open the AWS bucket you just created and click on Create folder. Provide a unique name for the folder and click on Save.
Image Source
Click on Upload and select the files in the Upload Wizard to transfer into the newly created folder. Once the data is in the Amazon S3 bucket, use the COPY command to move the data into an Amazon Redshift cluster.
You can use an SQL Workbench tool to run the following query:
plaintextCOPY table_name
FROM 's3://<your-bucket-name>/load/file_name.csv'
credentials 'aws_access_key_id=<Your-Access-Key-ID>'
CSV;
The table_name is the name of the table in the database where you want to load the CSV file data. The path s3://<your-bucket-name>/load/file_name.csv is the location of the CSV file in your Amazon S3 bucket. For credentials, you must provide the AWS access key ID associated with your AWS account. The access key must have the necessary permissions to access the S3 bucket. And CSV implies that the file being loaded is in CSV format.
Upon executing the SQL query, the data in the Amazon S3 bucket will be loaded into the specified Redshift table.
Method #2: Using SaaS Alternatives like Estuary to Integrate Marketo to Redshift
The manual integration method can be time-consuming and requires manual efforts for regular data updates, which prevents real-time insights. Using ETL tools like Estuary can help overcome these drawbacks.
Estuary Flow allows you to connect a wide variety of data systems in real time. With the range of in-built connectors and an easy-to-use interface, setting up a real-time data pipeline will only take a few minutes.
Before you start using Estuary for Marketo to Redshift integration, you must register for an Estuary account. If you already have one, then sign in to your account and follow these steps:
Step 1: Setting up the Source End of the Pipeline
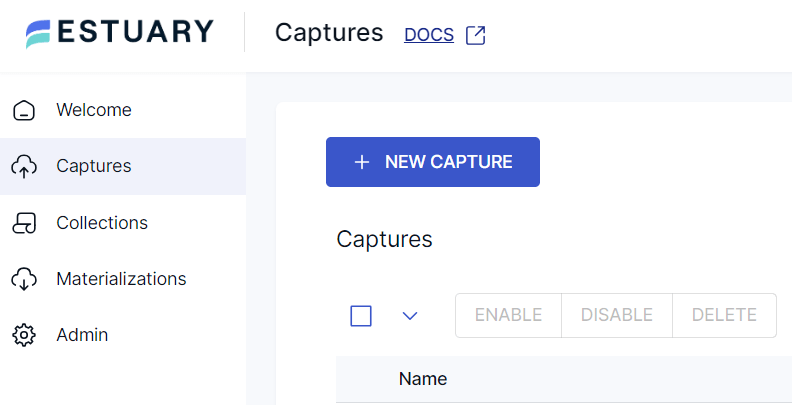
After signing in, you’ll be redirected to the Estuary dashboard. Click on Captures, then click on the NEW CAPTURE button.
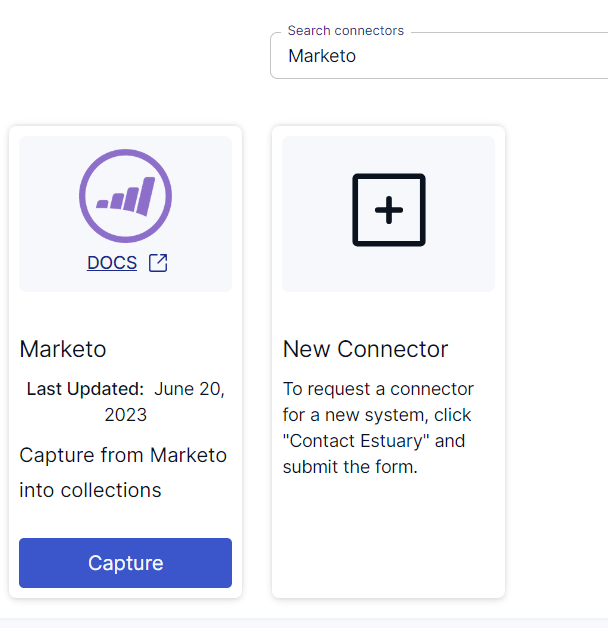
To set up Marketo as the source end of the pipeline, search for it in the Search connectors box. You will see the Marketo connector in the search results. Click on the Capture button of the connector.
Before using the Marketo connector to capture data, make sure you meet a few prerequisites. Read more about the prerequisites here.
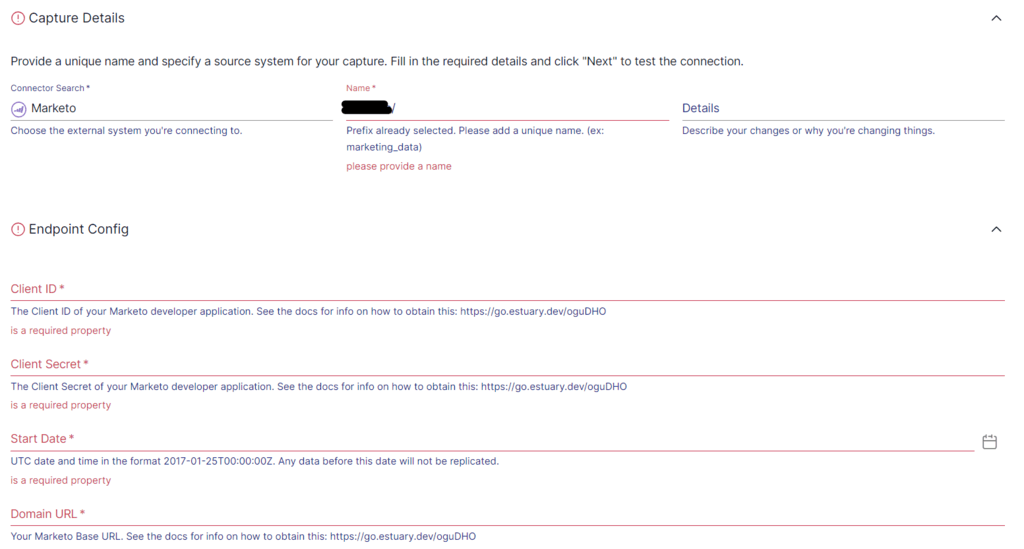
On the Marketo connector page, provide a unique Name for the connector. Then, fill in the required fields with details about Client ID, Client Secret, Start Date, and Domain URL.
Once you’ve provided the necessary information, click on Next, then click on Save and Publish. The connector will capture the data from Marketo into Flow collections. You can use this connector to sync the following Marketo tables:
- activities_X (like activities_send_email)
- Activity_types
- Campaigns
- Leads
- Lists
- Programs
Step 2: Setting up the Destination End of the Pipeline
Setting up Redshift to connect with Flow involves a few prerequisites. Ensure you take care of the prerequisites before proceeding.
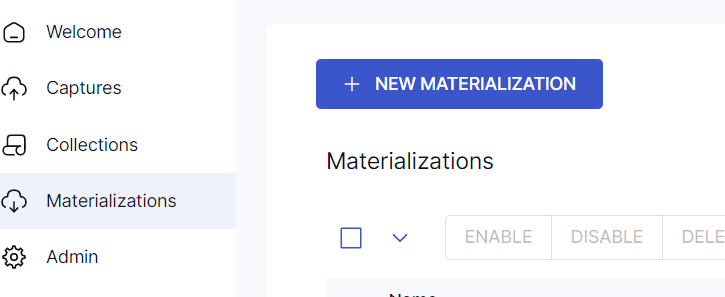
The next step is to set up the destination end of the pipeline. You can click on Materialize Connection in the pop-up following a successful capture. Or you can navigate back to the Estuary dashboard and click on Materializations, then click on NEW MATERIALIZATION.
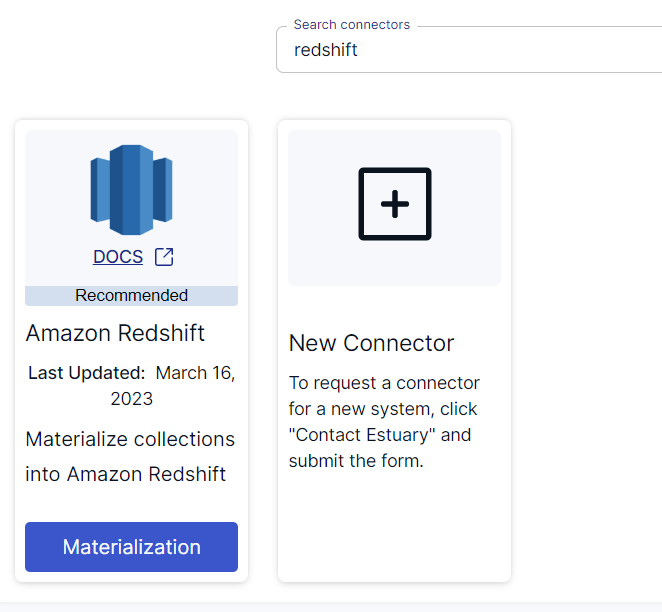
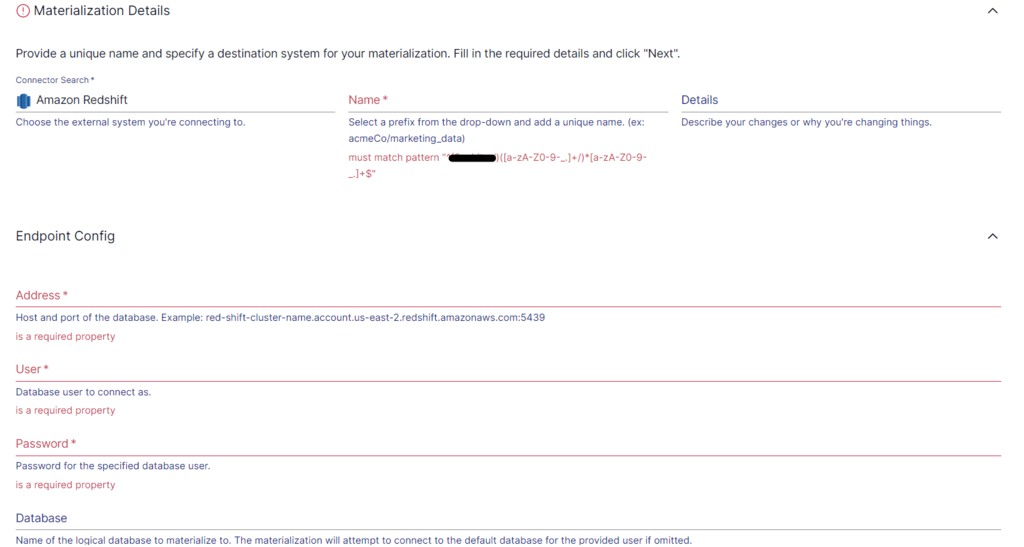
Search for Redshift in the Search connectors box and click on the Materialization button of the Amazon Redshift connector.
You’ll be redirected to the Redshift connector page, where you can start by providing a Name for the connector. Provide other required details like User, Password, Address, and other details of the S3 staging bucket.
Your collections will be selected automatically, but you can also make use of the Source Collections feature to manually select the collections to materialize.
Then, click on Next and then click on Save and Publish. The connector will materialize the Flow collections of Marketo data into your Amazon Redshift database. It uses your AWS account to materialize to Redshift tables and uses S3 buckets as a temporary staging area to store and retrieve data.
To learn more about the process, you can refer to the Estuary documentation:
Conclusion
By integrating Marketo with Redshift, you can harness the full potential of your marketing data. Moving your Marketo data into a Redshift data warehouse allows you to centralize the data and perform advanced analytics. This helps generate actionable insights to drive targeted marketing campaigns. Between the two methods for Marketo to Redshift migration, using Estuary Flow is the easier way to form a real-time data pipeline.
Estuary Flow has a wide range of in-built connectors to help move your data between platforms of your choice. Register for your Estuary account and try it out today!

About the author
With over 15 years in data engineering, a seasoned expert in driving growth for early-stage data companies, focusing on strategies that attract customers and users. Extensive writing provides insights to help companies scale efficiently and effectively in an evolving data landscape.


