Increasing data volumes and the demand for advanced analytics pose significant challenges for businesses, particularly when relying on traditional database solutions like MariaDB. While MariaDB is widely used across various applications and provides a stable data storage foundation, as your data requirements evolve, you may encounter performance bottlenecks or scalability limitations that hinder effective data management and decision-making.
On the other hand, Snowflake's cloud-based platform offers greater flexibility for handling large datasets. Moving your data from MariaDB to Snowflake can significantly improve query execution and provide advanced analytics capabilities, enabling deeper insights for better decision-making.
In this guide, we’ll explore an overview of both platforms and discuss the different methods that can help you move data from MariaDB to Snowflake effectively.
If you're ready to dive straight into the methods & steps, click here to jump to the methods for moving data from MariaDB to Snowflake.
Why Move from MariaDB to Snowflake?
MariaDB, while powerful, may struggle with scalability and performance as your data grows. Snowflake’s architecture, designed for the cloud, addresses these limitations by offering elasticity, parallel processing, and advanced analytics capabilities. Moving your data to Snowflake can be crucial for businesses looking to scale their data infrastructure and leverage real-time insights.
MariaDB Overview
Developed in 2009 by the original creators of MySQL, MariaDB is a powerful relational database management system (RDBMS) that serves as an excellent drop-in replacement for MySQL.
MariaDB seamlessly integrates with MySQL's libraries, APIs, and commands, ensuring a convenient transition for MySQL-compatible applications. Its diverse range of storage engines allows you to choose the most suitable one for specific application requirements. Moreover, MariaDB offers LGPL-licensed client libraries that support seamless integration with various programming languages and eliminate licensing concerns.
Now, let’s unpack some of the key features of MariaDB:
- Thread Pooling: A thread is the smallest processing unit within a program, and MariaDB offers a feature called Thread Pooling. It optimizes performance by using a pool of open threads for multiple connections. This eliminates the need to create new threads for each connection. Thread Pooling improves query speed and enhances the retrieval of results. The same feature is offered in MySQL's enterprise edition.
- Dynamic Columns: MariaDB’s dynamic columns provide you with a set of special functions. This will help you to store different types of columns for each row within a table. This feature provides flexibility for accommodating varying data structures.
- Seamless Scaling: MariaDB is designed to handle vast amounts of data, including billions of columns and rows, effortlessly. It can generate results quickly, typically within seconds, with its support for Massively Parallel Processing.
Snowflake Overview
Snowflake is a cloud-native data warehouse-as-a-service platform known for its scalability and ability to handle vast amounts of data without limitations. It can scale effortlessly and manage multiple tasks simultaneously, avoiding any performance issues.
Snowflake streamlines the organization, storage, and analysis of huge volumes of structured and unstructured data. Its architecture follows a decoupled model, separating storage and computing, allowing resources to scale independently according to the requirements. This design ensures remarkable flexibility and cost-effectiveness, as you only pay for the required resources.
Snowflake uses cloud infrastructures like Azure, AWS, or GCP to manage big data for analytics. It uses the ANSI SQL protocol, which makes it suitable to work with structured and semi-structured data like XML, JSON, and Parquet.
Let’s look at some of the key features of Snowflake:
- Security: Snowflake offers strong security features like multi-factor authentication, two-factor authentication, and role-based access control to keep your data safe and protected.
- Fail-Safe: Snowflake's fail-safe feature ensures that even if there's a problem with the disks or hardware, your historical data remains safe. It keeps a 7-day backup so that you can recover your data if needed.
- Standard and Extended SQL Support: Snowflake supports standard SQL and offers advanced SQL capabilities, including features like lateral view, merge, statistical functions, etc. This allows you to use common SQL commands and access powerful functions for data analysis.
- Performance: Snowflake demonstrates exceptional parallelism, enabling efficient query execution. Its high parallel processing capability efficiently distributes workloads, significantly boosting data processing and retrieval speeds.
Methods to Move Data from MariaDB to Snowflake
Moving data from MariaDB to Snowflake can be achieved through various methods, each with its own advantages and limitations. Below, we explore two popular approaches.
- Manual Method: Moving Data from MariaDB to Snowflake using Custom Code
- Automated Method: Using fully managed data integration tools like Estuary Flow
Manual Method: Moving Data from MariaDB to Snowflake using Custom Code
The manual method involves using custom code to extract data from MariaDB, perform data type mapping and preparation, and stage the data before loading it into Snowflake.
Step 1: Extracting Data from MariaDB
- Data extraction depends on the specific use case and the size of the data being exported. If the size of the data is relatively small, then you can extract the data using SQL SELECT statements within MariaDB’s command-line client.
Consider the following example:
plaintextmysql -u <name> -p <db> SELECT <columns> INTO OUTFILE 'file_path' FIELDS TERMINATED BY ',' OPTIONALLY ENCLOSED BY '"' LINES TERMINATED BY 'n' FROM <table>;The above query will retrieve data from the target table at the specified location based on the column names.
- To export large amounts of data from MariaDB, the recommended command-line tool is mysqldump. It allows you to export databases or tables to other servers by creating backups in SQL or other formats like CSV or XML.
Consider the following example:
plaintextmysqldump -h [database host's name or IP address] -u [the database user's name] -p [target_database] > db_backup.sqlThe above code will create a db_backup.sql file consisting of SQL statements that can be used to create the target_database specified above.
Step 2: Data Type Mapping and Preparation
- After exporting the data, ensure that the data types of the exported MariaDB data are compatible with the corresponding data types in Snowflake. For a better understanding of data preparation before the Staging process in Snowflake, refer to the Snowflake documentation.
Step 3: Data Staging
- Now, prepare the data for import into the Staging area. In Snowflake, users have the option to create two types of stages:
- Internal Stages
- External Stages
- You can create stages using the Snowflake GUI or SQL code. Here, we'll demonstrate the steps for creating an internal stage with SQL code.
The following query is the syntax for loading data into the internal stage:
plaintextCREATE [ OR REPLACE ] [ TEMPORARY ] STAGE [ IF NOT EXISTS ] <internal_stage_name>
 [ FILE_FORMAT = ( { FORMAT_NAME = '<file_format_name>' | TYPE = { CSV | JSON | AVRO | ORC | PARQUET | XML }
 [ format_type_options ] ) } ] [ COPY_OPTIONS = ( copy_options ) ] [ COMMENT = '<string_literal>' ]
In the above example, replace the placeholders with the necessary details.
Step 4: Moving Data to Snowflake
The COPY INTO DML statement will load staged Snowflake data in SnowSQL. Usage of the FROM clause is optional, and Snowflake automatically checks for files in the stage.
Loading data from Internal Stages:
User Stage Type
plaintextCOPY INTO TABLE_Name FROM @~/staged file_format=(format_name=’csv_format’) By default, each user in Snowflake has a stage allocated to them for storing files. This option is efficient for files accessed by a single user and needs to be copied into multiple tables.
Table Stage Type
plaintextCOPY INTO TABLE1 FILE_FORMAT=(TYPE CSV FIELD DELIMITER=’|’ SKIP_HEADER=1)Table Stage type is useful when files must be shared among multiple users and only need to be copied into one table.
These steps will successfully load data from MariaDB to Snowflake. However, there are some limitations associated with this method, including:
- Significant Manual Overhead: Moving data from MariaDB to Snowflake using custom code requires significant manual effort and technical expertise. This causes the method to be more time-consuming and labor-intensive.
- Limited Real-Time Capabilities: The custom code approach lacks real-time data loading capabilities while migrating data from MariaDB to Snowflake. This makes it unsuitable for organizations requiring the latest data updates.
- Limited Scalability: As data volumes increase, the custom code approach may not be able to handle the growing demands efficiently, limiting its scalability for future growth.
Automated Method: Using Fully Managed Data Integration Tools Like Estuary Flow
There are several no-code data integration platforms that can efficiently transfer data from MariaDB to Snowflake and help overcome the limitations associated with the manual approach. Among the range of such tools, Estuary Flow is a popular choice for data migration needs.
Estuary Flow is an easy-to-use platform that helps you to create real-time data pipelines at scale. Its built-in connectors facilitate seamless connections between two platforms for data movement in real time. Let's explore the step-by-step process for loading data from MariaDB to Snowflake.
Before you get started with setting up the data pipeline, sign in to your Estuary account or register for free.
Step 1: Capture the Data from the Source
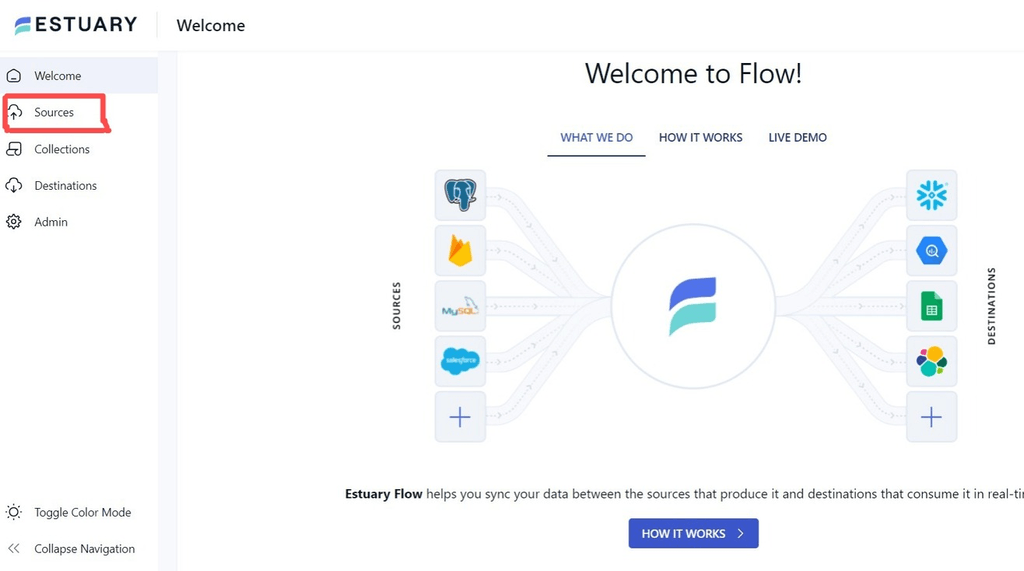
- In the Estuary Flow UI, click on Sources.
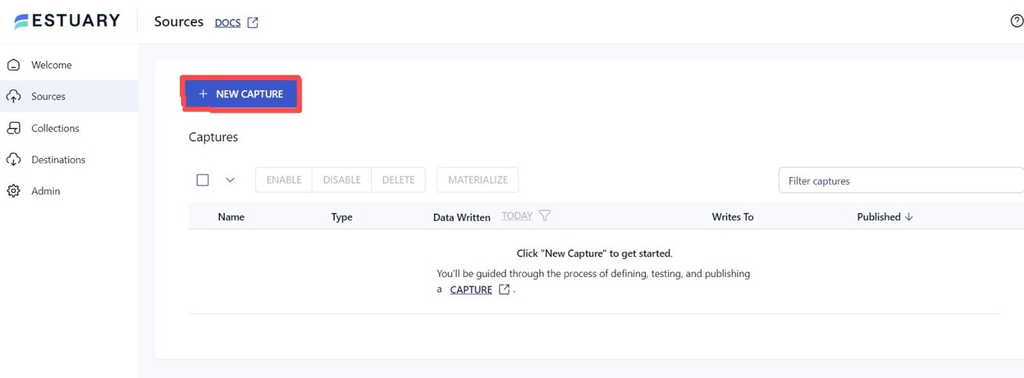
- Click on the + NEW CAPTURE button within the Sources window.
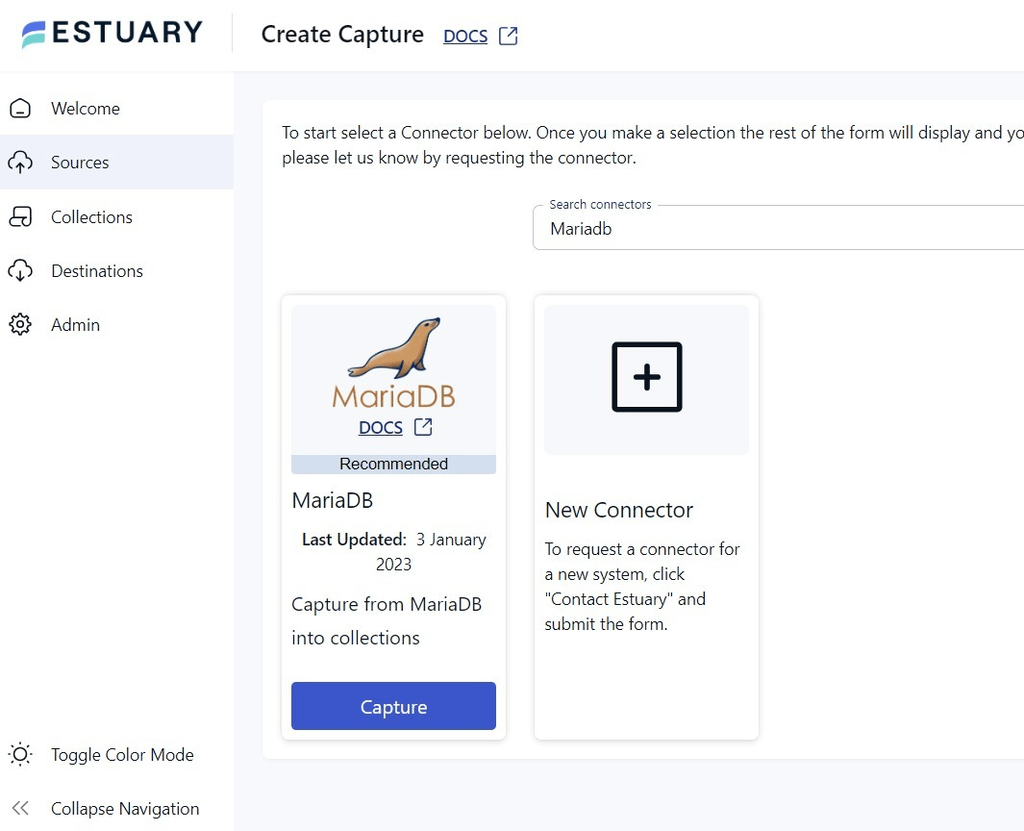
- Search for the MariaDB connector and click Capture.
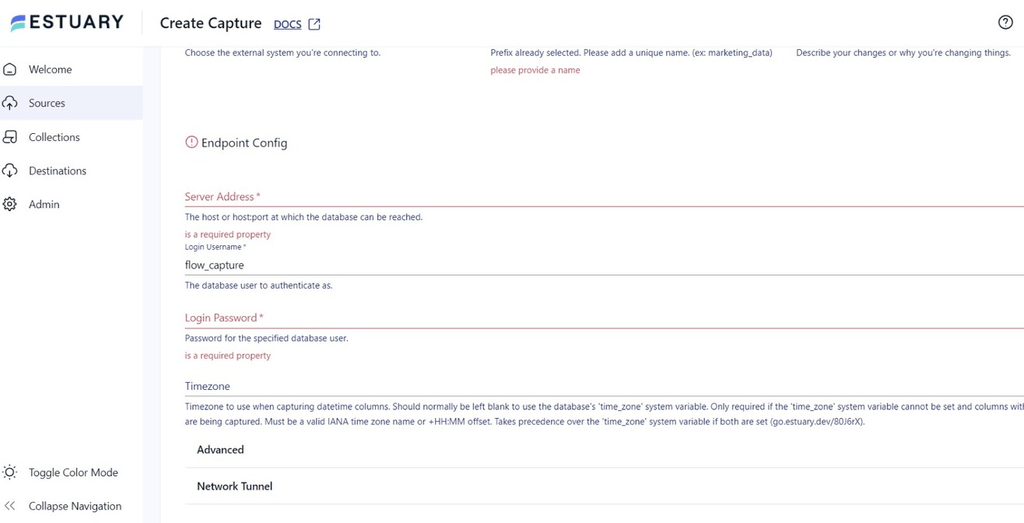
- Start by providing a unique Name for your capture, followed by specifying the other required details.
- In the Endpoint Config, fill in the required details, such as Server Address, Username, Password, and Timezone. You can also configure advanced settings and SSH tunneling as needed. Then, click on NEXT.
- Click on the SAVE AND PUBLISH button to save the capture configuration.
Step 2: Setup Snowflake as the Destination
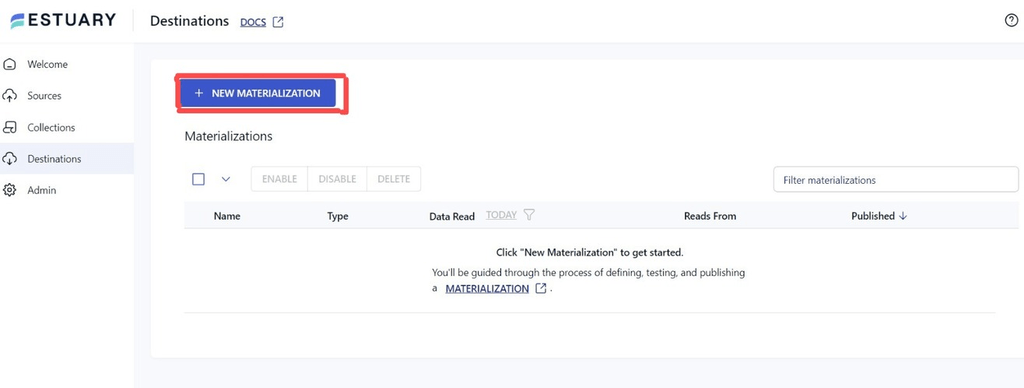
- Navigate to the Destinations section in the Estuary Flow UI and click on + NEW MATERIALIZATION.
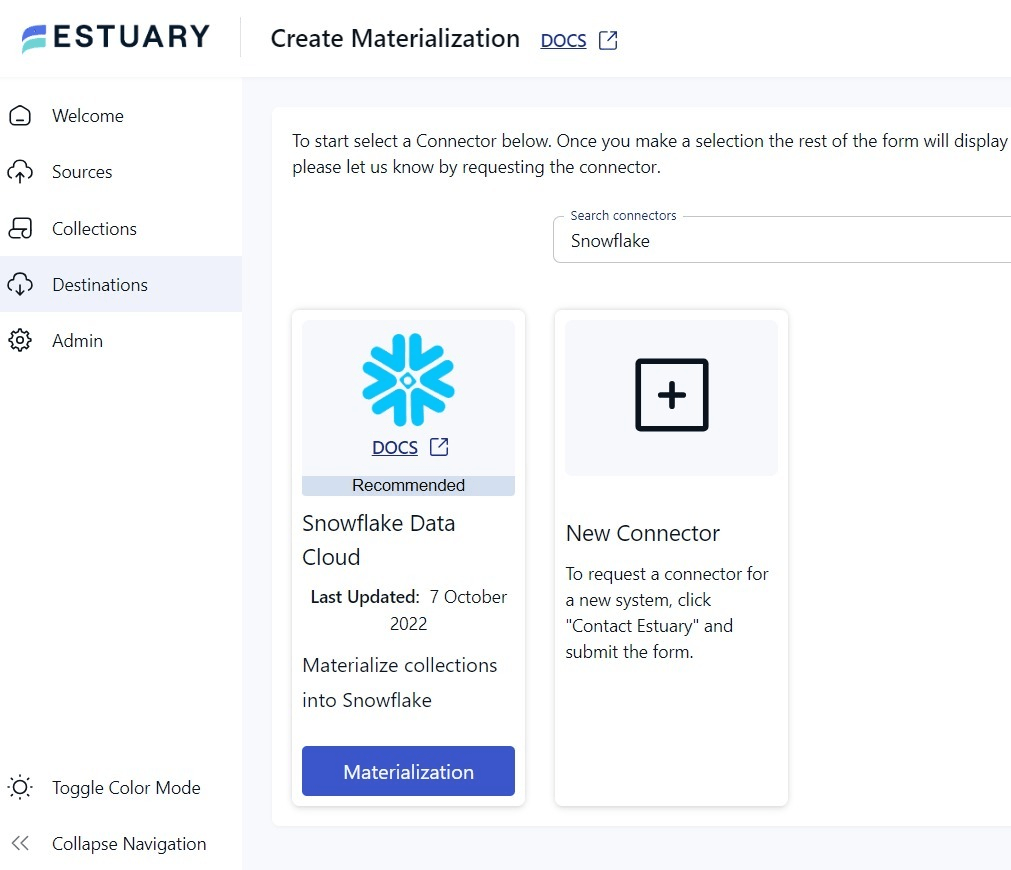
- Search for the Snowflake connector and click on the Materialization option of the connector.
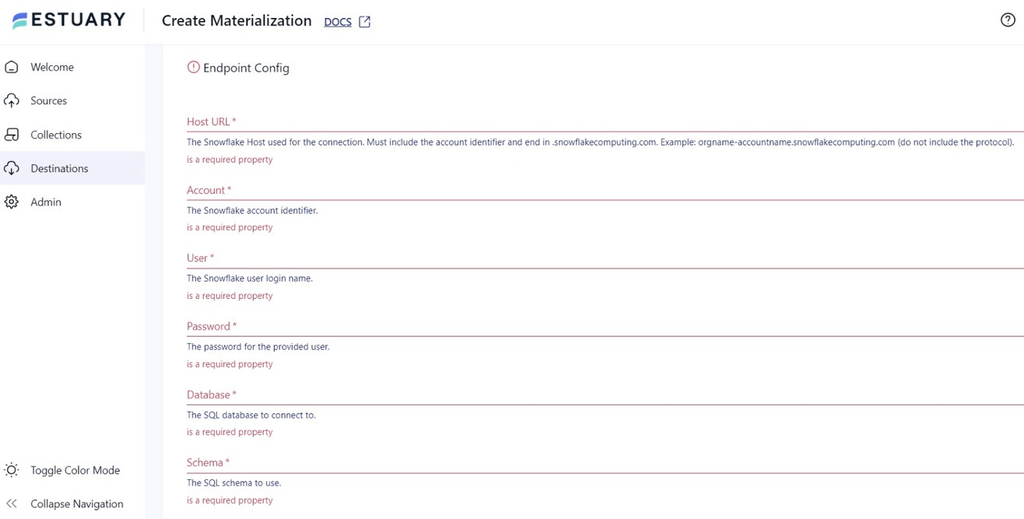
- You will be redirected to the Snowflake connector page, where you must fill in the necessary details, including a unique Name for the materialization.
- In the Endpoint Config, specify details such as the Host URL, Snowflake Account Identifier, Username, Password, Database, and Schema.
- Click on NEXT > SAVE AND PUBLISH to complete the setup.
For more information, you can refer to the Estuary documentation:
Estuary Flow will replicate your MariaDB data to Snowflake in real time. It continuously captures any changes in the MariaDB source tables and promptly replicates them to Snowflake, ensuring both databases are always up-to-date.
Benefits of Using Estuary Flow
Using reliable data integration tools like Estuary for loading data from MariaDB to Snowflake offers numerous advantages over manual methods. Let's explore some of the benefits:
- Pre-Built Connectors: Estuary Flow offers ready-to-use connectors for a wide range of data sources and destinations, ensuring effortless integration.
- User-Friendly Interface: Estuary Flow offers an intuitive interface, simplifying the setup of data transfer configurations with just a few clicks.
- Scalability: Estuary Flow handles large data volumes with ease, supporting active workloads at high change data capture rates.
- Cost-Effective: Estuary Flow follows a pay-as-you-go model, ensuring cost-effectiveness by charging only for the actual data transferred.
Conclusion: Choosing the Right Method for Your Needs
To recap, we’ve covered two methods to connect MariaDB with Snowflake. There’s the manual approach, which could work well for those with technical expertise who occasionally want to transfer data from MariaDB to Snowflake. But we have also looked at the automated method that involves using data integration tools like Estuary Flow, which is a cost-effective approach for real time data integration and setting up data pipelines with the scalability you need to handle complex workflows and large datasets. The choice simply depends on your data migration needs.
If you're looking for a reliable way to move your data between various platforms in real time, set up your first data pipeline for free — get started with Flow today!

About the author
With over 15 years in data engineering, a seasoned expert in driving growth for early-stage data companies, focusing on strategies that attract customers and users. Extensive writing provides insights to help companies scale efficiently and effectively in an evolving data landscape.


