Contemporary businesses need more than batch-processed data for operational efficiency and informed decision-making. Seamless data flow between systems is the need of the hour. Connecting Apache Kafka, a real-time event streaming platform, to MySQL, a widely-used relational database, is an impressive integration that can provide multiple benefits. Some advantages are improved scalability, durability, real-time data processing, and cost-efficiency.
The real-time data processing capabilities resulting from connecting Kafka to MySQL can assist you in responding almost instantly to market changes, customer behaviors, or operational issues. This can help optimize user experiences, streamline operations, and efficiently utilize market opportunities. Such an integration would also be suitable in use cases such as synchronizing data across different systems, monitoring user activities, and transaction processing.
In this guide, we’ll explore two easy methods to connect Kafka to MySQL to help you reap the benefits of this integration.
What is Apache Kafka?
Apache Kafka is an open-source event streaming platform designed explicitly for developing real-time, event-driven applications. It is vital in developing applications that consistently generate and process data records.
Apache Kafka is primarily a distributed streaming platform. It incorporates the functionalities of a message broker system to facilitate the transmission of messages from producers to consumers. Some other characteristics include its impressive speed and high accuracy in handling all data records.
Kafka organizes data records in chronological order of their occurrence within clusters, which can extend across multiple servers or even data centers. In addition, it employs replication and partitioning techniques to accommodate a substantial number of concurrent users.
Some of the key features of Apache Kafka include:
- High Throughput: Apache Kafka can handle millions of messages per second, making it a preferred choice for high-data processing and real-time analytics. The high throughput capability is helpful for applications requiring low latency and superior performance, enabling efficient data transfer and processing.
- Distributed Architecture: Kafka’s architecture spreads data across multiple nodes within a data cluster. This configuration makes Kafka scalable and well-suited for managing vast data while ensuring fault tolerance.
- Connectivity: Kafka offers extensive connectivity through Kafka Connect. Its connectors facilitate data integration with various sources, such as data lakes, databases, external systems, etc. This feature simplifies data pipelines and promotes real-time data movement between systems.
- Real-time Processing: Kafka can accomplish real-time processing because of its low latency and high throughput. It provides a pub-sub messaging model that enables producers to publish data, and consumers can subscribe to topics to receive the data in real-time.
What is MySQL?
MySQL is an open-source relational database management system that organizes data in a structured format using rows and columns in tables. Columns may be denoted as fields, while rows represent instances of specific records. MySQL establishes relationships between stored data through primary and foreign keys, which allows for effortless retrieval or querying of data from the database through SQL queries.
MySQL effortlessly handles various tasks, such as bulk editing, managing substantial data volumes, and creating custom datasets for specific queries.
Important features of MySQL include:
- Security: MySQL provides a flexible and secure authentication system to facilitate host-based verification for enhanced data security.
- Scalability: MySQL can efficiently manage extensive databases, with some users handling databases of over 50 million records, 200,000 tables, and 500 million rows.
- Connectivity: MySQL offers various connectivity options, including TCP/IP sockets across all platforms, named pipes on Windows, and Unix domain socket files on Unix systems. It also supports a wide range of programming languages through specific APIs.
- Clients and Tools: MySQL provides numerous utilities and tools for database management, such as mysqldump and MySQL Workbench. The MySQL Server also supports SQL statements for examining, optimizing, and repairing tables. These statements are accessible via command-line tools like mysqlcheck and myisamchk for MyISAM tables.
How to Connect Kafka to MySQL to Transfer Your Data
Let’s look at the two best ways to transfer data from Kafka to MySQL.
- Method 1: Using Estuary Flow to connect Kafka to MySQL
- Method 2: Manually connecting Kafka to MySQL using MySQL connector
Method 1: Using Estuary Flow to Connect Kafka to MySQL
Estuary Flow is a reliable, real-time extract, transform, load (ETL) tool that enables seamless data transfer from any source to any destination, including Apache Kafka and MySQL. It facilitates various automated tasks, such as extraction, loading, schema management, monitoring, and more, eliminating the requirement for significant technical expertise.
Key features of Estuary Flow
- Supports Multiple Data Processing Languages: You can manipulate your data within Flow using SQL, JavaScript, and other tools for performing real-time data joins and transformations. This allows incremental data transformation into new streams, ready to be moved to any destination.
- Cloud-based Stream Processing: Built on an open-source platform, Estuary Flow stores each stream in a real-time data lake, decoupled from its brokers. This architecture combines the scalability and elasticity of Apache Kafka with modern decoupled storage-compute capabilities. You can integrate messaging with schema management, SQL, and other computing engines, simplifying the management of real-time data streams.
- Flexible Data Routing: Flow offers a many-to-many data routing capability, allowing users to route the same data to multiple destinations within milliseconds efficiently. This feature simplifies data synchronization across various destinations without complex coding.
- Change Data Capture (CDC): CDC capabilities allow for detection of operations within a database to capture any modifications made to the data. When handling multiple databases and frequently changing sources, CDC proves more efficient than repeatedly reloading and rewriting data.
Here’s a step-by-step guide on using Flow to load data from Kafka to MySQL.
Prerequisites
Step 1: Connect to Apache Kafka Source
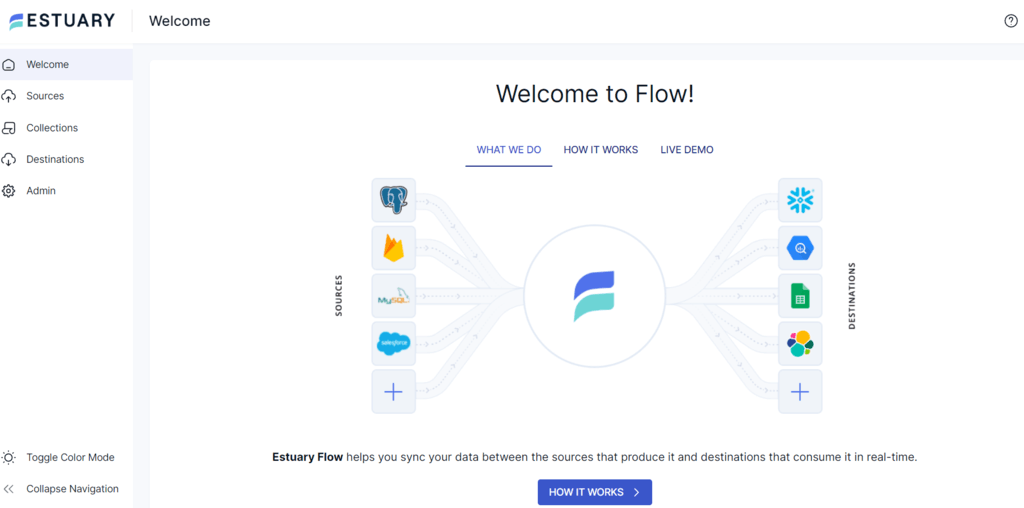
- After signing in to your Estuary account, you will be redirected to the dashboard.
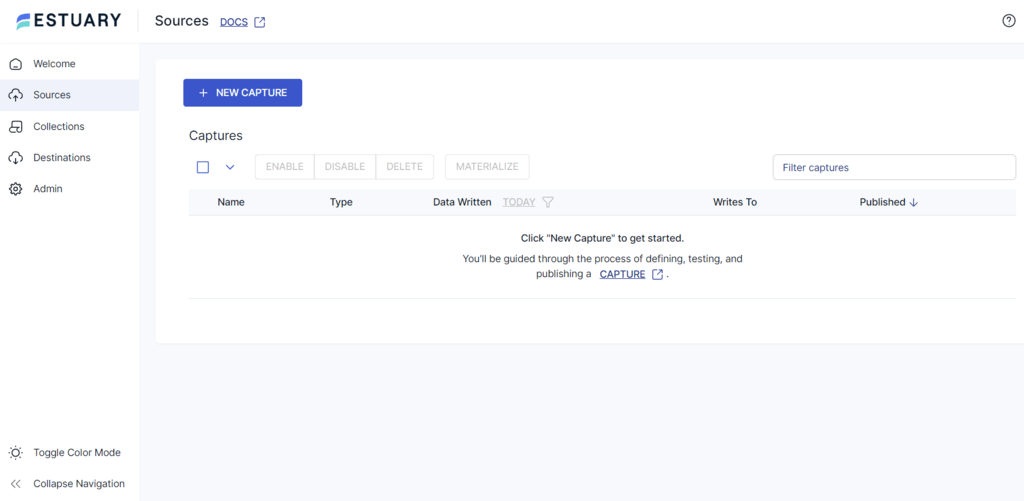
- To configure Apache Kafka as a source, select the Sources option from the left navigation pane of the dashboard and click the + NEW CAPTURE button.
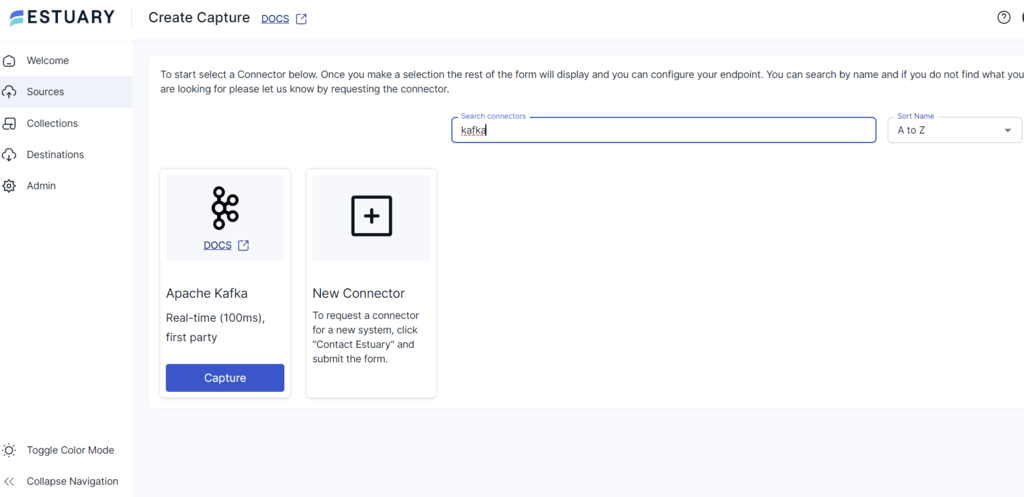
- Type Kafka in the Search connectors field.
- You will see the Apache Kafka connector in the search results; click on its Capture button.
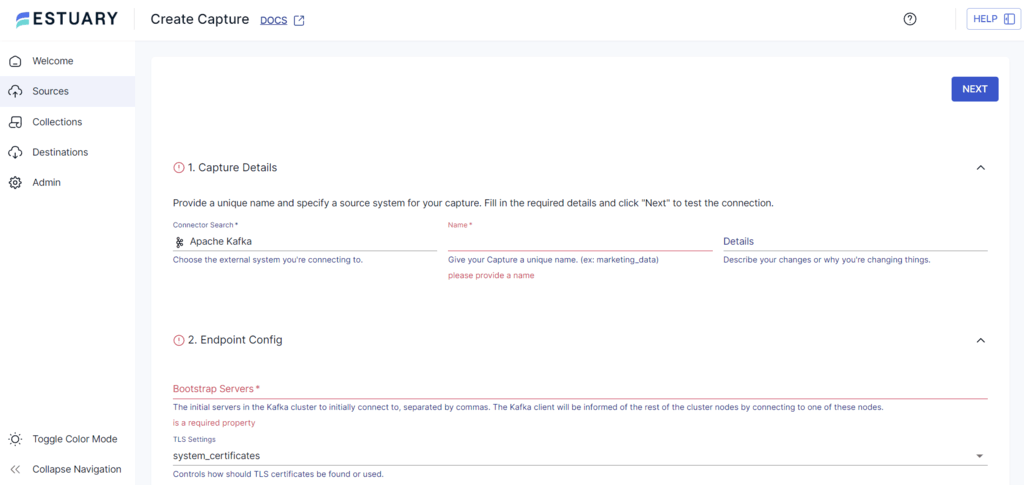
- On the Create Capture page, fill in details like a unique Name, Bootstrap Servers, SASL Mechanism, Username, and Password.
- Click on NEXT > SAVE AND PUBLISH to configure Kafka as the source of the data integration pipeline. The connector will capture streaming data from Apache Kafka topics.
Step 2: Connect MySQL as Destination
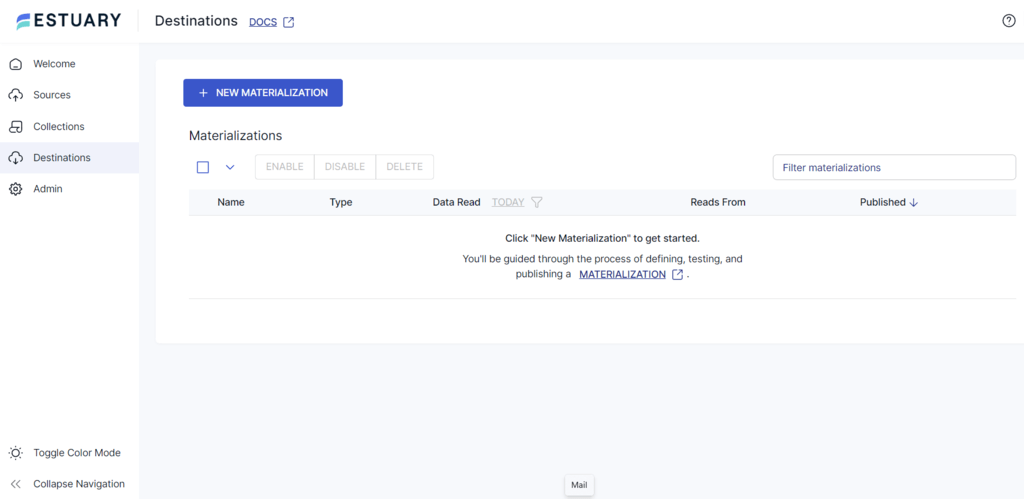
- To configure the destination end of the pipeline, click MATERIALIZE COLLECTIONS on the pop-up window that appears after a successful capture. Alternatively, you can select the Destinations option on the left navigation pane in the Estuary dashboard.
- On the Destinations Page, click on the + NEW MATERIALIZATION button.
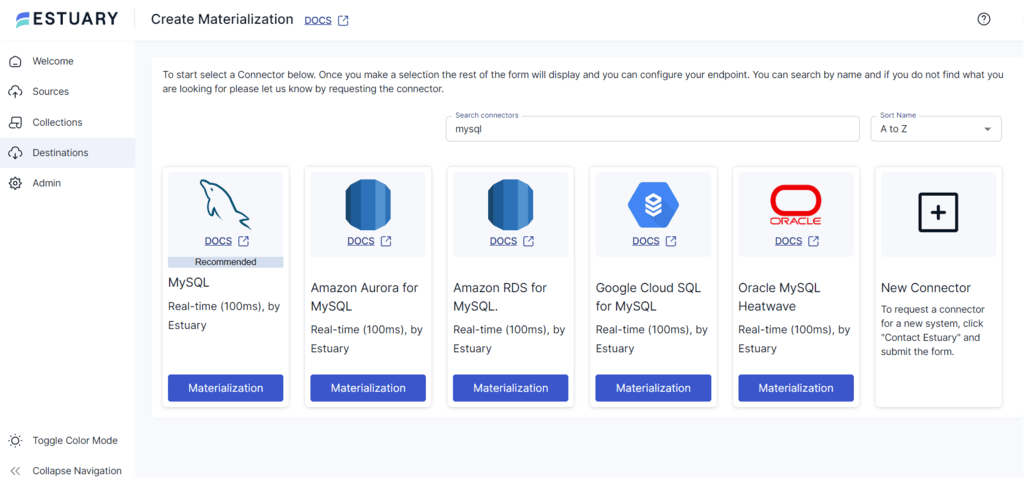
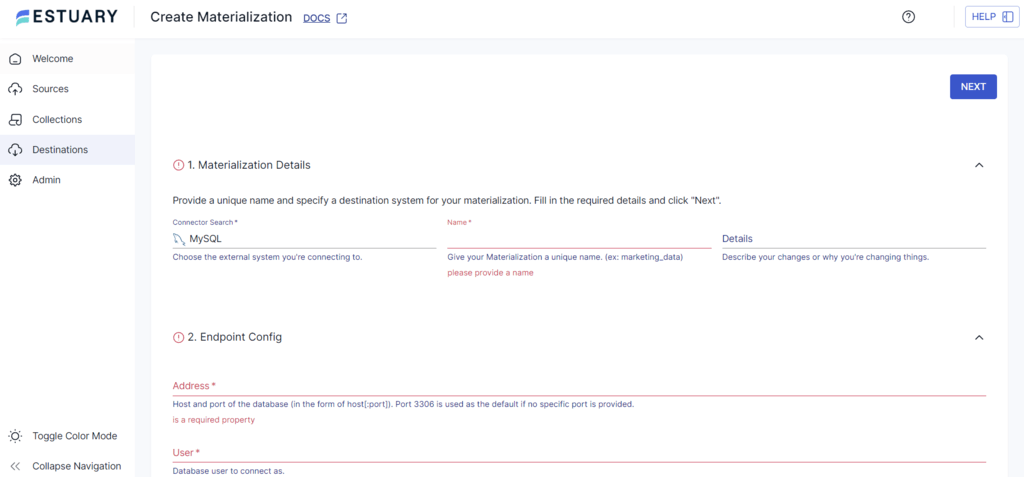
- On the Create Materialization page, search for the MySQL connector. From the many options you see in the search results, click on the Materialization button of the MySQL connector.
- Now, you will be redirected to the MySQL Create Materialization page. Fill in the details like Name, Address, User, Password, and the name of the Database.
- You can use the Source Collections section to link a capture to the materialization and Click on the SOURCE FROM CAPTURE button to materialize from multiple collections.
- Finally, click NEXT > SAVE and PUBLISH to finish the destination configuration. The connector will materialize Flow collections into a MySQL database.
Method 2: Manually Connecting Kafka to MySQL Using MySQL Connector
Here is the step-by-step guide for custom-loading data from Kafka to MySQL.
Step 1: Download and Install the MySQL Connector for Java
Download and install the Confluent Kafka Connect JDBC connector. Also, download the MySQL connector for Java here.
Step 2: Copy the MySQL Connector JAR File and Modify the Data Souce Properties
Copy the MySQL connector JAR file and place it to the existing Kafka Connect JDBC jars at /usr/share/java/kafka-connect-jdbc on Ubuntu. Then, modify the data source properties by creating a file at /etc/kafka-connect-jdbc/source-quickstart-mysql.properties with the content below.
plaintextsource-quickstart-mysql.properties
name=test-source-mysql-jdbc-autoincrement
connector.class=io.confluent.connect.jdbc.JdbcSourceConnector
tasks.max=1
connection.url=jdbc:mysql://127.0.0.1:3306/employee?user=*****&password=password
mode=incrementing
incrementing.column.name=empid
topic.prefix=verify-mysql-jdbc-
Adjust the provided configuration values according to your MySQL database configuration. Modify the connection URL as given below.
connection.url=jdbc:mysql://127.0.0.1:3306/<DatabaseName>?user=<username>&password=<password>
Note that username and password represent the credentials required to log into the MySQL database. The incrementing.column.name refers to the column in your database tables that strictly follows an incremental pattern, facilitating the detection of new rows.
In case of empty values, the system will automatically detect the column with an auto-incrementing property, considering it non-nullable. If such a column is not found, you can use the following commands to update the columns with the required properties.
plaintextALTER TABLE <table_name> MODIFY COLUMN <column_name> INT auto_increment
ALTER TABLE <table_name> ADD PRIMARY KEY (<column_name>)
Step 3: Launch Kafka, Zookeeper, and Schema Registry
Use the following command in the Confluent CLI to launch Kafka, Zookeeper, and Schema Registry.
plaintext$ confluent start schema-registryStep 4: Initiate Kafka Connect to Load Data from Kafka to MySQL
Kafka Connect is the component that runs your connector (in this case, the JDBC Sink Connector for MySQL). You can run it in either standalone or distributed mode depending on your deployment needs.
Option 1: Standalone Mode (for local testing)
To launch Kafka Connect in standalone mode, use the following command:
plaintextconnect-standalone \
  config/connect-standalone.properties \
  config/source-quickstart-mysql.properties
📝 Make sure your connect-standalone.properties file specifies the correct plugin path, key/value converters (e.g., AvroConverter, JsonConverter), and offset storage settings.
Avro example:
If your data is serialized using Avro, you’ll need the schema-registry settings in your standalone config:
plaintextkey.converter=io.confluent.connect.avro.AvroConverter
value.converter=io.confluent.connect.avro.AvroConverter
key.converter.schema.registry.url=http://localhost:8081
value.converter.schema.registry.url=http://localhost:8081
Option 2: Distributed Mode (for production)
For scalable or cloud-based environments, use Kafka Connect in distributed mode and register connectors via the REST API:
plaintextcurl -X POST http://localhost:8083/connectors \
  -H "Content-Type: application/json" \
  -d @source-quickstart-mysql.json
In this case, your connector config should be in JSON format and include fields like:
plaintext{
  "name": "mysql-source-connector",
  "config": {
    "connector.class": "io.confluent.connect.jdbc.JdbcSourceConnector",
    "connection.url": "jdbc:mysql://<host>:3306/<db>?user=<user>&password=<pwd>",
    "mode": "incrementing",
    "incrementing.column.name": "id",
    "topic.prefix": "verify-mysql-jdbc-"
  }
}
Tips to Avoid Errors
- Ensure the JDBC Connector JAR is placed correctly in your plugin path.
- Run curl http://localhost:8083/connector-plugins to verify your connector is registered.
- If using Avro, confirm your Schema Registry is running and reachable at localhost:8081 (or your configured URL).
Step 5: Initiate a Kafka Consumer (2025 CLI Syntax)
In recent versions of Apache Kafka (v3.5 and above), ZooKeeper has been deprecated and replaced with KRaft (Kafka Raft mode). As a result, legacy commands using --zookeeper no longer work. You must now use the --bootstrap-server flag to connect directly to the Kafka broker.
Let’s initiate a Kafka consumer to retrieve messages from the topic where your MySQL connector is publishing the data.
Example topic: verify-mysql-jdbc-employee
(Here, employee is the table name and verify-mysql-jdbc is the topic prefix.)
Use the following command to start consuming messages:
plaintextkafka-avro-console-consumer \
  --bootstrap-server localhost:9092 \
  --topic verify-mysql-jdbc-employee \
  --from-beginning
🔁 Replace localhost:9092 with your actual Kafka broker address if you’re running Kafka on a different machine or using a cloud-managed Kafka service like Confluent Cloud, Redpanda, or Amazon MSK.
Notes:
- If you're not using Avro serialization (e.g., if your data is in JSON), use kafka-console-consumer instead of kafka-avro-console-consumer.
- If you’re using Confluent Cloud or secured brokers, add a --consumer.config client.properties flag with authentication credentials.
- To view available topics and confirm your topic name, run:
plaintextkafka-topics --bootstrap-server localhost:9092 --listStep 6: Insert a Record into the MySQL Table and Verify the Kafka Topic
Once your MySQL connector is configured and running, insert a new record into the source MySQL table (e.g., employee). Kafka Connect will pick it up and publish it to the corresponding topic.
Run the following in your MySQL shell:
plaintextUSE employeeDB;
INSERT INTO employee (name, salary) VALUES ('Mark', 50000);
🔍 Make sure that the empid column is an auto-increment primary key if you're using mode=incrementing.
Now, open a new terminal and use the modern consumer command to verify that the message has been published:
plaintextkafka-avro-console-consumer \
  --bootstrap-server localhost:9092 \
  --topic verify-mysql-jdbc-employee \
  --from-beginning
You should see a message like:
plaintext{"name":{"string":"John"},"empid":1,"salary":{"int":53000}}
{"name":{"string":"Mark"},"empid":14,"salary":{"int":50000}}
💡 Your output format may vary depending on how Avro serialization is configured. For flat JSON or other serializers, fields may appear as {"name":"Mark", "empid":14, "salary":50000}.
Troubleshooting Tips
- If the message doesn’t appear immediately, ensure Kafka Connect is running and properly connected to MySQL.
- Check your Kafka topic with:
plaintextkafka-topics --bootstrap-server localhost:9092 --describe --topic verify-mysql-jdbc-employee- Review Kafka Connect logs to troubleshoot connector issues:
plaintexttail -f connect.logLimitations of the Custom Method
- Manual data migration may not be efficient for huge datasets, as it can lead to potential delays in data synchronization.
- Mapping schemas manually between Kafka and MySQL may lead to mapping errors, resulting in data loss or corruption.
- Continuous maintenance is required to accommodate changes in data structures, configurations, or business requirements. This includes updating the script to handle new data fields, changing data types, or changing integration logic.
- Maintaining and developing migration scripts requires an in-depth understanding of source and target systems. Any lack of skilled professionals in the organizations can present significant challenges.
Conclusion
Connecting Kafka and MySQL offers a powerful solution for real-time streaming, providing a robust foundation for developing applications and extracting valuable insights. While the manual method helps you to swiftly migrate your data, using a data integration platform like Estuary Flow provides additional advantages, such as being able to connect conventional systems and modern hybrid cloud configurations, better scalability, and ensuring data quality and consistency during integration.
Estuary reduces operational complexities with its automatic partitioning, scaling, and schema management. Its managed service and user-friendly interface also simplify streaming Kafka data to MySQL for analysis and applications.
Are you looking to migrate data between different platforms? Estuary Flow, with its impressive features, is the solution to your varied data integration needs. Sign up for your free account or log in to get started!
FAQs
Is schema evolution supported when syncing Kafka to MySQL?

About the author
With over 15 years in data engineering, a seasoned expert in driving growth for early-stage data companies, focusing on strategies that attract customers and users. Extensive writing provides insights to help companies scale efficiently and effectively in an evolving data landscape.


