In today’s evolving business landscape, unlocking the full potential of user engagement on website and mobile applications can provide you with a competitive edge. Google Analytics 4, a revolutionary analytics platform, offers a deeper understanding of customer interactions. Although it provides you with insights into user engagement, connecting Google Analytics 4 to Snowflake can result in in-depth data analysis for effective decision-making.
Snowflake, a cutting-edge cloud-based data platform, is an excellent choice for a centralized repository of aggregated data from various sources. The benefits of a GA4-Snowflake integration include comprehensive cross-channel and real-time analytics.
Let’s explore these two platforms and the different ways to load data from Google Analytics to Snowflake.
Google Analytics 4: An Overview
Google Analytics 4 (GA4) is an analytics service that allows businesses to measure traffic and engagement across their apps and websites. It is built upon the foundation of its predecessor, Universal Analytics, and includes several enhancements that cater to evolving business needs.
While page views were the most important metric in Universal Analytics, the focus of GA4 is to track events. This includes specific user interactions, such as clicks, views, form submissions, etc. Instead of seeing generalized data, you now gain a deeper understanding of user engagement and how they interact with your app and website. By combining data tracking information for both app and web interactions, you can obtain a unified view of user behavior across multiple digital platforms.
Yet another impressive feature of GA4 is its Life cycle collection feature, which allows you to track the entire user journey from acquisition to retention. Understanding the complete lifecycle of your users can help you optimize strategies for improved customer experiences.
Snowflake: An Overview
Snowflake is a cloud-based data warehouse built on top of the Microsoft Azure, Amazon Web Services, and Google Cloud infrastructure. It offers a fully managed and scalable solution for data warehousing, data lakes, data sharing, and data engineering.
Snowflake is a popular data warehouse choice because it separates storage from compute, enabling on-demand scaling and preventing resource contention. Similar to a shared disk architecture, Snowflake uses a central data repository for persisting data that is accessible from all compute nodes of the platform. And to process queries, Snowflake uses Massively Parallel Processing (MPP) compute clusters. Multiple clusters can access the same data simultaneously, and each node in the cluster stores a portion of the entire data set locally.
If you want to access historical data (modified or deleted data) at any point within a defined period, you can use Snowflake’s Time Travel feature. It helps:
- Restore data-related objects, such as tables, schemas, and databases, that might have been accidentally or intentionally deleted.
- Duplicate and back up data from key points in the past.
- Analyze data usage/manipulation over specified time periods.
Methods to Move Data from Google Analytics 4 to Snowflake
You can use one of the following methods to integrate your data from Google Analytics 4 to Snowflake:
- Method #1: Using CSV File Export/Import
- Method #2: Using GA4-BigQuery Integration
- Method #3: Using No-Code Tools like Estuary Flow
Method #1: Using CSV Files Export/Import to Move Data from Google Analytics 4 to Snowflake
You can export a Google Analytics 4 report as a CSV file and then load it into a Snowflake database. Here are the steps involved in this process:
Step 1: Export Data from Google Analytics 4 as CSV Files
- On the Google Analytics dashboard, select the Reports icon from the left menu.
- Click on the share icon on the top right of a report.
- Click on Download file and select Download CSV. The CSV file will be available in your downloads folder.
Step 2: Load the CSV Files to Snowflake
To load into a Snowflake database using the Classic Console, follow these steps:
- Select Databases and then choose a specific database and schema.
- Click on the Tables tab and locate the table into which you want to load data.
- Either select a table row and click on Load Data or select a table name and click on Load Table.
- In the Load Data wizard, select a warehouse to load data into the table, and then click on Next.
- Navigate through Load files from your computer → Select Files, and browse the files you want to load.
- After selecting the CSV files of your Google Analytics 4 reports, click on Open and select Next.
- From the dropdown list, select the CSV file format and click on Load. Finally, click on OK to close the Load Data wizard.
Method #2: Using GA4-BigQuery Integration to Move GA4 Data to Snowflake
You can export all of your raw events from Google Analytics 4 properties to BigQuery for free and then transfer the data to Snowflake. Here are the steps to follow:
- Set up a BigQuery Export by following the steps for a GA4-BigQuery Export integration.
- Next, create a GCS bucket to receive the exported tables from BigQuery, since Snowflake can read files directly from GCS. Use Parquet format with snappy compression and execute the following command using BigQuery’s command-line tool:
plaintextbq extract --destination_format=PARQUET --compression=SNAPPY bigquery-public-data:ga4_obfuscated_sample_ecommerce.events_20221202 gs://your-bucket/yourprefix/ga4sample-20221202-*bigquery-public-data:ga4_obfuscated_sample_ecommerce.events_20221202 must be replaced with the full name of the source BigQuery table from which data will be extracted.
gs://your-bucket/yourprefix/ga4sample-20221202-* must be replaced with the GCS location where the extracted data will be saved.
- Configure Snowflake to read from GCS securely by following these steps.
- Create a table in Snowflake to read the exported files with:
plaintextlist @fh_gcp_stage; -- check files exist
create or replace table ga4_variant(v variant);
copy into ga4_variant from @fh_gcp_stage/yourprefix/
pattern='yourprefix/ga4sample-.*'
file_format = (type='PARQUET');
This script will load all files in the specified folder while skipping the ones it has already loaded into the specified table.
Upon completing these steps, your GA4 data is now ready to query in Snowflake.
Method #3: No-Code Tools like Estuary Flow to Load Data from Google Analytics 4 to Snowflake
No-code tools often have a user-friendly interface and drag-and-drop functionalities to simplify the setting up of data integration workflows. Such tools can effectively extract data from the source and load it into the destination without requiring a single line of code. No-code tools are also designed to automatically scale to suit varying data integration requirements.
Among the range of no-code tools available, Estuary Flow is an excellent choice for a real-time data integration solution. Its Change Data Capture (CDC) feature captures changes to databases in real time, helping maintain up-to-date data.
To set up a Google Analytics 4 to Snowflake data integration pipeline with Flow, you will need an Estuary account. If you don’t already have one, register for a free account. Then, sign in to your account and follow these steps:
Step 1: Configure Google Analytics 4 as the Data Source
Prerequisites to use the Google Analytics 4 connector:
- Your Google Analytics 4 property ID.
- The Google Analytics Data API enabled on your Google project (that is linked to your Analytics property).
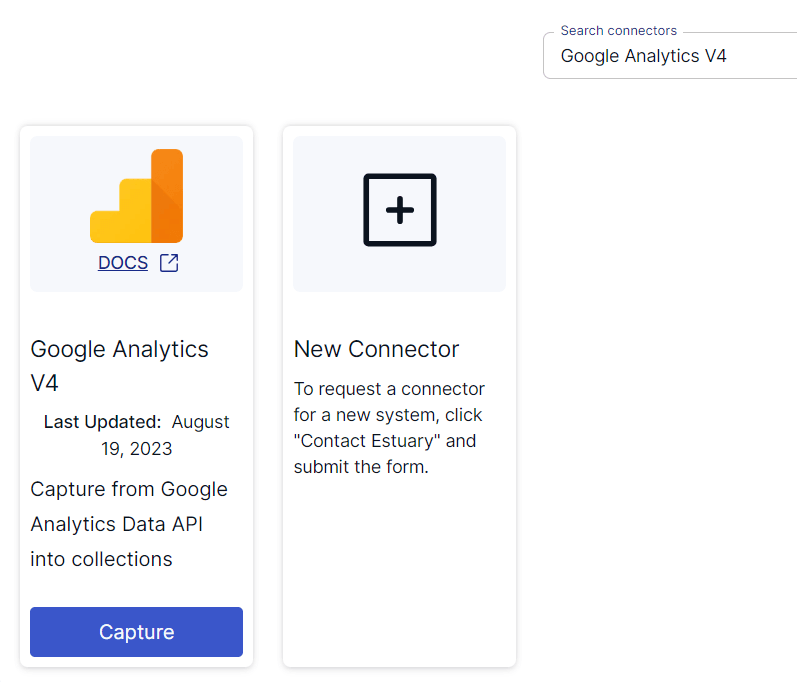
The left-side pane of the Estuary dashboard lists a few options, of which you must click on Sources. To proceed, click on the + NEW CAPTURE button and use the Search connectors box to look for Google Analytics V4. When you see the connector in the search results, click on its Capture button.
Image Source: Estuary
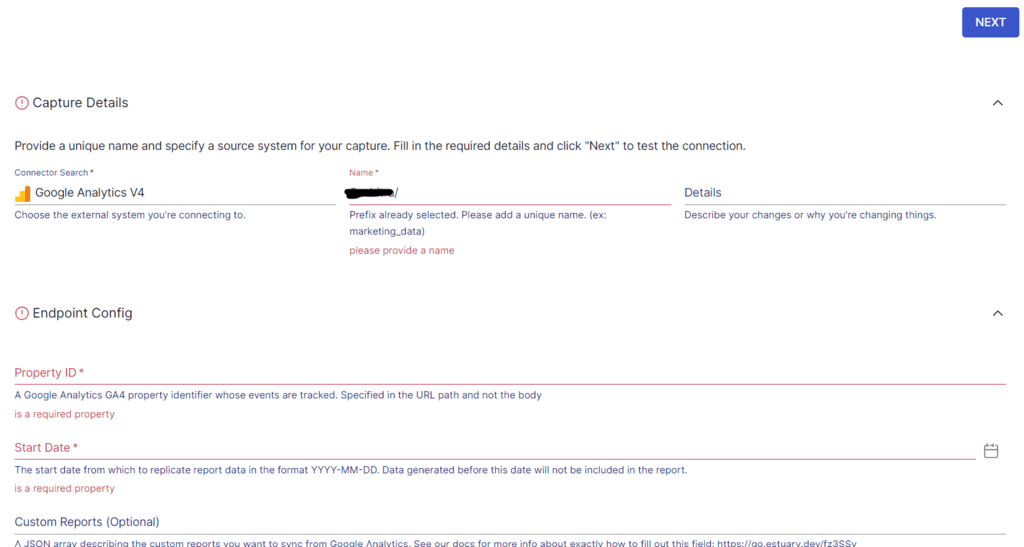
On the Google Analytics V4 connector page, specify the required details, such as a Name for the capture, Property ID, and Start Date. You can use OAuth or a service account JSON key to authenticate Estuary Flow’s access to your Google account. After providing the details, click on NEXT, followed by the SAVE AND PUBLISH button.
Image Source: Estuary
The connector will capture data from Google Analytics 4 properties into Flow collections via the Google Analytics Data API. Here are some of the data resources supported by this connector:
- Daily active users
- Devices
- Four-weekly active users
- Locations
- Pages
- Traffic sources
- Website overview
- Weekly active users
Each of these resources is fetched as a report and mapped to a Flow collection through a separate binding.
Step 2: Configure Snowflake as the Data Destination
Before you use the Snowflake connector, you must complete a few prerequisites.
After a successful capture, you will see a pop-up window with the details of the capture. Click on the MATERIALIZE COLLECTIONS button on this pop-up to set up the destination end of the pipeline. Alternatively, you can navigate back to the Estuary dashboard and click on Destinations → + NEW MATERIALIZATION.
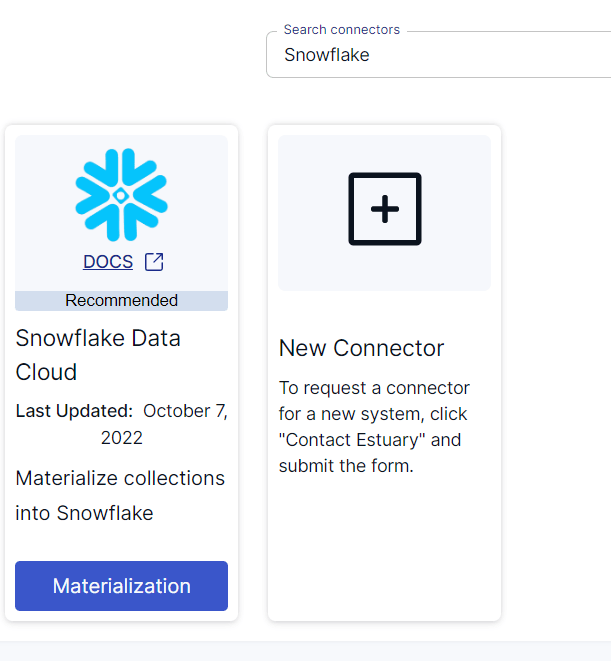
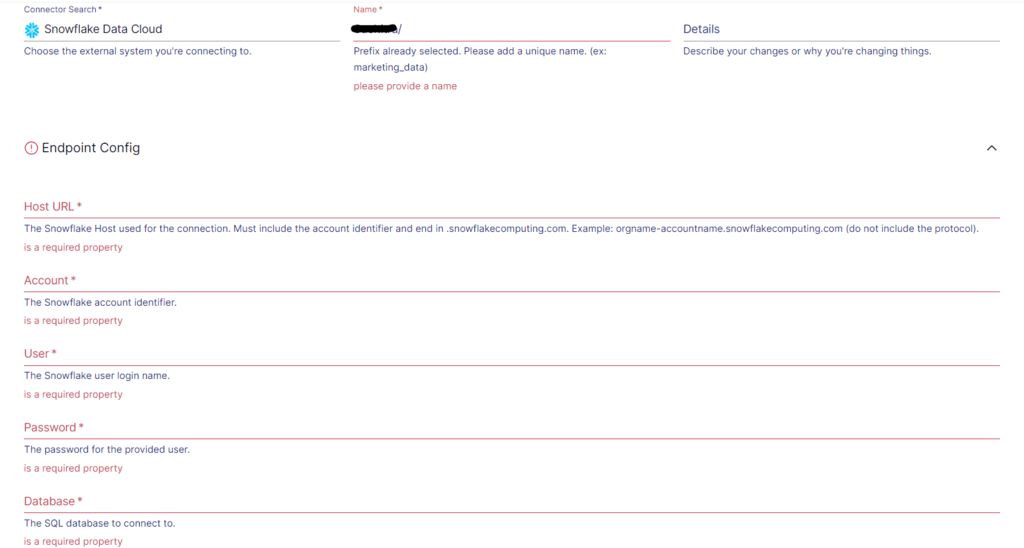
Enter Snowflake in the Search connectors box. The search results will display the Snowflake Data Cloud connector. Click on the Materialization button to proceed.
Image Source: Estuary
You will be redirected to the Snowflake connector page, where you must fill in some required details. This includes a Name for the materialization, Host URL, Account, Database, and Schema.
While the Flow collections will be automatically selected, you can use the Source Collections feature to manually add data you want to materialize into your Snowflake database. Then, click on NEXT → SAVE AND PUBLISH. This will materialize the Flow collections of your Google Analytics 4 data into tables in a Snowflake database.
Image Source: Estuary
For more information about the configuration process of the connectors, refer to the Estuary documentation:
Conclusion
Google Analytics to Snowflake integration effectively combines the analytical capabilities of GA4 with the versatility of Snowflake. This integration enhances data analysis and offers valuable insights into user behavior.
To integrate the two platforms, you can use one of three different methods: CSV files, GA4-BigQuery integration, and no-code tools. Using the CSV files export/import method will export only up to 5k rows in a single file. Both the CSV file method and GA4-BigQuery integration method are suitable for one-time data replication. However, these methods are also time-consuming and involve manual efforts.
On the other hand, no-code tools offer pre-built connectors and easy-to-use interfaces to simplify the data migration setup process. A fully-managed tool like Estuary Flow seamlessly transfers data between platforms in real time, with millisecond latency.
Estuary Flow has a range of connectors for popularly used data sources and destinations. This allows you to integrate any two platforms in only a few minutes. Register for your free account and start building data pipelines today!
Looking to connect Google Analytics 4 with other platform? Checkout these guide:

About the author
With over 15 years in data engineering, a seasoned expert in driving growth for early-stage data companies, focusing on strategies that attract customers and users. Extensive writing provides insights to help companies scale efficiently and effectively in an evolving data landscape.


