Exporting Facebook Ads data manually is time-consuming and error-prone — especially when juggling CSV files, S3 uploads, and Redshift COPY commands. But there’s a better way. With Estuary Flow, you can set up a real-time pipeline from Facebook Ads to Amazon Redshift in just minutes — no code, no delays.
In this guide, we’ll walk you through two methods to transfer Facebook Ads data to Redshift:
- A manual approach using CSV files and S3
- A fully automated, no-code method using Estuary Flow
You’ll learn how each method works, the pros and cons, and how to choose the best approach based on your data needs.
Want to skip ahead to the methods? Click here to jump straight to the step-by-step guide on connecting Facebook Ads to Redshift.
About Facebook Ads
Facebook Ads, founded in 2007, is one of the largest online advertising platforms that allow you to connect with users through ad campaigns. It enables you to promote your products or services in several formats, such as videos, images, sponsored posts, headlines, or carousel ads. You can explain your product with videos; there are many types for that, including engaging 3D explainer videos that can captivate your audience and clearly demonstrate your product's features and benefits. These ads are shown to users' feeds, in-stream, stories, related/relevant searches, or messages on several platforms. Facebook Ads utilize targeted audience selection, considering factors like age, gender, interest, language, or geography. This selection gives you a better chance to find the target audience you're looking for and boosts your sales.
With Ad Placement, you can choose where your ad appears, including Facebook, Instagram, Messenger, and Meta Audience Network. You also have control over the ad’s run time, allowing you to target users on multiple platforms during specific times. These features offer a focused advertising approach, increasing the effectiveness of your campaigns and reaching your desired audience at the right time.
About Amazon Redshift
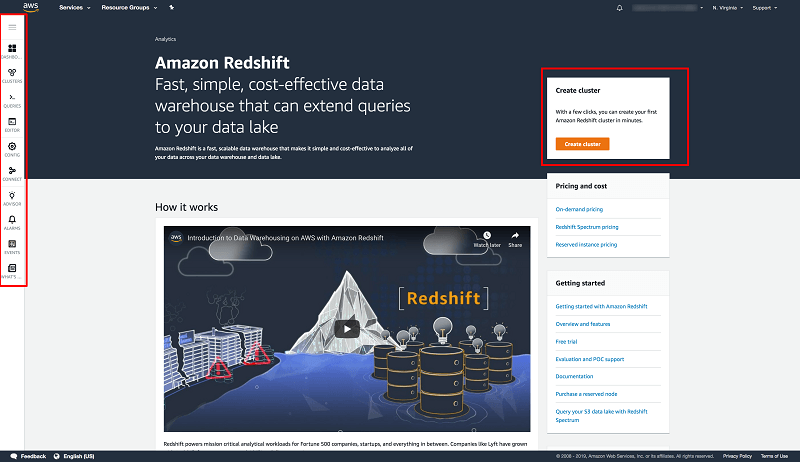
Amazon Redshift, founded in 2013, is a fully managed, cloud-based data warehouse capable of handling complex structured and unstructured data. It enables quick analytics and data warehousing at a petabyte-scale. Redshift’s high-performance query execution is powered by columnar and parallel processing, ensuring faster data retrieval and compression. It supports industry-standard SQL, making it compatible with many existing SQL-based applications. This compatibility allows users familiar with SQL to seamlessly perform complex data manipulation, analysis, and reporting tasks on large datasets.
Redshift integration enables a comprehensive and efficient data ecosystem to gain valuable insights and make data-driven decisions. It seamlessly integrates with AWS services, such as AWS glue, S3, AWS data pipeline, and various analytical tools.
How to Transfer Data From Facebook Ads to Redshift
This section walks you through two different methods to transfer data from Facebook Ads to Amazon Redshift.
- Method 1: Using no-code SaaS alternatives like Estuary Flow
- Method 2: Manually load data from Facebook Ads to Redshift using CSV
Method 1: Using No-Code Tools Like Estuary Flow
Estuary Flow is a reliable and completely automated tool that includes features for data extraction, transformation, and replication. To replicate data continuously, it supports real time data streaming, ensuring that you always have up-to-date data at the destination. This allows you to generate insights and take action as soon as the data is generated in Redshift.
Before you start loading your Facebook Ads data into Redshift using Estuary Flow, let's take a look at the prerequisites and then follow the steps:
Prerequisites:
- To use the Amazon Redshift connector, you will need a Redshift cluster, an S3 bucket, and an AWS root or IAM user with read and write permission to the S3 bucket.
Step 1: Capture the Data From Your Source
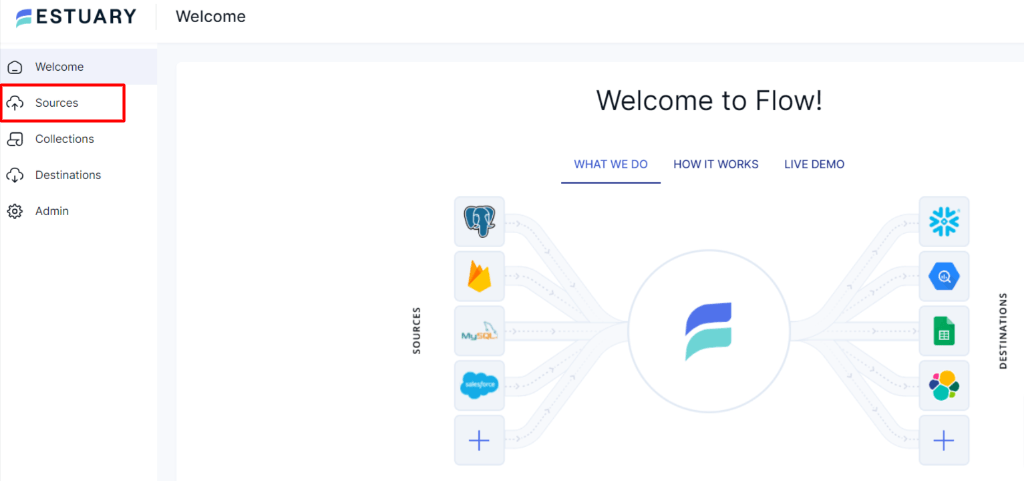
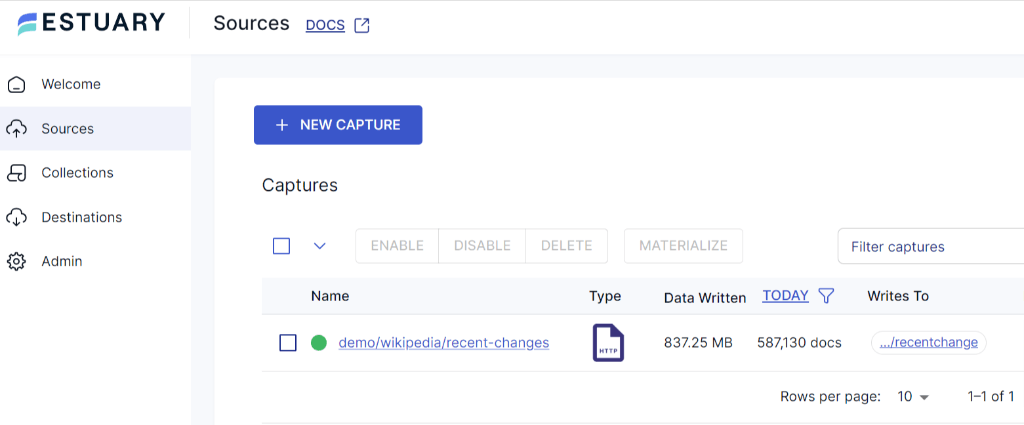
- Log in to your Estuary account or register now for free. Once you’ve logged in, navigate to the Sources option on the left side of the Estuary dashboard.
- On the Sources page, click on the + NEW CAPTURE button. This step is done to set up the source end of your data pipeline.
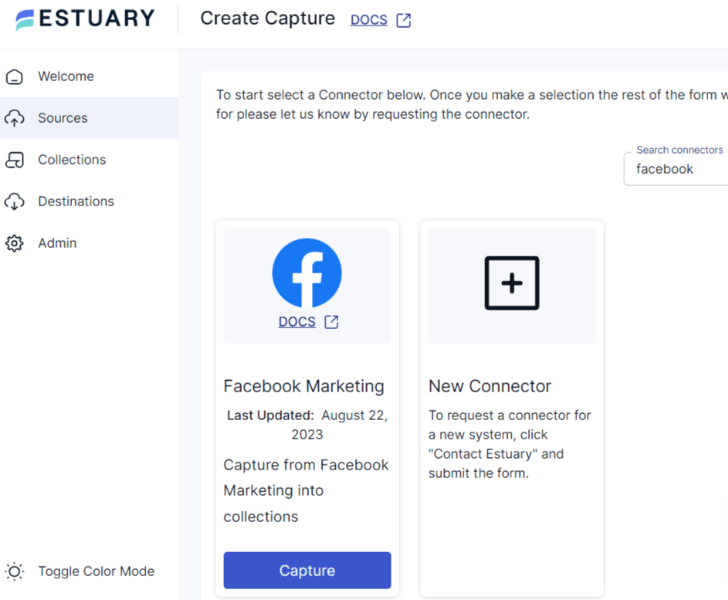
- You will be directed to the Create Capture page. Then search for Facebook Marketing in the Search connector box and click on the Capture button. You’ll be directed to the Facebook Marketing Capture connector page.
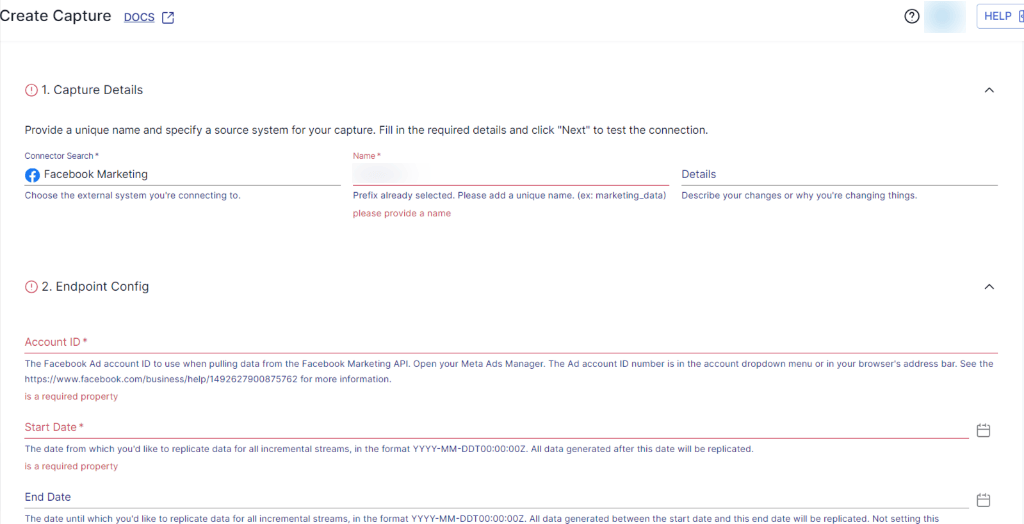
- On the Facebook Marketing Capture connector page, fill in the Capture name and other details like Account ID, Start Date, End Date, and authenticate your Facebook account with OAuth2. You can complete it either by signing in with OAuth2 or manually supplying an access token. Then, you will get a pop-up window where you can authorize access. Flow will not access any of your data during the authorization process.
- Once you have filled in all the required details, click on NEXT. Then click on SAVE AND PUBLISH. These steps will create a connection with your Facebook Ads account.
Step 2: Set Up Your Destination
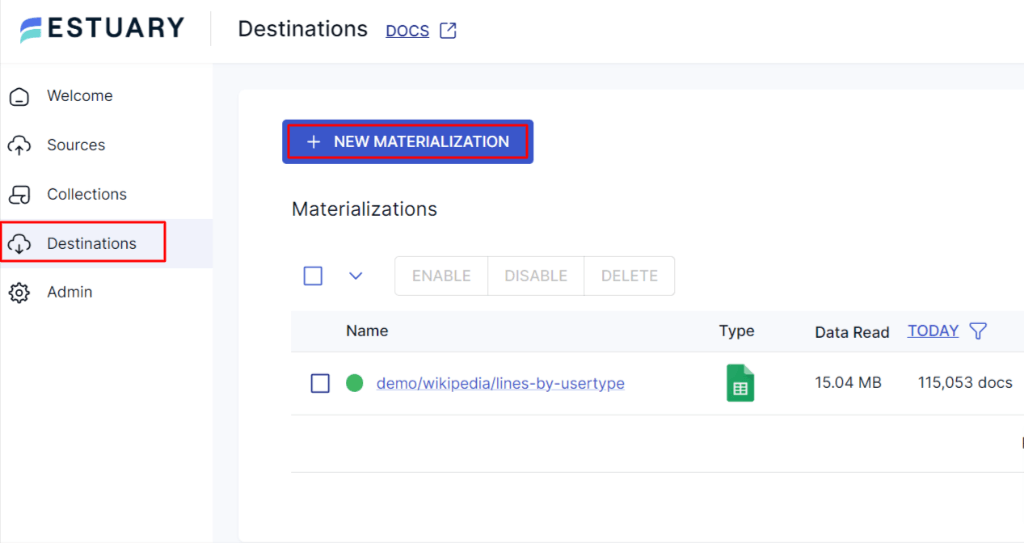
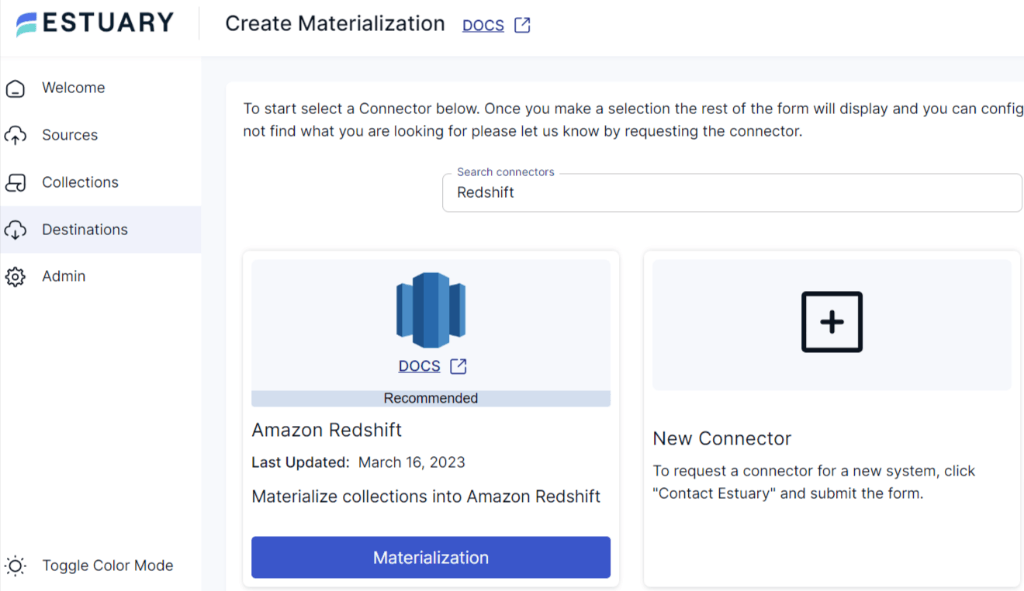
- Navigate to the Estuary Dashboard and click on Destinations on the left-side pane to set up the destination end of the pipeline. Then click on + NEW MATERIALIZATION.
- You’ll be directed to the Create Materialization page. Search for Amazon Redshift in the Search Connectors Box and click on the Materialization button.
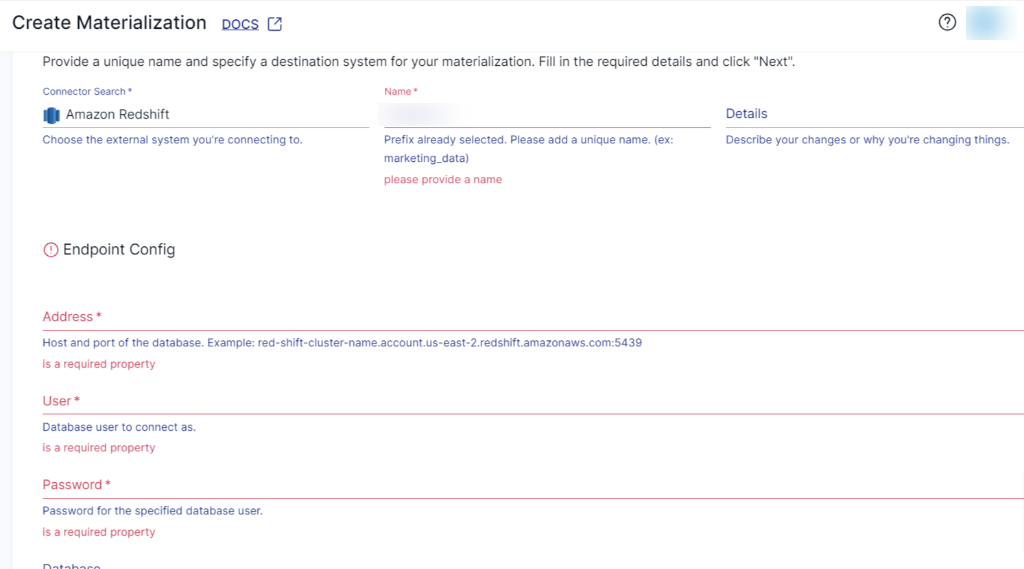
- Now you’ll be directed to the Redshift connector page. Fill in all the mandatory fields like Address, Database User name, and Password, S3 bucket name, AWS access key ID for read/write permission, Secret Access Key, and Region of the S3 bucket. If the data captured from Facebook Ads was not automatically filled in, you can add the data from the Source Collections section.
- Once you’ve filled in all the fields, click on NEXT. Then click on SAVE AND PUBLISH.
On successful completion of the above steps, Estuary will set up an automated data transfer process from Facebook Ads to Redshift. For detailed information on the process, see the Estuary's documentation:
Key Benefits of Using Estuary Flow
- Real-Time Data Consistency: Estuary Flow uses data streaming technology that enables the collecting and processing of data from sources in real time. This lets you achieve real-time data consistency across all your systems and analyze data as soon as it's generated.
- Rich Ecosystem Integration: Seamlessly connect with popular data warehousing and analytics tools to unlock the full potential of your data.
- Handle Schema Changes: Mismanagement of schema changes can result in system failure and data inconsistencies. Estuary automatically handles schema changes, ensuring data accuracy and integrity.
- Robust Data Transformation: Flow uses built-in data validation mechanisms and transformation features, ensuring quality and accuracy of the data flowing through your pipelines.
Method 2: Manually Load Data From Facebook Ads to Redshift
To manually move Facebook Ads data to Redshift, you need to export it into a CSV file, and upload it to an S3 bucket. Then, copy the data into Amazon Redshift. Let's explore the step-by-step process to replicate data from Facebook Ads to Redshift.
Step 1: Log in to your Facebook Ads Manager account. Before exporting Facebook Ads data to CSV, decide which campaign or Ad report you want to pull with a specific date and time frame.
If you decide to export Ad Campaign data, then follow Step 2, or if you decide to export the Ads report, then follow Step 3.
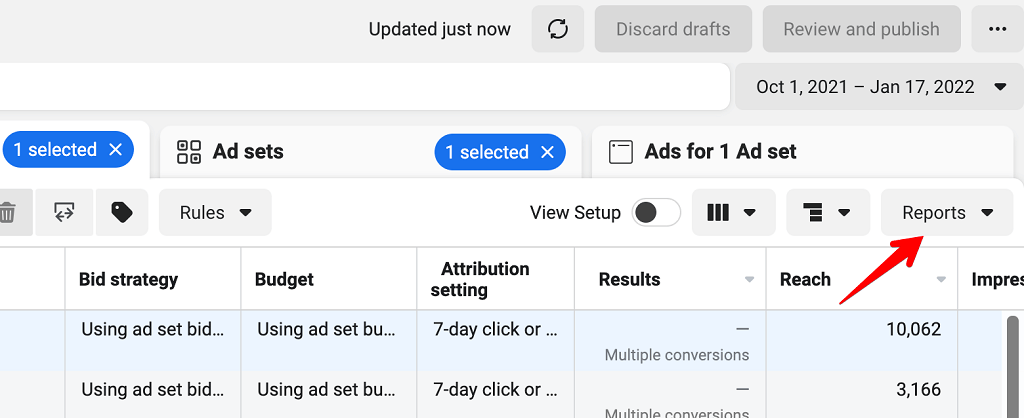
Step 2: Click on the Reports button located at the right corner of the page. Then click on Export Table Data. A pop-up window will appear with a selected Export name report and multiple Export format options such as .csv, .xls, etc. Choose .csv format and click on the Export button. The CSV file will be downloaded to your computer.
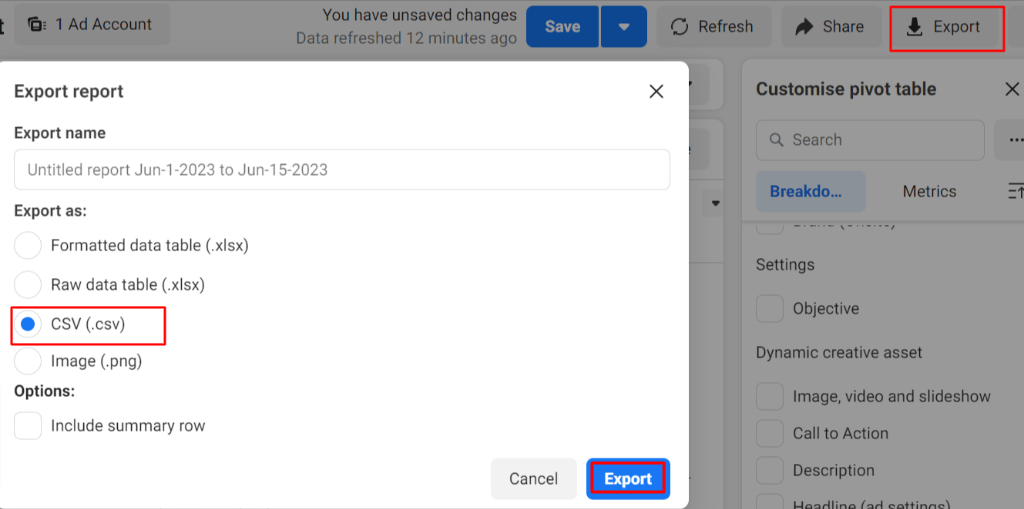
Step 3: Click on the Export button located at the top right corner of the page. You can select the customized fields that you want to export to the CSV file. A pop-up window will appear with multiple format options such as .xlsx, .csv, and .png. Choose CSV, click on the Export button, and the file will be downloaded to your machine.
Step 4: Now log in to your AWS Management account.
Step 5: In the Amazon S3 console, click on Create bucket. Then, provide a unique S3 bucket name, select the region, and click on Create.
Step 6: Navigate to the bucket that you've created and click on the Create folder. Provide a unique name to this folder and click on the Save button.
Step 7: Next, go to the IAM console and choose Policies. Create an AWS IAM policy to give access to the S3 bucket.
Step 8: Now click on the Upload option to load Facebook Ads CSV data to the newly created folder in S3.
Step 9: Once your CSV files are uploaded into the S3 bucket, use AWS CLI or the web console to move them to the Amazon Redshift cluster.
If you’re using AWS CLI, enter the following command to upload files from the S3 bucket to Amazon Redshift:
plaintextCOPY table_name
FROM 'path_to_csv_in_s3'
credentials 'aws_access_key_id=ACCESS_KEY;aws_secret_access_key=ACCESS_SECRET_KEY'
CSV;
Replace ‘table_name’ with the table you’ve created in Redshift and ‘path_to_csv_in_s3’ with the CSV file path, which is stored in the S3 bucket. Finally, provide the aws_access_key_id and aws_secret_access_key.
Now your data is successfully loaded into Amazon Redshift and ready to query.
Although this approach involves several steps, it is appropriate if you’ve a limited amount of data to transfer in Redshift.
Limitations of using CSV Files Approach
There are several limitations involved in using a manual approach to copy data from Facebook Ads to Redshift using CSV files. Some of them are:
- Time-Consuming: Using a manual approach is a tedious process due to the multiple tasks involved. This method requires exporting data from Facebook Ads in CSV format, cleaning it, uploading it to an S3 bucket, and then moving it to Redshift. Particularly when dealing with large data sets or real-time information, this process can introduce latency. As a result, it might impede the data integration into Redshift and hinder timely analysis.
- Data Accuracy Risks: If the data in CSV files are not cleaned properly, there is a risk of data inaccuracies. This may result in incorrect decisions, affecting the overall precision of the transferred data.
The Takeaway
The two alternatives to connect Facebook Ads data to Redshift are manually replicating with CSV files and using no-code alternatives. Regardless of the choice you make between these alternatives, it is important to keep your requirements in mind. Depending on what you need, you have to consider what each method has to offer.
Usually, the manual approach is straightforward for smaller tasks involving data sets that aren’t too large or complex, but includes several steps that you need to take care of to get it to work properly. However, reliable data pipeline tools like Estuary Flow can overcome these drawbacks by offering a real-time and fully automated integration service.
If you’re looking for an efficient, real-time solution to move data from Facebook Ads to Redshift, then you must try Estuary Flow. Sign up today; build your first pipeline for free!
Looking to move your Facebook Ads data to other destinations? Dive into these tutorials for further reading:

About the author
With over 15 years in data engineering, a seasoned expert in driving growth for early-stage data companies, focusing on strategies that attract customers and users. Extensive writing provides insights to help companies scale efficiently and effectively in an evolving data landscape.


