Data pipeline platforms like Estuary are a great option to simplify building and managing your data architecture, but what happens when you need to connect to a system that’s not represented on the platform’s list of supported connectors? The situation is bound to crop up, even with pipeline platforms that boast multiple hundreds of connectors: new APIs get released at an astounding rate. Thankfully, you still have options if that niche, cutting-edge system perfectly fits your use case.
Many data pipeline platforms will let you request new connectors. Whether they really encourage you to do so can be another matter, leaving you in limbo for months—or years. While Estuary welcomes new connector requests and responds quickly, with a frequent release schedule for new options, it can feel risky to trust any external company to match your internal deadlines.
It can therefore be a relief when you’re able to take the matter into your own hands; doubly so if you can still make use of a data pipeline platform’s benefits, like built-in low latency and automatic schema evolution. How is this possible? By using webhooks.
This guide explores webhook integration as a way to connect unsupported systems to your data pipeline platform in real time—without building a custom connector.
What Are Webhooks?
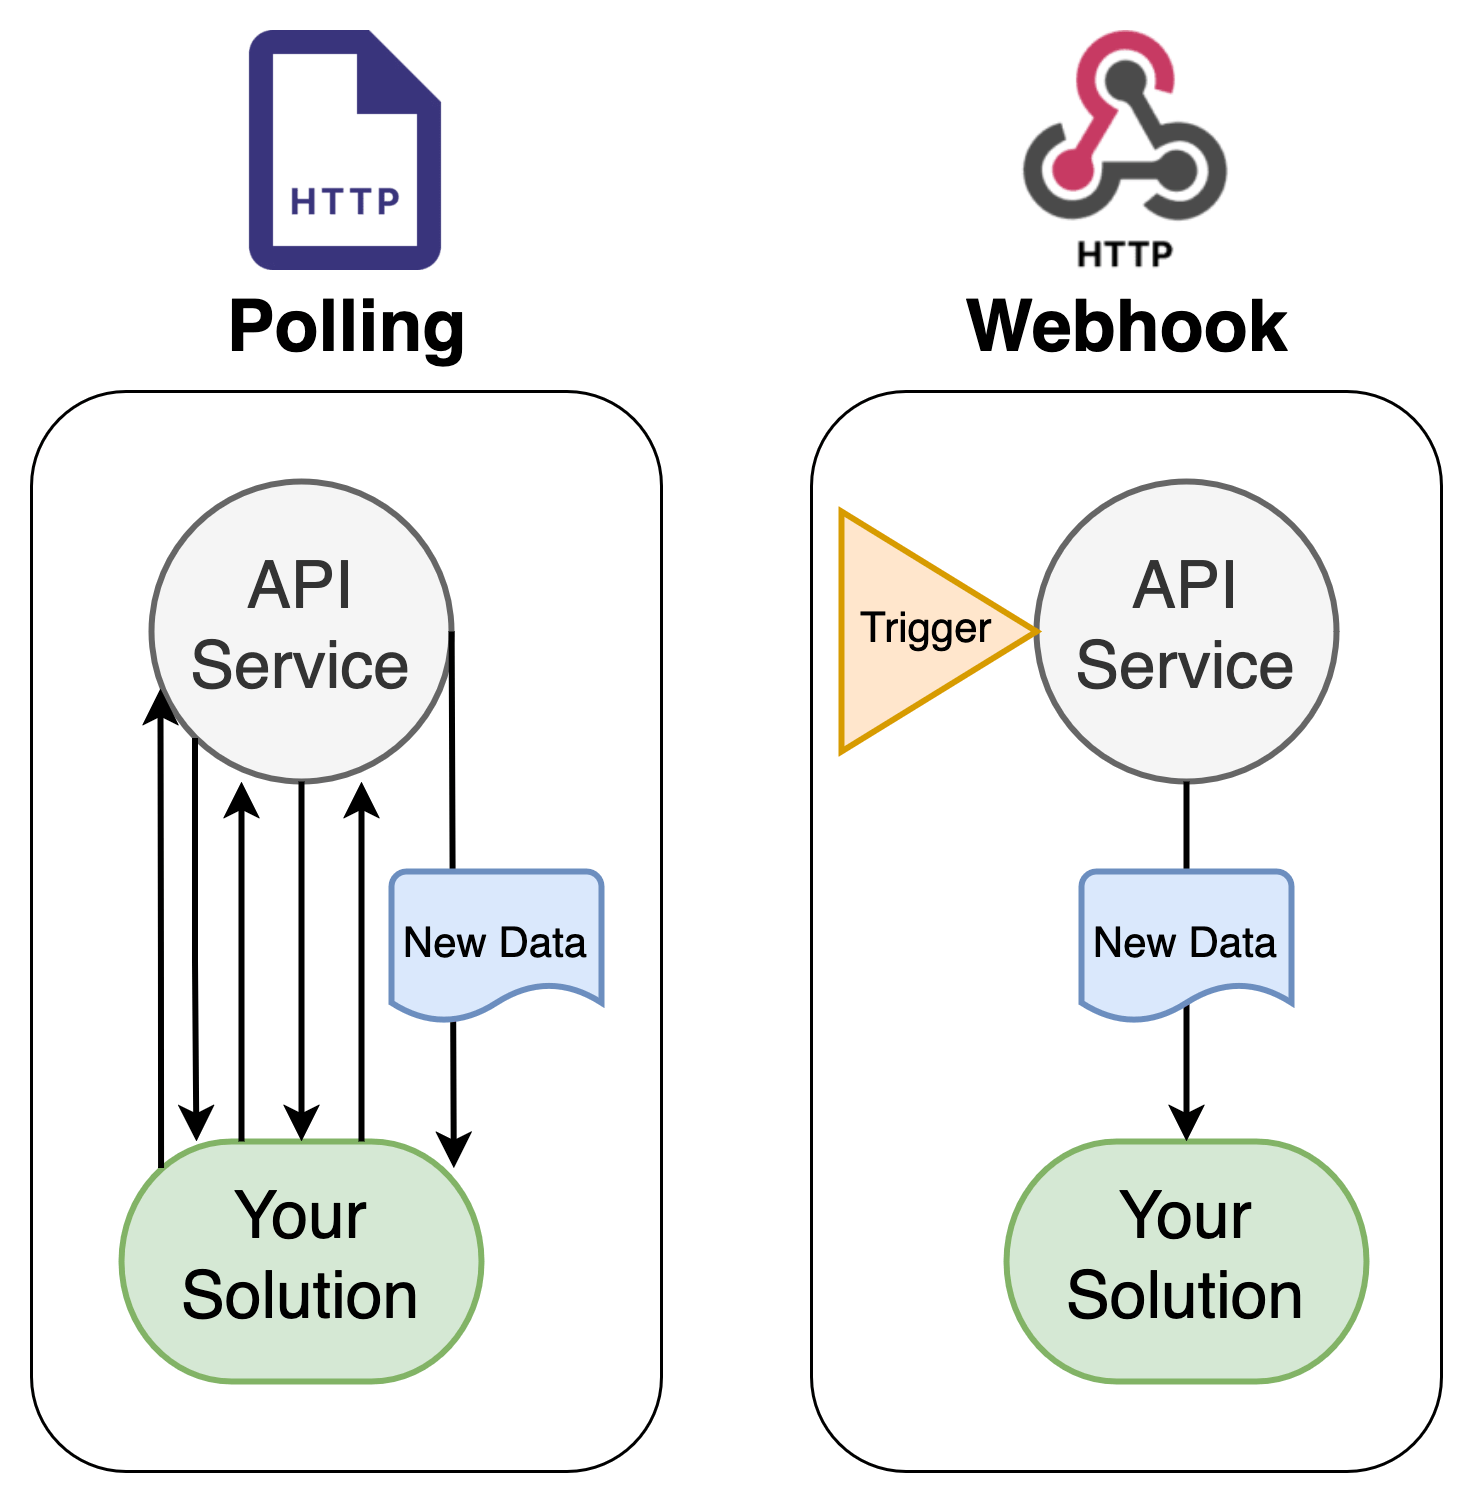
Webhook integrations offer a way to connect with external systems where the external system will push updates to you using an HTTP callback rather than requiring you to pull updates from the system via API request.
Webhooks are user-defined in the sense that you get to define where the webhooks go (which web address) and what events you want to be notified about (what should trigger the webhook).
When the trigger occurs in the external system, such as a new message entering an inbox or a new payment being processed, it sends an HTTP request to your defined URL with data about the update.
Webhooks vs. API requests: Which is Better for Streaming Data?
If you’re using an HTTP protocol anyway, why not simply use API requests instead? The system you want to connect to provides perfectly good REST or GraphQL APIs.
APIs offer a great way to connect to a variety of systems, and are invaluable when creating integrated workflows. But they require you to initiate the request. This is perfectly natural when a change in your system prompts you to create or fetch data from the external API. It’s not such a great fit when you simply want to track and replicate data as it changes from that external system.
Say you’re connecting to a POS (Point-of-Sale) API so you can aggregate and analyze purchases while monitoring inventory levels. You don’t know when new sales occur, so you don’t know when to send in that API request.
To get around this, you can implement polling, which involves sending the same API request (such as GET orders) over and over again. If you choose a short polling interval, you may be able to stay reasonably up-to-date on changes, at the cost of wasteful requests and duplicated work. Aggressive polling may even impact the source system: many companies implement rate limits that define a maximum number of requests you’re allowed within a certain time interval for just this reason.
On the other end, if your polling interval is overly long, you can miss timely updates and won’t be able to implement truly real-time features. Using the POS example, consider catching issues with payments as they occur, fraud detection, or item recommendations, all of which rely on time-sensitive data.
In these cases, doesn’t it simply make more sense for the source system to tell you when an update is available?
Webhook Limitations
Like with APIs, source systems can vary wildly in their webhook offerings, and there can be concerns about reliability. If you initiate an API request, you at least know when it returns with a 500 internal server error. If you’re relying on receiving webhooks, you may never even know when one fails at the source system.
Some systems are better about webhook failure messaging than others. For example, Twilio provides an API and alert triggers that specifically log errors and warnings that Twilio encounters when attempting to send data to your webhook. Others may attempt to resend a webhook that encounters errors, or simply fail quietly.
If you’re integrating with a system that doesn’t provide very robust support around webhooks, you can supplement webhooks with infrequent API polling. This way, you can receive timely webhooks for the bulk of cases, but still catch the occasional undelivered event in an hourly or daily batch request.
Other systems may choose to send very minimal data via webhook. A new online order may only result in a webhook with a timestamp, the order ID, and the type of event (whether the order was created, updated, or deleted). These systems necessitate following up on a webhook with an API request to receive the full event details, such as the items in the order, order total, and payment method. This style of webhook can still be useful to notify you when events occur, but can be a hassle for strict data replication use cases.
And then there are systems that provide APIs without supporting webhook functionality at all. You’ll still be able to access HTTP endpoint data from these systems via their APIs or a general HTTP File connector, even if you’ll need to contend with polling limitations.
What Systems Support Webhooks?
Numerous platforms spanning various verticals offer webhook options. The sampler here is presented as a jumping-off point to highlight a small portion of the range of available data connections.
Monitoring and observability
Monitoring and observability use cases, by definition, should be as close to real-time as possible to be effective. Any delay on alerts delays investigation and gives issues the chance to compound.
It’s therefore no wonder that Datadog, a Cloud Monitoring as a Service platform, supports webhooks. Similarly, the Grafana observability platform offers outgoing webhook integration options for their Incident Response Management product.
CRMs and messaging
New customers and new messages are generally events you don’t want to miss. While a top CRM like Salesforce is already likely to have its own connector in any decently-equipped data pipeline platform, there are lots of CRM options out there with their own niches and priorities. And many support webhooks.
For example, Pipedrive is a streamlined CRM system, focused on the flow from sales leads to closed deals. Intercom, on the other hand, is more of a shared inbox where conversations can be divided up among team members. Both support webhook integrations.
POS systems
The Point-of-Sale examples earlier weren’t just hypothetical. Commerce moves quickly and businesses need to stay on top of new orders, inventory levels, and issues with payments. But similarly to CRM systems, there are a lot of POS options out there, so any one data pipeline platform is unlikely to provide pre-built connectors for them all.
Besides Stripe, the ubiquitous online payment API, more traditional retail and restaurant POS systems include Clover and Square. Webhooks with these platforms help unlock in-person transactions, letting you keep up with real-time traffic at brick and mortar locations.
Using Estuary’s Webhook Capture Connector
One tempting aspect of API requests is their accessibility, especially when initially testing out a new platform. You can simply load up the endpoint and header information into Postman, send a curl request, or even try it out directly in the platform’s docs. Webhooks, on the other hand, require a little more initial setup, since requests get sent to a URL that you specify and that, presumably, you manage.
Estuary simplifies this process, letting you set up and test webhooks without building out your own server to handle requests. Estuary does this by providing you with a unique URL that you can use when configuring webhooks with an external system. That system will then send webhook data directly to an Estuary collection. You can review the webhook results in Estuary and seamlessly integrate it with the rest of your data architecture.
Note that so far this is all focused on capturing data from external sources. Estuary also provides a webhook materialization connector for the other way around, but a deeper discussion on that functionality will have to wait for another article.
In the meantime, let’s look at the webhook capture process with Estuary step-by-step.
Step 1: Create an HTTP Webhook capture in Estuary
To kick off your webhook integration:
- First sign in to your Estuary dashboard. If you don’t already have an account, you can sign up for free.
- In the Sources tab, select the New Capture button.
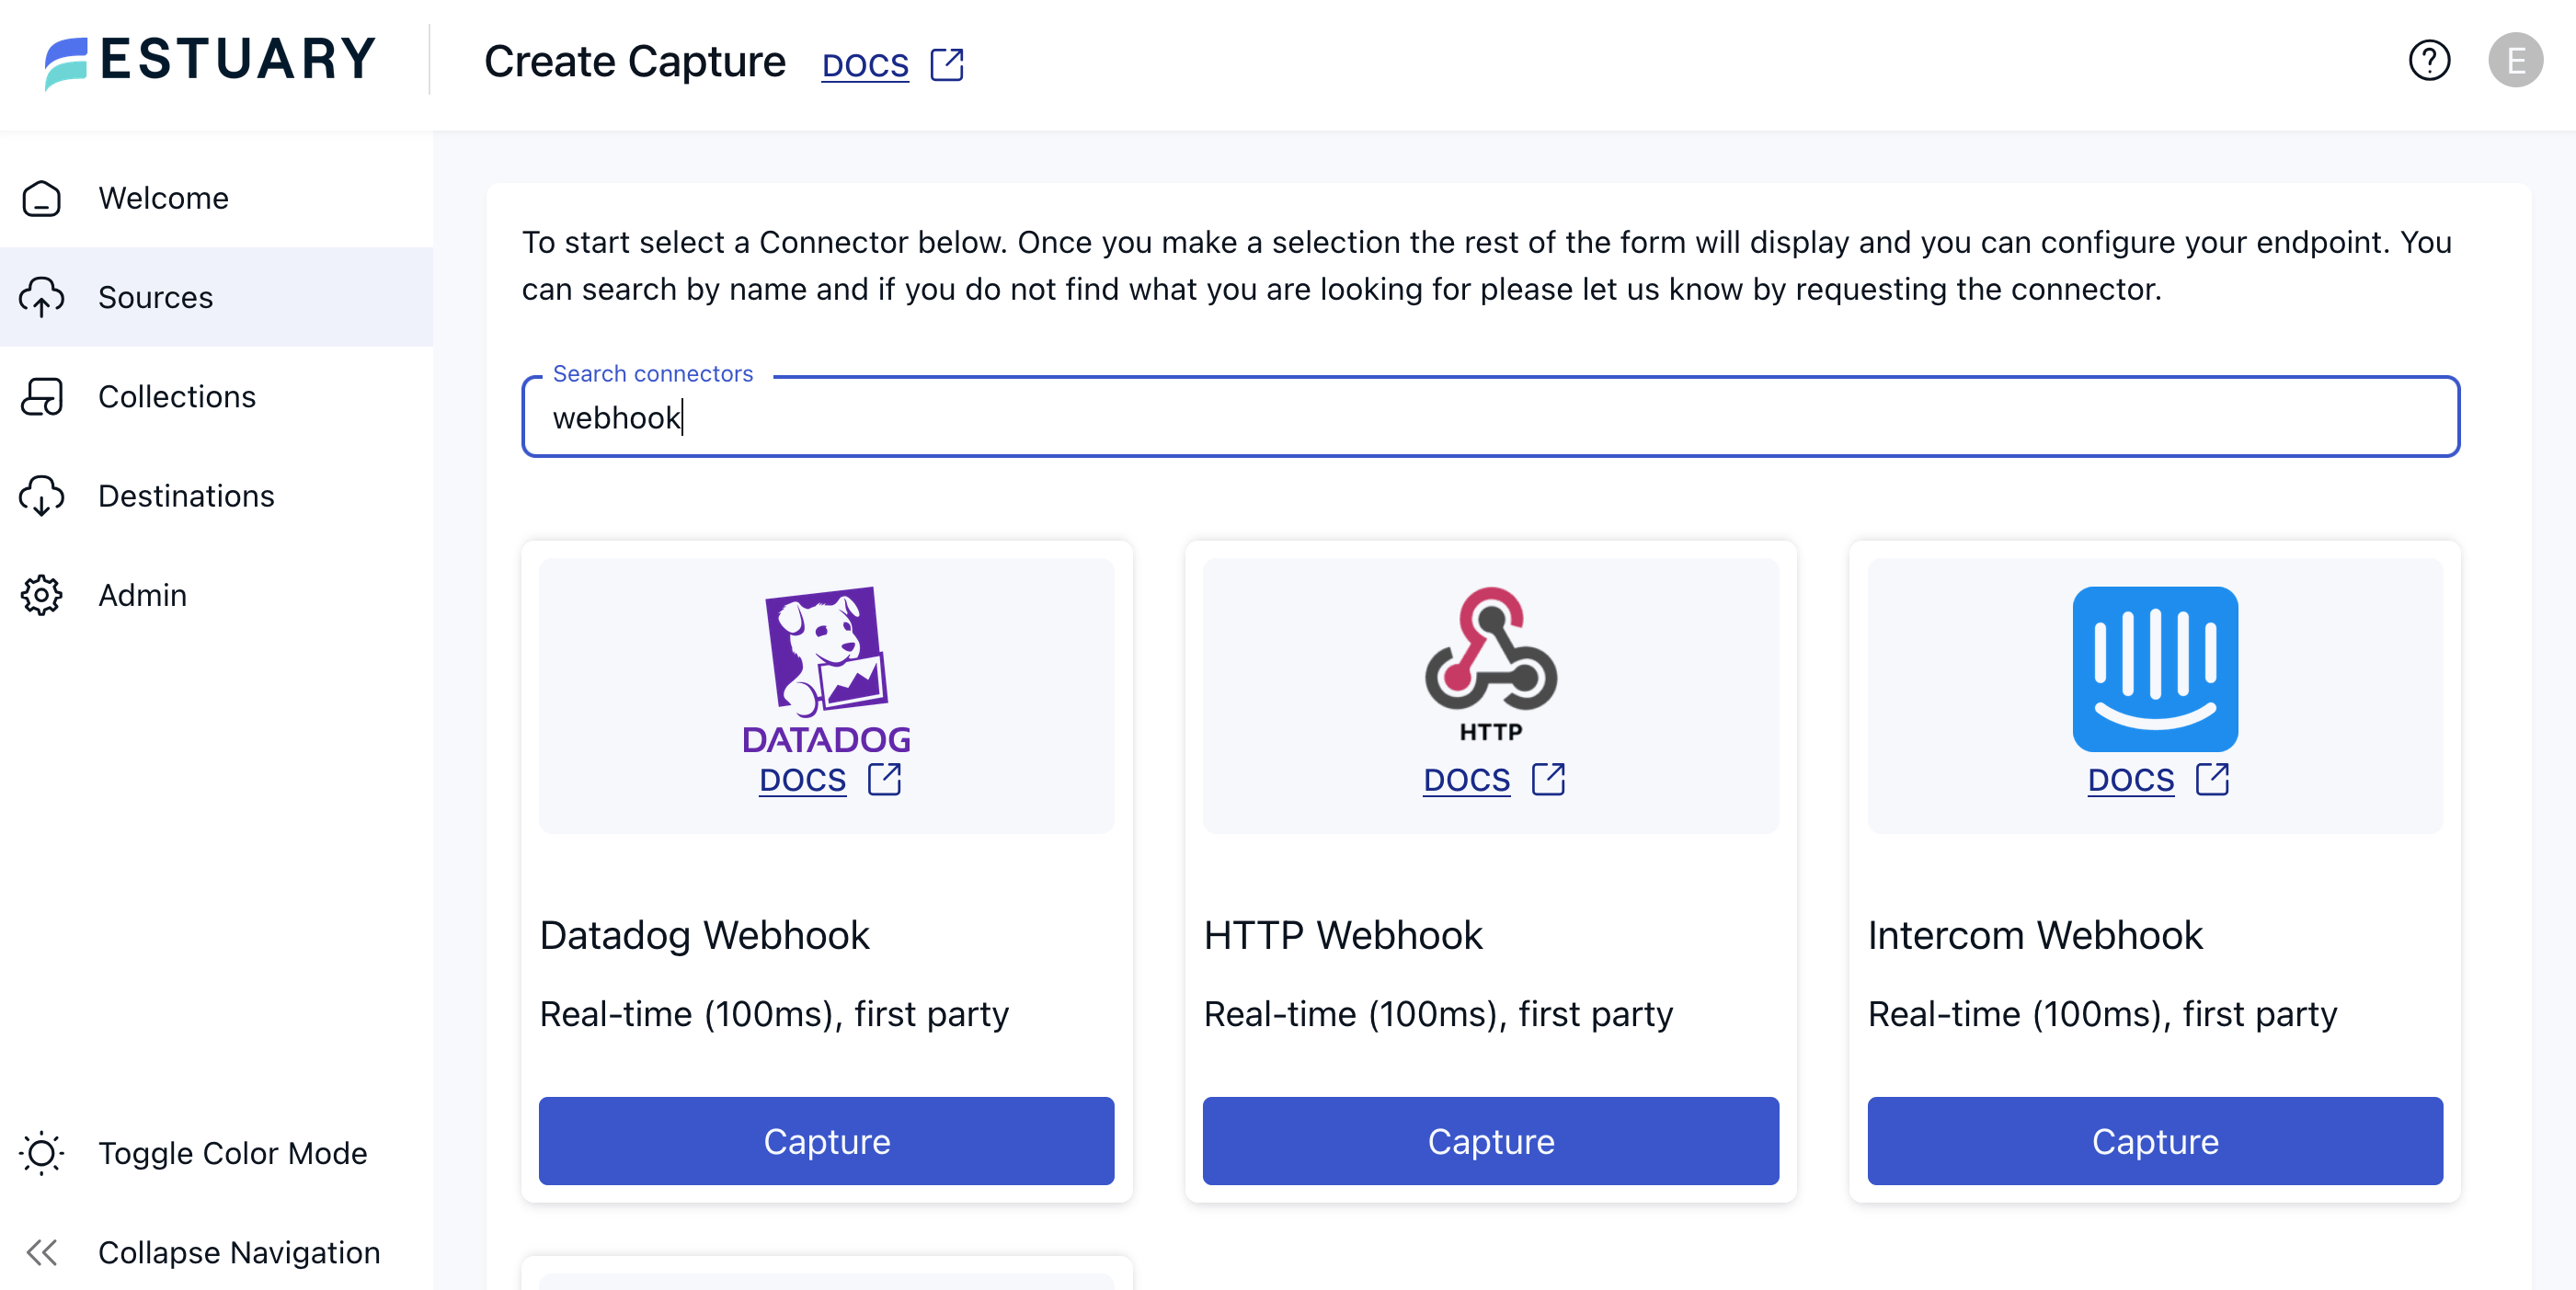
- Search for “webhook.” You can choose one of the name-brand options if you’re integrating with a specific supported system, like Datadog or Intercom. Otherwise, choose the general HTTP Webhook connector.
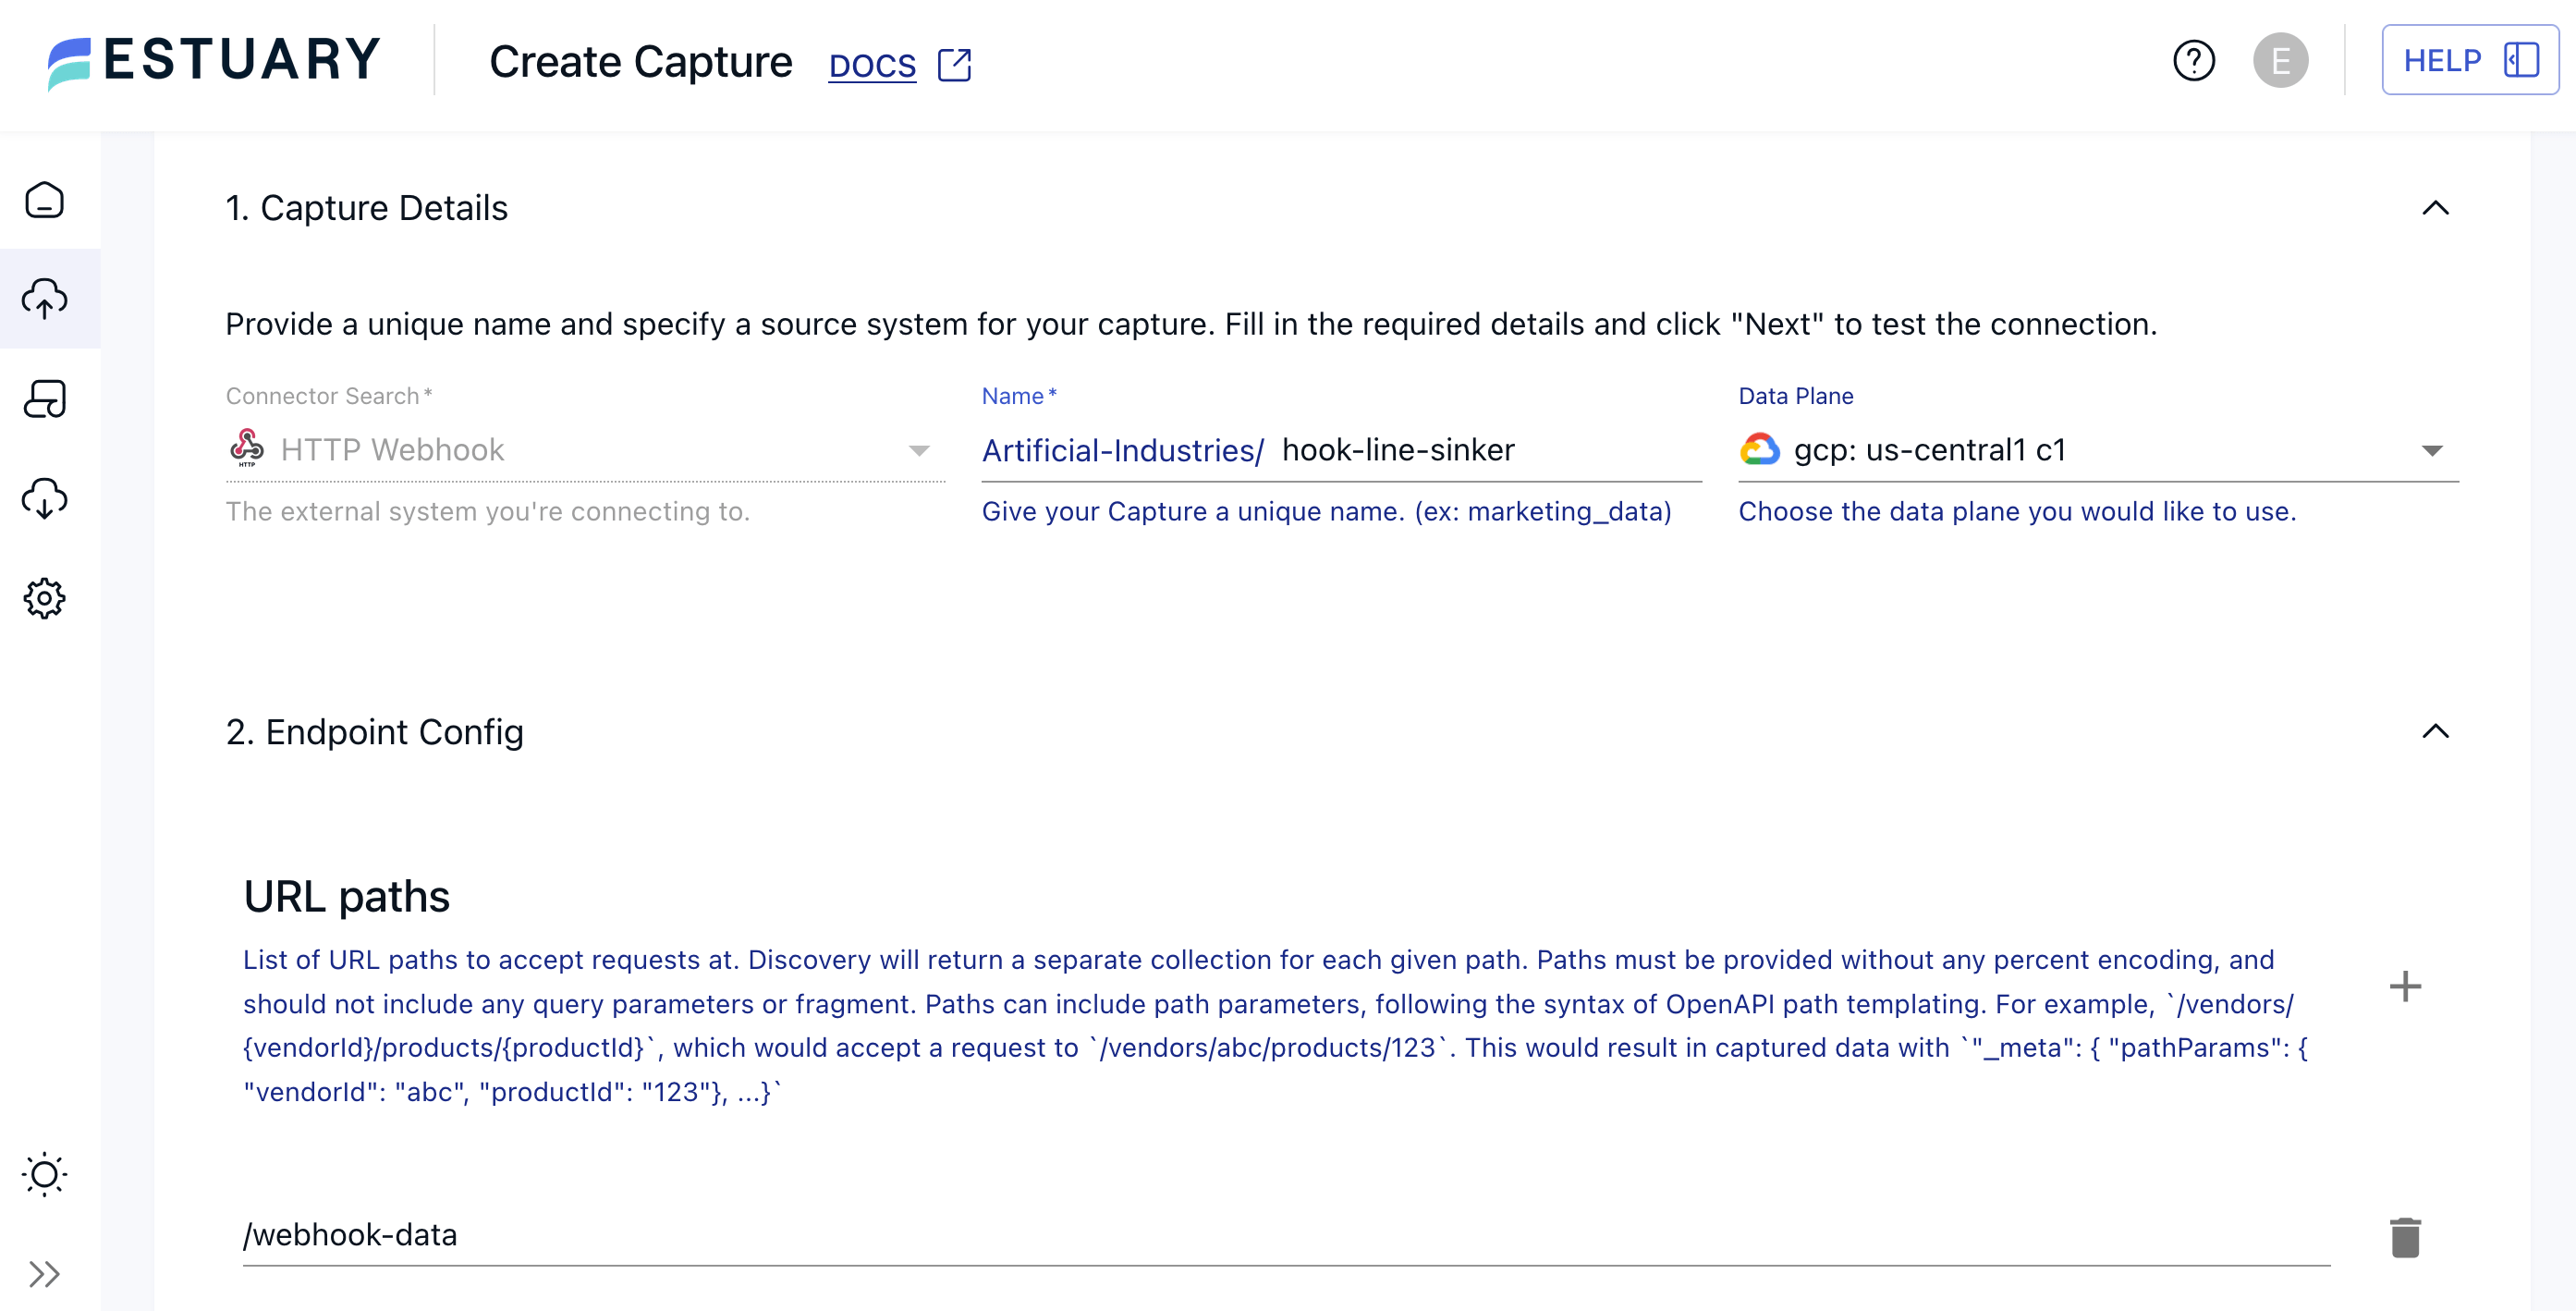
- Fill out the connector configuration details. This includes:
- Name: A unique name for your capture.
- URL paths: Here, you can set the path name for your URL and add additional paths. Since each path will send data to its own collection, you may want to create multiple webhooks with their own separate paths. For example, one to collect inventory item updates and one to collect order updates.
- Authentication token: Specify a bearer token to gate access to your URLs. Incoming requests will need to present this token before they can write data to your collection, so this option will depend on your source system’s capabilities.
- CORS allowed origins: A list of origins that are explicitly permitted using the
Access-Control-Allow-Originheader.
- Click Next, then Save and Publish.
Step 2: Retrieve your webhook URL
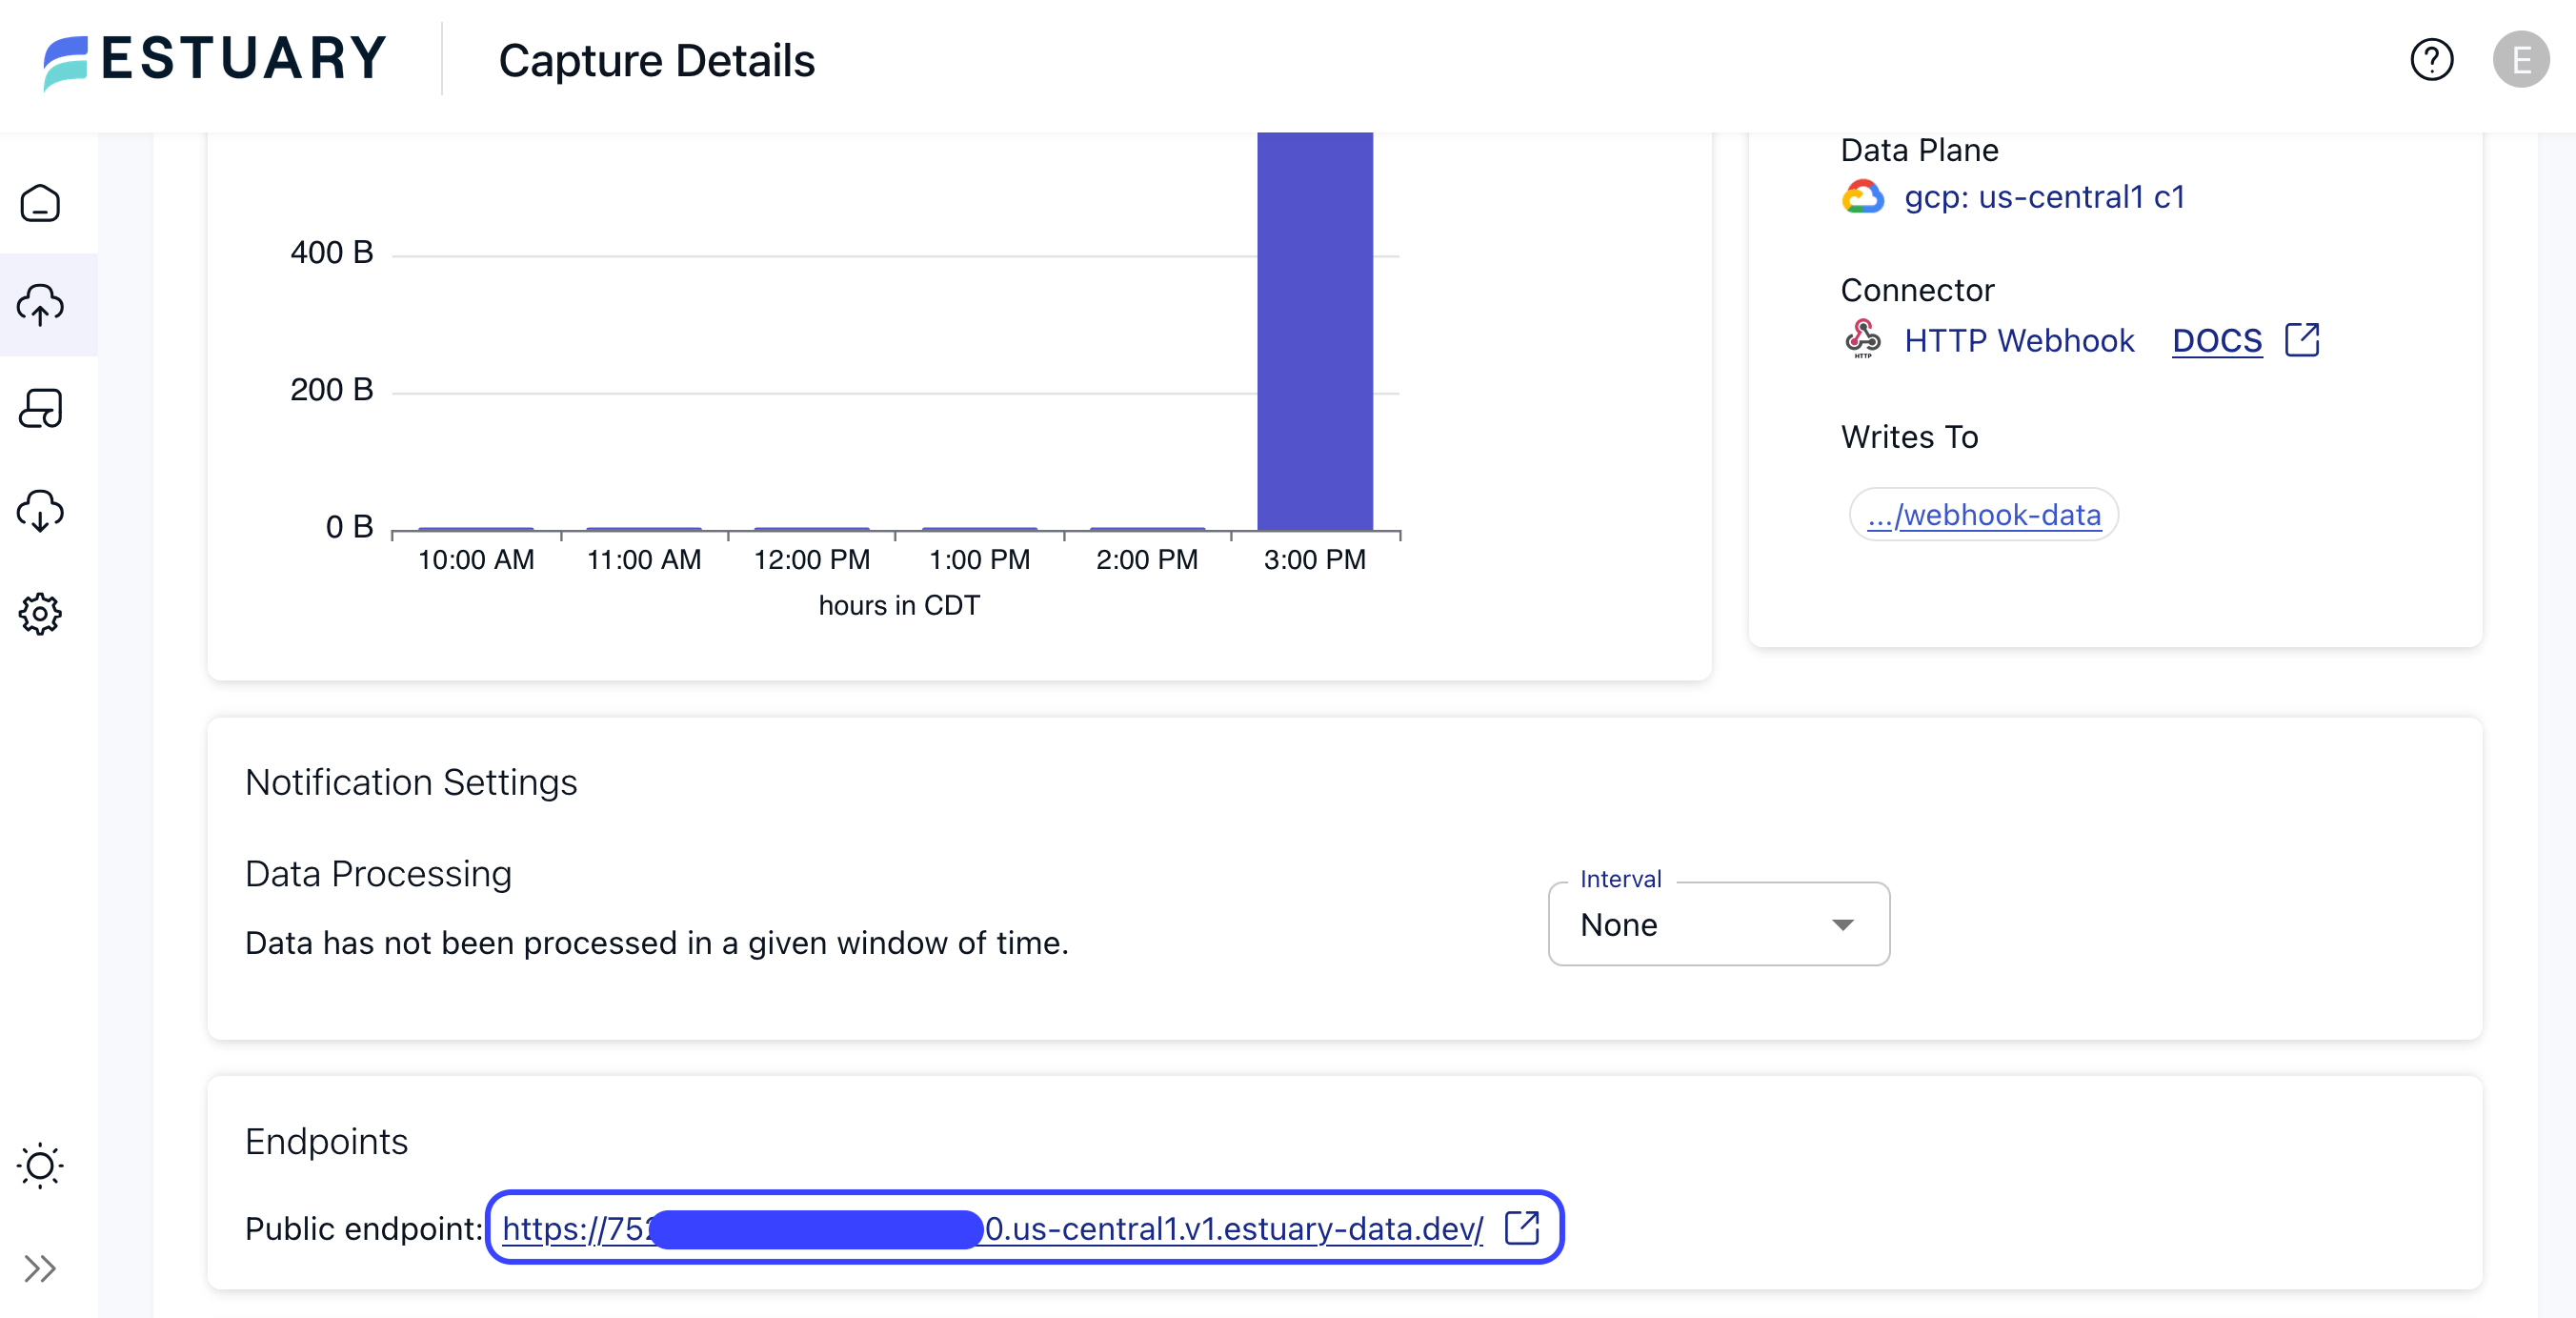
Once your connector has been created, you can find your base URL on the Capture Details page.
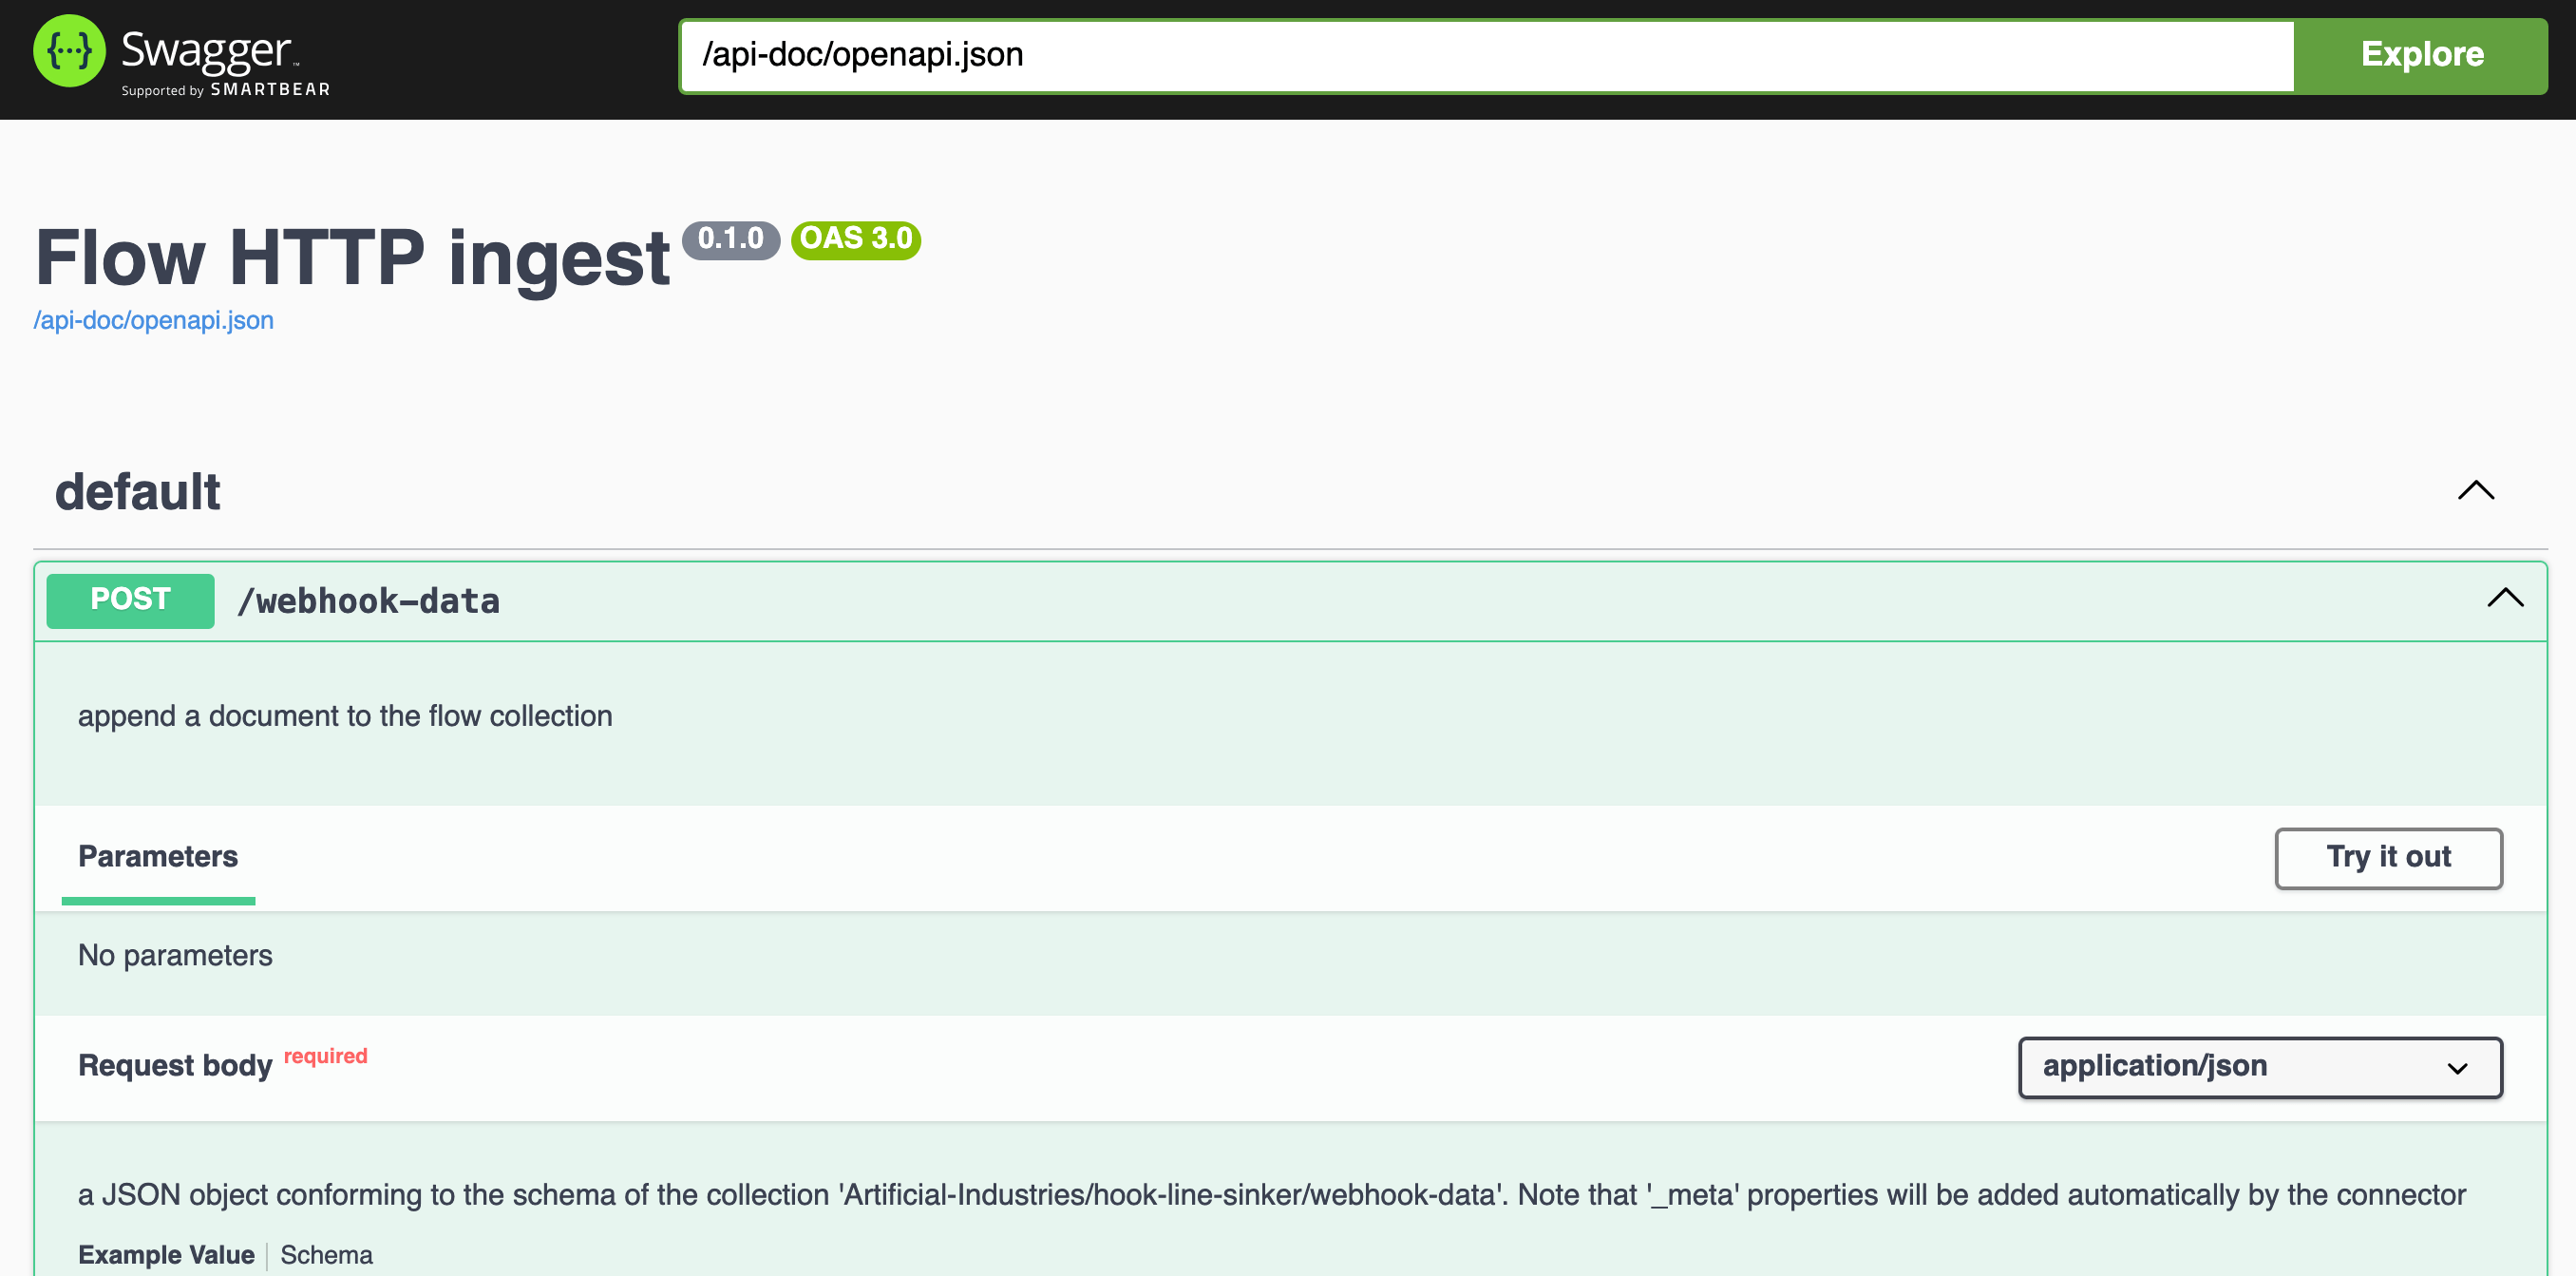
On the Overview tab, scroll down to the Endpoints card. This section displays the public base URL you will use for your webhook. You can also follow the link to a generated Swagger docs dashboard. Here, you can see information on all of your paths. There’s even one of those “Try it out” buttons to quickly test sending some data to your Estuary collections.
If you use another source to test your capture, such as Postman or curl, note that you’ll need to put your base URL and specific path together for your full webhook URL. Your source system will also need this full URL. This should be something like https://your-generated-base-url.estuary-data.dev/your-specified-path.
Step 3: Configure the webhook in your source system
Once you’re familiar with the URL Estuary generated, it’s time to put it to work in your source system. Each platform will have its own way of configuring webhooks, so make sure to check the specific docs for your source system for this step.
In general, though, when you create a webhook in a platform’s dashboard, you will have the opportunity to provide a Webhook URL or Address, as well as select which event types you want to receive notifications on.
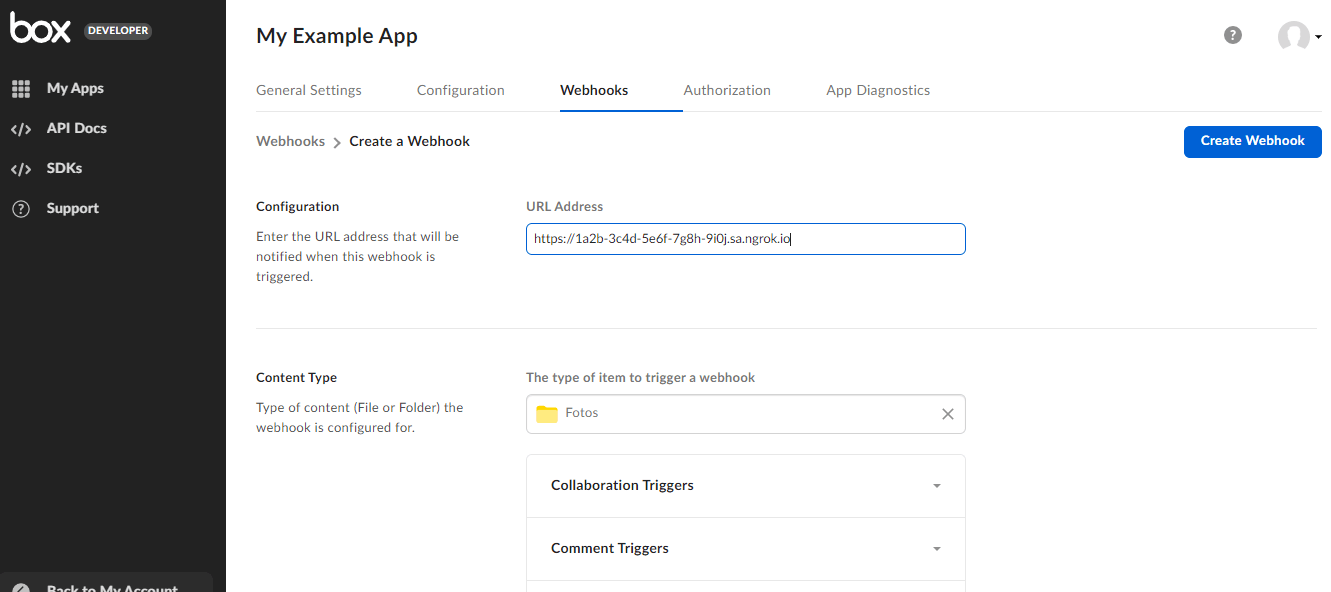
For example, if you were setting up a webhook with Box, you may want to receive updates whenever a new file is added to a folder. Box’s webhook configuration includes a URL Address field where you can paste your generated URL, as well as a Trigger field where you can specify what activates the webhook.
Other platforms may have requirements around authentication or security, but the basics will be the same.
Once everything is set up in your source system, trigger an event if you’re able to, and check that your data lands securely in your Estuary collection.
With that, you’re all integrated! And you didn’t even need a name-brand connector to do it.
Conclusion
It doesn’t need to be hard to keep up with the latest, greatest APIs and services. And it doesn’t necessarily require a lot of custom integration code that inevitably breaks as soon as that cutting-edge API changes their schema.
Data pipeline platforms like Estuary offer solid generic HTTP connections, even when there isn’t a pre-built platform-specific connector. A basic HTTP File connector can pull updates from an API on a polling interval while an HTTP Webhook connector receives pushed data from a source system.
There are tradeoffs on either side, such as limitations around API polling and variable support for webhook retries and failure reporting. But if your source system provides robust webhook integration support, they’re a great way to stay up-to-date on business-critical data.
Try out Estuary to simplify your webhook setup and connect with us on Slack to let us know what you’d like to see from us next.

About the author
Emily is a software engineer and technical content creator with an interest in developer education. She has experience across Developer Relations roles from her FinTech background and is always learning something new.


