Braintree to Snowflake Integration: Automate Payment Data Syncs
Learn how to integrate Braintree with Snowflake for secure, analytics-ready payment data. Compare manual CSV import with Estuary, the right-time data platform that unifies CDC, batch, and streaming in one dependable system.
Payment processing data holds immense value for every business, but traditional gateways often limit scalability and flexibility. Braintree overcomes these challenges with modern capabilities like multi-currency support, advanced fraud protection, and 3D Secure authentication. However, to fully unlock the potential of this data, it needs to be analyzed alongside other business systems in a powerful analytics platform such as Snowflake.
Integrating Braintree data into Snowflake enables teams to track payment performance, analyze customer behavior, and make data-driven decisions with greater accuracy. This guide explains two reliable ways to move data from Braintree to Snowflake:
- A manual CSV export and import process.
- An automated, scalable approach using Estuary, the right-time data platform that unifies CDC, batch, and streaming in one dependable system.
Estuary gives you complete control over when your data moves, whether instantly, on a schedule, or in batches, so your pipelines always align with your operational and cost goals.
What Is Braintree?
Braintree is a modern payment gateway owned by PayPal that helps businesses accept and manage payments securely across web, mobile, and in-person channels. It simplifies payment processing while supporting advanced features that improve global reach and customer experience.
The platform integrates easily with popular e-commerce systems, mobile applications, and content management platforms. This allows merchants to start accepting payments quickly without extensive development work. Whether you operate a subscription service, retail store, or online marketplace, Braintree scales with your business needs.
Key Features of Braintree:
- Multi-Currency Support: Accept payments in multiple currencies so customers can pay in their local currency without conversion hassles.
- Global Payment Methods: Support for major credit cards, digital wallets such as PayPal, Apple Pay, and Google Pay, and regional options like iDEAL, Alipay, and Sofort.
- Advanced Data Security: Sensitive card data is stored in the Braintree Vault, protected by multiple encryption keys with split knowledge and dual control. This ensures cardholder data remains secure even if other systems are compromised.
What Is Snowflake?
Snowflake is a cloud-native data warehousing and analytics platform that enables organizations to store, process, and analyze large volumes of data with ease. Designed for scalability and performance, Snowflake allows teams to focus on insights rather than managing infrastructure.
Unlike traditional data warehouses, Snowflake separates compute and storage. This architecture lets you scale each component independently, ensuring fast performance for heavy workloads while keeping storage costs predictable. The platform is widely used for analytics, machine learning, and data sharing across industries.
Key Features of Snowflake:
- Fully Managed Service: Snowflake handles infrastructure, software updates, and optimization automatically, allowing teams to focus entirely on analysis.
- Automatic Query Optimization: The system optimizes query execution behind the scenes, delivering consistent performance without manual tuning.
- Secure Data Sharing: Snowflake allows you to share live, governed data with internal teams and external partners without duplicating datasets, improving collaboration and consistency.
- Scalability and Flexibility: Instantly scale up or down to handle variable workloads while maintaining high concurrency and cost control.
By combining Braintree’s transactional data with Snowflake’s analytical power, businesses can unlock a deeper understanding of customer behavior, transaction trends, and revenue performance.
Integrating Braintree with Snowflake: 2 Methods
Integrating Braintree with Snowflake allows you to centralize and analyze payment data in one place. By combining Braintree’s transactional insights with Snowflake’s scalable cloud architecture, you can uncover patterns in payment performance, customer preferences, and regional trends.
There are two reliable methods to integrate Braintree with Snowflake:
- Method 1: Using Estuary – the right-time data platform that unifies CDC, batch, and streaming in one dependable system.
- Method 2: Using manual CSV export and import – a slower, hands-on process that works for small datasets or one-time transfers.
Using Estuary simplifies and automates the integration, giving you complete control over when your data moves. You can choose to sync instantly, on a schedule, or in batches depending on your business needs and cost requirements.
Method 1: Using Estuary for Braintree to Snowflake Integration
The most efficient and scalable way to integrate Braintree with Snowflake is by using Estuary, the right-time data platform that unifies CDC, batch, and streaming pipelines in one dependable system. Estuary automates continuous data movement from your Braintree account to Snowflake with minimal setup, eliminating the need for manual exports or custom ETL scripts.
Prerequisites
Before you begin, make sure you have:
- An active Estuary account
- Your Braintree account credentials (Merchant ID, Public Key, and Private Key)
- A Snowflake account with a database, schema, and warehouse configured for data ingestion
Step 1: Configure Braintree as the Source
- Log in to your Estuary account.
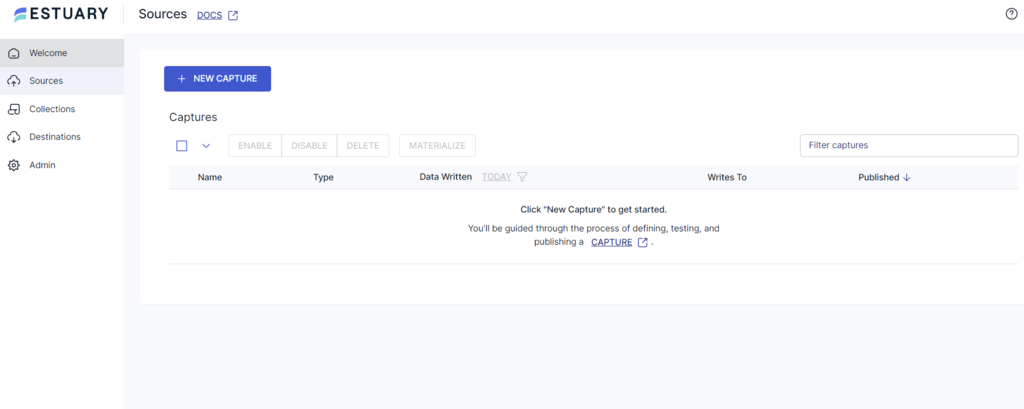
- In the left navigation pane, select Sources and click New Capture.
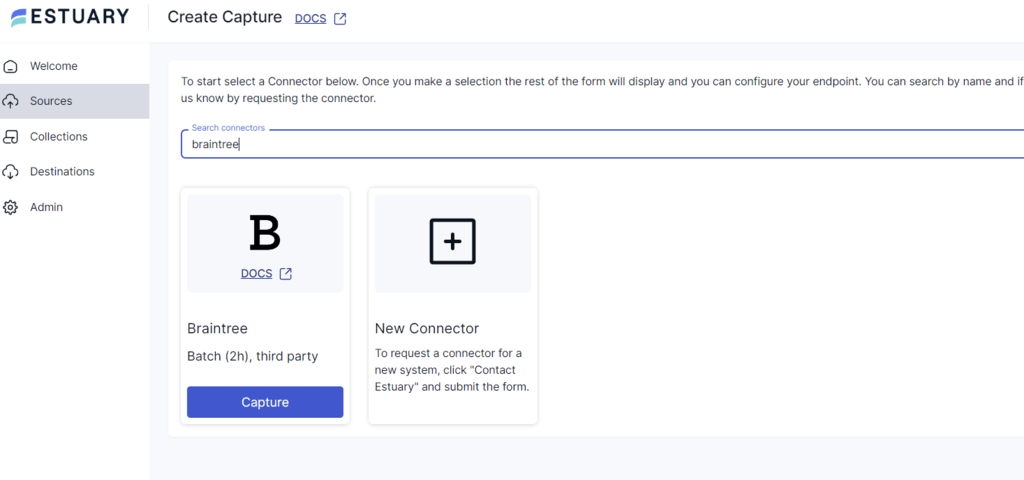
- Use the Search connectors field to find Braintree and select it.
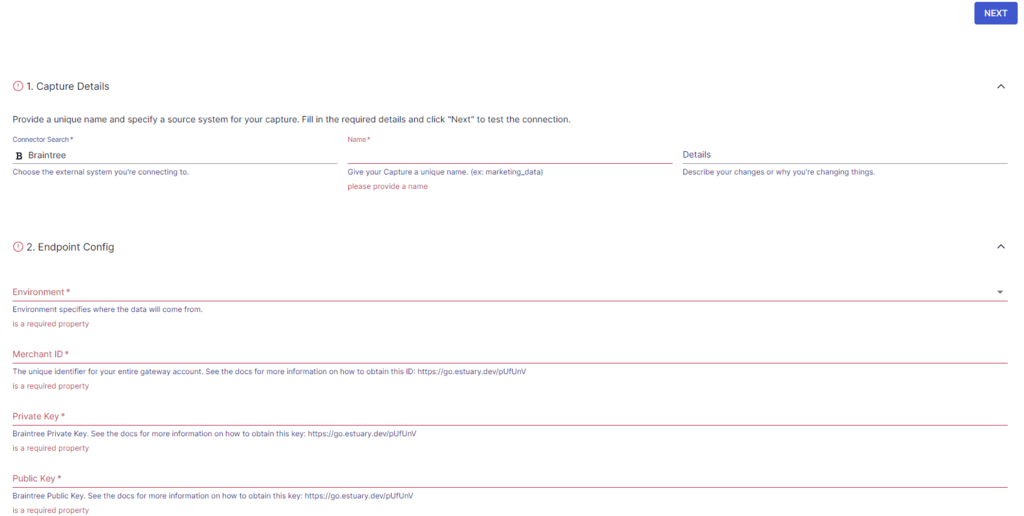
- Fill in the following required fields on the Create Capture page:
- Merchant ID: Your Braintree account identifier
- Public Key: From your Braintree API credentials
- Private Key: Your private API key
- Start Date: Optional; defaults to 30 days before the current date
- Sandbox Environment: Set to true if you are using a sandbox account
- Window Size: The time window (in hours) for each data fetch, defaulting to 24
- Click Next, then Save and Publish to begin capturing data into Estuary collections.
Once published, Estuary automatically discovers and syncs the following Braintree resources:
- Full Refresh Streams: Add Ons, Discounts, Merchant Accounts, Plans
- Incremental Streams: Credit Card Verifications, Customers, Disputes, Subscriptions, Transactions
Note: Due to Braintree API limitations, all incremental streams except Transactions capture only new records (creates). To ensure updates are captured, enable scheduled backfills. By default, Estuary runs these backfills every Friday at 20:00 UTC.
Step 2: Configure Snowflake as the Destination
After setting up your Braintree capture, the next step is to send the data to Snowflake.
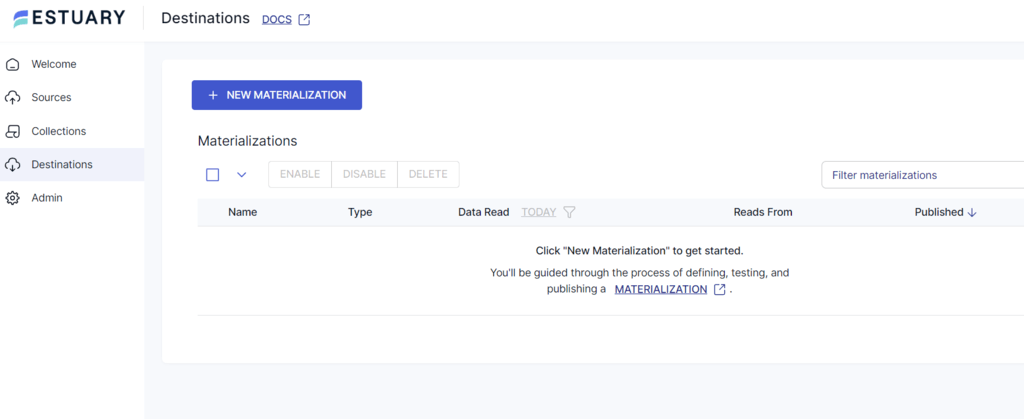
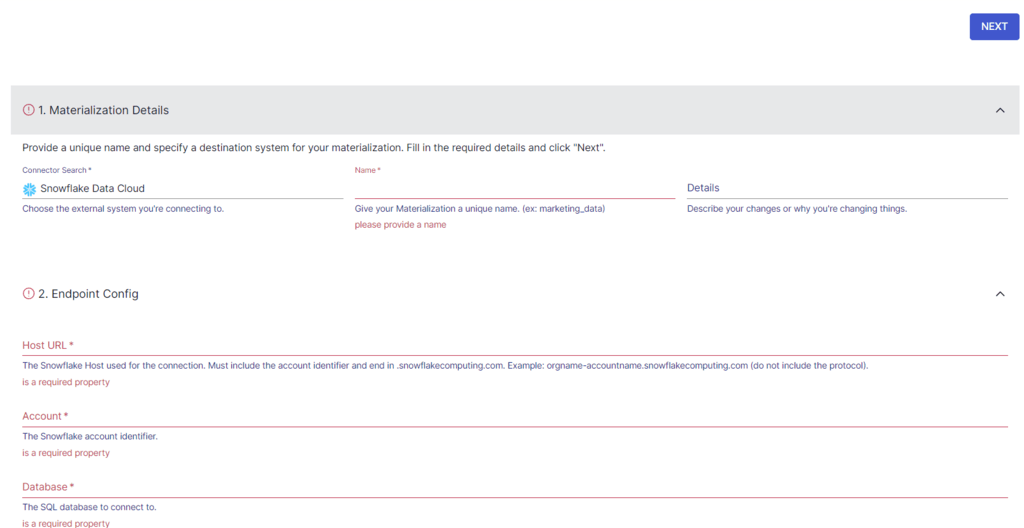
- Click Materialize Collections (this appears automatically after saving your capture) or go to Destinations and select New Materialization.
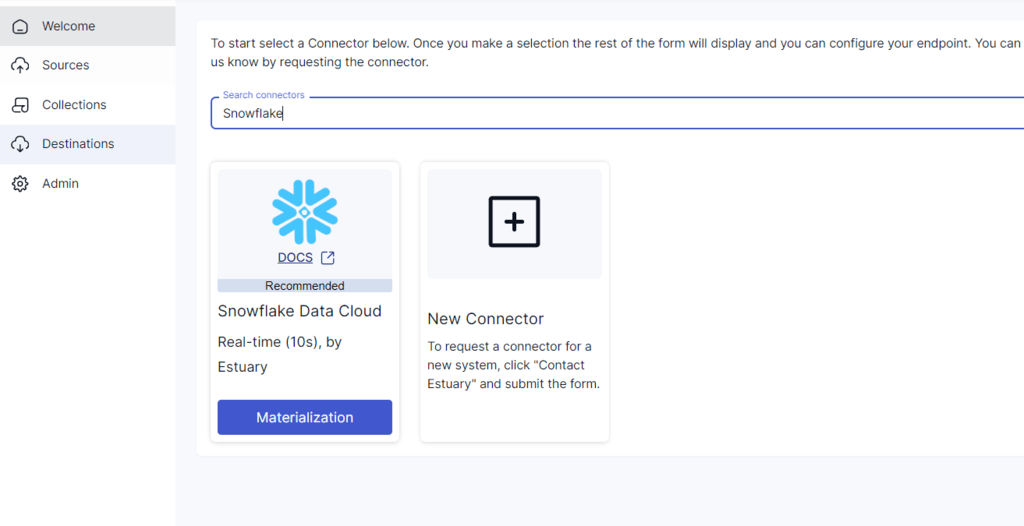
- Search for Snowflake and select it as the destination connector.
- Enter your connection details:
- Host (Account URL): Example: orgname-accountname.snowflakecomputing.com
- Database: Your target Snowflake database
- Schema: The schema where tables will be created
- Warehouse: Your Snowflake virtual warehouse
- Role: The role with access to the selected database and schema
Authentication (Updated Requirement)
Snowflake now requires key-pair (JWT) authentication. Username and password authentication is deprecated.
To configure key-pair authentication:
- Generate a key pair locally:
plaintextopenssl genrsa 2048 | openssl pkcs8 -topk8 -inform PEM -out rsa_key.p8 -nocrypt
openssl rsa -in rsa_key.p8 -pubout -out rsa_key.pub- Assign your public key to the Snowflake user:
plaintextALTER USER ESTUARY_USER SET RSA_PUBLIC_KEY='MIIBIjANBgkqh...';- Copy your private key into Estuary’s Snowflake connector under the Private Key field.
This authentication method secures communication between Estuary and Snowflake and enables Snowpipe Streaming and delta updates.
- Choose your source collections (the Braintree resources captured earlier).
- Optionally enable Delta Updates to improve performance and reduce latency. This uses Snowpipe Streaming for continuous row-level writes into Snowflake tables.
- Click Next, then Save and Publish to start materializing Braintree data into Snowflake.
Step 3: Verify and Monitor the Integration
- Once both connectors are published, Estuary continuously syncs new data from Braintree to Snowflake.
- Use the Estuary dashboard to monitor data freshness, throughput, and task health.
- To optimize Snowflake costs, configure your warehouse to auto-suspend after one minute of inactivity:
plaintextALTER WAREHOUSE ESTUARY_WH SET AUTO_SUSPEND = 60;Benefits of Using Estuary
- Unified Data Movement: Manage CDC, batch, and streaming integrations within one platform.
- Right-Time Control: Choose the cadence that fits your operations, whether instant, scheduled, or batch-based.
- Low-Latency Sync: Snowpipe Streaming delivers near-instant updates for analytics-ready data.
- Data Reliability: Exactly-once delivery and automatic recovery ensure consistency and correctness.
- No-Code Configuration: Set up Braintree-to-Snowflake pipelines quickly without writing code.
Explore how Estuary unifies CDC, batch, and streaming pipelines in one platform. Try the Interactive Demo
Method 2: Using CSV Export/Import to Migrate Data From Braintree to Snowflake
This method involves exporting the data from Braintree’s Control Panel and loading it into Snowflake. Here are the detailed steps to manually transfer your Braintree data to Snowflake:
Step 1: Extracting Data From Braintree
Braintree’s Control Panel offers two methods for searching and exporting data: Basic Search and Advanced Search.
- Basic Search is a simple search bar in the UI's top right corner. You can use it to fetch generic information such as customer details, payment methods, and transaction details.
- Advanced Search provides a more robust and flexible way to fetch more detailed information about Transactions, Verifications, Vaults, and Subscriptions using filters. This gives you more granular control over the type of data you wish to export.
Fetching Transaction Data
The steps to export Transaction Data from Braintree are relatively simple:
- Log into the Braintree Control Panel.
- Click on the Transactions tab.
- Scroll down to the Transaction Search section and apply your desired filters.
- Finally, click on Search to retrieve the filtered transaction data.
Fetching Card Verification Data
Exporting the card verification data is also straightforward:
- Log into the Braintree Control Panel.
- Click on the Vault tab and select the Verifications tab.
- Apply filters based on your requirements in the Verification Search section.
- Click Search to fetch the filtered verification data.
Fetching Vault Data
If you need to export Vault data containing specific customer records, follow these steps.
- Log into the Braintree Control Panel.
- Navigate to the Vault section.
- Scroll down to the Customer Search section and apply relevant filters.
- Click on Search to retrieve the filtered customer data from the vault.
Exporting the Data as CSV
Once you have the desired data, you can download them as CSV files by clicking the Download button at the top of the search result page. You can view your download history in the Downloads section of the Braintree Control Panel.
Step 2: Loading CSV into Snowflake
After exporting the data from Braintree, the next step is to load it into Snowflake. Here are the steps to do this.
- Sign in to your Snowsight account.
- Proceed by selecting Data > Databases from the navigation menu.
- Choose your database and schema.
- Within the object explorer, select the table you wish to populate with the data.
- Click on Load Data to start the process.
- In the Load Data into Table window, click on Browse to choose your files.
- Proceed to upload the CSV files containing your Braintree data.
- Select a warehouse if a default warehouse hasn't been set for your account. Then click on Next to proceed.
- Now, you need to choose your file format. There are two options:
- Choose a pre-existing file format from the current database. In this case, it will be CSV.
- Opt for a custom file type, adjusting the settings to suit your data file.
- Optionally, decide on the course of action if an error occurs during the load process. By default, the system is set to not load any data from the file if errors are encountered.
- Next, click Load to begin importing your file. Upon completion, Snowsight will display the count of rows that were successfully added to the table.
By following the above steps, you can migrate your data from Braintree to Snowflake. However, this manual approach comes with its own set of limitations.
- Time-consuming Process: This method of data migration can be very time-consuming, involving multiple manual steps, including data extraction, transformation, and loading. Each of these steps needs to be performed accurately to maintain data integrity, increasing the entire process's duration.
- Increased Risk of Data Loss: Manual data handling increases the risk of data loss or corruption. Human errors during data extraction, transformation, or loading can lead to incomplete data migration, data corruption, or even the loss of critical data.
- Lack of Scalability: Scalability is another major concern when using manual migration methods. As the amount of data increases, the feasibility of such methods also decreases. This is especially problematic for businesses that handle large volumes of data or anticipate future data growth.
- Lack of Real-time Integration: Using CSV files to load data lacks real-time integration. CSV files are inherently static snapshots of data and require manual updates, making it difficult to obtain live and dynamic data. This limitation can hinder real-time data analysis and decision-making processes that rely on up-to-date information.
Conclusion
Integrating Braintree with Snowflake enables businesses to turn payment data into actionable insights. From tracking transaction performance to understanding customer behavior, this connection helps teams make data-driven decisions that improve operations, reduce fraud, and enhance customer experience.
While the manual CSV export and import process can work for small or one-time transfers, it quickly becomes time-consuming and error-prone as data volume grows. A modern solution like Estuary simplifies this process by automating continuous data movement with built-in reliability and control.
With Estuary, you can integrate Braintree and Snowflake in just a few clicks and keep data flowing in real time or on your preferred schedule. The platform ensures exactly-once delivery, predictable performance, and the flexibility to run pipelines at the cadence that best fits your business.
Talk to Our Data Integration Experts
Need help designing a secure, right-time pipeline for Braintree and Snowflake? We’re here to help. Contact the Estuary Team
FAQs
How often should I sync Braintree data with Snowflake?
What data can I extract from Braintree?
Is my payment data secure during integration?

About the author
With over 15 years in data engineering, a seasoned expert in driving growth for early-stage data companies, focusing on strategies that attract customers and users. Extensive writing provides insights to help companies scale efficiently and effectively in an evolving data landscape.


