Key Takeaways
Integrating Amazon Aurora with Snowflake allows organizations to unlock powerful analytics, streamline reporting, and maximize the value of operational data. While traditional manual methods can achieve this, real-time platforms like Estuary Flow offer a more scalable, low-maintenance approach.
Integration Methods:
- Estuary Flow
A no-code, real-time data integration platform that connects Aurora (PostgreSQL or MySQL) to Snowflake in minutes using prebuilt connectors and Change Data Capture (CDC) support. - Manual SQL-Based Setup
Involves configuring Aurora via RDS/EC2 and exporting data into Snowflake using scripts or third-party tools — flexible but time-consuming, lacks real-time sync, and requires significant technical expertise.
Introduction
Many organizations today are directing their efforts towards becoming more data-driven. As a result, many companies are on the lookout for efficient cloud data warehousing solutions that offer enhanced capabilities for ingesting and storing the increasing volumes and varieties of data.
Moving data from Amazon Aurora to Snowflake allows you to leverage Snowflake’s powerful data processing and analytics capabilities. One key factor contributing to its use with Aurora is Snowflake’s compatibility with AWS, a leading cloud platform.
This guide will provide a detailed walkthrough on how you can move your data from Aurora to Snowflake, ensuring a smooth and effective data integration.
Aurora Overview
Amazon Aurora is a fully managed relational database engine that supports MySQL and PostgreSQL. It leverages the strength and performance of both databases, giving you nearly five times the throughput of MySQL and three times the throughput of PostgreSQL. With Aurora, you can seamlessly use the code and tools of both databases without making modifications to your existing applications.
Aurora operates on an on-demand, auto-scaling basis. This setup allows the databases to automatically start, shut down, and adjust their capacity according to your application’s requirements. Your storage volume expands incrementally in units of 10 GB, offering a maximum capacity of 128 TiB. This flexibility ensures your database can easily adapt to fluctuating data demands.
For high-volume applications requiring increased read-throughput, Aurora provides a feature that can generate up to 15 Amazon Aurora Replicas. These replicas leverage the same underlying storage as the primary source instance. This feature not only eliminates the need to perform write operations at the replica node but also decreases the lag time for handling read requests. Additionally, you have access to a simplified reader endpoint to track, add, or remove replicas as needed.
Snowflake Overview
Snowflake is a fully managed SaaS (Software as a Service) offering that can be hosted on three major cloud platforms, namely AWS, Google Cloud Platform, and Microsoft Azure. Since it is a SaaS tool, you do not have to worry about installing, managing, or configuring any hardware or software infrastructure.
Snowflake has a unique decoupled architecture with three separate layers: storage, compute, and cloud services. The storage and compute layers operate independently of each other, while the cloud services layer coordinates all activities across Snowflake.
To keep your data secured even during extreme operational failure, Snowflake offers a robust fail-safe data recovery feature. This feature helps you recover historical data within a seven-day period. It is important to note that the fail-safe feature is only put to use when you have exhausted all other methods of data recovery.
Snowflake also has a Native App Framework that allows you to build data applications using Snowflake’s diverse features. You can get access to a testing environment, release app versions, and even monetize your apps by listing them on the Snowflake Marketplace.
Methods to Move Data from Aurora to Snowflake
There are a few ways to load your data from Amazon Aurora to Snowflake. We’ll explore two methods that you can use to establish a connection between Aurora and Snowflake.
Method 1: Load Data from Aurora to Snowflake Using Estuary Flow
Amazon Aurora supports both Postgres and MySQL, so you can choose the database you are most comfortable with to set up a data pipeline. Estuary Flow, a SaaS integration tool, helps you seamlessly load your data from Aurora to Snowflake without the need for extensive coding or technical expertise.
Brief Overview of Estuary Flow
Estuary Flow is a real-time data operations platform that helps you set up data pipelines to a wide range of cloud warehouses and data systems. It offers pre-built connectors to simplify the integration process, so you only have to configure the source and destination connectors for your datasets. You can synchronize your data from the source system to a data warehouse in minutes without using a single line of code.
Here are some of the key features of Estuary Flow:
- Several Data Sources and Destinations: Estuary Flow allows you to extract data from multiple sources and load them into different destinations through a single data pipeline.
- Transformation Processes: With Estuary Flow, you get the autonomy of choosing real-time or batch transformations through SQL, TypeScript, or dbt. You can choose to transform and merge data before moving it to a data warehouse (ETL) or transform the data after loading it (ELT).
- Scalability: To handle vast volumes of data and meet high throughput demands, Estuary Flow is designed to scale operations horizontally. This feature makes the platform suitable for all sizes and types of businesses.
To start the data migration process with Estuary Flow, create or sign in to your account. Then follow this step-by-step guide on how to set up Amazon Aurora for PostgreSQL.
Step 1: Set up Amazon Aurora for PostgreSQL as the Source
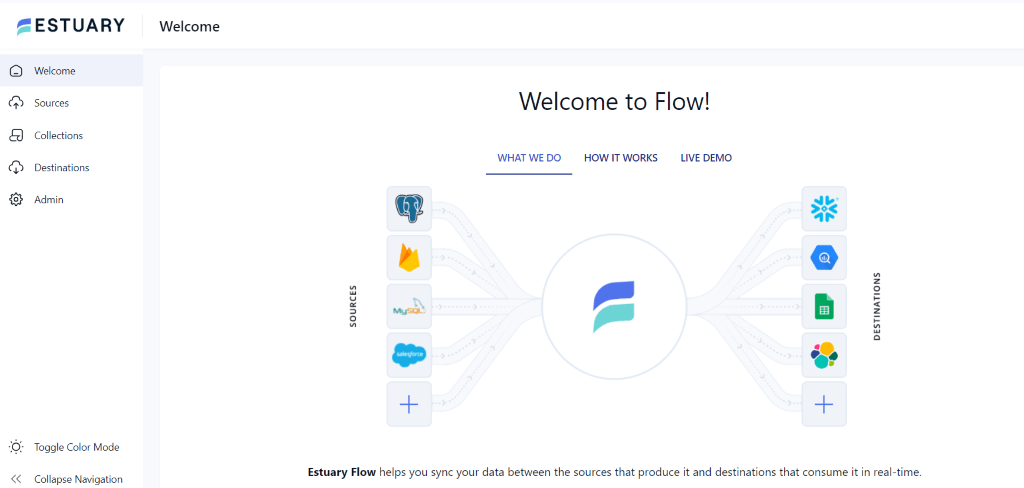
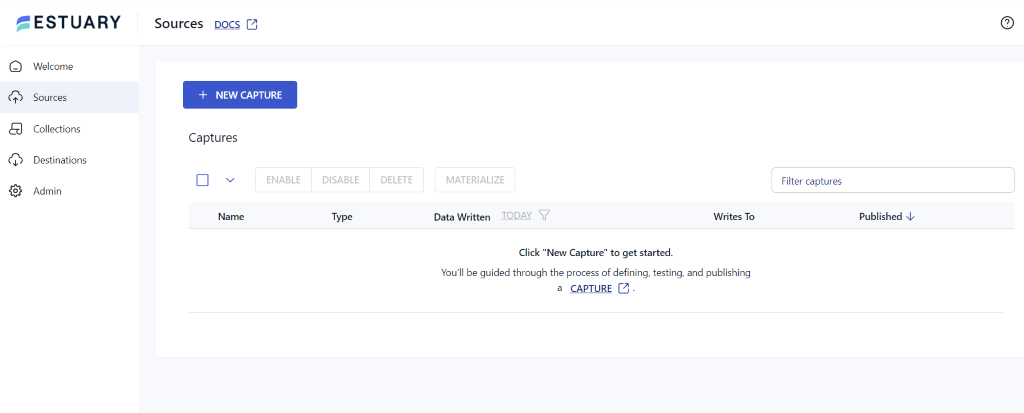
- After signing in, you will be directed to the Estuary Flow dashboard. Click the Sources tab on the left navigation bar.
- On the Sources page, click the + NEW CAPTURE button.
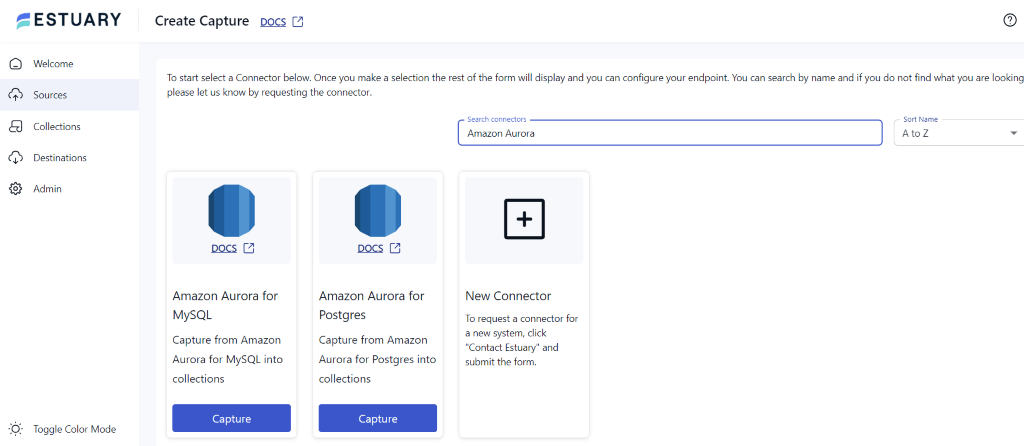
- Type Amazon Aurora in the Search connectors bar. You will see two options in the search results.
- Choose Amazon Aurora for Postgres by clicking on the connector’s Capture button.
Before migrating data from Amazon Aurora for Postgres, you need to complete some prerequisites.
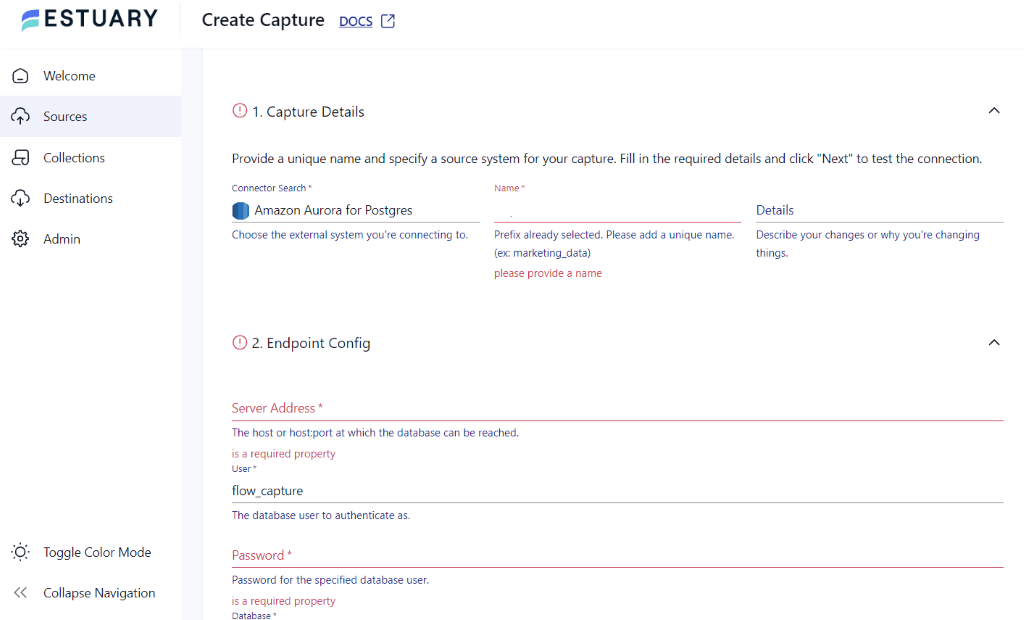
- In the Create Capture page, fill in the required fields under Capture Details and Endpoint Config. This includes a unique Name, Server Address, Password, and Database.
- Scroll to the top and click the NEXT button, followed by SAVE AND PUBLISH.
Step 2: Set up Snowflake as the Destination
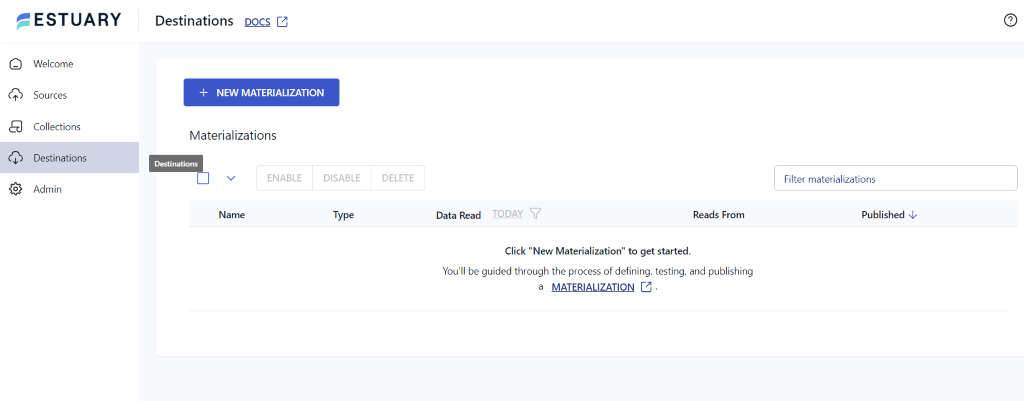
- Navigate to the Estuary Flow dashboard and click the Destinations tab.
- On the Destinations page, click the + NEW MATERIALIZATION button.
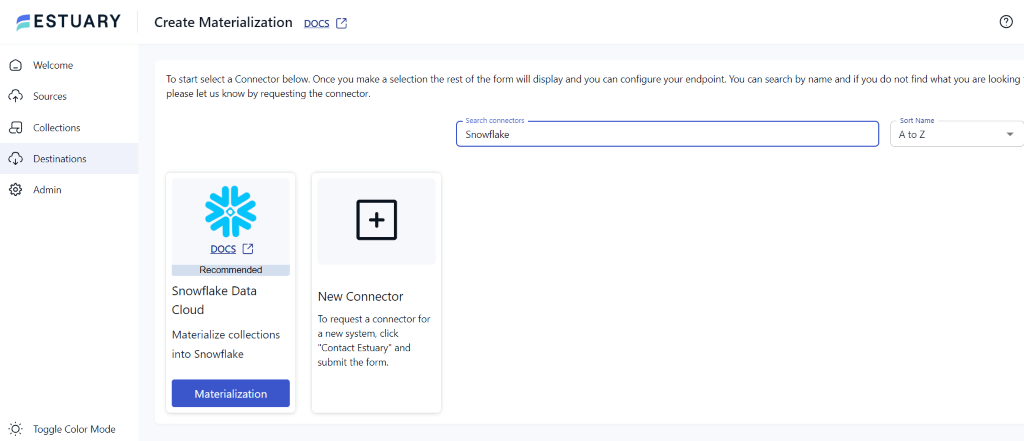
- Type Snowflake in the Search connectors box, and click the connector’s Materialization button.
Ensure you complete the prerequisites before configuring Snowflake as the destination end of your data pipeline.
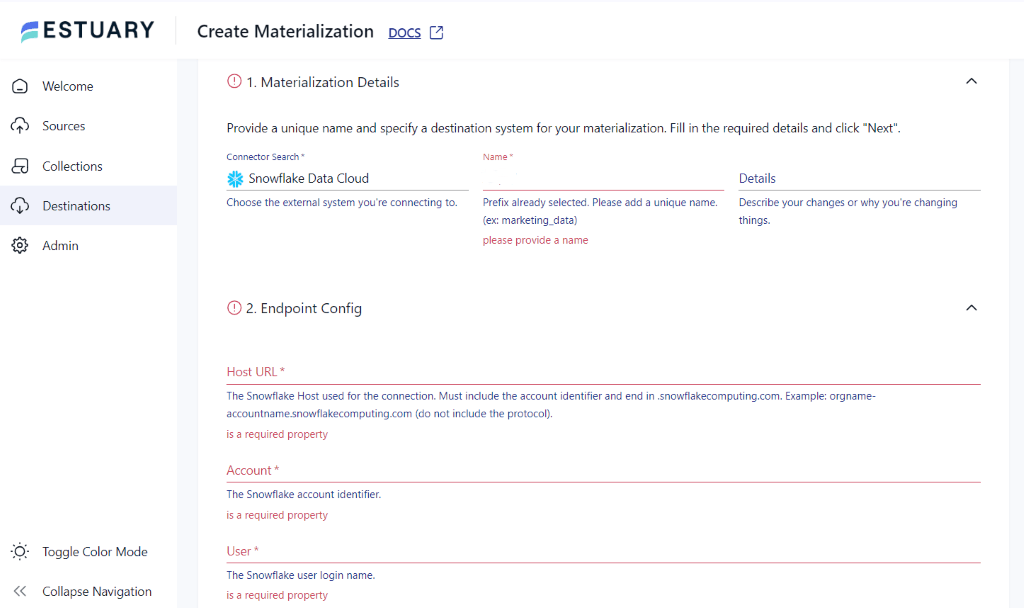
- On the Create Materialization page, fill in the required fields under Materialization Details and Endpoint Config. This includes a unique Name, Host URL, Account, and User, among other fields.
- Select the LINK CAPTURE button to add your data captured from Aurora.
- Scroll to the top and click the NEXT button, followed by SAVE AND PUBLISH.
If you want to set up Amazon Aurora for MySQL instead, you can still follow the above-mentioned step-by-step guide. The only difference is that you need to select the Amazon Aurora for MySQL connector as your source. You can refer to Estuary Flow’s documentation to learn more about the MySQL prerequisites.
In just two straightforward steps, you can create a robust data pipeline with Estuary Flow! An added benefit of this method is that Estuary Flow can capture data changes in near-real time using Change Data Capture.
Method 2: Load Data from Aurora to Snowflake Manually
To get started with this method, you’ll need a PostgreSQL or MySQL account. After configuring the account, upload your dataset to the database management system of your choice. Next, set up a Snowflake account and establish a connection between the two to sync your data. The prerequisites for this method include:
- Creating an AWS account for an administrative user.
- Creating an Amazon EC2 instance.
Step 1: Set up PostgreSQL or MySQL in Amazon Aurora
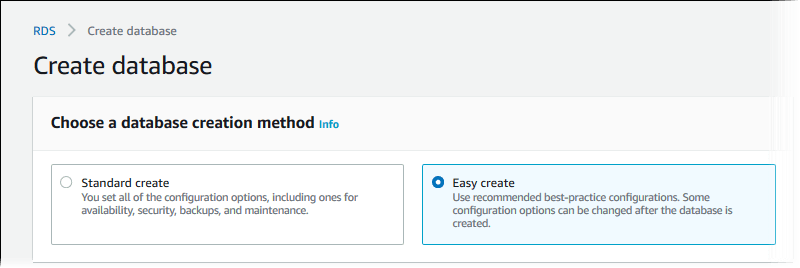
- To create an Aurora MySQL/PostgreSQL DB cluster, you can choose between two database creation methods offered by AWS. The Easy Create configuration is recommended, as you can modify some configuration options even after creating your database. To get started, sign in to your AWS account and open the Amazon RDS console.
- Choose the AWS Region from the upper-right corner of the console.
- In the navigation pane, select Databases > Create database > Easy create.
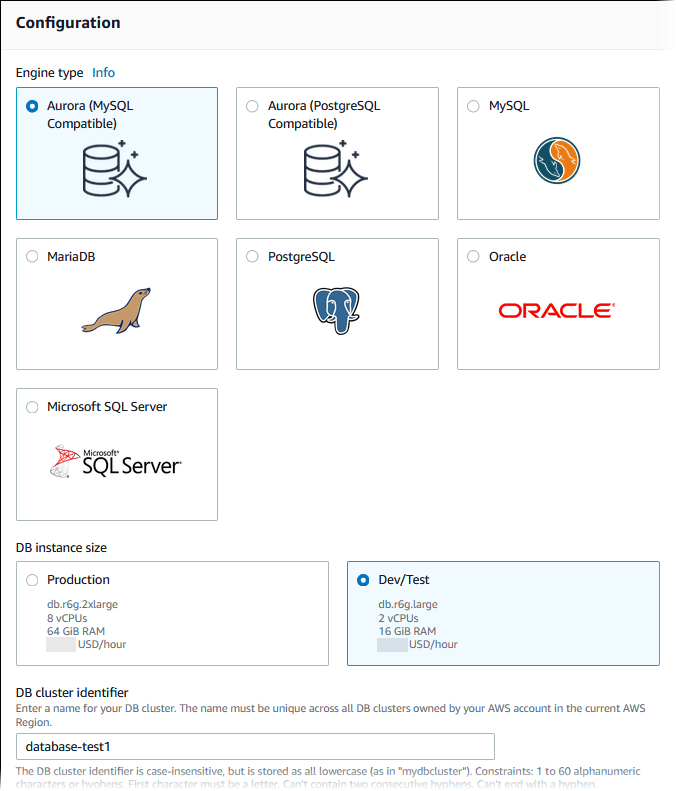
- For the Engine Type within the Configuration tab, select either Aurora (MySQL Compatible) or Aurora (PostgreSQL Compatible).
- Select Dev/Test for DB instance size and type database-test1 for DB cluster identifier.
- You will be directed to the Create Database page. Fill in the Master username and select Auto generate a password.
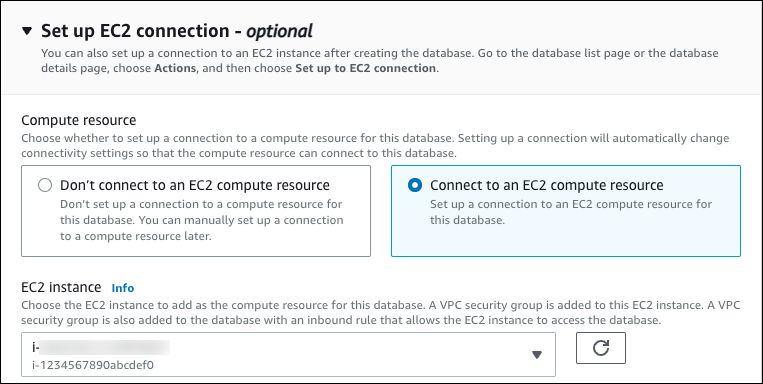
- Establish a connection with an EC2 instance you may have created earlier by opening Set up EC2 connection - optional and selecting Connect to an EC2 compute resource.
- Navigate back to the Databases page and select the new DB cluster you created. If the status of the cluster shows Available, you can start connecting and using it.
Step 2: Connect Aurora PostgreSQL/Aurora MySQL to Snowflake
Once you have connected to the Aurora DB cluster with either PostgreSQL or MySQL, the next step will be to move the data to Snowflake. Since this process may require a little more time and expertise, you can follow a detailed step-by-step guide:
Limitations of the Manual Method
- Time-Consuming: If you have data that requires in-depth analysis to understand certain patterns and trends, this method may not be the best choice. This is mainly because you need to set up and configure all the accounts, which may become time-consuming and cause a delay in strategic decision-making.
- Technical Expertise: If you have never used AWS or Snowflake before, you might face challenges while setting up the data pipelines. In these cases, you may feel the need to rely on experts. Hiring or training staff well-versed in technical processes may increase business expenditure.
- No Real-Time Data Capture: In this method, you cannot capture changes in your data in real time. Since your data may be processed in frequent intervals or batches, there may be a time lag in getting accurate information at your fingertips.
Final Takeaways
Transferring your data from Aurora to Snowflake will allow you to leverage Snowflake’s features and get more value from your datasets. With Snowflake’s separate storage and compute layer, you only pay for the services you utilize, ensuring you stay within your budget.
The manual way of integrating Amazon Aurora with Snowflake can be time-consuming, require technical expertise, and lack real-time data capture. However, using Estuary Flow simplifies the process of setting up data pipelines. Move your data within minutes, and scale your operations without any bounds. To learn more about Estuary Flow’s capabilities, sign up for free!
FAQs
Is Amazon RDS the same as Aurora?
No, Amazon RDS and Aurora are not the same. Both are managed database services provided by AWS. While Amazon RDS is designed to simplify the setup, operation, and scaling of relational databases in the cloud, Aurora is a specific database engine offered as part of Amazon RDS.
Is Amazon Aurora serverless?
Amazon Aurora offers a serverless option called Amazon Aurora Serverless. This is an on-demand autoscaling configuration of Aurora. It automatically starts up, shuts down, and scales based on your application’s needs.
Is Snowflake owned by AWS?
No, Snowflake is not owned by AWS; Snowflake Inc. is an independent company that provides a cloud-based data warehousing service known as Snowflake. However, Snowflake is an AWS Partner and offers software solutions, data analytics, ML, and retail competencies.

About the author
With over 15 years in data engineering, a seasoned expert in driving growth for early-stage data companies, focusing on strategies that attract customers and users. Extensive writing provides insights to help companies scale efficiently and effectively in an evolving data landscape.


