Key Takeaways
Migrating data from Amazon Aurora to Amazon Redshift enables organizations to transition from operational databases to scalable, analytics-ready environments. While AWS DMS is a common migration approach, real-time ETL tools like Estuary Flow significantly reduce complexity and setup time.
Overview of Integration Methods:
Method 1: Using Estuary Flow (No-Code, Real-Time)
- Step 1: Set up Aurora (MySQL or PostgreSQL) as the source connector
- Step 2: Configure Redshift as the destination
- Step 3: Automatically stream and materialize data in Redshift with built-in CDC support
Method 2: Using AWS DMS (Manual)
- Step 1: Create replication instances and endpoints
- Step 2: Set up and run a replication task
- Step 3: Monitor, validate, and troubleshoot the migration process manually
Estuary Flow provides real-time replication, no-code setup, and support for schema enforcement and scaling — making it an ideal solution for faster, easier Aurora to Redshift data migration.
Introduction
Whether driven by scalability requirements, performance enhancements, or other business needs, migrating your data from Amazon Aurora to Amazon Redshift is a significant undertaking that comes with substantial benefits. The migration from Aurora, a high-performance database engine, to Redshift, a fully managed, petabyte-scale data warehouse, is driven by several factors.
The reasons for this are vast, from enhanced analytics and improved cost efficiency to consolidating data from various sources for unified analysis. There’s also the added advantage of making effective data-driven decisions and maximizing the value of your data assets.
After a quick introduction to both platforms, let’s look at two different methods to load data from Aurora to Redshift.
Amazon Aurora - The Source
Amazon Aurora is a fully managed relational database compatible with MySQL and PostgreSQL. It blends the reliability of commercial databases with the cost-effectiveness of open-source ones. Aurora can deliver up to five times higher throughput than MySQL and up to three times higher than PostgreSQL, without requiring alteration to existing applications. It optimizes its MySQL and PostgreSQL engine with a specialized storage system, allowing up to 128 TiB scalability.
Let's look at some of the benefits of using Amazon Aurora.
- Robustness and Reliability: It manages faults and performs storage recovery through continual backups and seamless restoration. This is done to specific points in time using backtrack for Aurora MySQL and Aurora PostgreSQL.
- Migration Support: Aurora provides migration support to migrate existing databases from commercial engines like Oracle or SQL Server, as well as from open-source databases like MySQL and PostgreSQL.
- Serverless configuration: Aurora’s serverless configuration enables automatic scaling of compute capacity and automatic startup/shutdown based on application demand. It’s a cost-effective solution where you pay for actual usage, eliminating the need for manual database instance management.
Amazon Redshift - The Destination
Amazon Redshift is a cloud-based data warehouse service designed for petabyte-scale data. Its serverless option provides hassle-free data access and analysis without requiring manual configurations. The services automatically adjust resources and scale capacity to ensure swift performance for diverse workloads, charging only for active usage periods.
One of the impressive features of Redshift is that it can query and load data in the query editor or your chosen BI tools. Regardless of the size of the data source, Redshift consistently produces quick query results using common SQL tools and business intelligence software. Its familiar and affordable SQL features are available in an easy-to-use, maintenance-free environment.
Here are some other key features of Amazon Redshift.
- End-to-End Encryption: Redshift ensures data privacy and security compliance using SSL encryption for transit data and AES-256 encryption for data at rest, including backups.
- Massively Parallel Processing: Redshift follows the MPP model, distributing large processing tasks among multiple nodes for faster data handling. Compute nodes work in parallel rather than sequentially to tackle calculations.
- Result Caching: Redshift caches the results of repeated queries; subsequent queries can return results faster, drastically reducing the time and resources required for common query results.
2 Ways to Load Data From Aurora to Redshift
You can stream your data from Aurora to Redshift using the methods below:
- Using SaaS tools like Estuary Flow for Aurora to Redshift integration
- Using AWS Database Migration Service to upload data from Aurora to Redshift
Method 1: Using Estuary Flow to Load Data from Aurora to Redshift
No-code extract, transform, load (ETL) tools like Estuary Flow can transfer data from the source to the destination in real time. The intuitive interface and range of readily available connectors make the data-loading process easier; all it takes are a few clicks.
Prerequisites
First, let’s look at the prerequisites for this form of data integration:
Step 1: Configure Aurora as the Source Connector
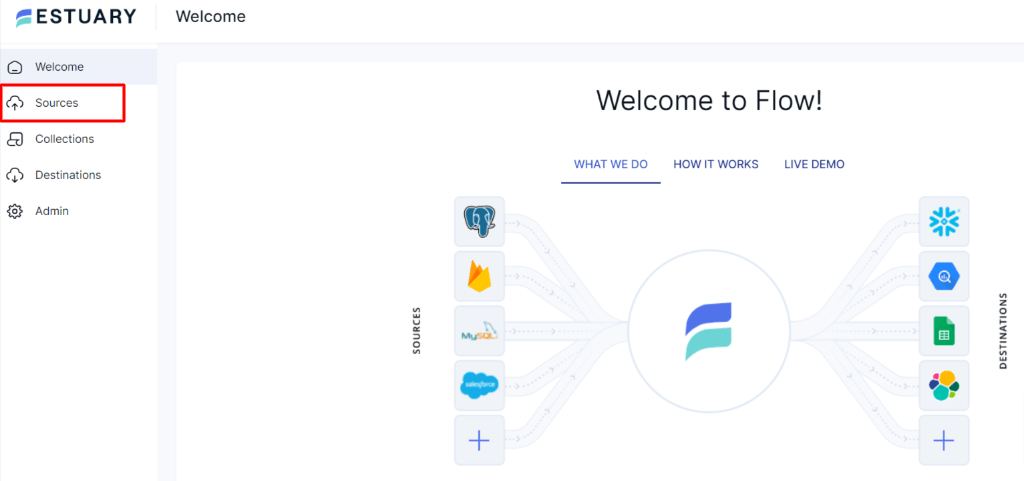
- Now, log in to your Estuary account, and select Sources on the left-side pane of the dashboard.
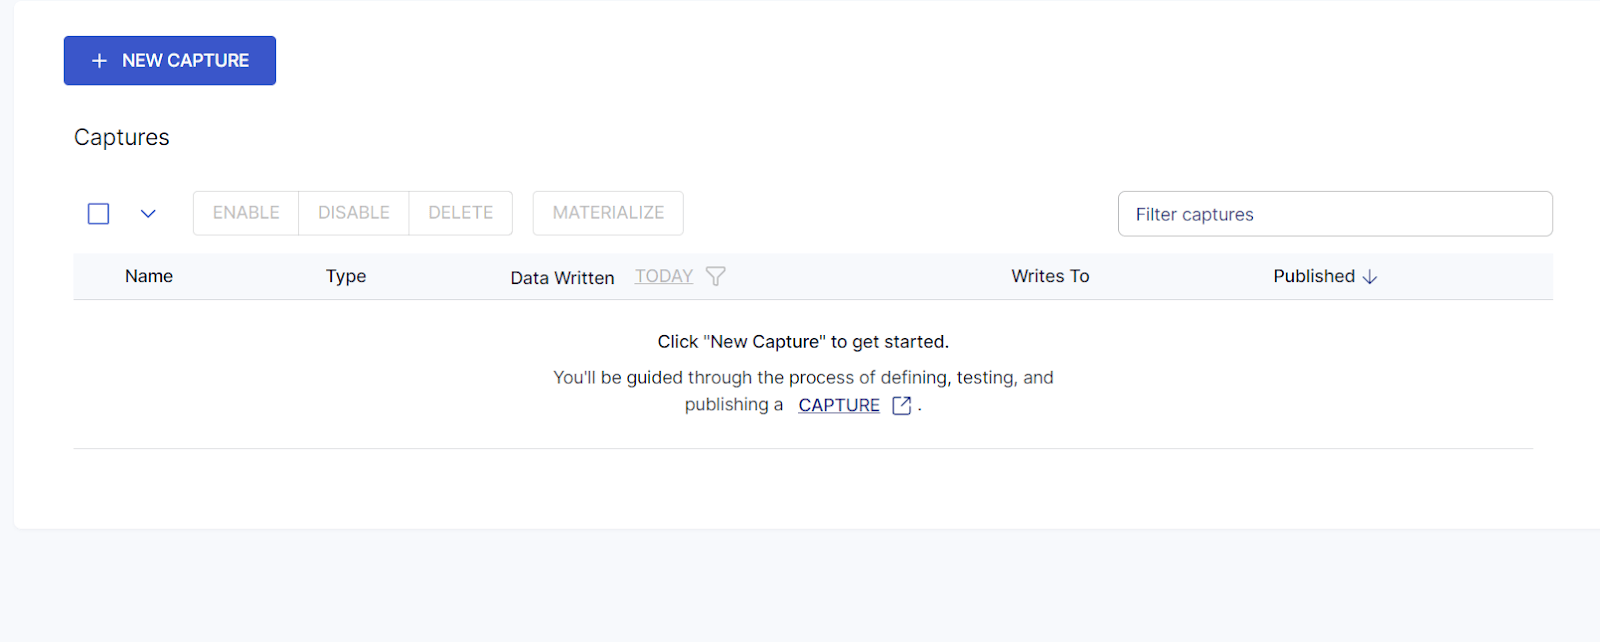
- Click the + NEW CAPTURE button on the top left corner of the Sources page.
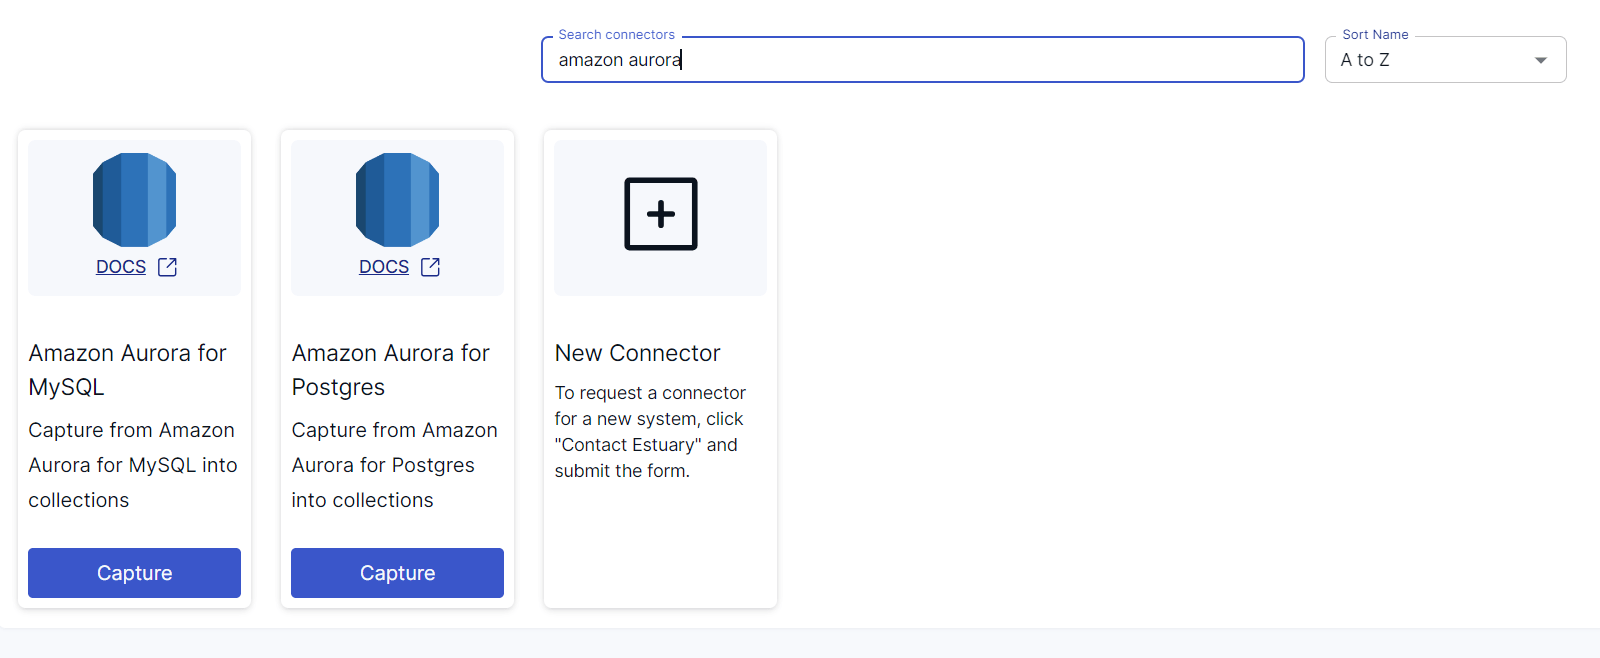
- Search for the Aurora connector using the Search connectors field.
- Among the options that you see in the search results, click on the Capture button of the required connector. For this tutorial, let’s go with the Amazon Aurora for MySQL connector.
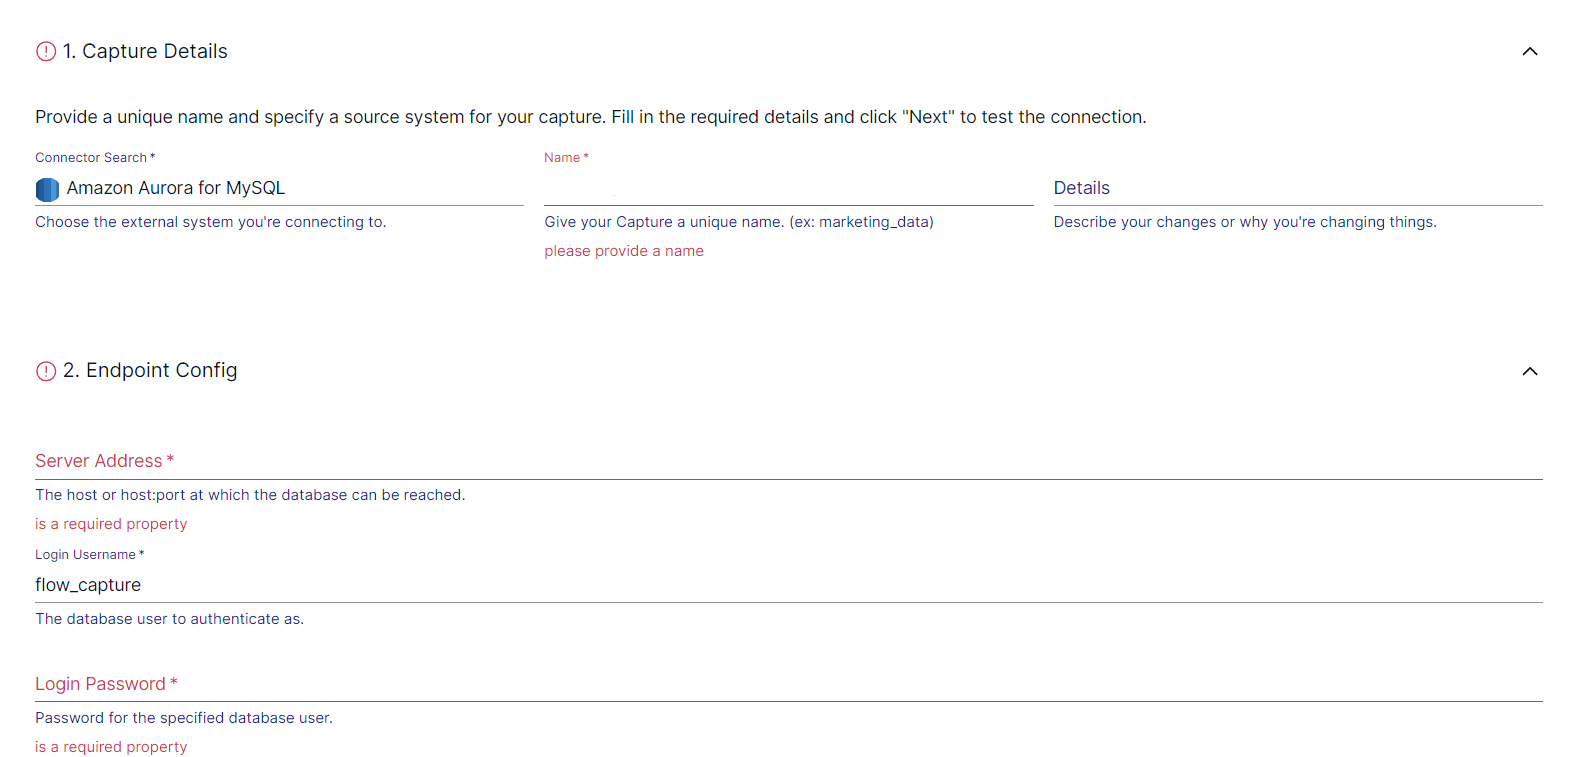
- You will be redirected to the Aurora connector page, where you must fill in the required fields, including a Name for the capture. Other mandatory fields include Server address, Login Username, and Login Password.
- After filling in the required details, click on NEXT > SAVE AND PUBLISH. The Amazon Aurora for MySQL connector uses Change Data Capture (CDC) to continuously capture updates from a MySQL database into one or more Flow collections.
If you’d like to set Aurora for Postgres as the source instead, Estuary provides a source connector you can configure. The steps will remain the same as above.
Step 2: Configure Redshift as the Destination
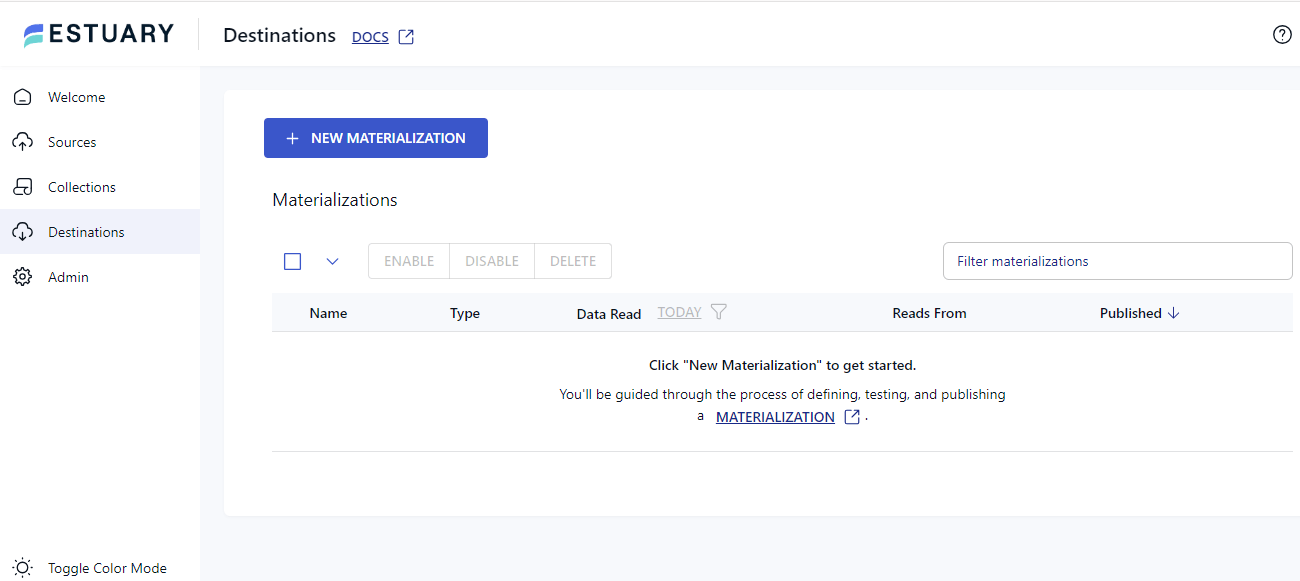
- After configuring the source, the next step is to configure the destination end of the pipeline. To do this, you can click MATERIALIZE COLLECTIONS in the pop-up window that appears after a successful capture. Alternatively, you can select the Destinations option on the left-side pane of the dashboard.
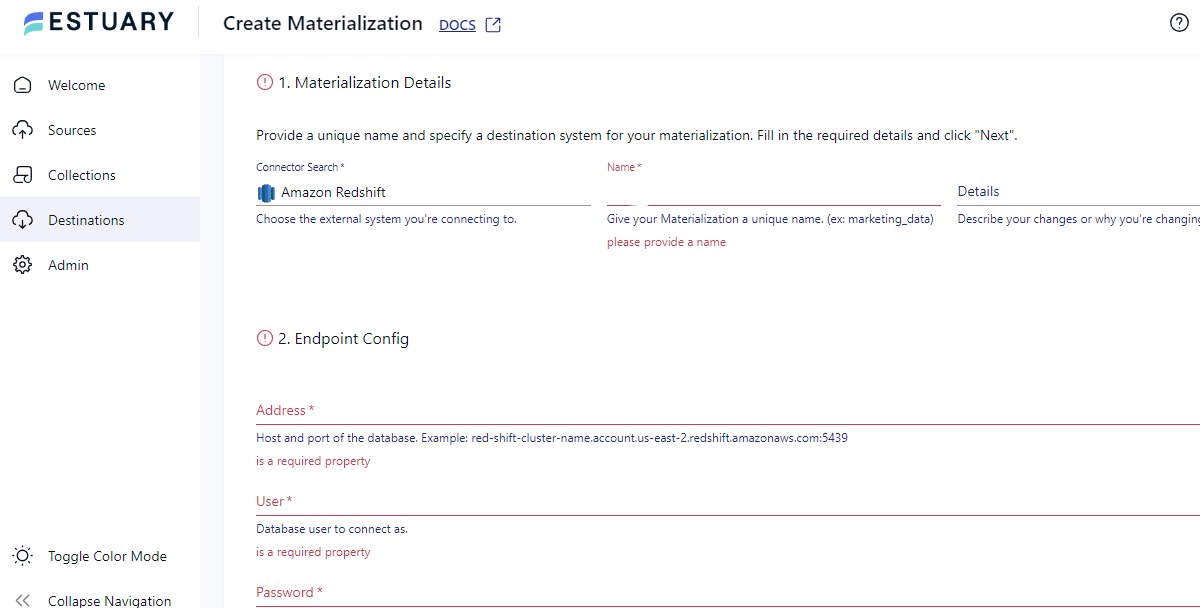
- Click on the + NEW MATERIALIZATION button on the Materializations page.
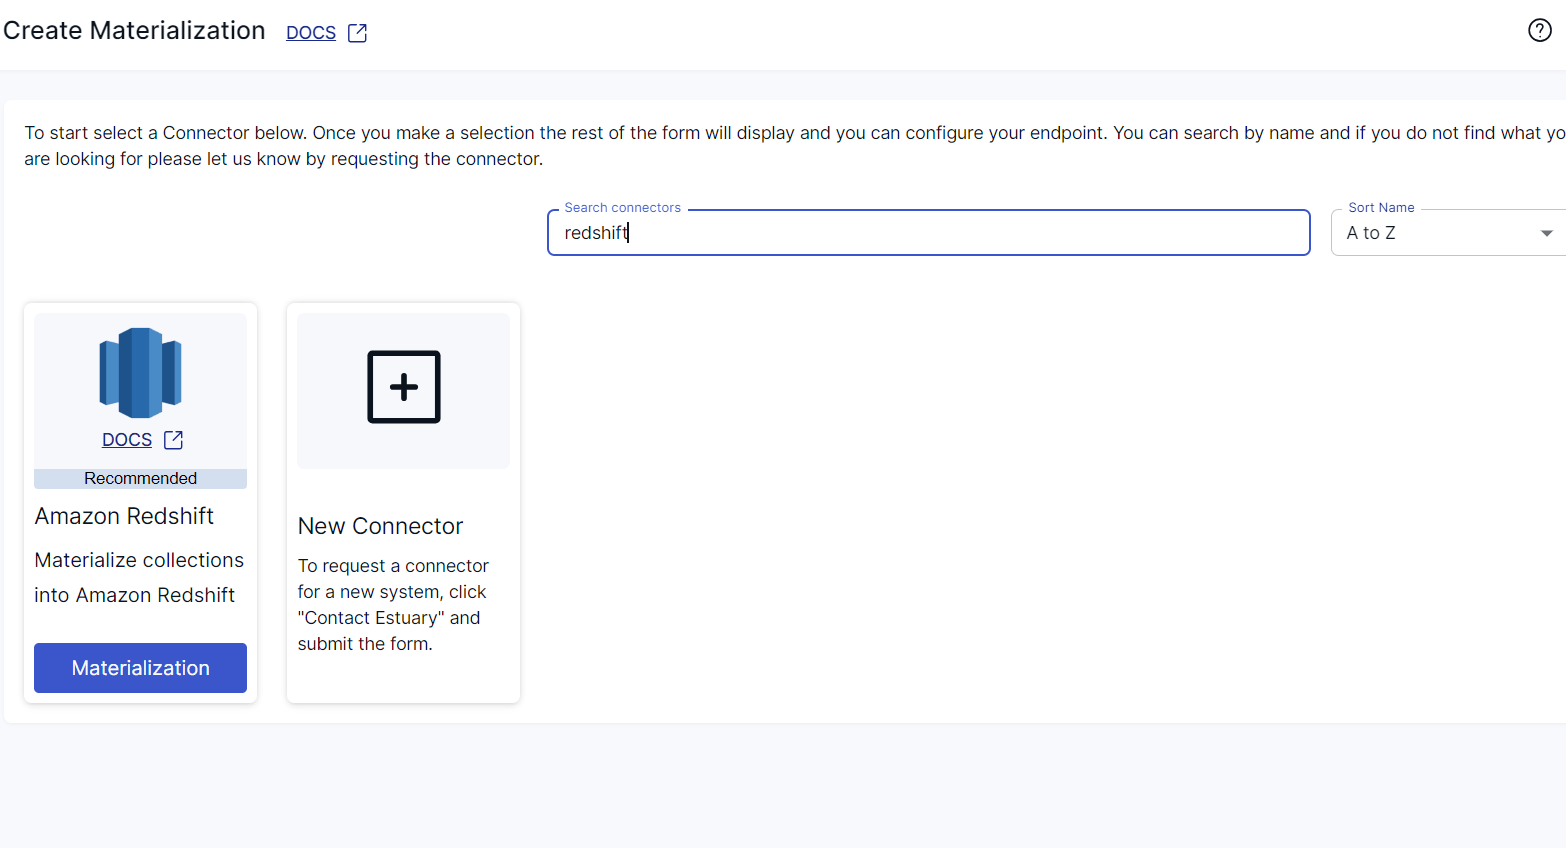
- Use the Search connectors field to look for the Redshift connector. When you see the connector in the search results, click its Materialization button.
- You will be redirected to the Redshift connector configuration page, where you must provide all the relevant details, such as Address, User, Password, and other S3 staging bucket details.
- If the captured collections from Aurora aren’t selected automatically, you can manually add the data using the Source Collections feature.
- Then, click on NEXT > SAVE AND PUBLISH. This will materialize Flow collections into tables in the Redshift database.
Key Benefits of Using Estuary Flow
Some of the benefits of having Estuary as your fully-managed, DataOps solution:
- No-code Connectivity: You can use Estuary Flow to connect to just about any source to destination in just a few clicks.
- Real-time processing: Flow facilitates real-time data streaming and migration, ensuring continuous data capture and replication across platforms with minimum latency. This guarantees immediate data availability.
- Scalability: Flow is designed for horizontal scaling to effectively manage substantial data volumes, making it suitable for enterprises of various sizes, from small-scale to large-scale operations.
Method 2: Using AWS Database Migration Service (DMS) to Upload Data from Aurora to Redshift
AWS DMS is the cloud service provided by Amazon Web Services that enables easy database migration to AWS. When using AWS DMS to move tables from Aurora to Redshift, you must input the details of your source and target databases, including their endpoints and schema names.
DMS operates using a replication instance, which handles the migration task. This instance reads data from the source and transfers it to the target, all within its memory. You can use higher-class replication instances when dealing with a large volume of data.
Follow the step-by-step process below to upload data from Aurora to Redshift using AWS Database Migration Service.
Step 1: Create a Table in Aurora
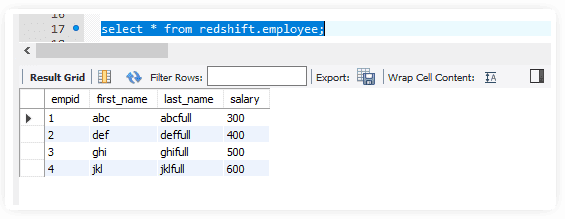
- Create a table in Amazon Aurora, with a table name of your choice. Later, you’ll use DMS to move the data from this table to Redshift.
Here’s an example query to create a table.
plaintext create table redshift.employee
 (
empid integer,
first_name varchar(50),
last_name varchar(50),
salary integer
);- Add some rows in the Aurora table.
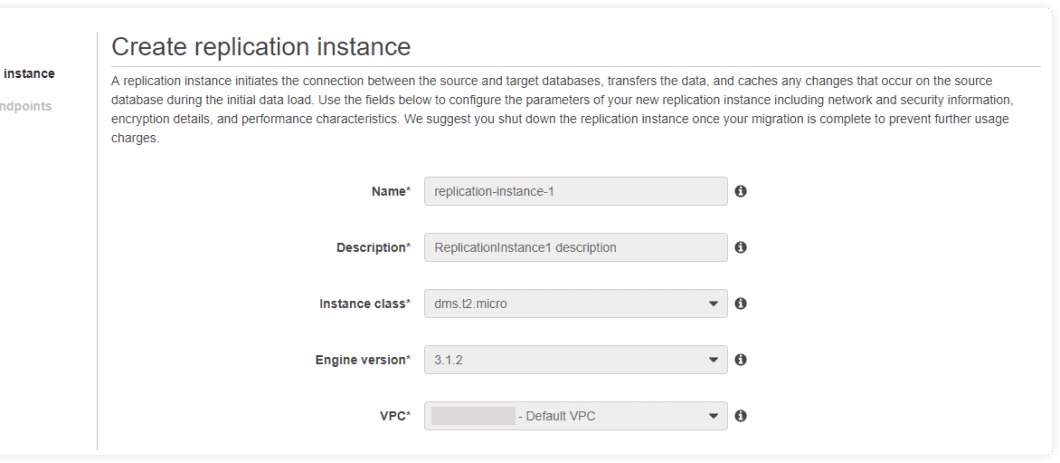
- Navigate to the DMS service and create a Replication Instance.
- The replication instance initiates the connection between the source and the target database during the initial data load.
- Configure the parameters of your new replication instance, including network and security information, encryption details, and performance characteristics.
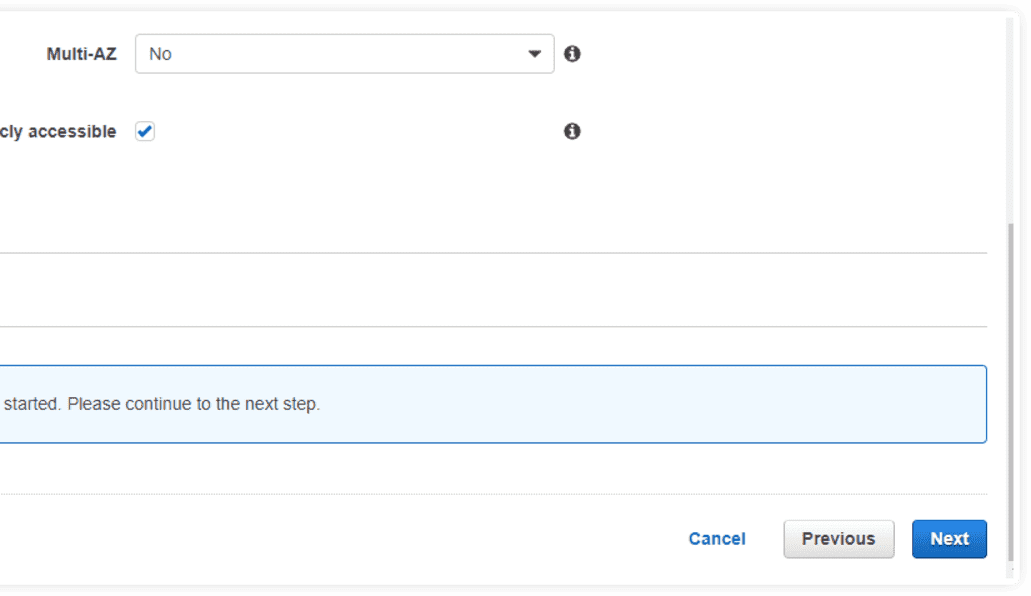
- Provide all the relevant details such as Name, Description, Instant class, Engine version, and Multi-AZ. Then, click Next.
Step 2: Create Source and Target Endpoint
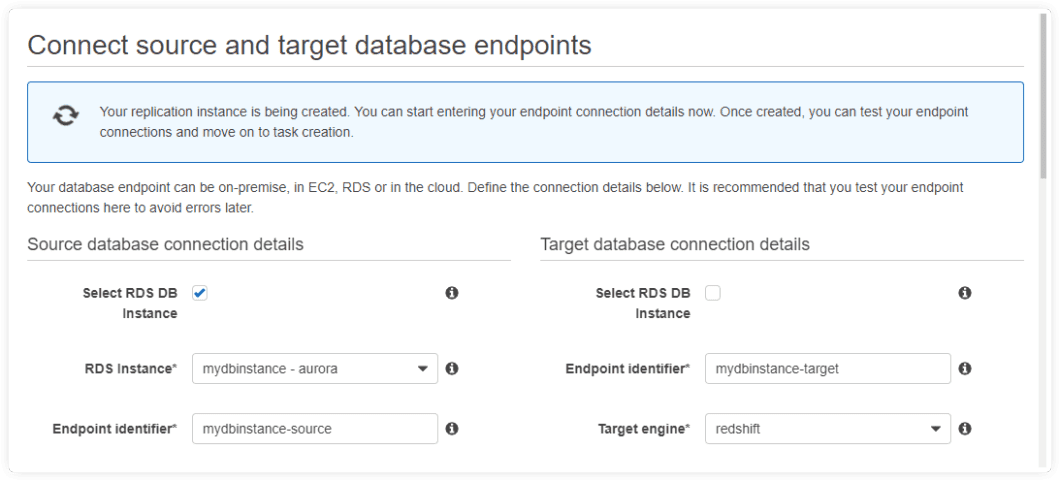
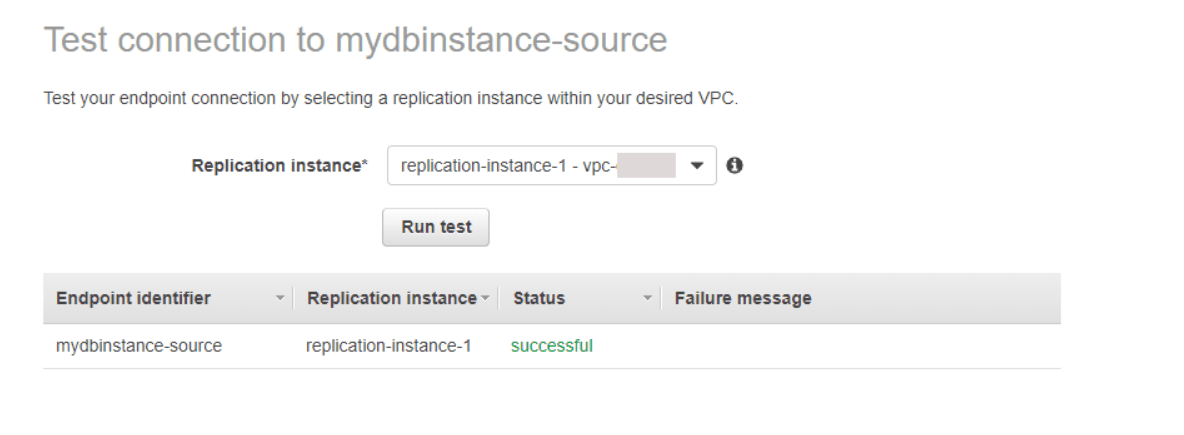
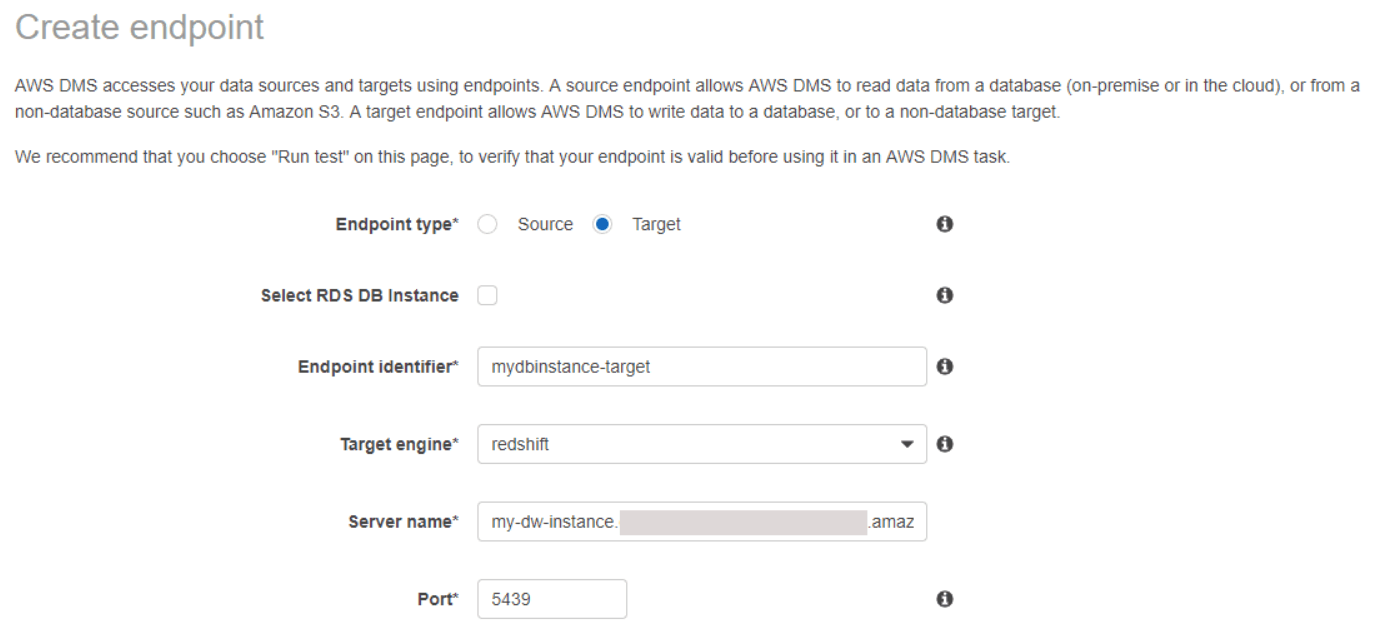
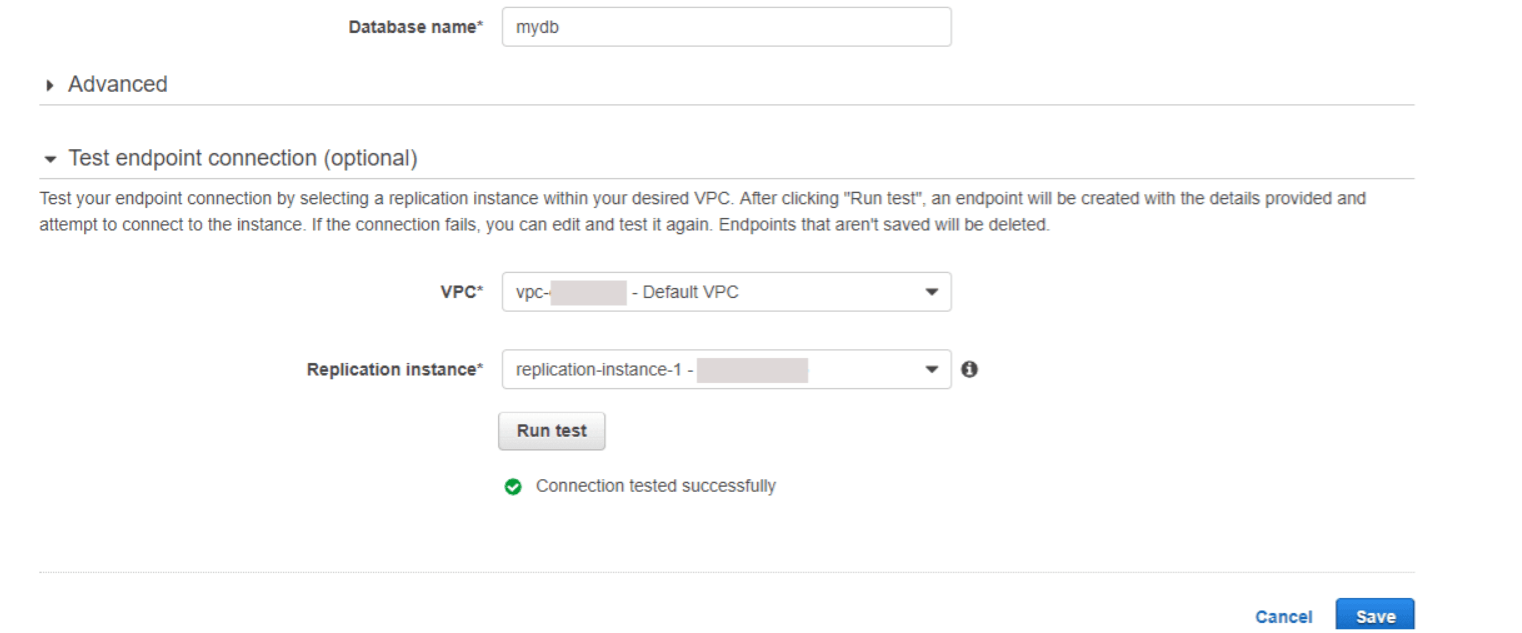
- Create source and target endpoint to test the connection from the replication instances.
- Start entering your endpoint connection details. Once it is created, you can test your endpoint connection and move on to task creation.
- Once the endpoints are created, It will appear as below.
Step 3: Create a Replication task
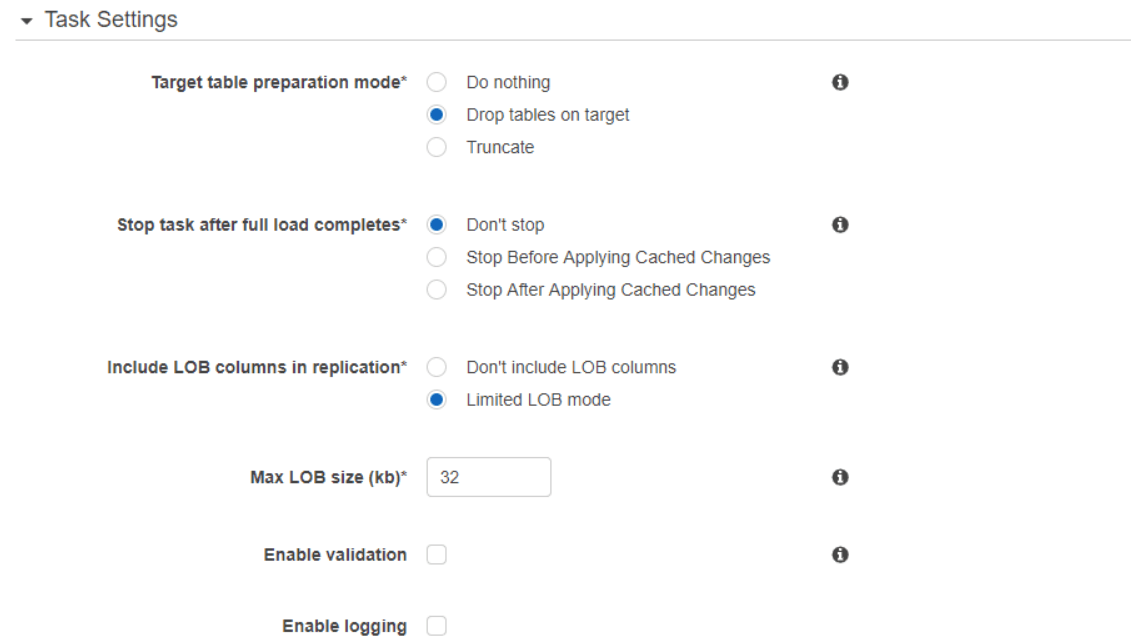
- After creating the endpoints and replication instances, create a replication task, which will handle the data migration.
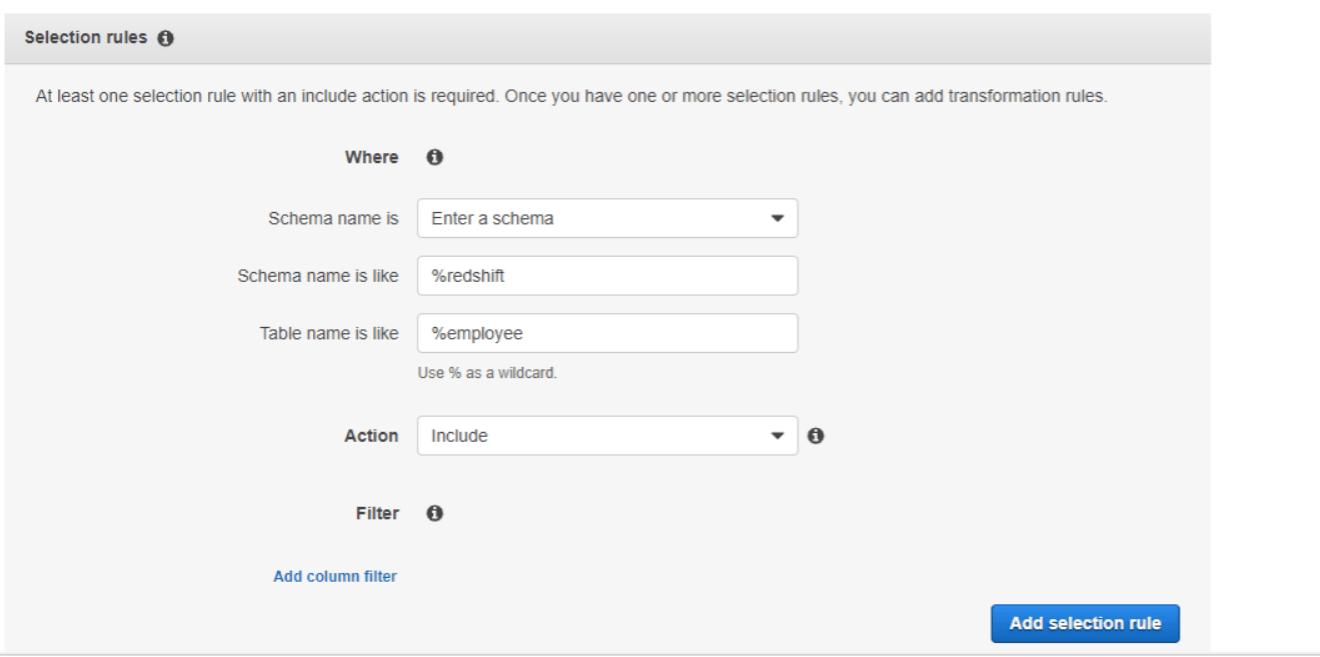
- Choose the table name and schema that you want to migrate. You can use % as wildcards for multiple tables/schema.
Step 4: Start the Replication Task
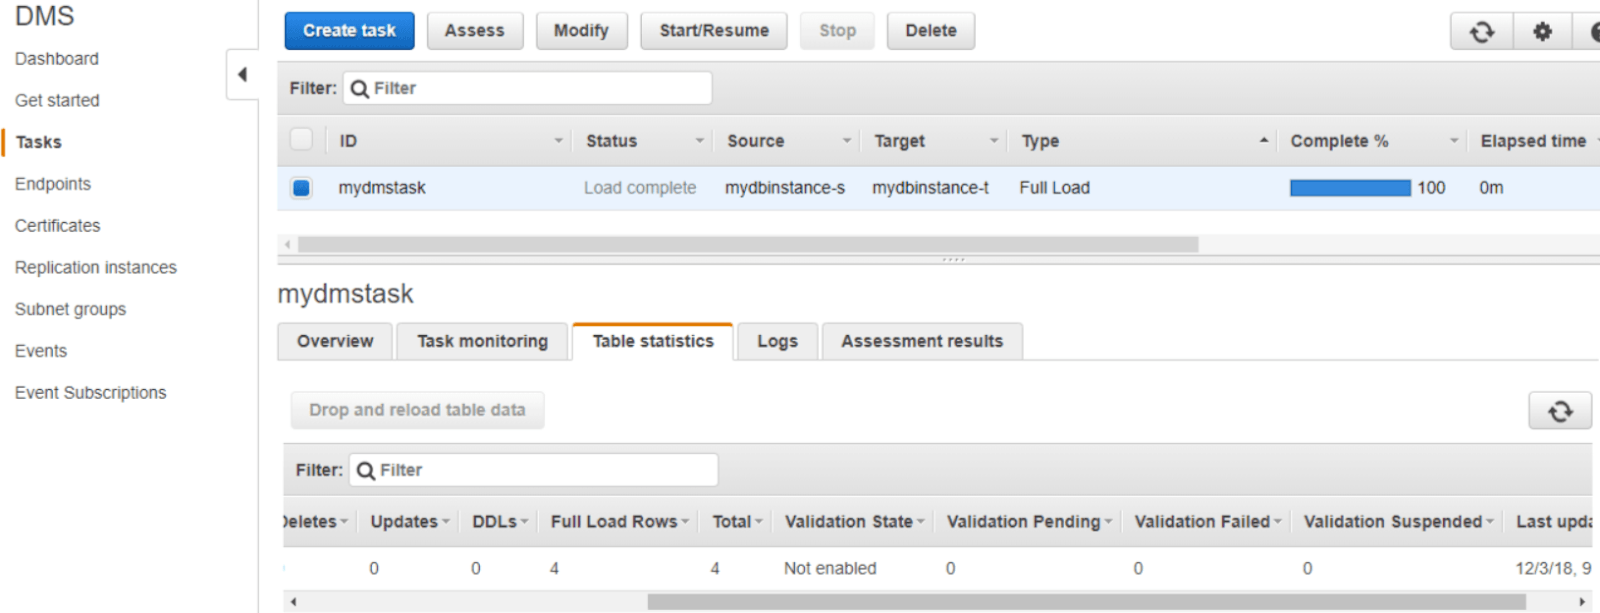
- Once you are done with the setup, start the Replication Task.
- Upon the completion of the replication task, you will see an assessment report with all the details.
- Since the replication task is complete, you can check the data in Redshift to ensure successful data migration.
Limitations of Using AWS DMS to Load Data from Aurora to Redshift
- Lack of SCT: AWS DMS lacks support for SCT (Schema Conversion Tool), which is a significant drawback when transferring Aurora data to Redshift. Since automatic schema conversion from Aurora to Redshift may not be possible, manual intervention will be required to ensure schema compatibility.
- Manual Tasks: Due to the varying features of Aurora and Redshift, manual tasks are essential during setup. For example, DMS doesn’t support the migration of stored procedures directly since Redshift doesn’t support this feature in the same way Aurora does.
- Replication Instance Storage Limit: AWS DMS replication instances have a storage limit, which can be up to 6 TB. This limit could restrict how much data you can migrate at one time, especially for larger datasets.
- Cross-region Migration Limitations: Cross-region migration from Aurora to Redshift is not always supported; both databases must remain in the same AWS region for a successful data transfer.
Summing It Up
Migrating data from Aurora to Redshift is a great opportunity for you to enhance data analytics, streamline operations, and achieve more cost-effective data management. You can load data from Aurora to Redshift by using AWS DMS. However, this method could be time-consuming, complex, and require manual efforts, especially for large databases.
Consider supercharging your data migration efforts by using powerful tools like Estuary Flow as an alternative to manual methods. With impressive features, including scalability, real-time processing, and 200+ connectors, all it takes is a few minutes for the Aurora to Redshift replication.
Would you like to upload your data from Aurora to Redshift without any coding hassles? How about setting up real-time data pipelines for multiple platforms? Then sign up to get started with Estuary Flow today!
FAQs
What is Aurora zero ETL?
Aurora zero-ETL is the process of instant transfer of transactional data written into Amazon Aurora to Amazon Redshift, eliminating the need for complex ETL pipelines.
Is Aurora SQL or NoSQL?
Amazon Aurora is a MySQL and PostgreSQL-compatible cloud-based relational database. It combines the availability and performance of traditional enterprise databases with the cost-effectiveness and simplicity of open-source databases.
Is Redshift an ETL tool?
No, Redshift is not an ETL tool. It is a cloud-based data warehousing service that provides powerful data storage, querying, and retrieval capabilities for large-scale data analytics.

About the author
With over 15 years in data engineering, a seasoned expert in driving growth for early-stage data companies, focusing on strategies that attract customers and users. Extensive writing provides insights to help companies scale efficiently and effectively in an evolving data landscape.


